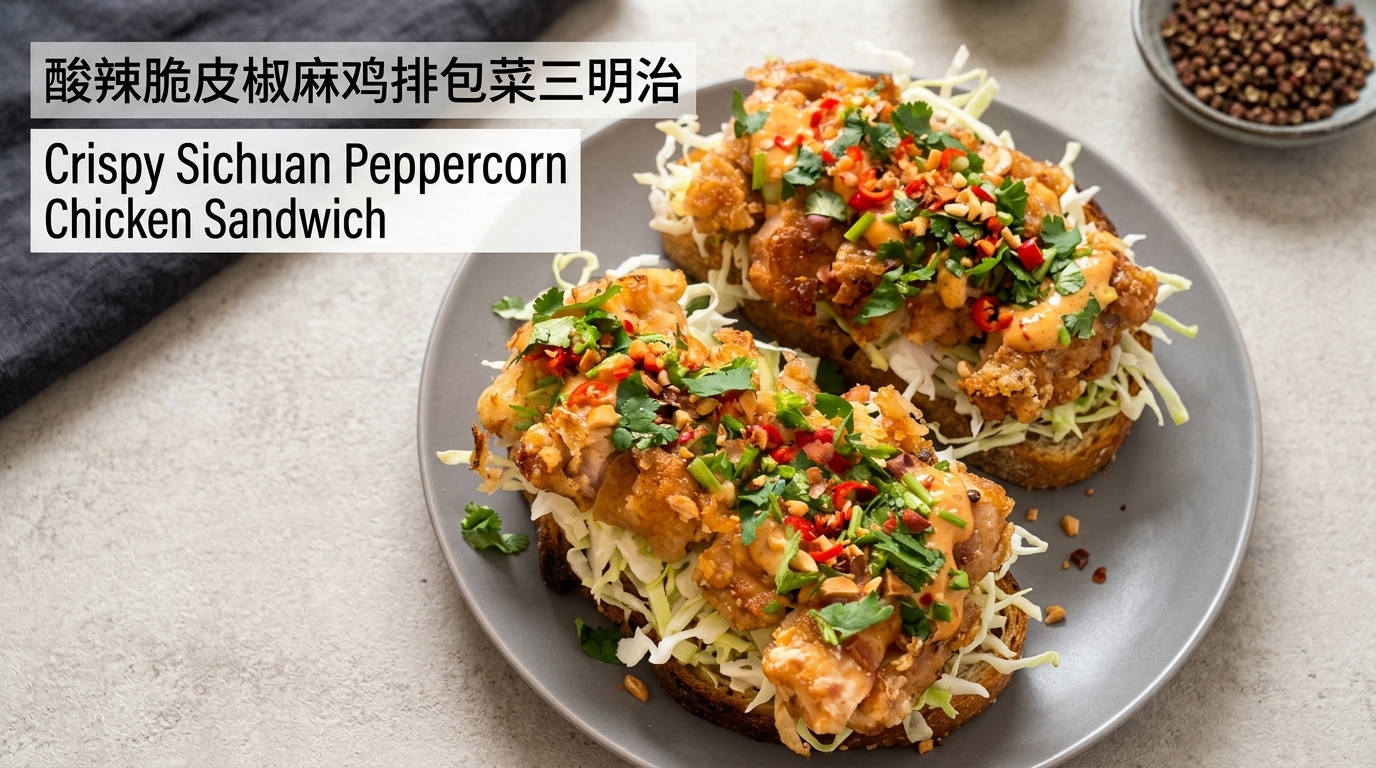
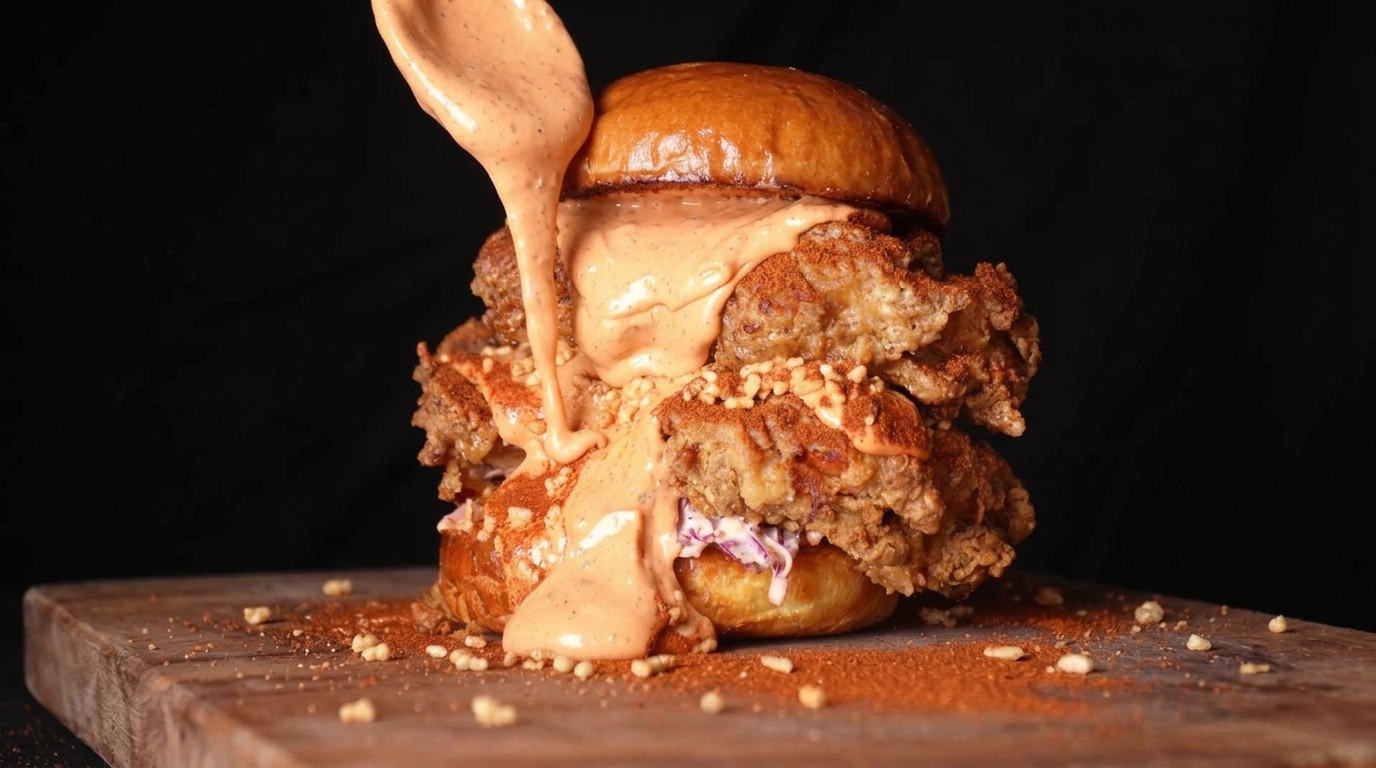
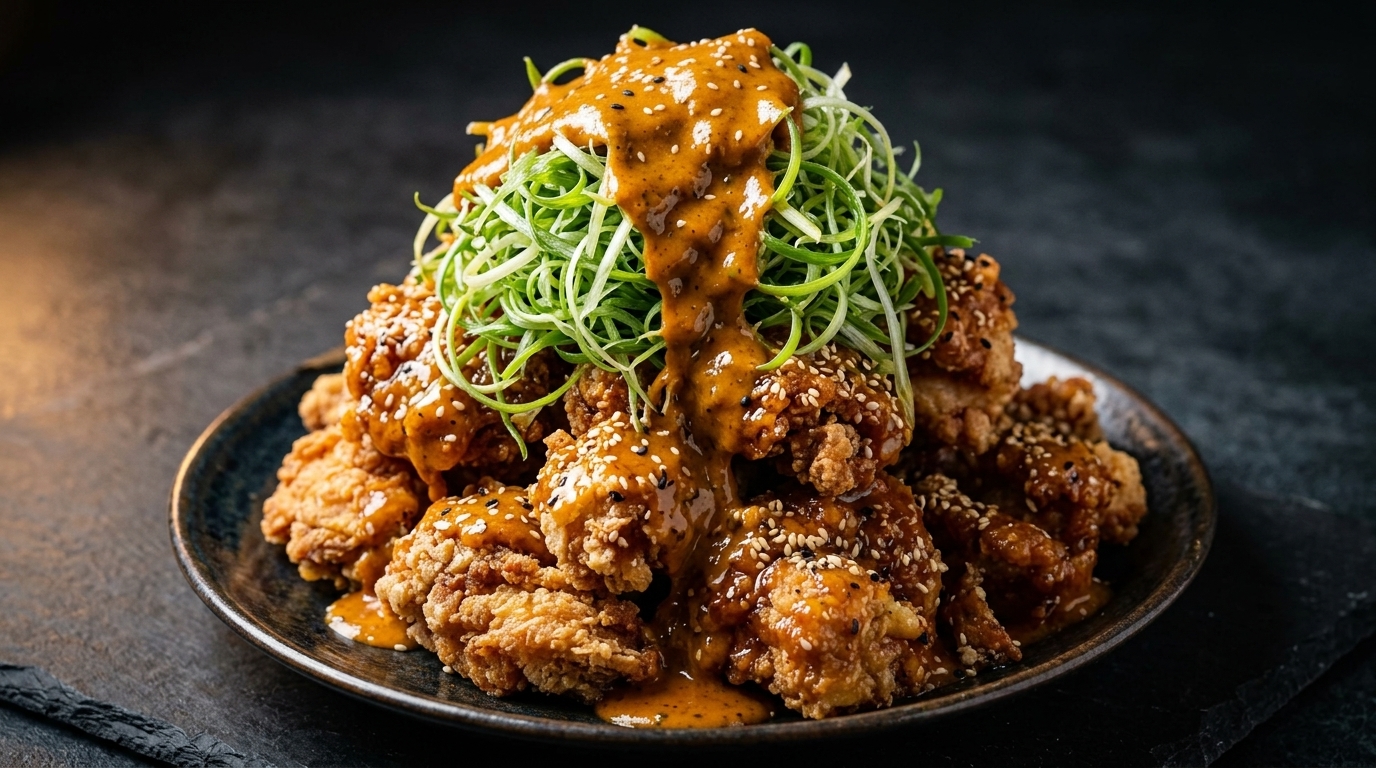
Crispy Scallion Fried Chicken
Special Sauce
Incredibly juicy double-fried chicken topped with a refreshing mound of ice-soaked scallions and a savory garlic lemon black pepper sauce. The ultimate bite.
There is something magical about the contrast of piping hot, ultra-crispy fried chicken paired with cold, crisp scallions. By soaking the shredded green onions in ice water, their sharp raw bite mellows into a refreshing crunch that cuts perfectly through the rich meat. Coated in a deeply savory, complex sauce, every bite offers a perfect balance of temperature, texture, and flavor.
Ingredients
- 500 g boneless skin-on chicken thighs
- 12 red onion, sliced
- 1 tbsp minced garlic
- 4 slices fresh ginger
- 2 tbsp soy sauce
- 1 tbsp fish sauce
- 1 tbsp oyster sauce
- 1 tbsp Sriracha chili sauce
- 1 tsp white pepper powder
- 120 ml buttermilk
- 1 cup all-purpose flour
- 1 cup cornstarch
- 12 tsp baking soda
- 2 cups shredded scallions
- 1 tbsp crushed white sesame seeds
- 12 cup garlic lemon black pepper honey sauce
- as needed cooking oil
Instructions
- 1Cut the Chicken Thighs
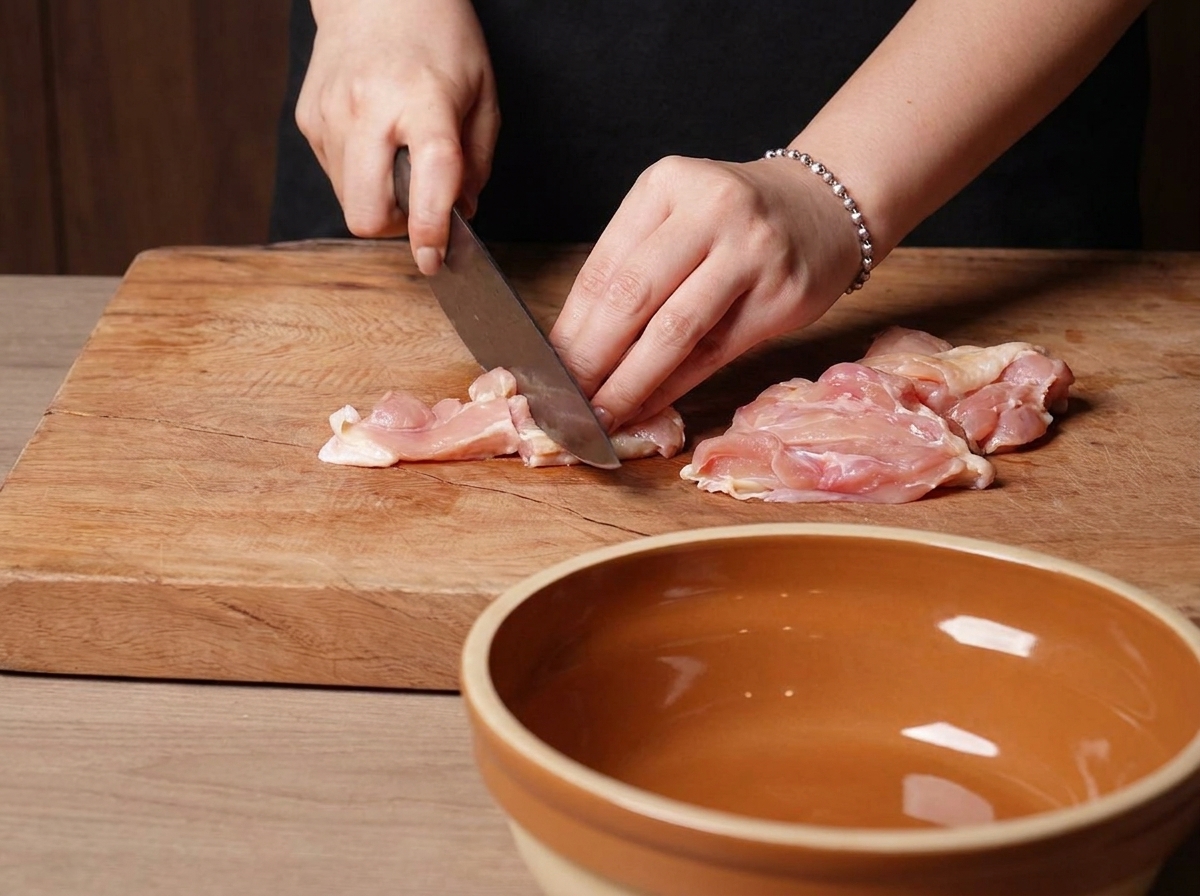
Place the skin-on, boneless chicken thighs on a wooden cutting board and use a sharp knife to cut them into your preferred bite-sized pieces. Leaving the skin on ensures the meat stays juicy and adds a fantastic crispy texture once fried.
Tip: Make sure your knife is very sharp so it cleanly cuts through the chicken skin without tearing it or pulling it away from the meat. - 2Slice the Red Onion
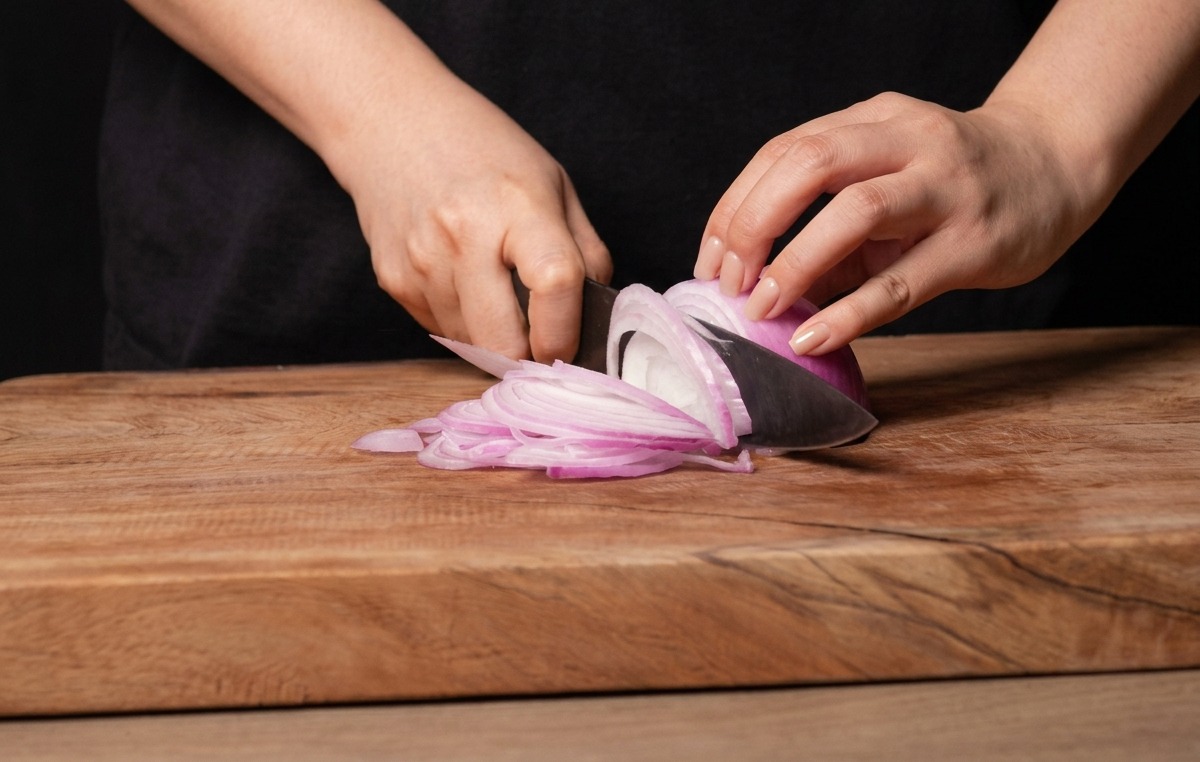
Take a fresh red onion and slice it up on your cutting board. The exact shape and thickness dont matter too much, as its primary purpose is to impart flavor and neutralize any gamey taste in the chicken during the marination process.
Tip: Red onions provide a subtle natural sweetness and a mild spiciness that deeply enhances the overall flavor profile of the marinade. - 3Add the Aromatics
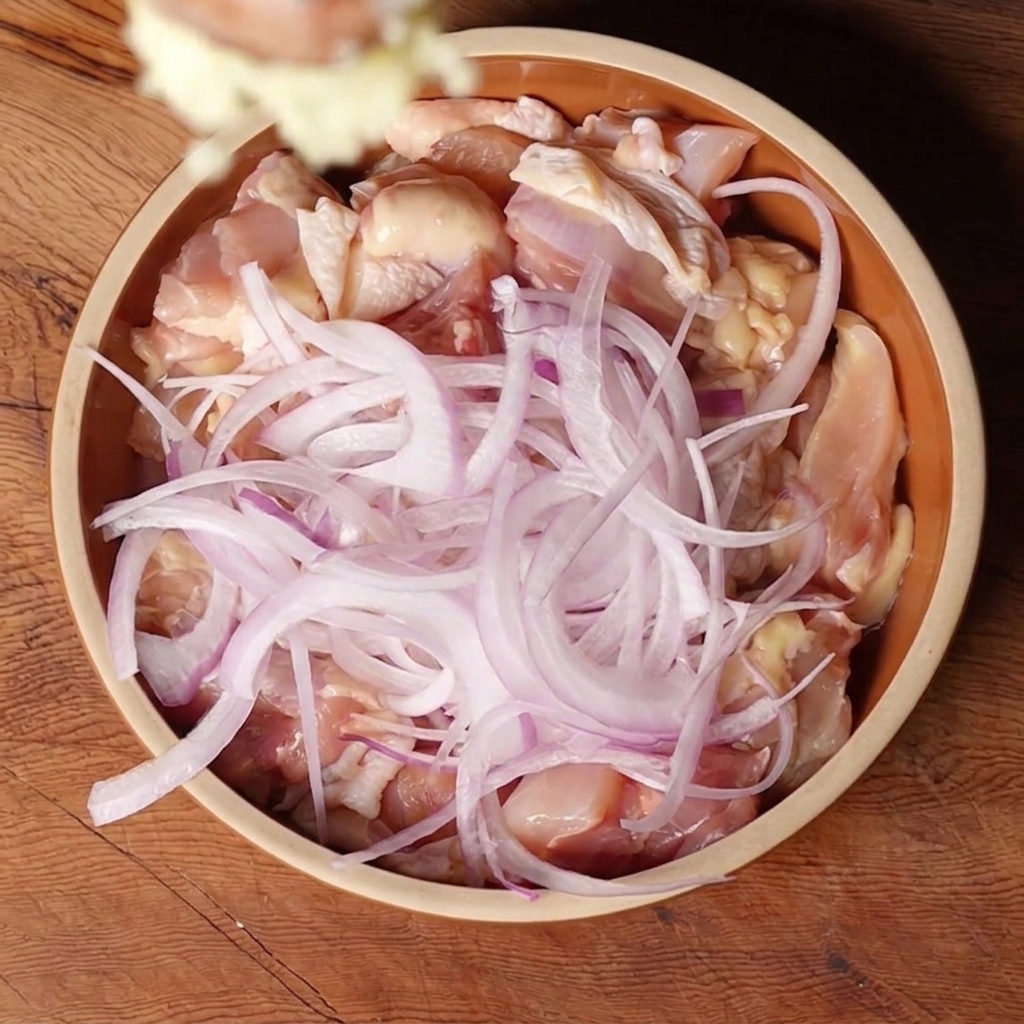
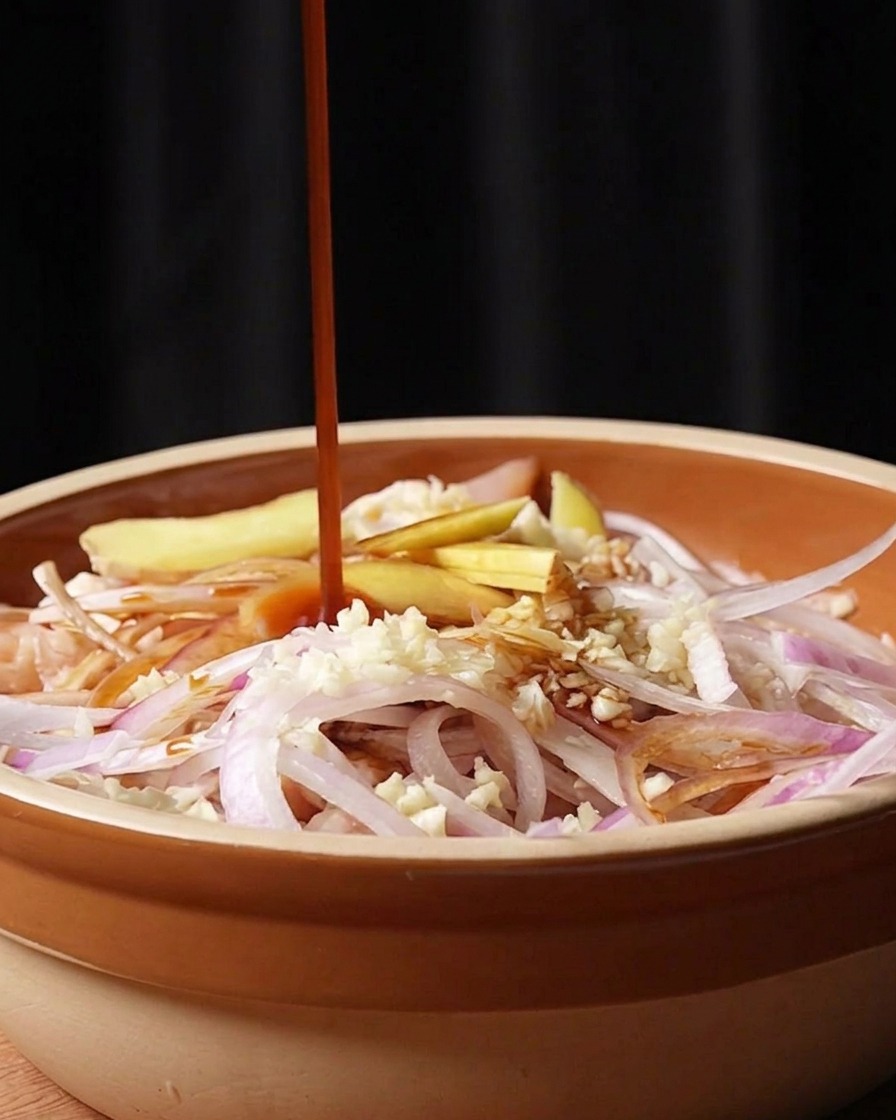
Transfer your cut chicken pieces and sliced red onions into a large mixing bowl. Add in a generous spoonful of minced garlic and a few slices of fresh ginger to build the essential aromatic base for the fried chicken marinade.
Tip: Freshly minced garlic will provide a much stronger, sharper, and more authentic flavor compared to pre-minced jarred garlic or garlic powder. - 4Pour Soy and Fish Sauce
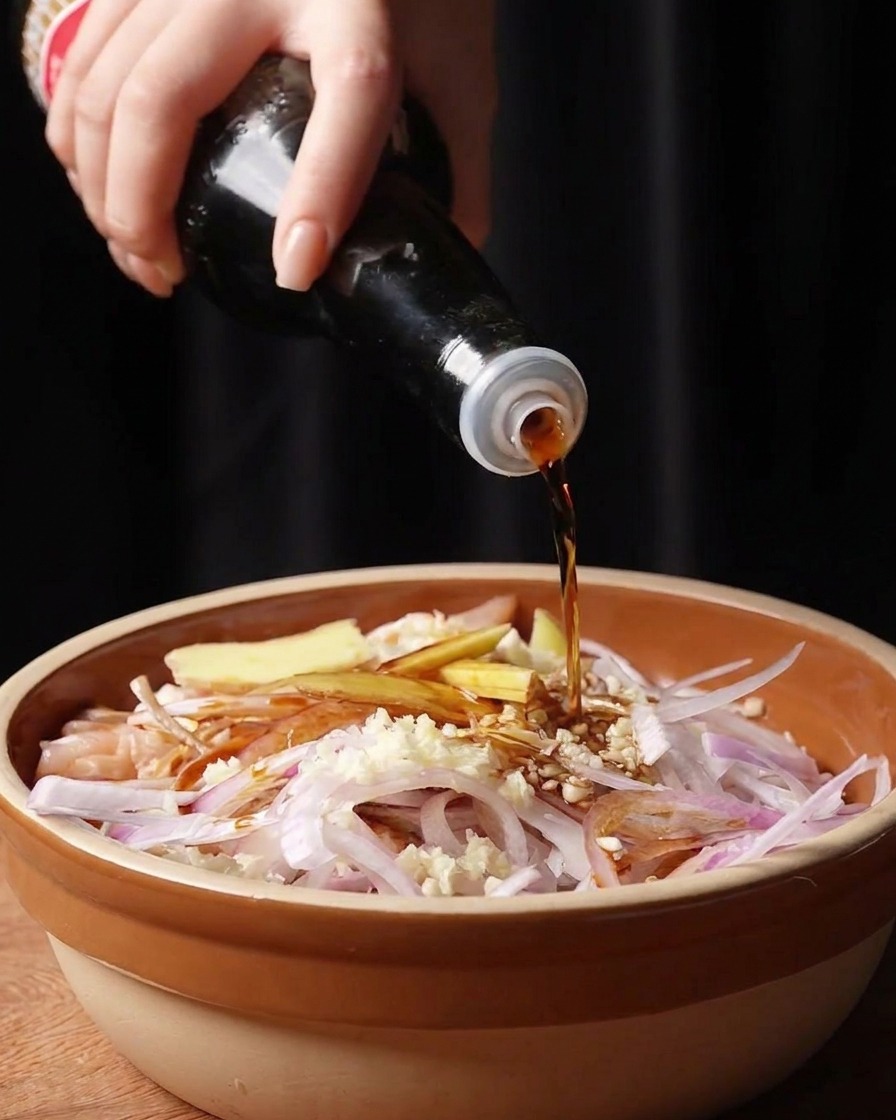
Pour soy sauce into the bowl to give the chicken a rich color and deep savory flavor. Follow it up with fish sauce to boost the umami. Because fish sauce provides significant saltiness, you can skip adding extra table salt to avoid over-seasoning.
Tip: The saltiness of fish sauce varies greatly between brands. If you are trying a new brand, be conservative with the amount. - 5Add Oyster Sauce
Squeeze a generous amount of thick oyster sauce into the chicken mixture. This ingredient significantly enriches the base flavor of the chicken thigh meat, rounding out the savory and sweet notes of the marinade.
Tip: Oyster sauce is quite thick and sticky, so ensure you mix the chicken very thoroughly later so the flavor is evenly distributed. - 6Squeeze in Sriracha
Finish the main seasoning by squeezing Sriracha chili sauce into the bowl. It delivers a comfortable savory umami with a hint of sweetness and a mild, pleasant spiciness that wont overwhelm the dish or burn your stomach.
Tip: Keep in mind that different brands of chili sauce have varying levels of heat and sweetness, so adjust the quantity to suit your personal taste. - 7Add White Pepper
Shake a generous amount of white pepper powder into the bowl with the chicken and other seasonings. White pepper is a key ingredient that provides a distinct earthy heat essential for an authentic flavor profile.
Tip: Dont skip the white pepper—it offers a unique flavor that black pepper cannot replicate in this marinade. - 8Pour in the Buttermilk
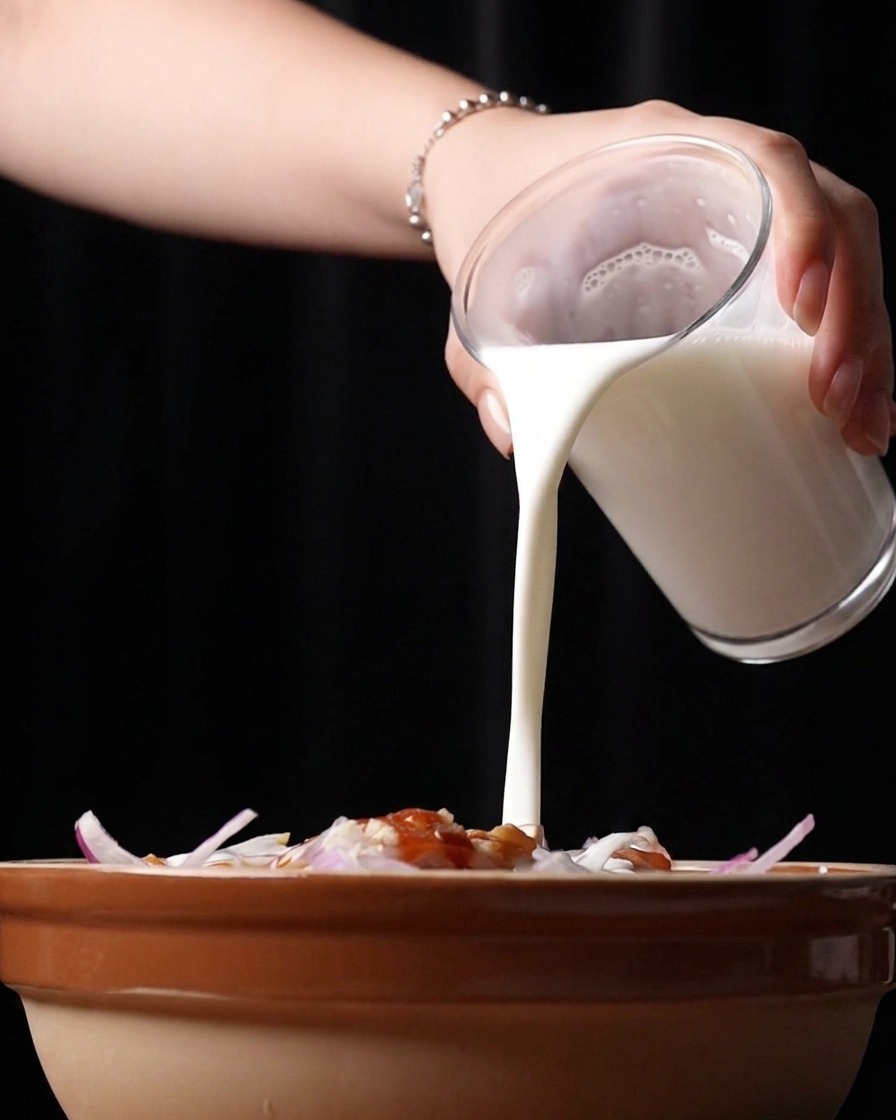
Pour the buttermilk over the chicken and seasoning mixture. The acidity and enzymes in the buttermilk help tenderize the meat, ensuring the fried chicken turns out incredibly juicy on the inside.
Tip: If you dont have buttermilk on hand, you can substitute it with plain yogurt or regular milk mixed with a squeeze of fresh lemon juice. - 9Mix and Marinate
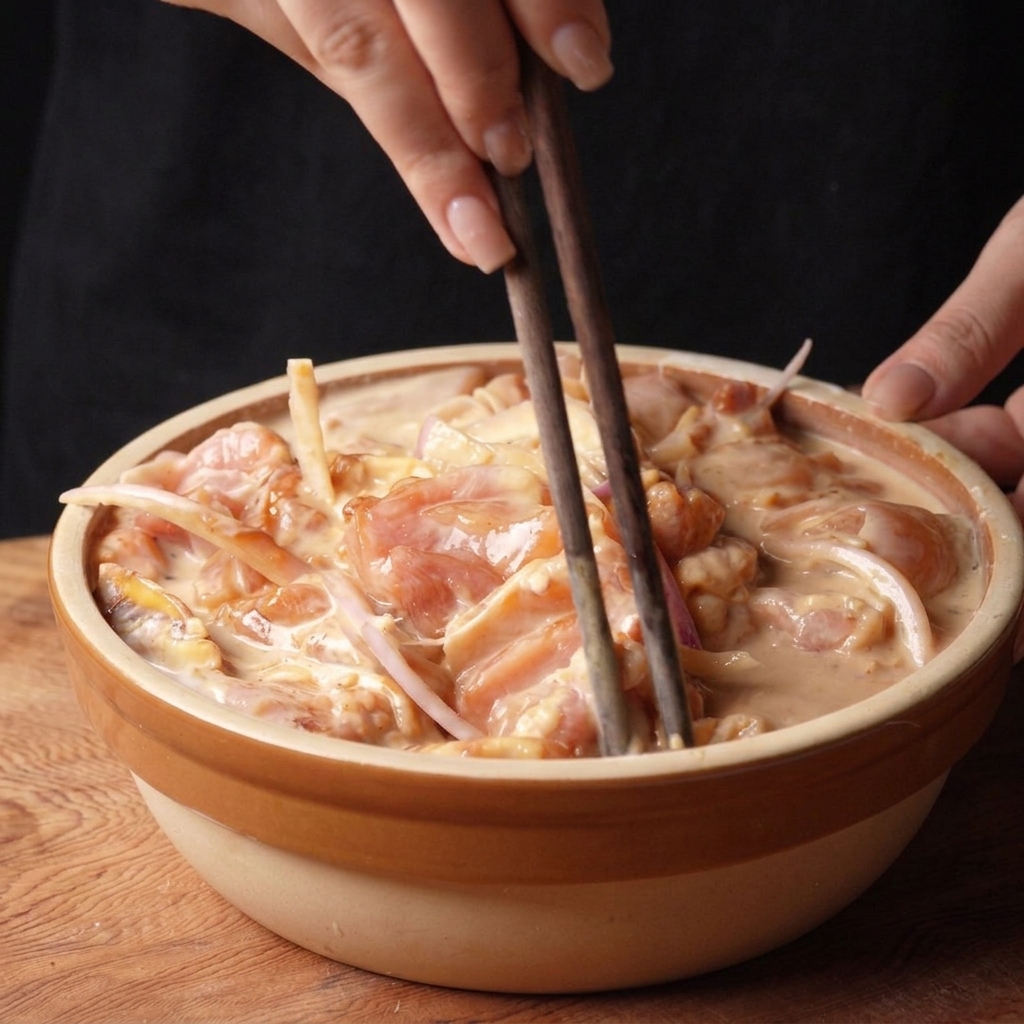
Use chopsticks to thoroughly mix all the seasonings and buttermilk with the chicken, making sure every single piece is evenly coated. Cover the bowl and let the chicken marinate to absorb all the flavors.
Tip: Marinate the chicken for at least 3 hours. For the best flavor and texture, leave it to marinate overnight in the refrigerator. - 10Prepare the Dry Coating

In a separate wide dish, combine equal parts all-purpose flour and cornstarch. You can also add a small amount of baking soda or baking powder to this mixture, which will help create a crispier, airier crust when fried.
Tip: Using a 5050 ratio of flour to cornstarch is the secret to achieving a coating that is both substantial and wonderfully crisp. - 11Season the Flour Mixture
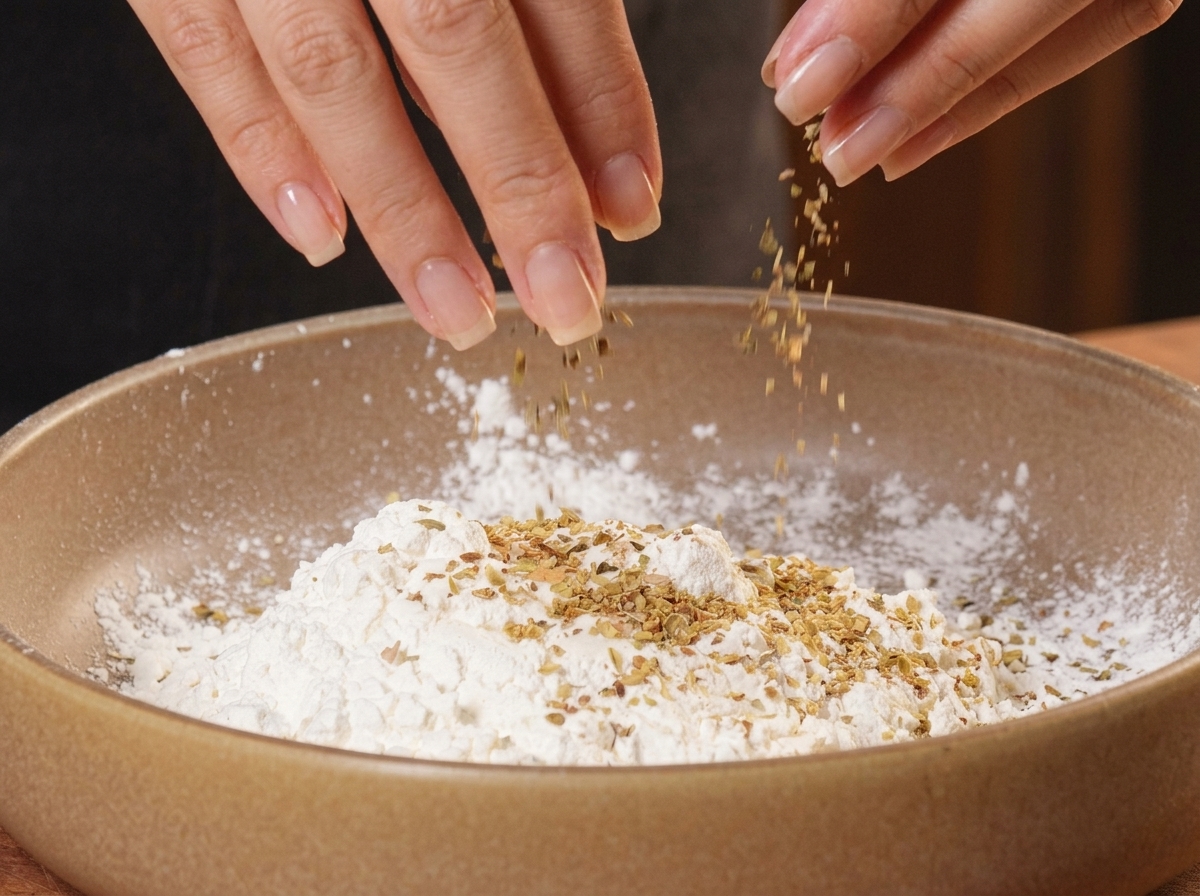
Sprinkle dry seasoning powders over your flour and cornstarch mixture. Seasoning the dry coating is a crucial step to ensure the fried chicken is deeply flavorful from the outside crust to the inside meat.
Tip: Season the flour with a mix of salt, pepper, garlic powder, or any of your favorite dry spices to complement the marinade. - 12Coat the Chicken
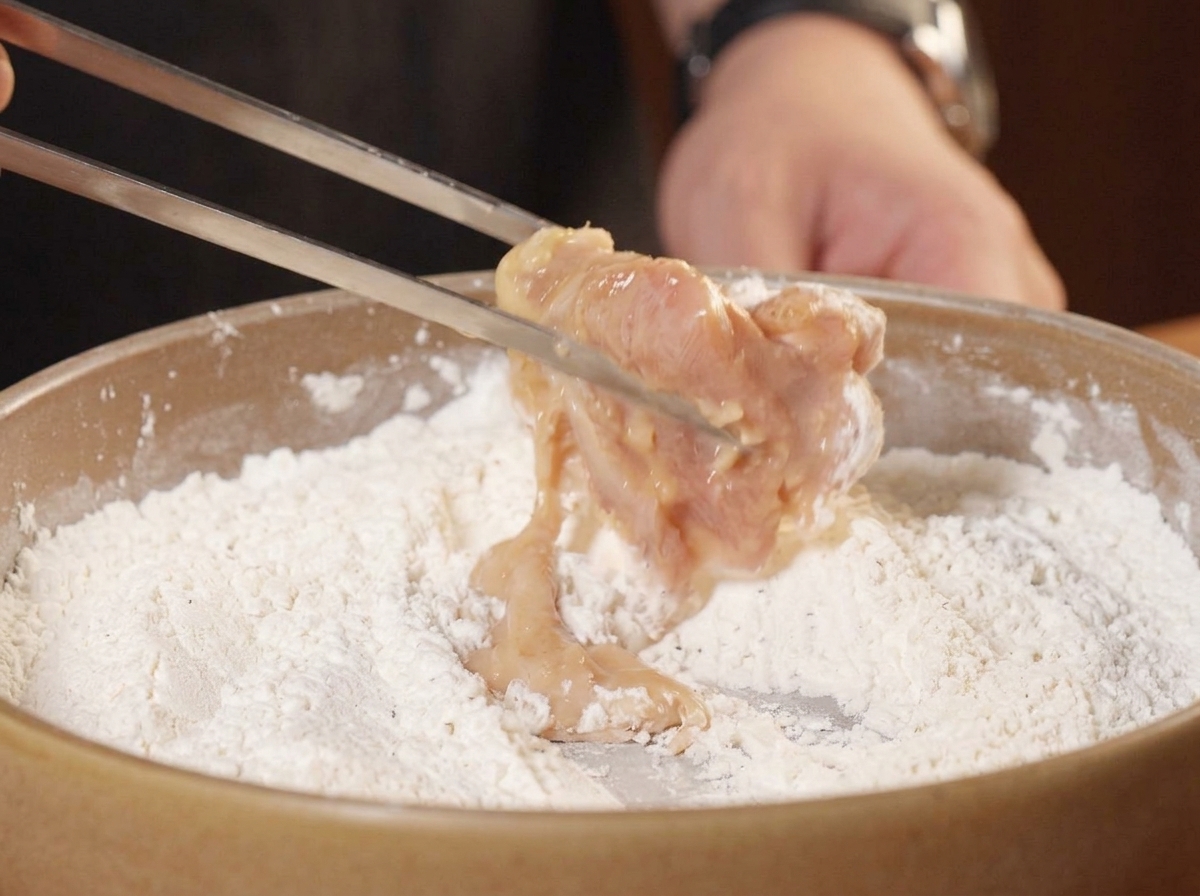
Take a piece of the wet, marinated chicken and place it into the seasoned dry flour mixture. Toss and press the chicken into the powder until it is completely coated, then gently shake off any excess flour before frying.
Tip: If you prefer a flakier, extra-craggy crust, use your hands to vigorously rub the chicken back and forth in the dry powder. - 13Shake Off Excess Flour
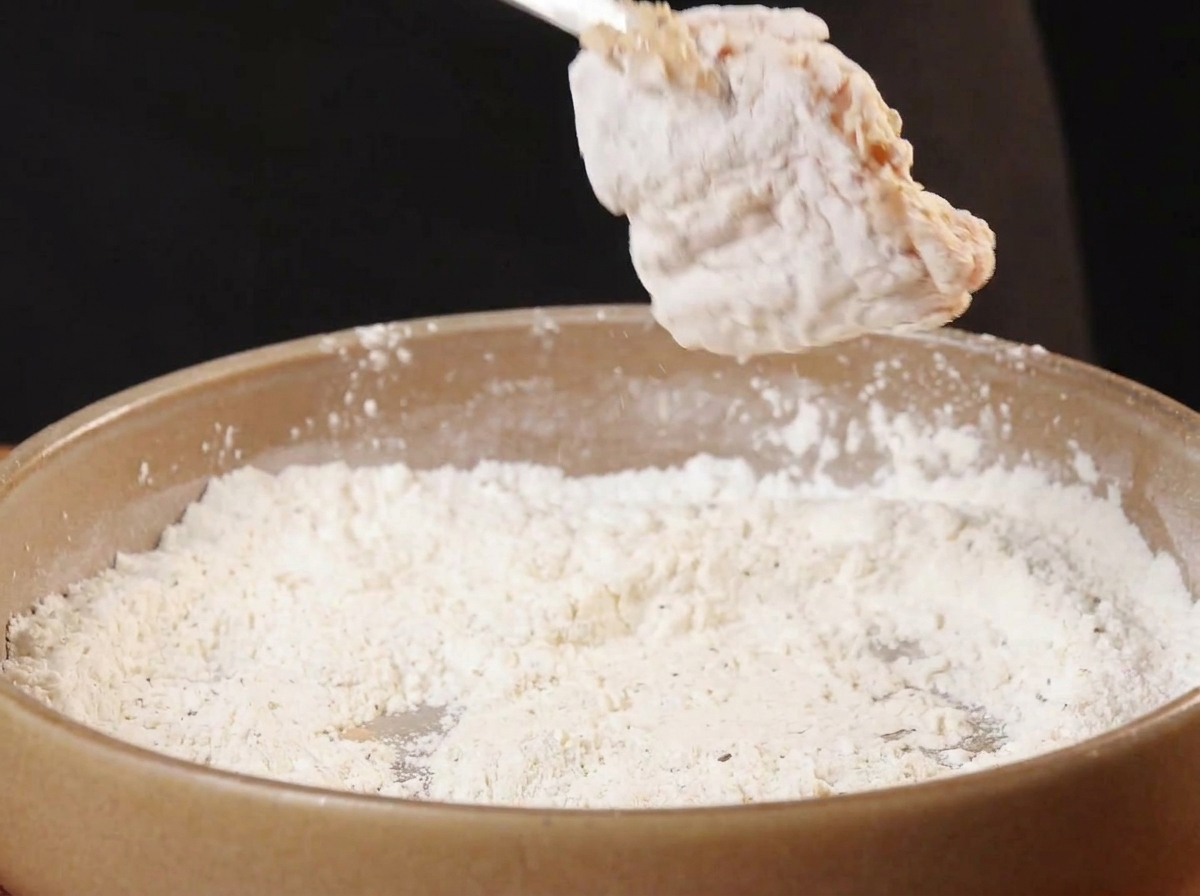
Use tongs or your hands to lift the coated chicken pieces and gently shake them to remove any excess dry powder. This prevents the frying oil from becoming cloudy with loose flour and ensures a thin, even crust on the finished fried chicken.
Tip: If you prefer an extra flaky and highly textured crust, vigorously rub the chicken in the dry flour mixture with your hands before shaking off the excess. - 14First Fry at 160°C
Carefully lower the coated chicken pieces into a pan of hot oil heated to 160 degrees Celsius (320 degrees Fahrenheit). Do not stir the chicken immediately after dropping it in; let the crust set undisturbed. Fry slowly until medium-well done to lock the natural juices inside.
Tip: Fry the chicken in small batches to prevent the oil temperature from dropping too drastically, which can lead to a greasy, heavy crust. - 15Remove and Rest the Chicken
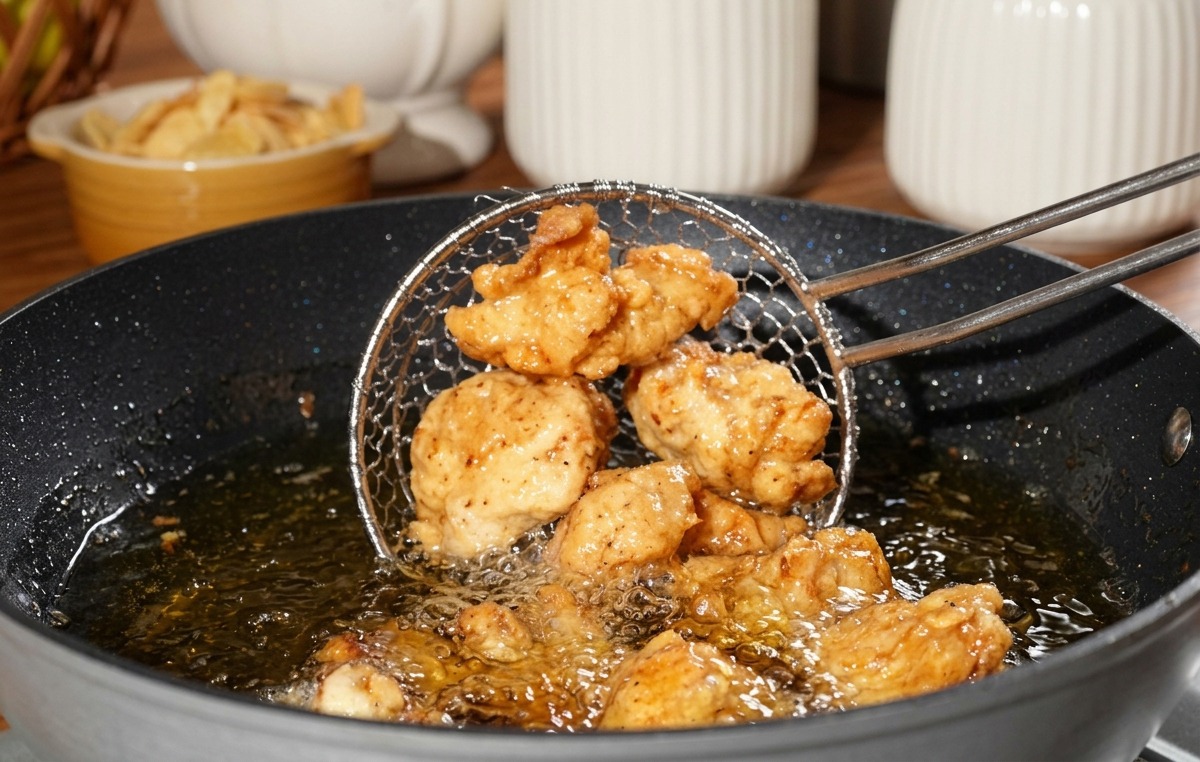
Use a spider strainer to carefully lift the partially cooked, lightly browned chicken out of the hot oil. Transfer the pieces to a wire cooling rack to rest and drain while you prepare the oil for the second frying stage.
Tip: Always place freshly fried foods on a wire cooling rack instead of a flat plate to prevent the bottom crust from becoming soggy from trapped steam. - 16Double-Fry for Maximum Crunch
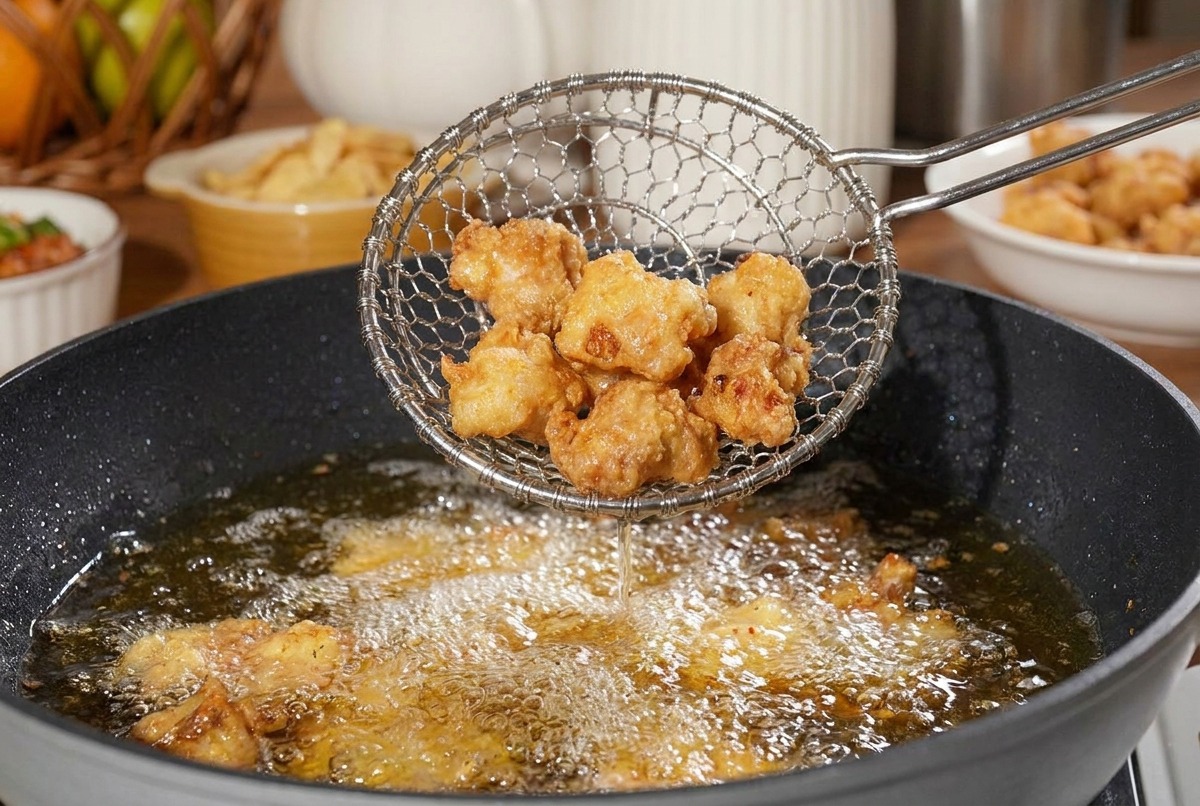
Increase the oil temperature to 180°C and carefully return the chicken pieces to the pot for a quick second fry. This stage takes about 30 seconds and is crucial for achieving a deeply golden, extra-crispy crust while keeping the meat juicy inside. Use a wire skimmer to lift the chicken once the crust is perfectly set.
Tip: Make sure the oil is fully up to temperature before adding the chicken back in; this ensures the exterior crisps up immediately without absorbing excess oil.