Classic Neapolitan-Style Margherita Pizza
Master the art of the classic Margherita pizza with this long-fermented dough recipe. Featuring fresh buffalo mozzarella, vibrant tomatoes, and sweet basil on a rustic, chewy crust.
The Margherita pizza is a testament to the beauty of Italian culinary simplicity. By utilizing a 24-hour cold fermentation process and a touch of whole wheat flour, this dough develops an incredible depth of flavor and a perfectly airy cornicione (crust edge) that honors authentic Neapolitan traditions.
Ingredients
- 1500 g high-gluten flour
- 100 g whole wheat flour
- 800 g water
- 40 g olive oil
- 20 g salt
- 20 g yeast
- to taste pizza sauce
- to taste fresh buffalo mozzarella
- to taste fresh cherry tomatoes
- to taste fresh basil leaves
Instructions
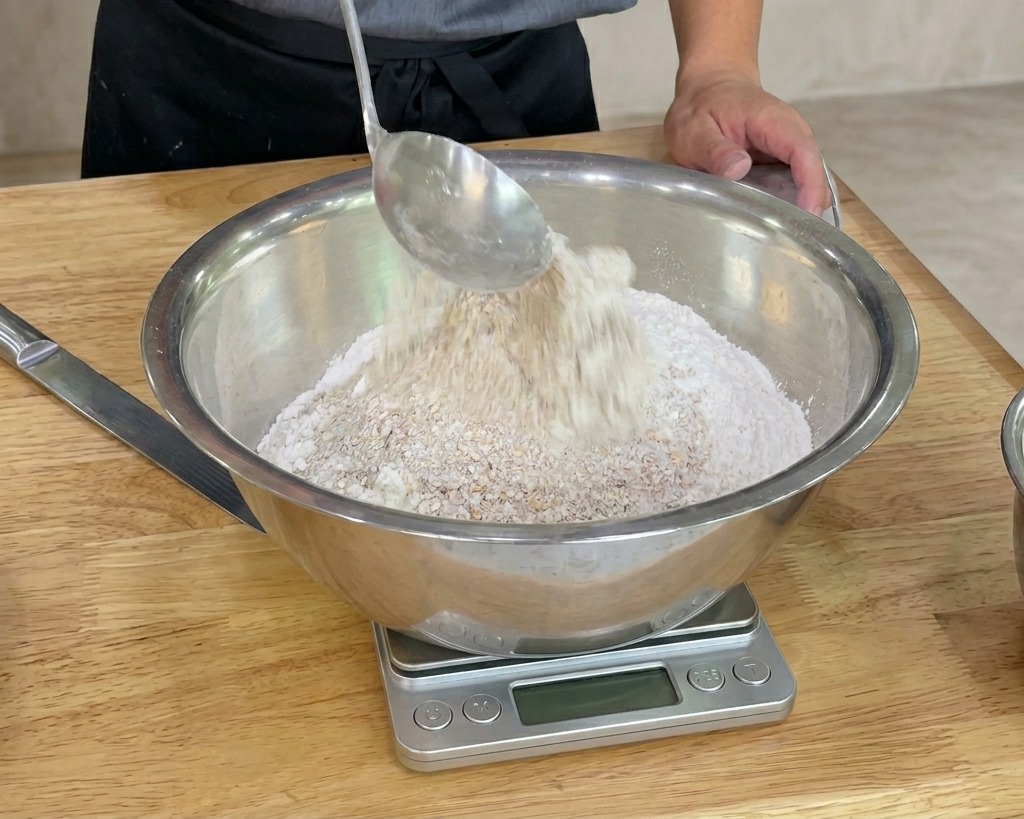
- 1Measure the flour
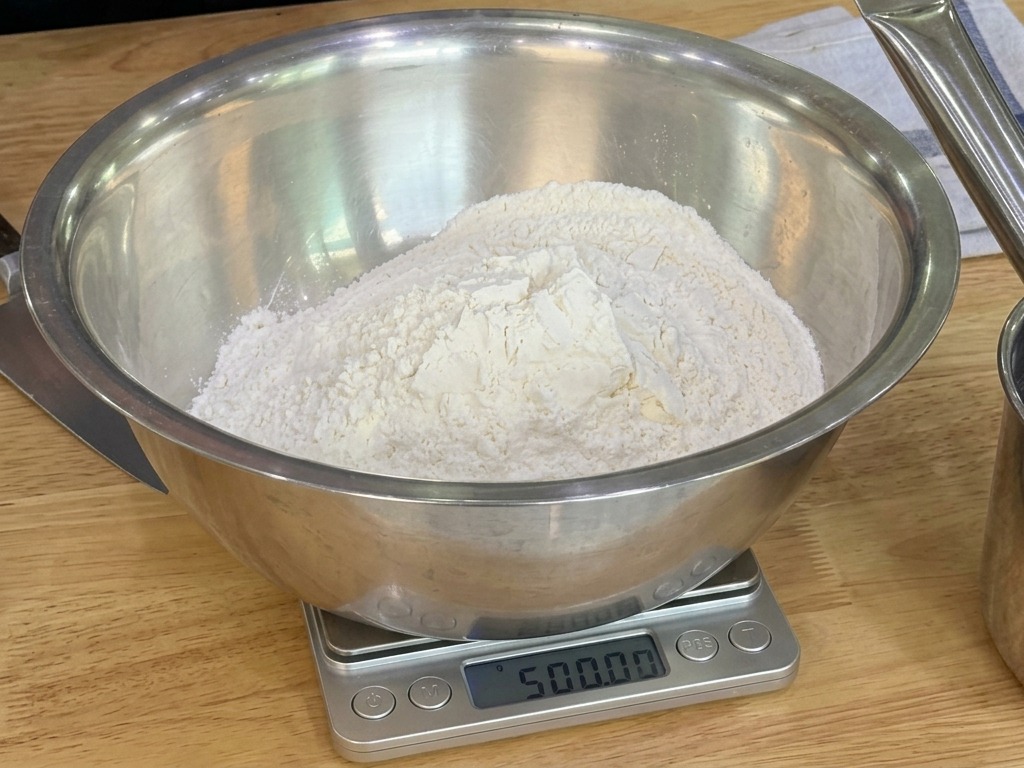
Begin by placing a large mixing bowl on a digital scale and zeroing it out. Carefully weigh out the high-gluten flour until you reach exactly 1500g. Using a digital scale ensures precision, which is key for a consistent, high-quality pizza dough.
Tip: Always measure your ingredients by weight rather than volume for the most accurate hydration ratio. - 2Incorporate whole wheat flour
Add the whole wheat flour to the bowl along with your high-gluten base. Incorporating a small portion of whole grains adds a subtle, rustic depth of flavor and a slightly nuttier aroma to the finished pizza crust.
Tip: Mix the dry flours together gently before adding any wet ingredients to ensure an even distribution. - 3Add the olive oil
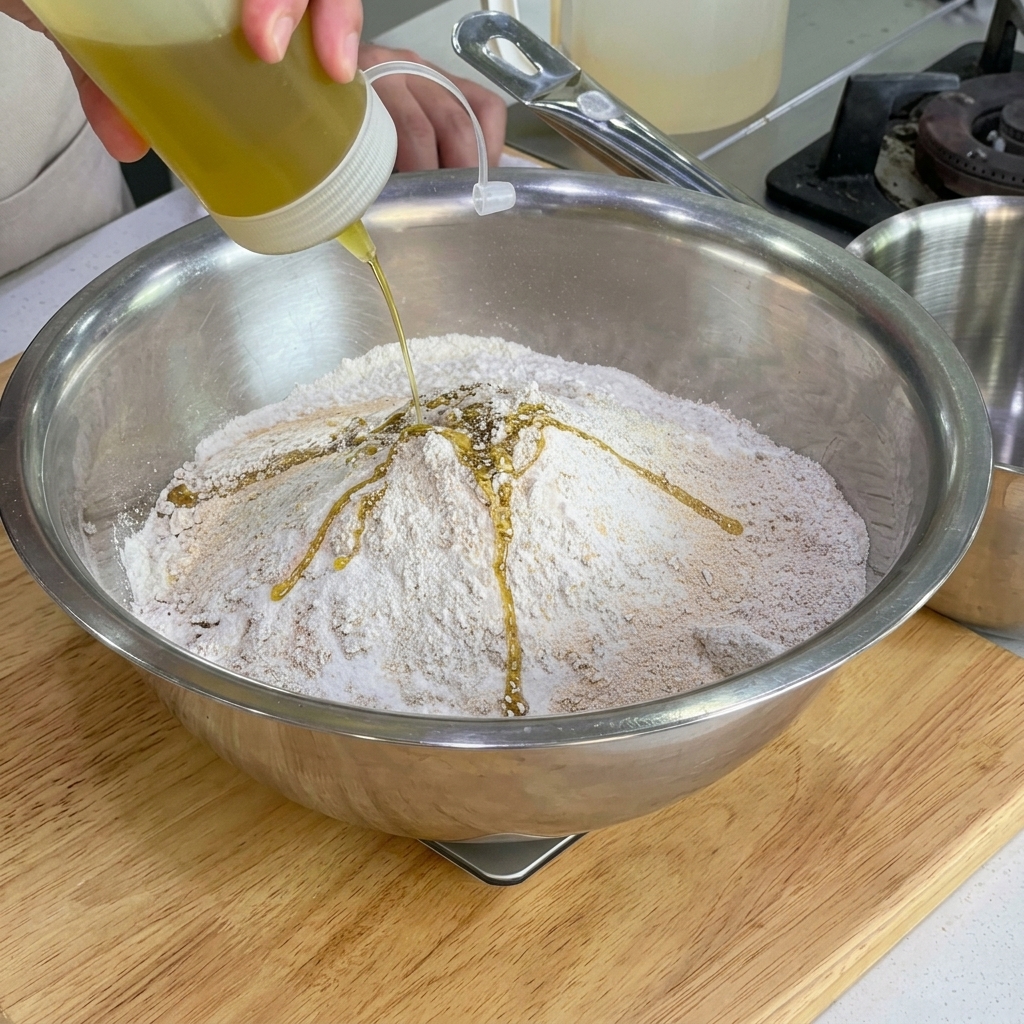
Create a small well in the center of your dry ingredients and pour in the olive oil. The oil enriches the dough, keeping the interior crumb tender while helping the crust achieve a beautiful, crispy golden exterior during baking.
Tip: Use a high-quality extra virgin olive oil for the most authentic flavor profile. - 4Pour in the water
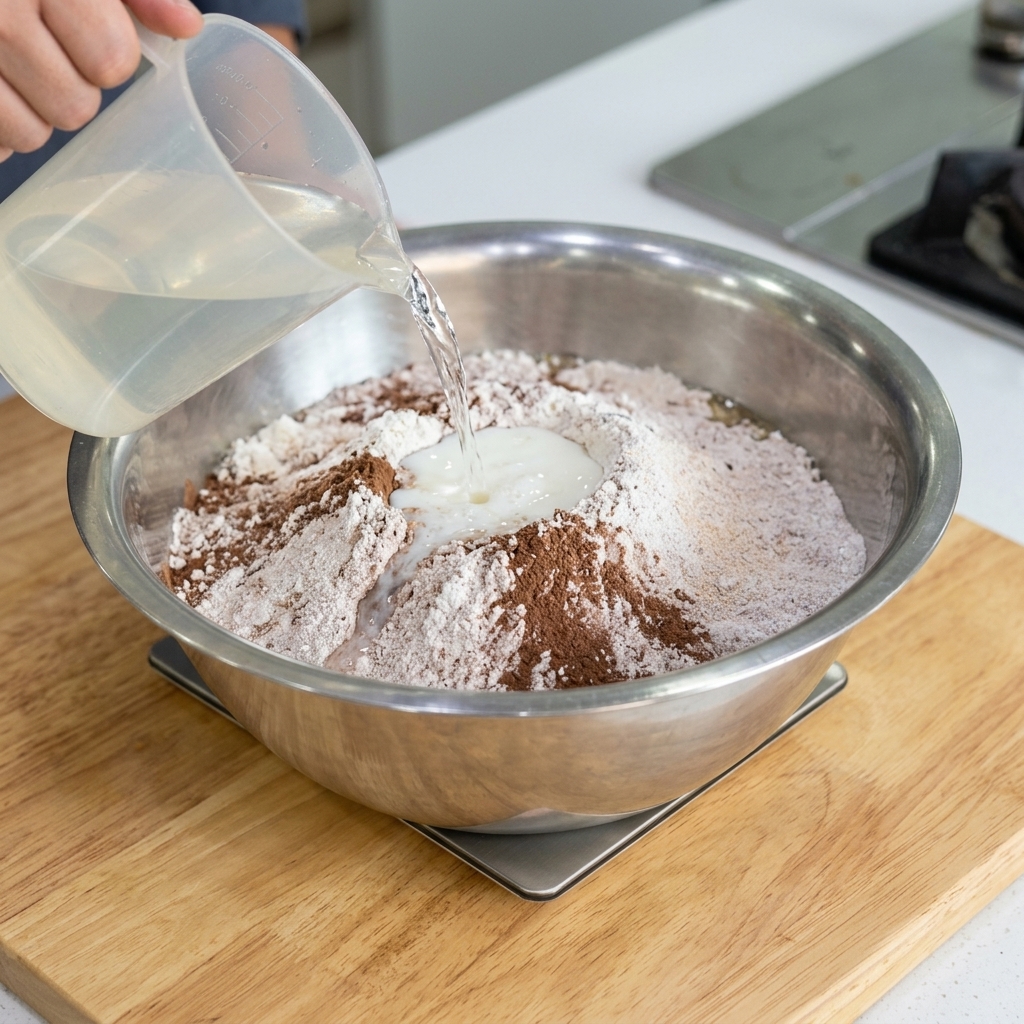
Slowly pour the room temperature water into the mixing bowl. Maintaining the correct hydration level—roughly a 2 to 1 ratio of water to flour—is crucial for creating a workable dough that develops a strong gluten structure.
Tip: Add the water gradually; you can always add a splash more if the dough feels too dry, but it is harder to fix an overly wet dough. - 5Knead the dough
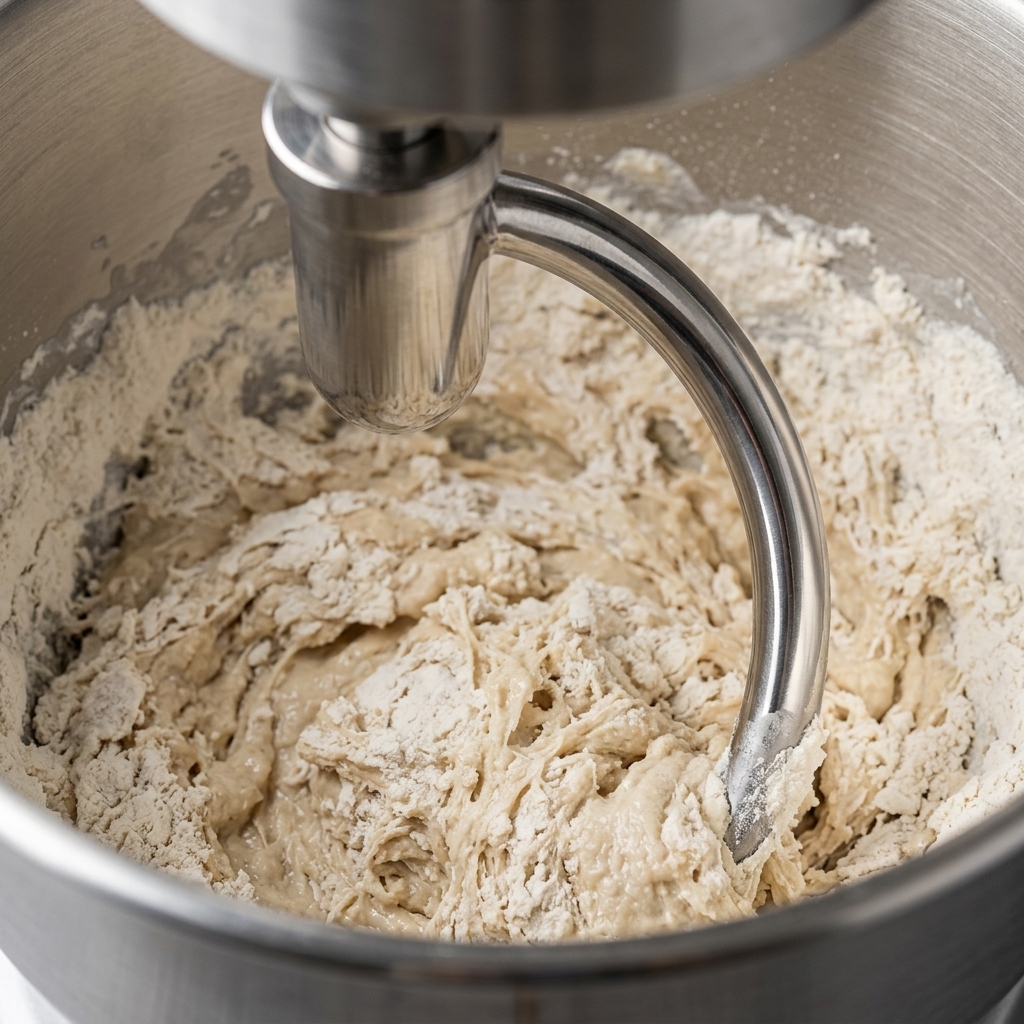
Mix the ingredients using a stand mixer fitted with a dough hook. Knead on a low to medium speed until the dough comes together into a smooth, cohesive ball that pulls away cleanly from the sides of the bowl.
Tip: Listen to your mixer; if it sounds like its struggling, lower the speed to prevent overheating the motor or the dough. - 6Divide the dough
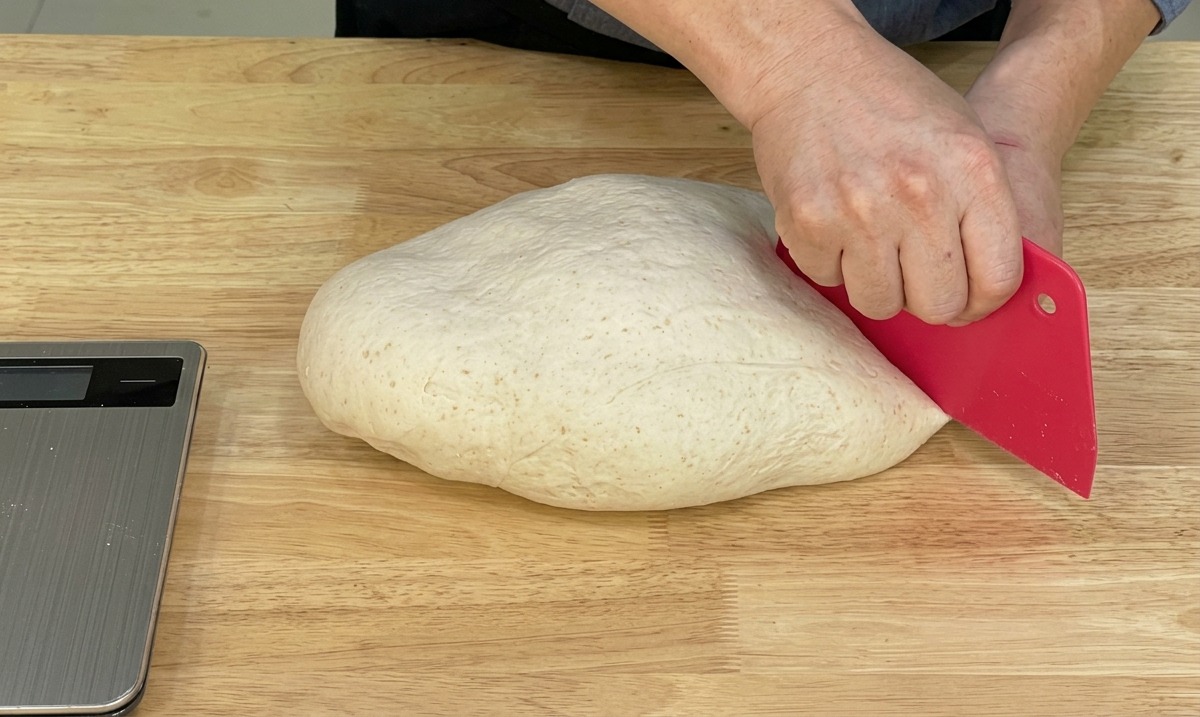
Once the dough is fully kneaded, transfer it to a wooden board. Using a bench scraper, divide the large mass of dough into 12 equal portions, weighing exactly 200 grams each.
Tip: A bench scraper makes clean cuts without tearing the gluten structure, which is essential for a good pizza crust. - 7Shape the dough balls
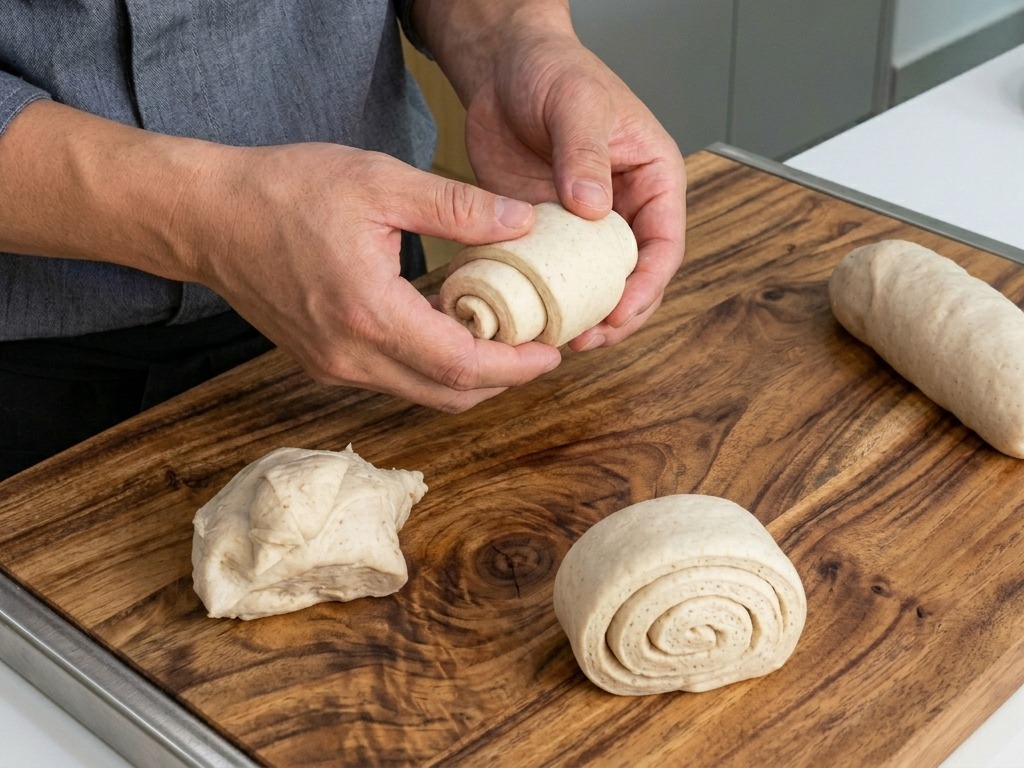
Take each 200g portion of dough and roll it into a smooth, tight round ball. Ensure the bottom is sealed well to trap the gases during fermentation.
Tip: Creating surface tension on the dough ball helps the pizza rise evenly and hold its shape. - 8Proof the dough
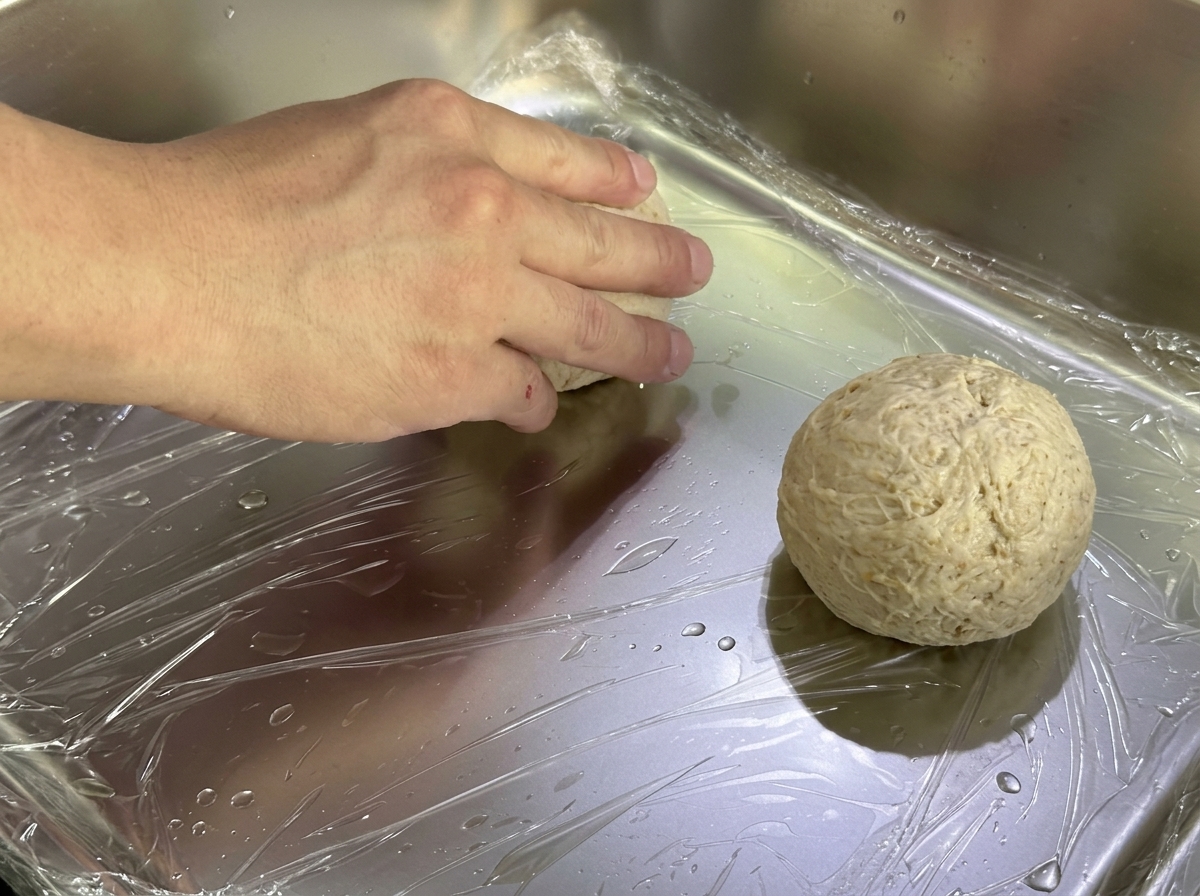
Place the shaped dough balls into a metal tray lined with clear plastic wrap, leaving enough space between them for expansion. Cover and let them proof for at least 24 hours to develop flavor.
Tip: A long, slow fermentation of at least 24 hours is the secret to a complex, rich dough flavor. - 9Flatten the dough
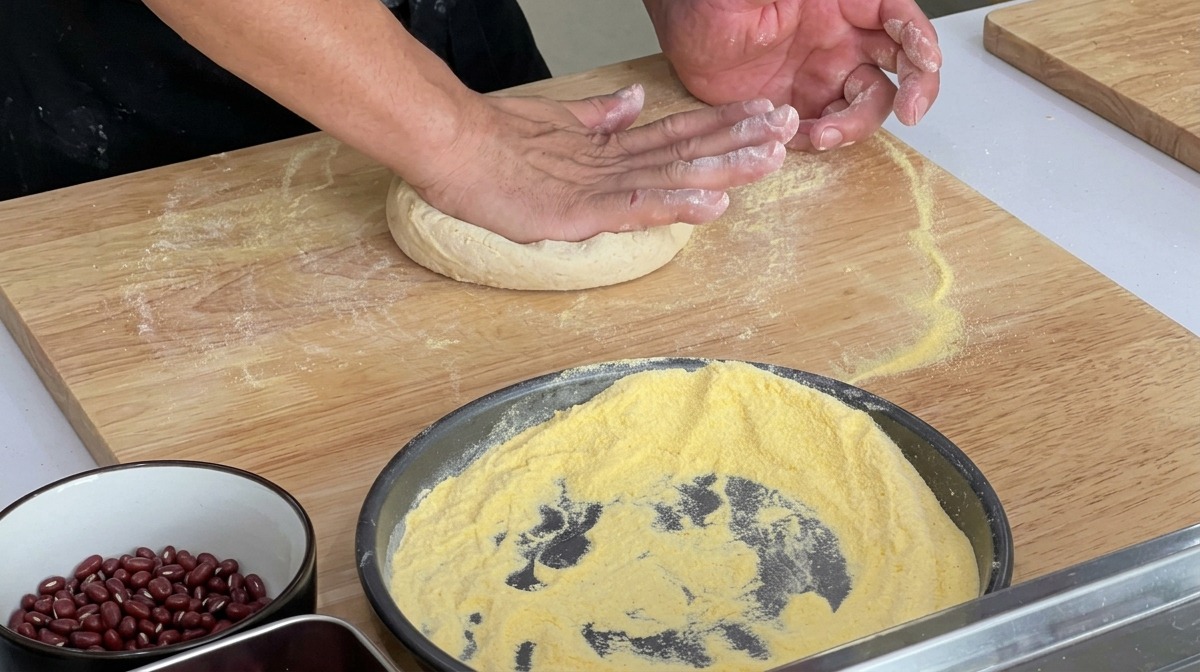
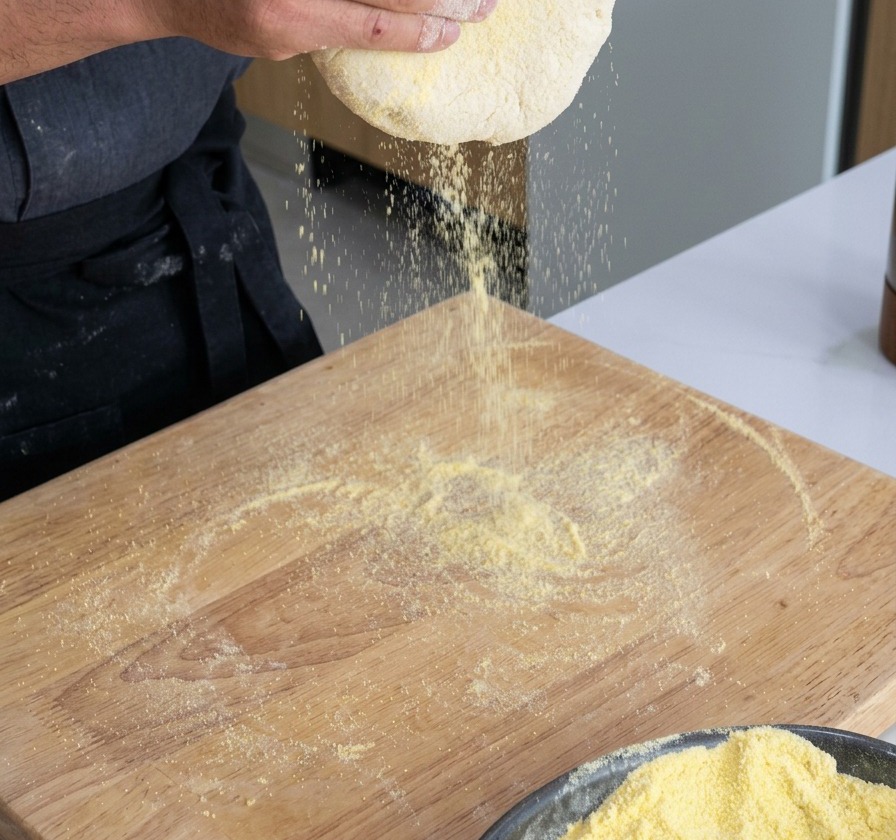
After proofing, take a dough ball and place it on a work surface generously dusted with dry flour or semolina. Gently press it flat with your palms, starting from the center and working outwards.
Tip: Always press the dough gently to keep the air bubbles intact; avoid using a rolling pin for authentic Neapolitan-style pizza. - 10Stretch with gravity
Lift the flattened dough and hold it vertically, allowing gravity to naturally stretch the center thinner. Rotate it gently through your hands to ensure an even stretch.
Tip: Letting gravity do the work prevents overworking the dough and helps maintain a uniform thinness in the center. - 11Shape the crust edge
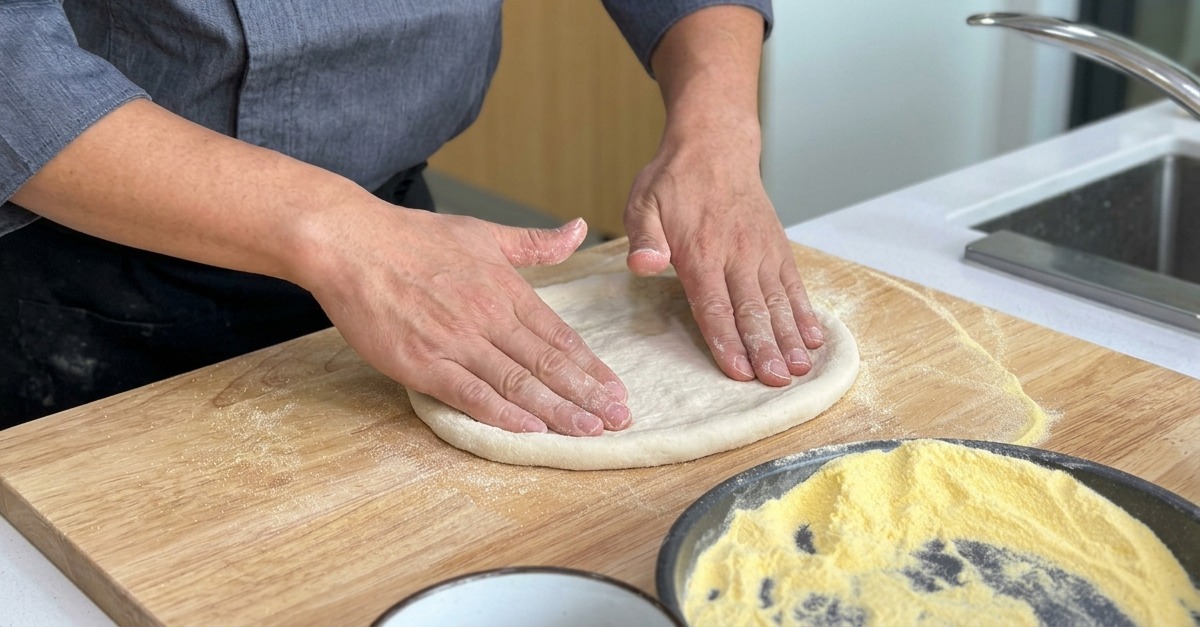
Place the stretched dough back onto the board. Continue to carefully stretch it outward with your fingers, making sure to leave the edges slightly thicker to form the crust.
Tip: Leaving a thicker edge (the cornicione) ensures a beautifully puffy and airy crust after baking. - 12Spread the pizza sauce
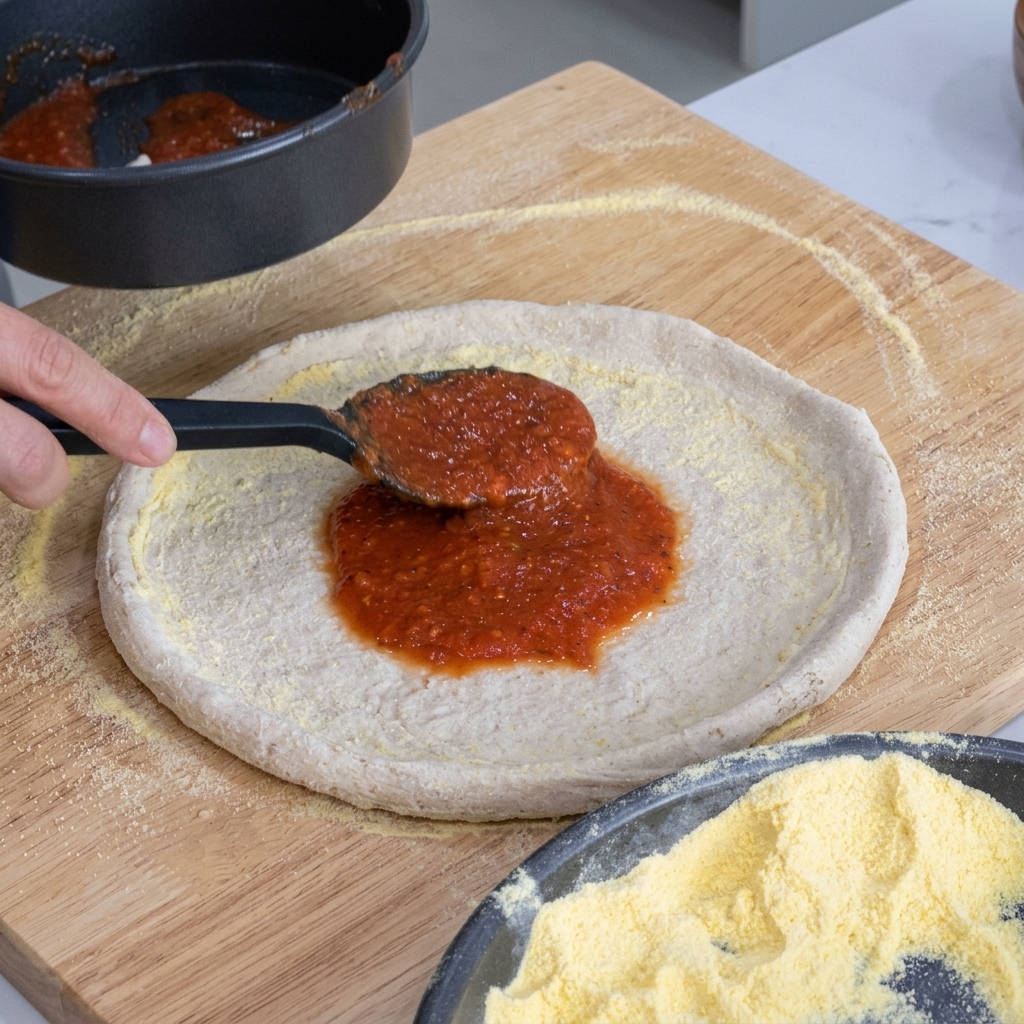
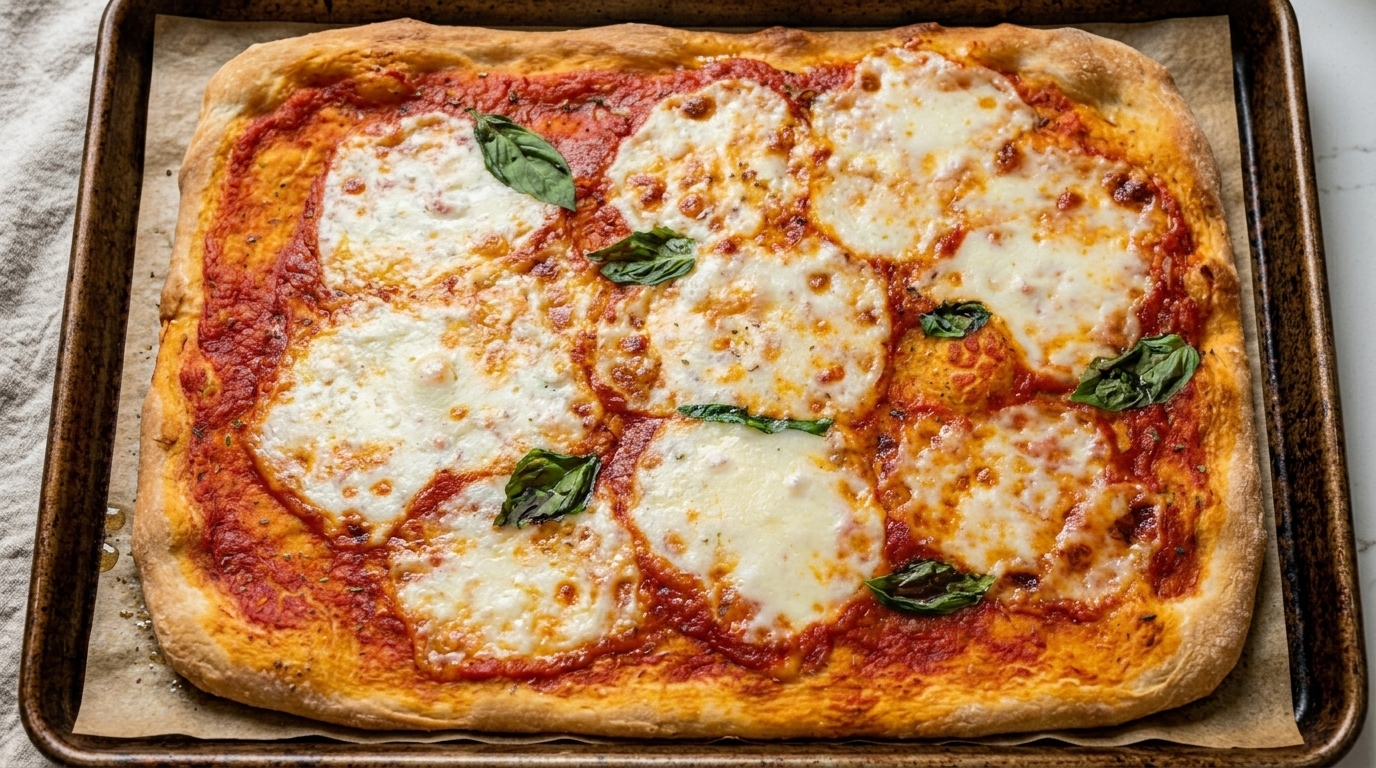
Spoon the prepared red pizza sauce into the center of the stretched dough. Use the back of the spoon to spread it evenly in a circular motion, leaving a small border around the edge for the crust.
Tip: Dont apply too much sauce, or the center of the pizza will become soggy. - 13Add the mozzarella
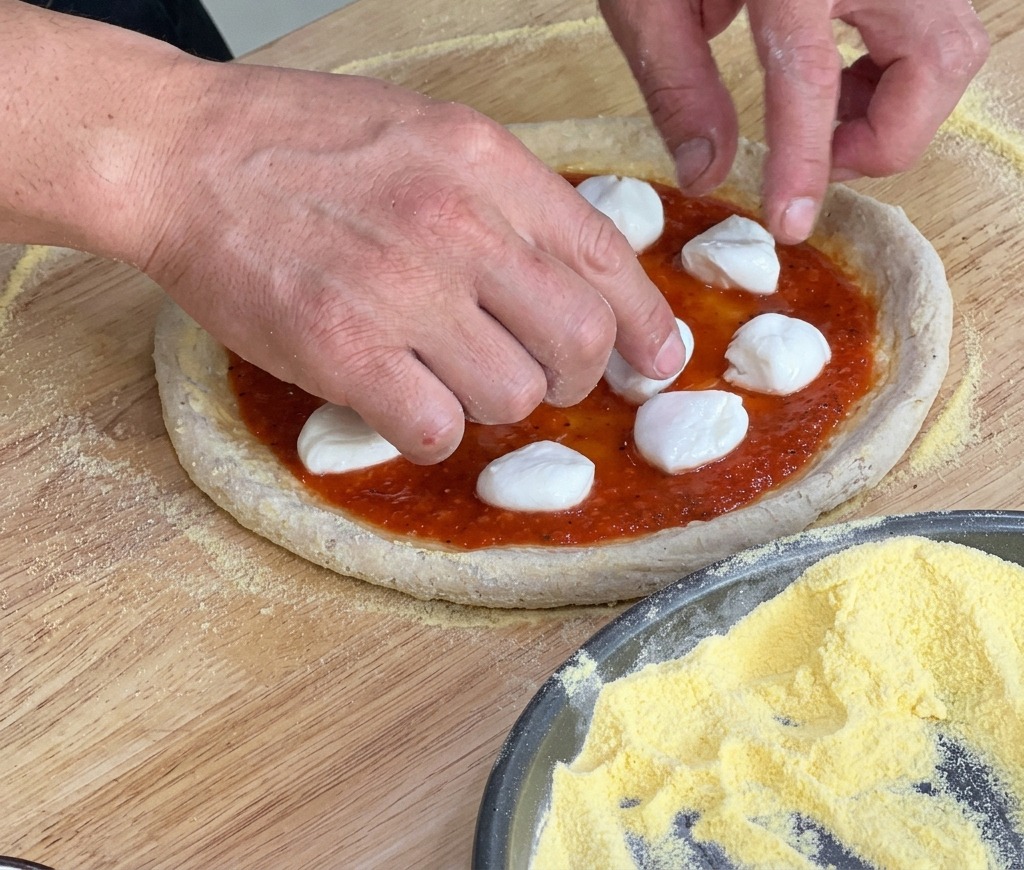
Tear or place individual pieces of fresh buffalo mozzarella evenly over the sauce-covered dough. Leave some space between the pieces as the cheese will melt and spread during baking.
Tip: Pat fresh mozzarella dry with a paper towel before using to prevent excess moisture from making your pizza soggy. - 14Slice the cherry tomatoes
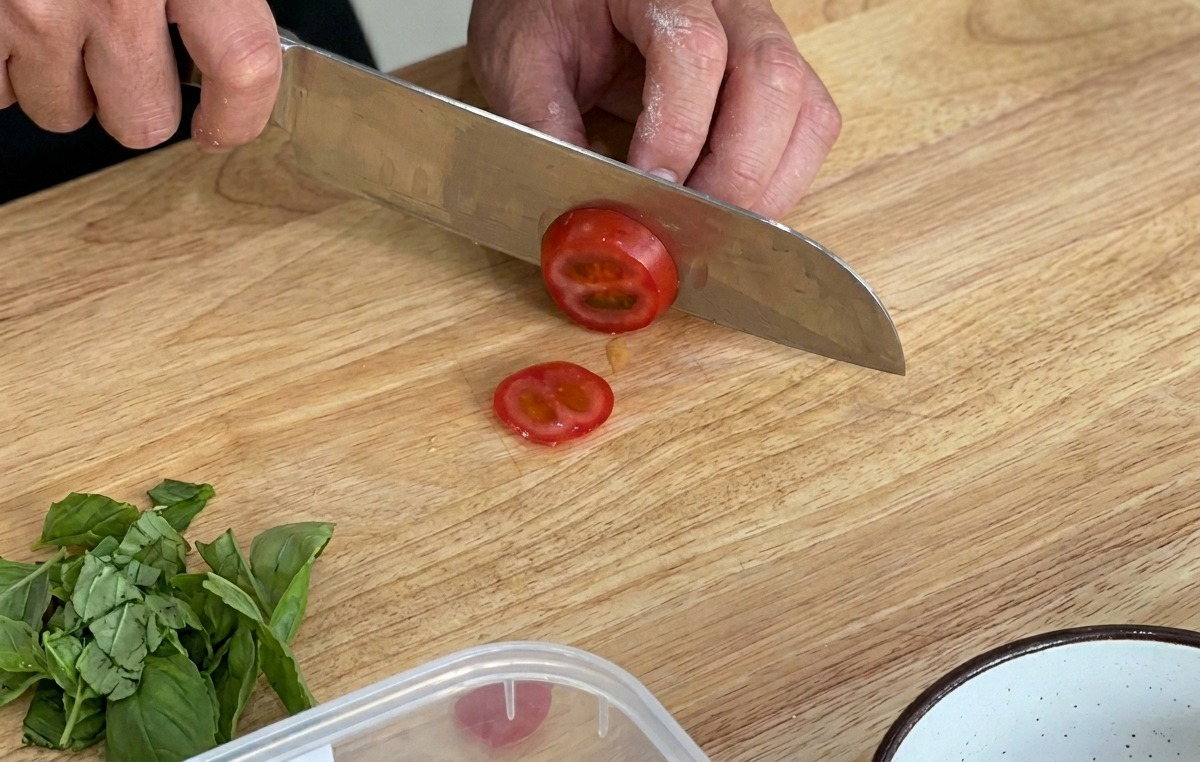
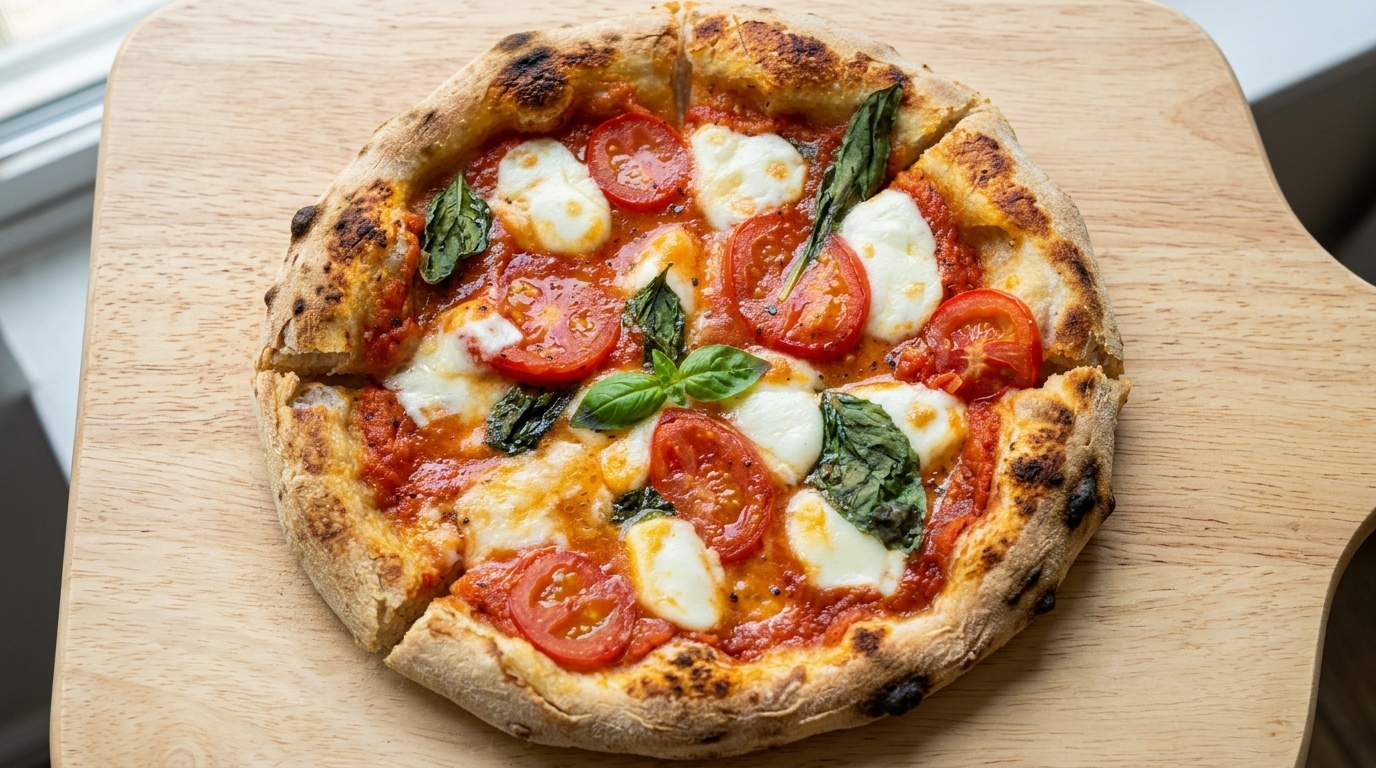
Using a sharp knife, carefully slice the fresh cherry tomatoes into thin rounds on a cutting board. These will add a burst of fresh, slightly acidic flavor to balance the rich cheese.
Tip: A serrated knife works best for slicing small tomatoes easily without squishing them. - 15Arrange the tomatoes
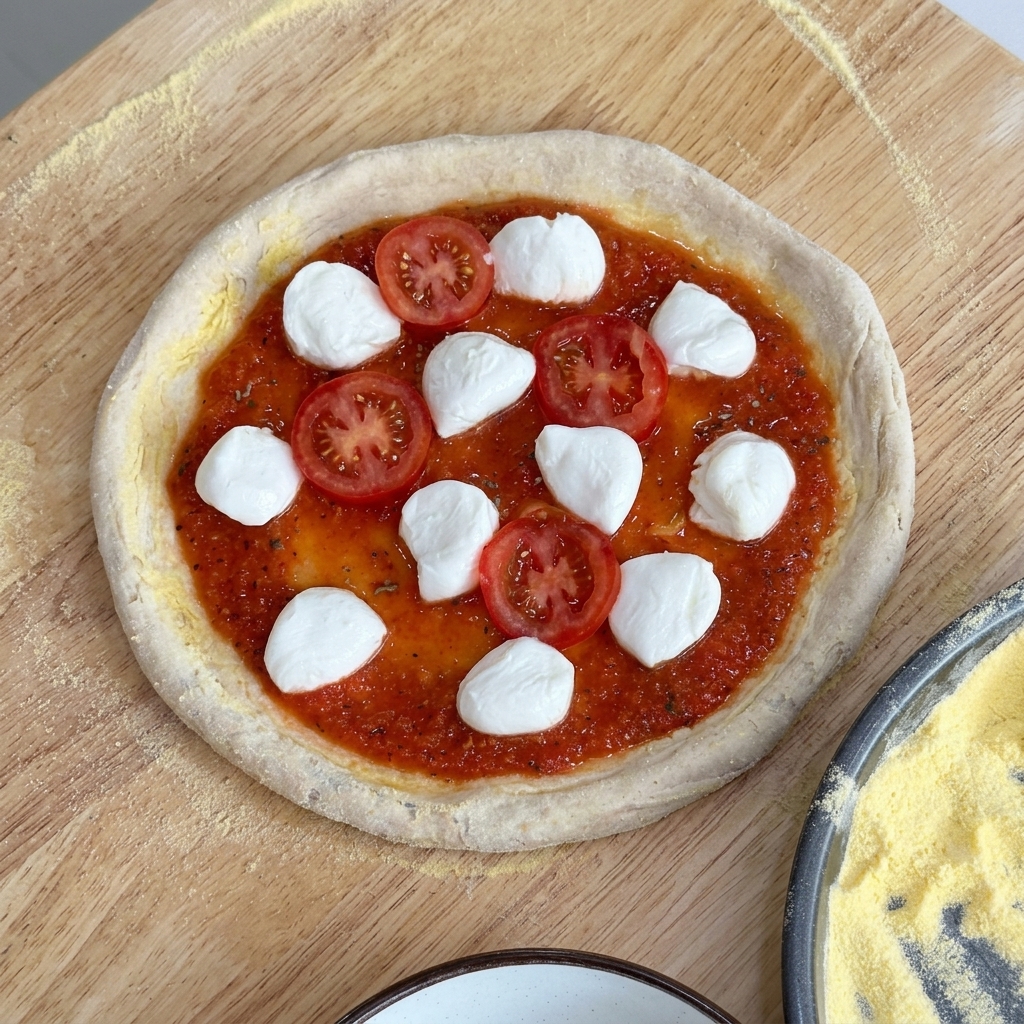
Distribute the sliced cherry tomatoes evenly across the pizza, placing them between the pieces of mozzarella cheese. This ensures every slice will have a good balance of toppings.
Tip: Spacing the tomatoes evenly ensures a perfect balance of acidity and richness in every bite. - 16Add the fresh basil
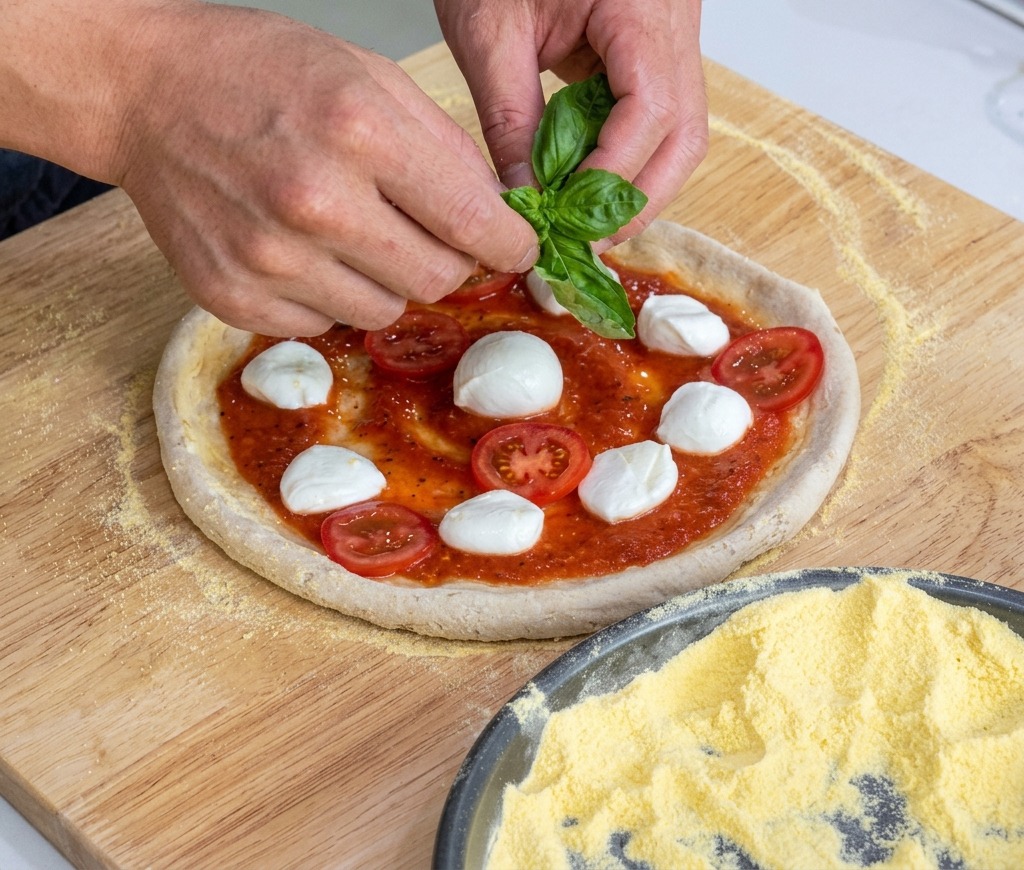
Scatter fresh green basil leaves over the pizza. The fragrant basil completes the classic Margherita flavor profile and adds a beautiful pop of vibrant color before baking.
Tip: You can also reserve a few fresh basil leaves to add after baking so they retain their bright green color and fresh aroma.