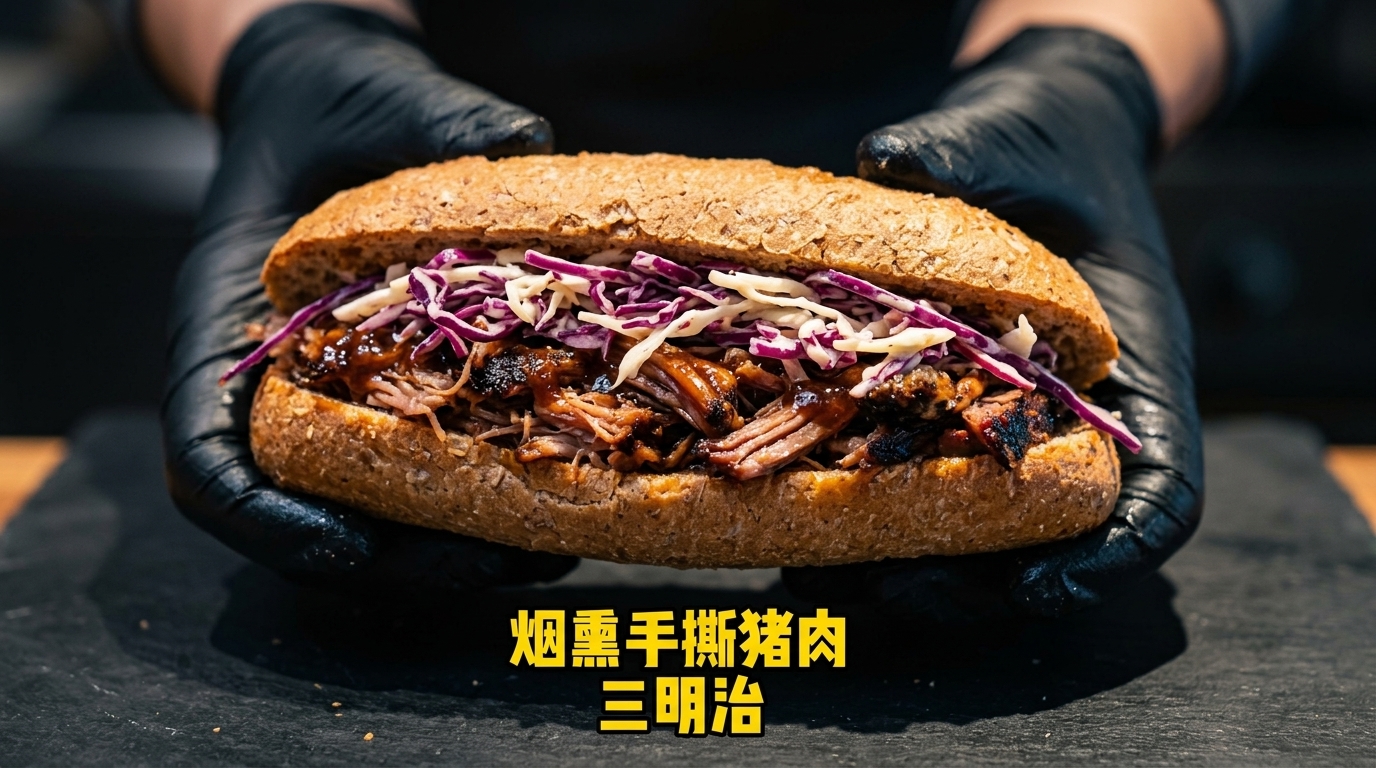
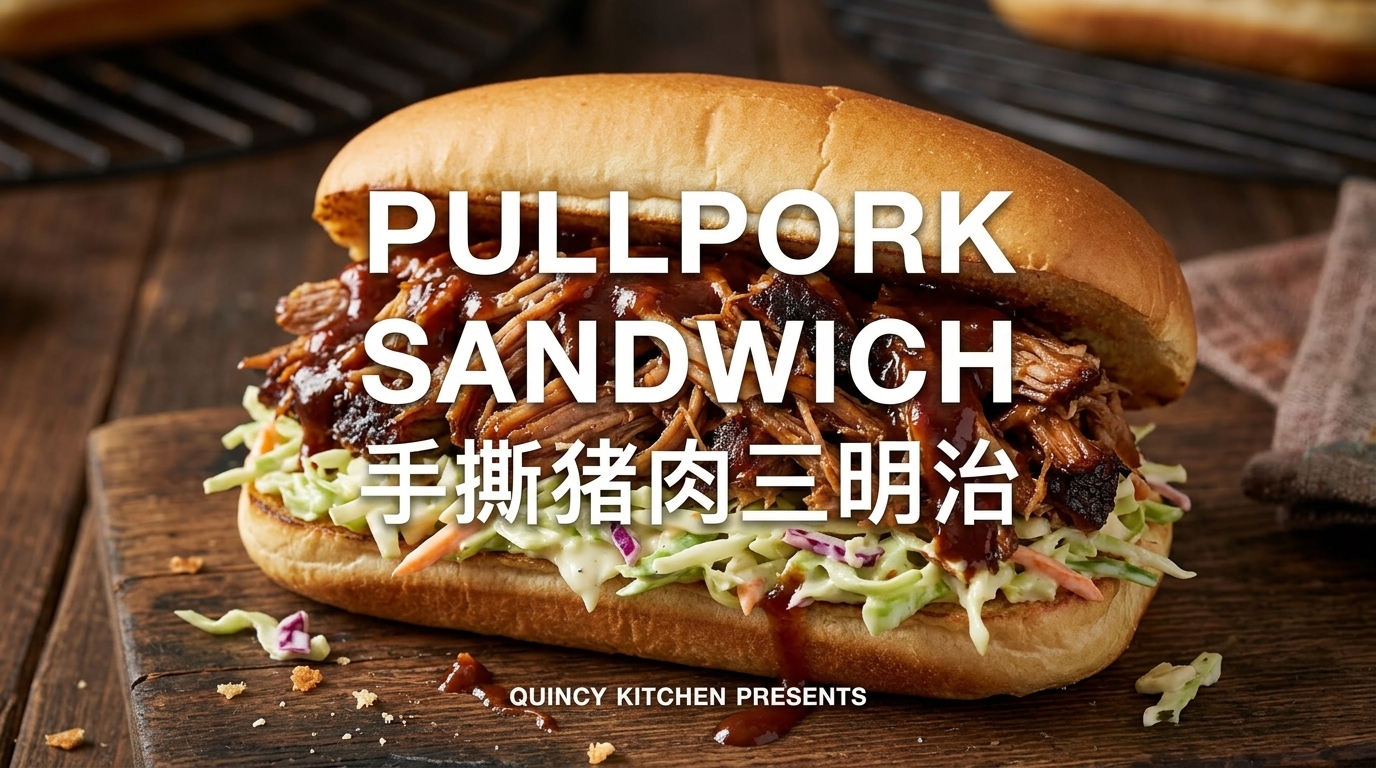
Classic Smoked Pulled Pork Sandwich
Tender, slow-smoked pork shoulder with a rich mahogany bark, hand-pulled and tossed in tangy BBQ sauce, served over crisp, creamy coleslaw on a toasted bun.
True barbecue is a labor of love that rewards patience with meltingly tender meat and profound flavor. This pulled pork sandwich brings the authentic, low-and-slow smokehouse experience to your backyard kettle grill. By combining a deeply savory dry rub, an eight-hour apple cider vinegar-spritzed smoke, and a bright, citrusy coleslaw, it achieves the perfect balance of richness, smoke, and crunch.
Ingredients
- 1 whole raw pork shoulder
- 1 rack raw pork ribs
- 2 tbsp onion powder
- 2 tbsp black pepper
- 2 tbsp garlic powder
- 2 tbsp salt
- 2 tbsp smoked paprika
- 1 cup apple cider vinegar
- 1 cup American BBQ sauce
- 12 head shredded cabbage
- 1 tbsp lemon juice
- 12 cup mayonnaise
- to taste salt and black pepper
- 4-6 long sandwich rolls
Instructions
- 1Prepare the pork shoulder
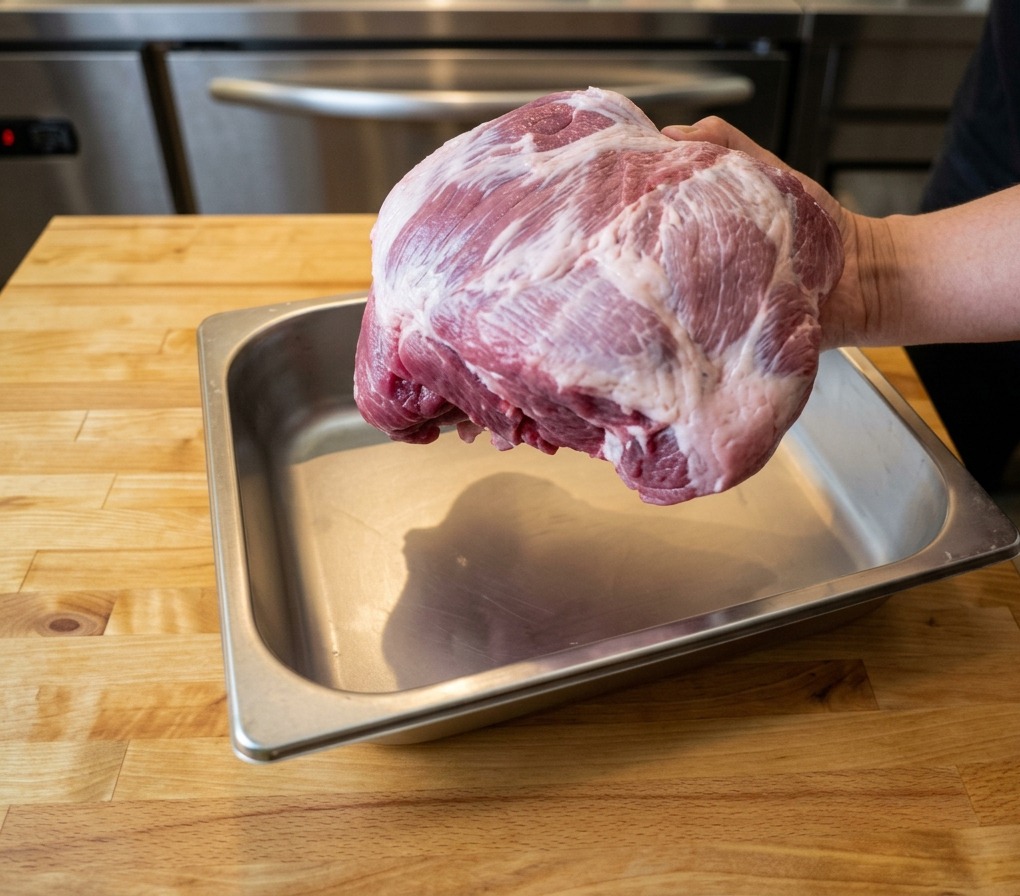
Place the whole raw pork shoulder into a large metal tray or pan. This substantial cut of meat is ideal for low and slow smoking; its high fat and connective tissue content will break down over hours on the grill to yield incredibly tender, melt-in-your-mouth pulled pork.
Tip: Pat the surface of the pork shoulder dry with paper towels before applying any seasoning. A dry surface helps the spice rub adhere much better. - 2Prepare the pork ribs
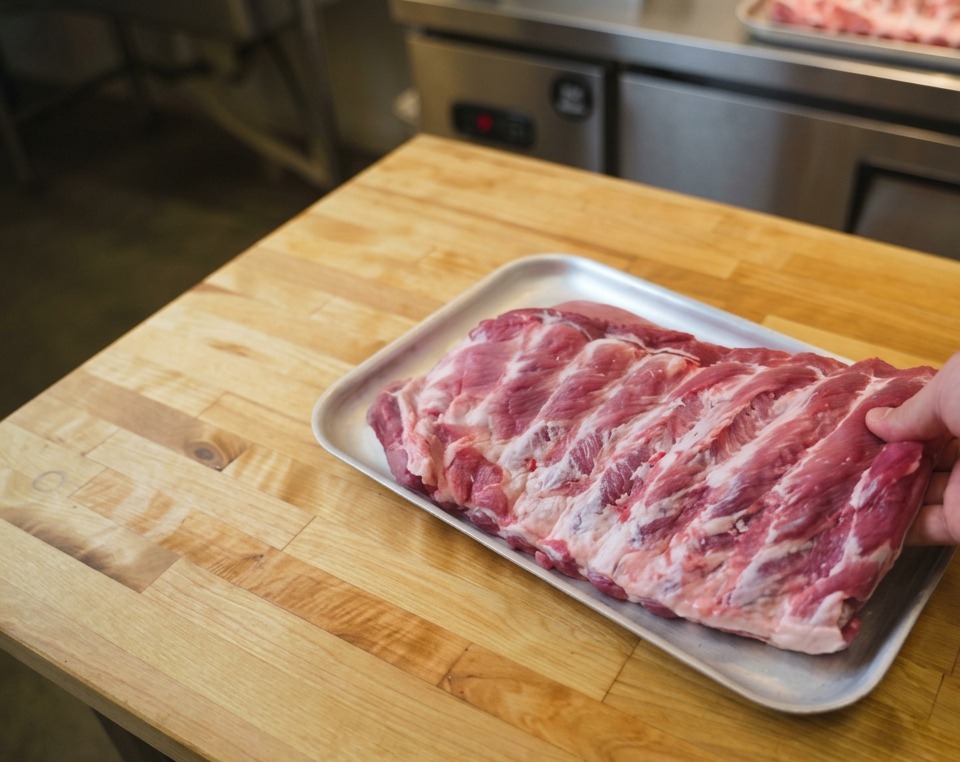
Lay out the rack of raw pork ribs on a sturdy butcher block or cutting board. Look for ribs with good, even marbling and a uniform thickness across the entire rack, which ensures they will cook at a consistent rate alongside the pork shoulder.
Tip: Use a butter knife and a paper towel to grip and peel off the thin, tough membrane on the bone side of the ribs before seasoning. - 3Mix the BBQ rub
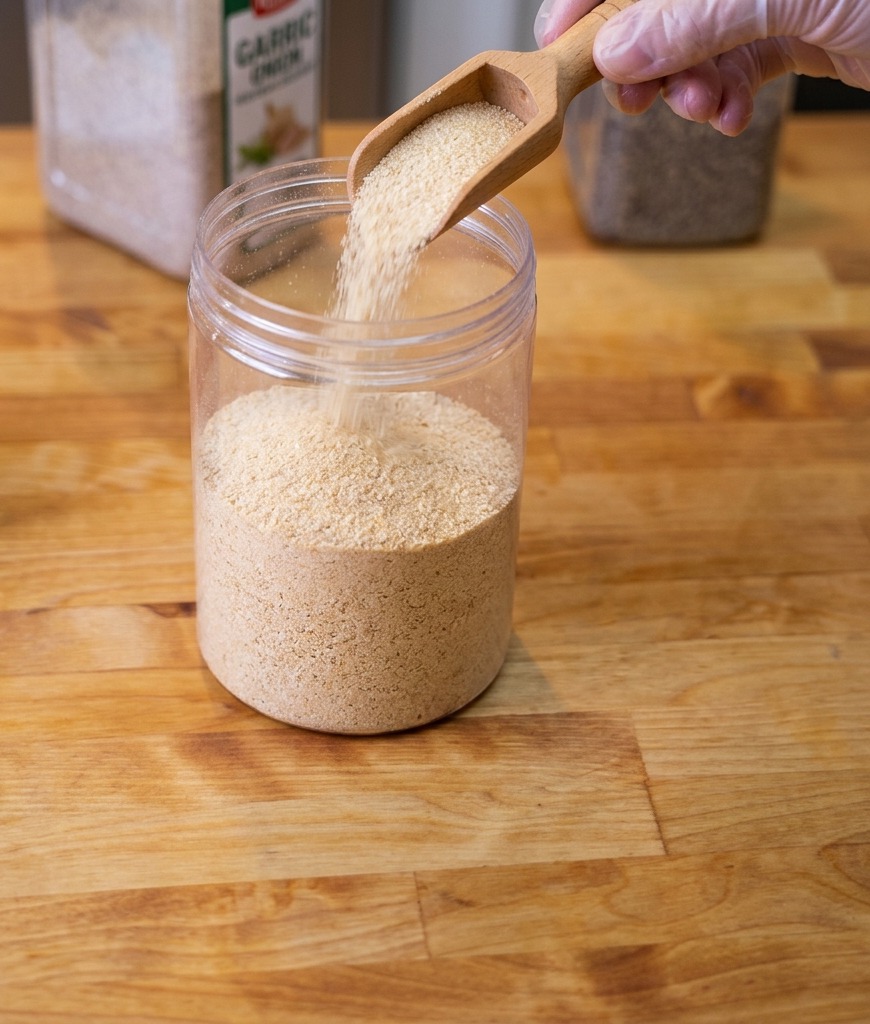
In a clear container, begin layering your dry seasonings to create the ultimate BBQ rub. Combine onion powder, black pepper, garlic powder, salt, and smoked paprika. The smoked paprika provides a beautiful mahogany color, while the salt and garlic build a deeply savory flavor profile.
Tip: Make a double or triple batch of this dry rub and store the excess in an airtight container in your pantry for future barbecue sessions. - 4Season the pork shoulder
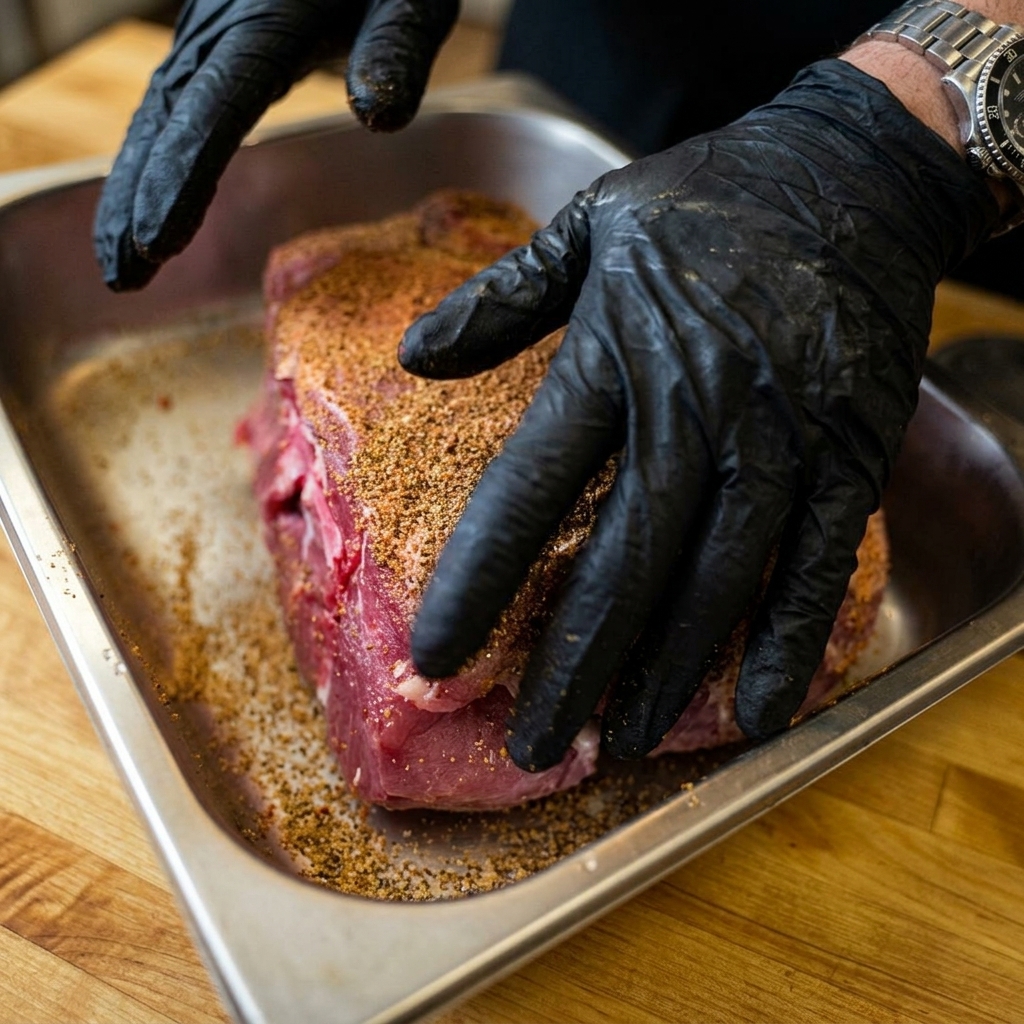
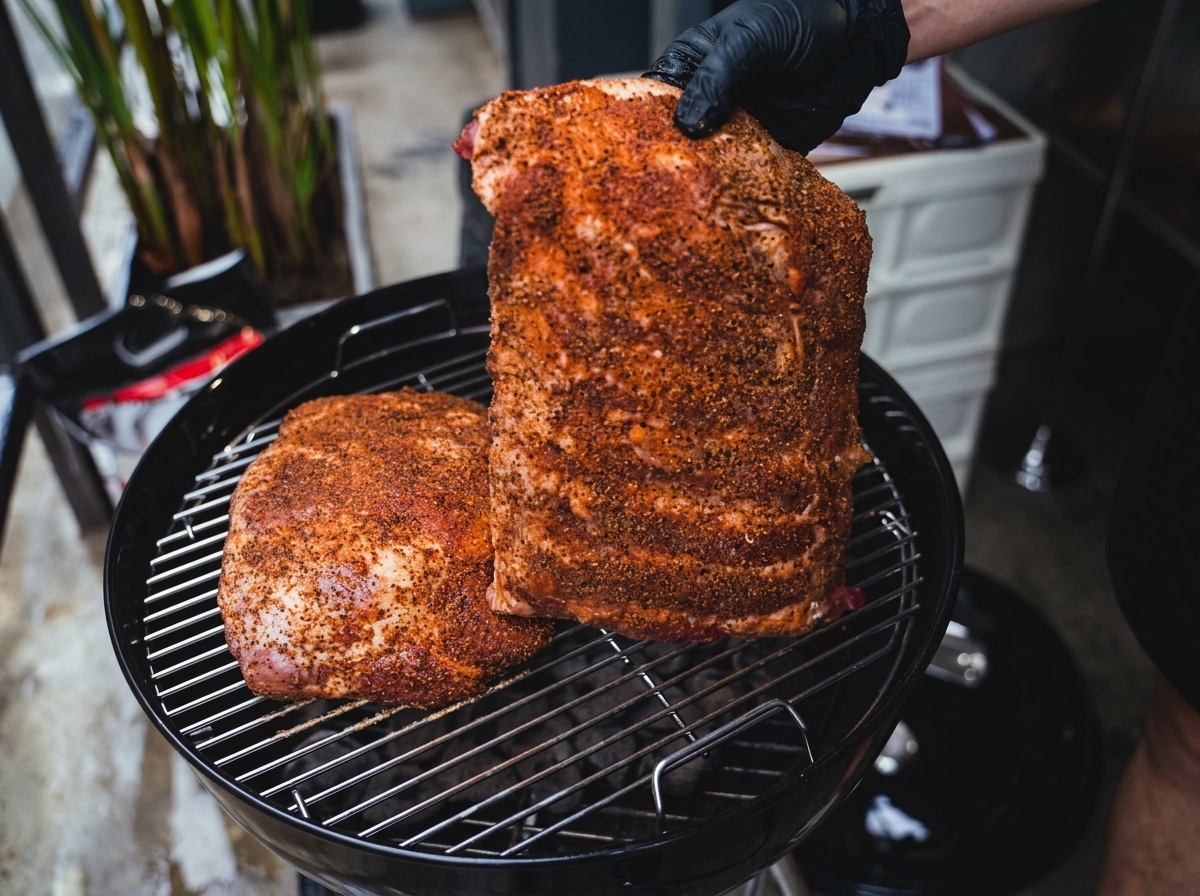
Generously coat the entire surface of the pork shoulder with your prepared dry rub. Using gloved hands, firmly press and pat the spices directly into the meat, ensuring that every side—including the edges and bottom—is completely covered with a thick, even layer of seasoning.
Tip: For the best flavor and texture, season the meat, cover it, and let it rest in the refrigerator for 24 hours. This acts as a dry brine, tenderizing the pork. - 5Season the pork ribs

Repeat the seasoning process with the rack of pork ribs. Apply a liberal amount of the dry spice blend over the meat, gently patting it down so the rub adheres securely to the surface. During the long smoking process, this thick coating will transform into a crusty, flavorful bark.
Tip: Dont forget to season the bone side of the ribs as well, though you can apply a slightly lighter coat there compared to the top meaty side. - 6Prepare the charcoal
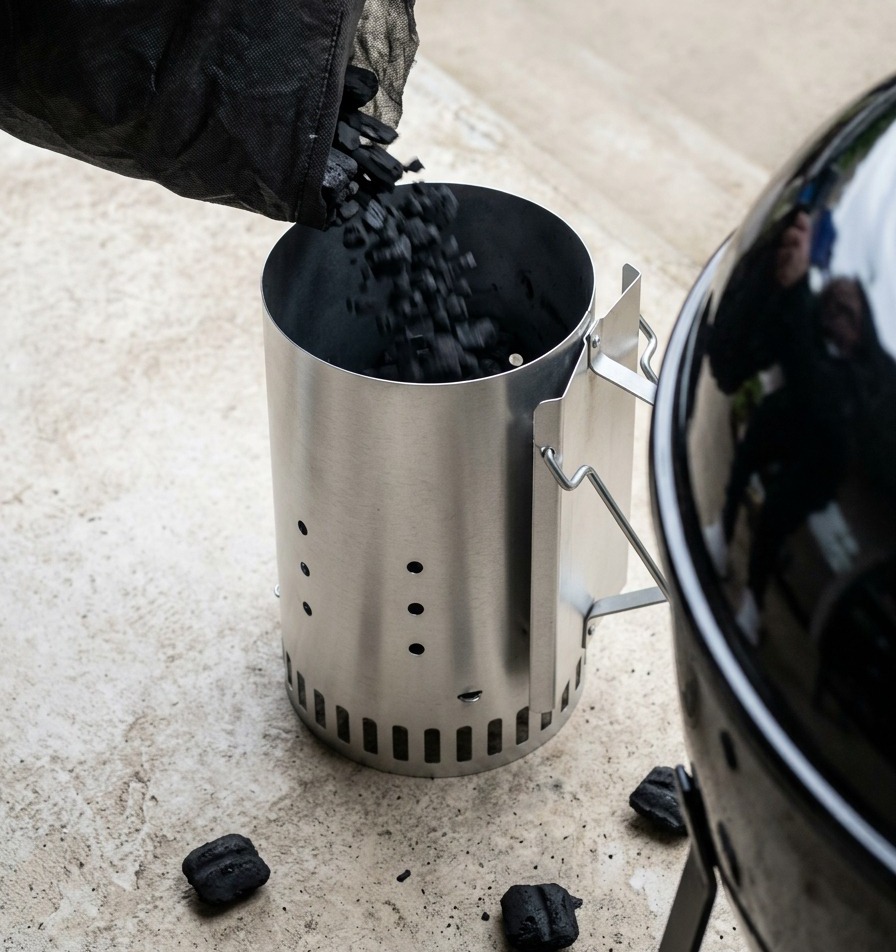
To get your grill ready for smoking, you need a steady, reliable heat source. Pour black charcoal briquettes from the bag directly into a cylindrical metal chimney starter. Using a chimney starter is the most efficient and consistent way to get your coals evenly lit without using chemical lighter fluid.
Tip: Place a couple of paraffin wax cubes or crumpled newspaper under the chimney starter and light them to ignite the charcoal from the bottom up. - 7Add lit charcoal to the grill
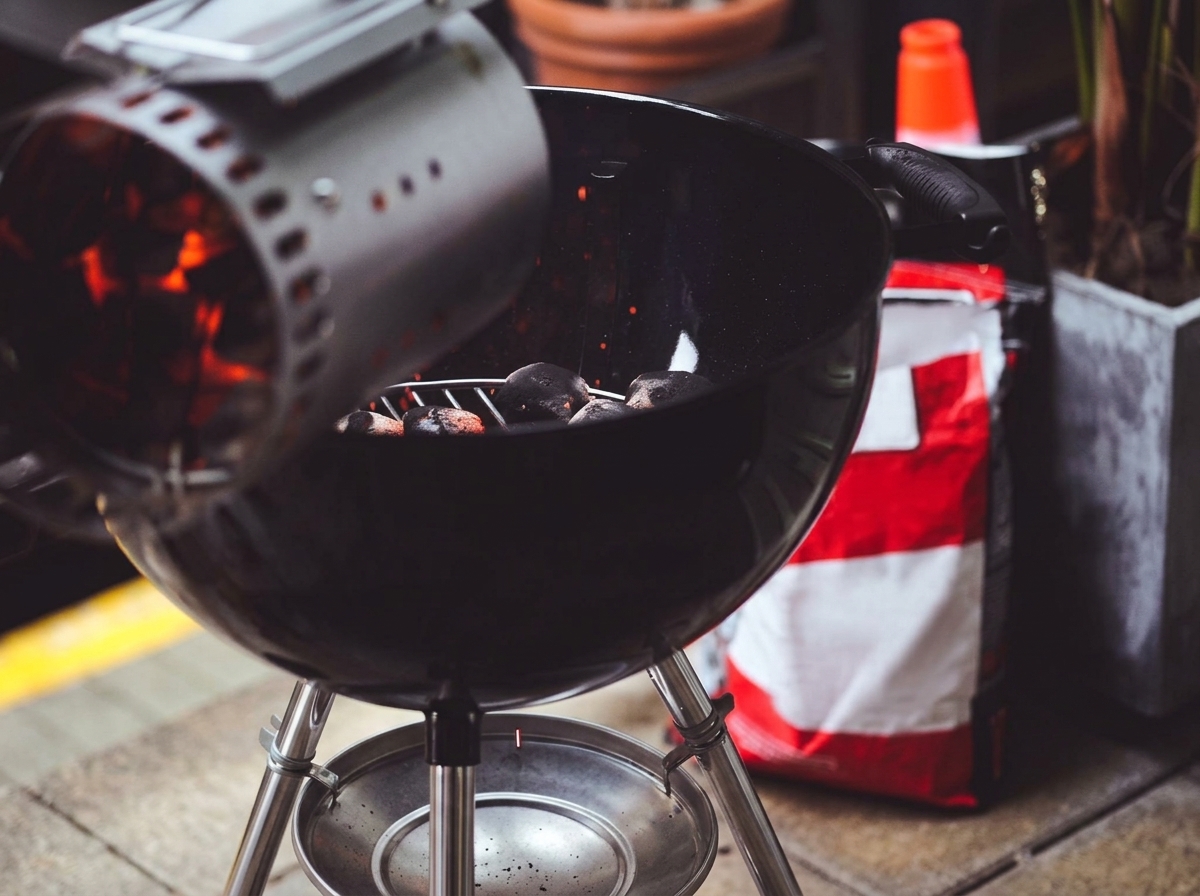
Carefully pour the lit, glowing red-hot charcoal from the chimney starter into the base of your kettle grill. Arrange the coals to one side to set up a two-zone cooking area, which is essential for low and slow smoking.
Tip: Always use heat-resistant gloves when handling a hot charcoal chimney starter to prevent burns. - 8Place the meat on the grill
Place the heavily seasoned raw pork shoulder and ribs onto the grill grate. Position the meat opposite the hot coals for indirect cooking, which will gently tenderize the pork while infusing it with a rich, smoky flavor.
Tip: Ensure the meat is placed over the unlit side of the grill to prevent burning and to allow the fat to render slowly. - 9Smoke until a bark forms
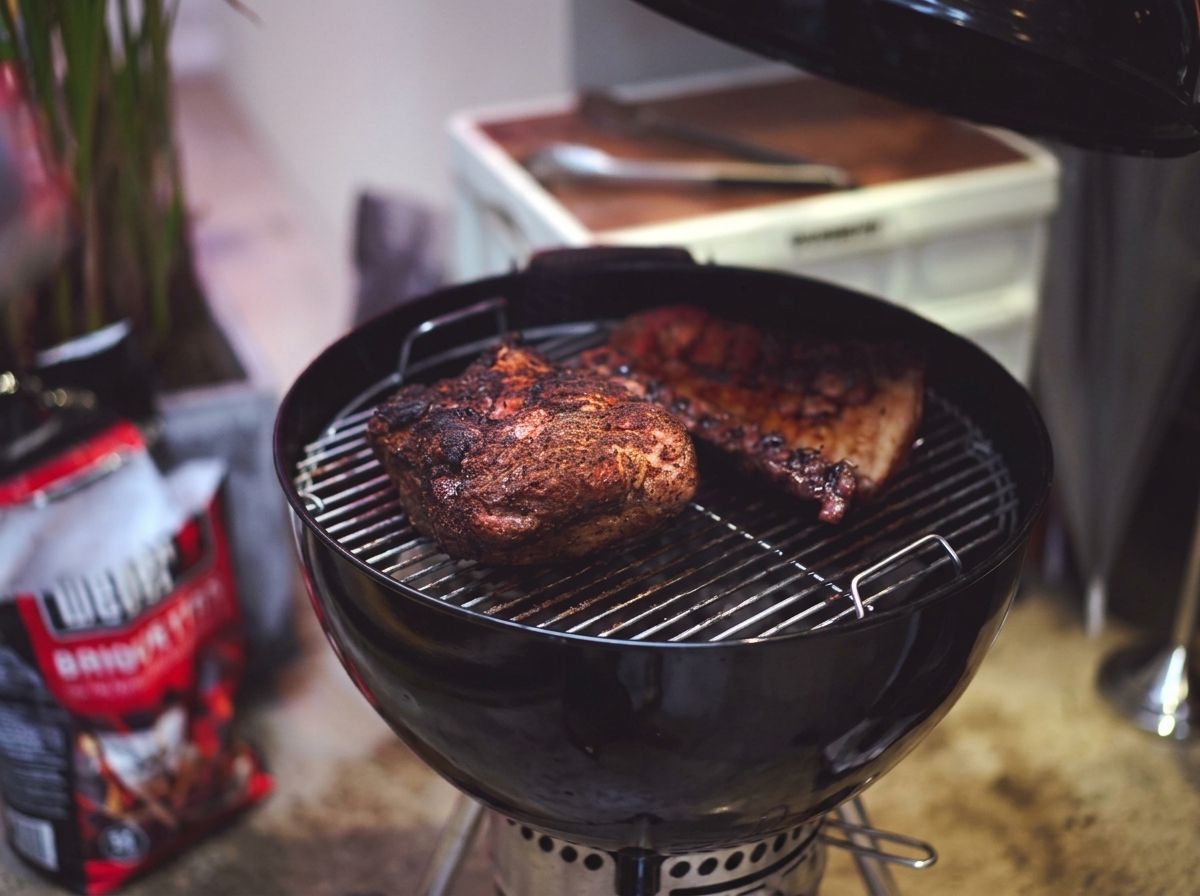
Close the lid and let the pork shoulder and ribs smoke until they develop a deeply browned dark crust commonly known as the bark. Maintain a steady temperature around 120 degrees Celsius for the first four hours resisting the urge to open the lid.
Tip: The dark crust is crucial for flavor as it is formed by the caramelization of the rub and the meat reacting to the wood smoke. - 10Spray with Apple Cider Vinegar
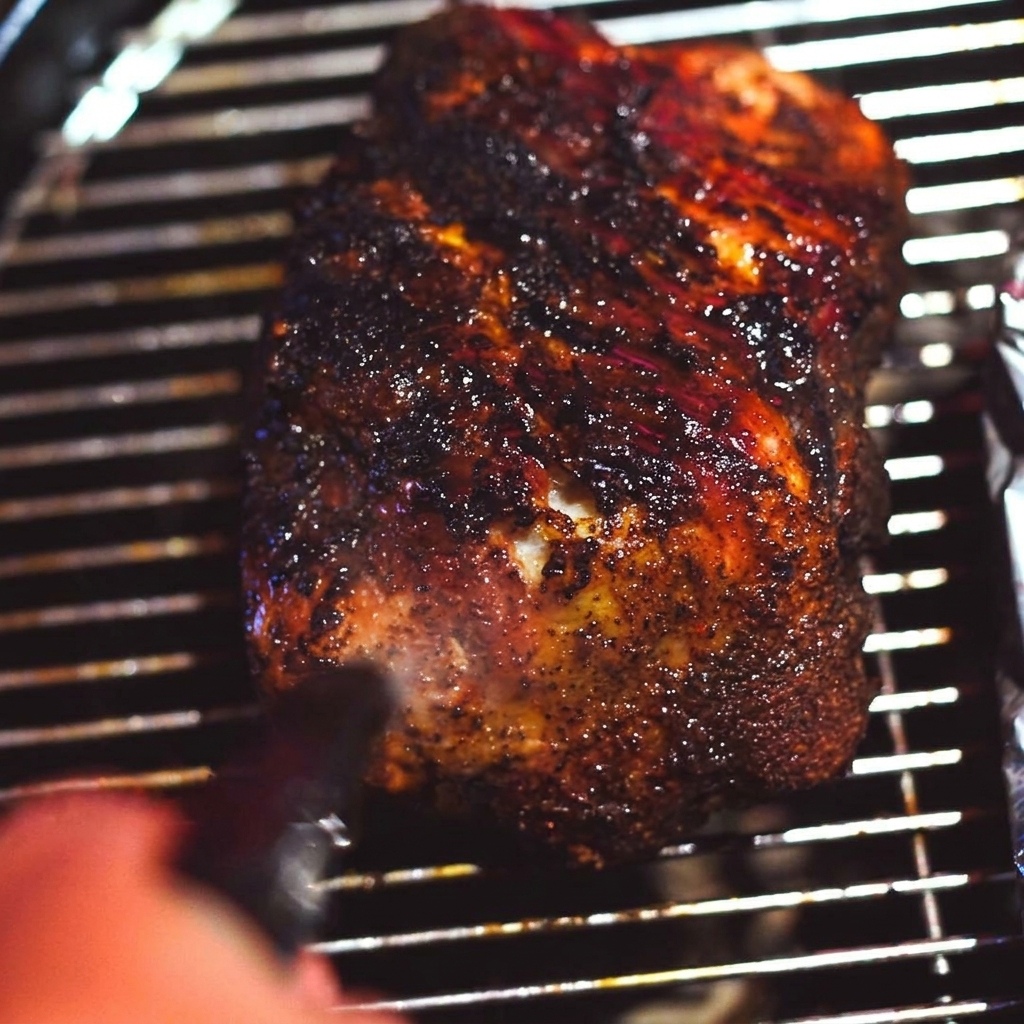
After the initial four hours of smoking, quickly open the grill lid and spray the dark, crusted surface of the pork evenly with apple cider vinegar. This adds essential moisture and a hint of tanginess, which helps to build a deep, flavorful bark on the exterior of the meat.
Tip: Work as quickly as possible to minimize heat loss from the grill while the lid is open. - 11Wrap the meat in foil
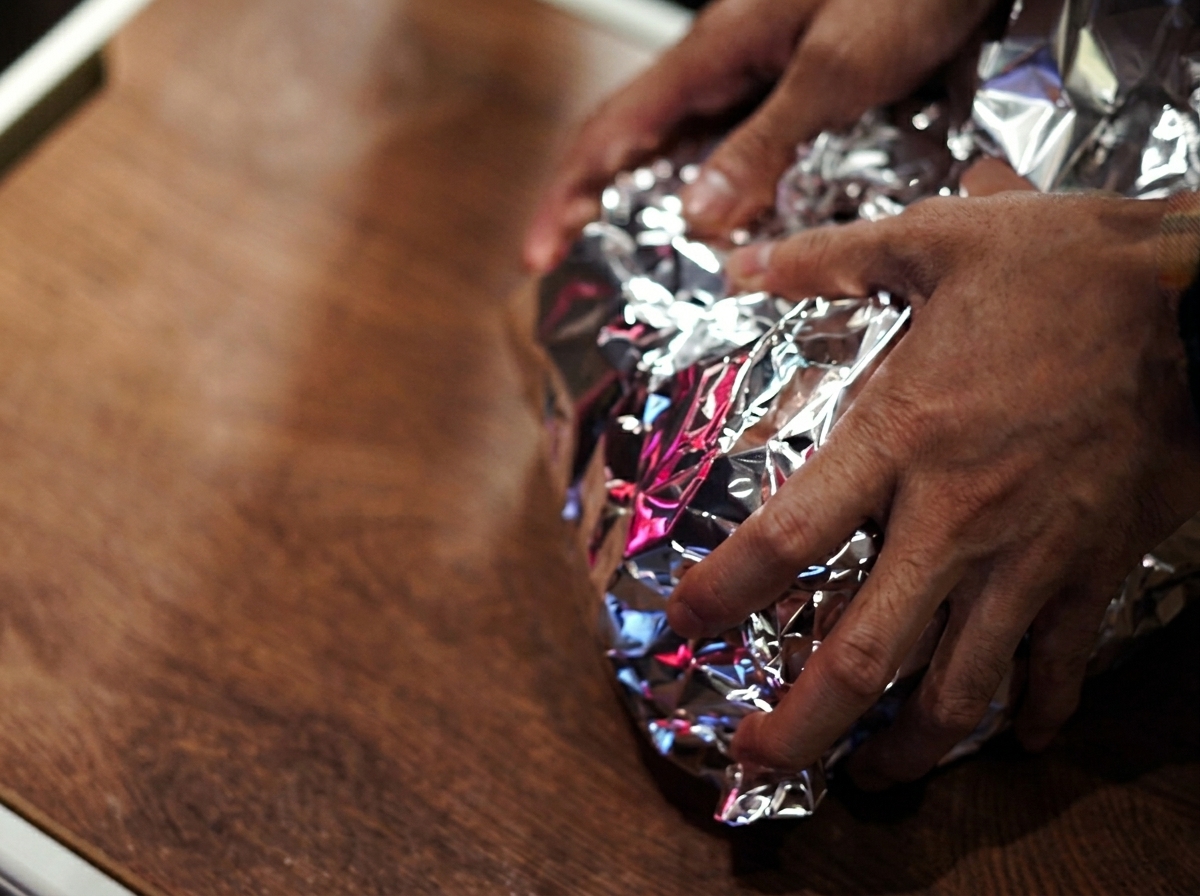
Tightly wrap the partially cooked meat in multiple layers of heavy-duty aluminum foil, then return it to the grill to cook for an additional four hours. This technique traps moisture and helps push the meat through the cooking stall, ensuring it becomes perfectly tender.
Tip: Make sure the foil is sealed tightly to prevent any flavorful juices or steam from escaping while the meat finishes cooking. - 12Shred the pulled pork
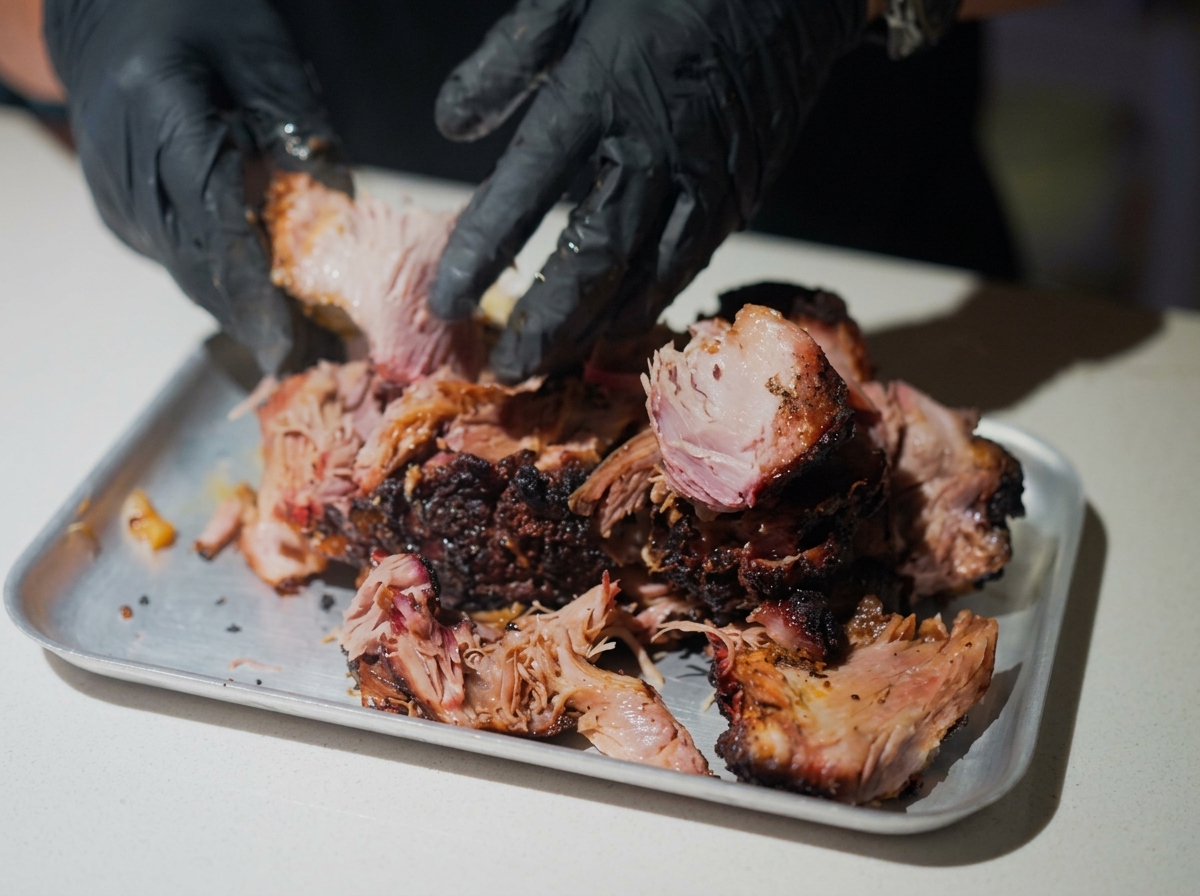
Once the pork shoulder is fully cooked and has rested, use gloved hands to physically tear and pull the meat apart. The slow-cooked pork should easily shred into tender, bite-sized pieces, ready to be tossed with your favorite BBQ sauce.
Tip: Shred the meat while it is still warm, as the connective tissue is relaxed and it will pull apart much easier than when cold. - 13Sauce the shredded pork
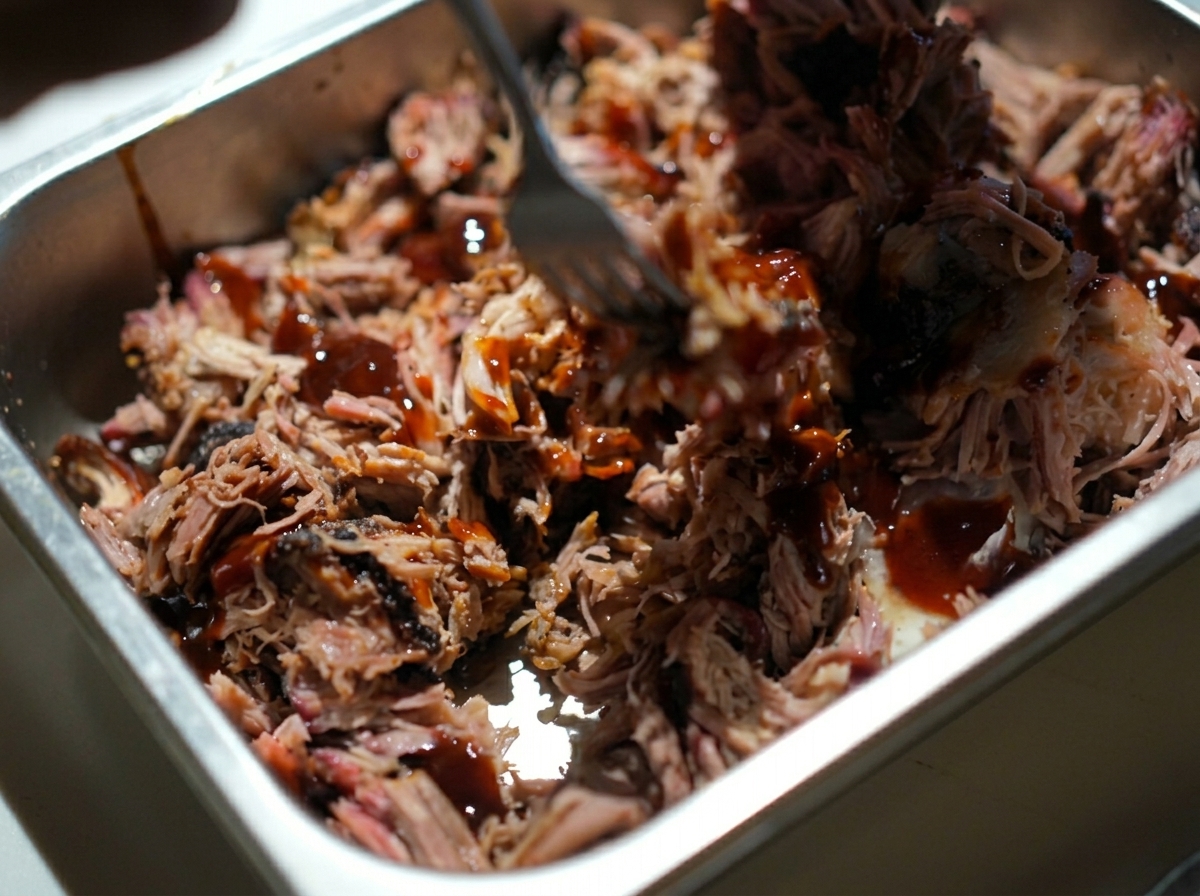
Transfer the pulled meat into a large pan discarding any remaining large chunks of unrendered fat. Drizzle your preferred American BBQ sauce over the warm pork and toss thoroughly until every strand is beautifully coated and glossy.
Tip: Warm the barbecue sauce slightly before mixing it into the pork so it blends seamlessly without cooling down the meat. - 14Prepare the Coleslaw and Bun
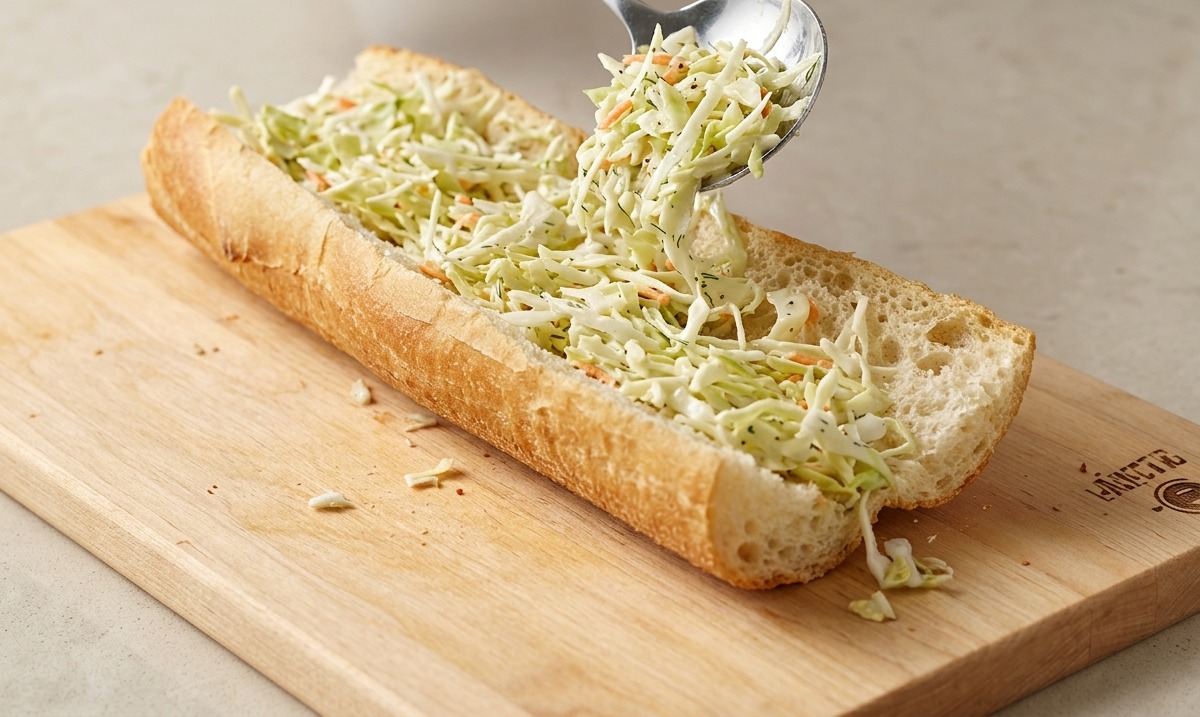
Toss the freshly shredded cabbage with lemon juice, salt, mayonnaise, and black pepper to create a crisp, tangy coleslaw. Slice a long sandwich roll in half and use a spoon to spread a generous, even layer of the prepared coleslaw along the bottom half of the bread.
Tip: Lightly toast the inside of the sandwich roll before adding the coleslaw to prevent the bread from becoming soggy. - 15Assemble the Sandwich
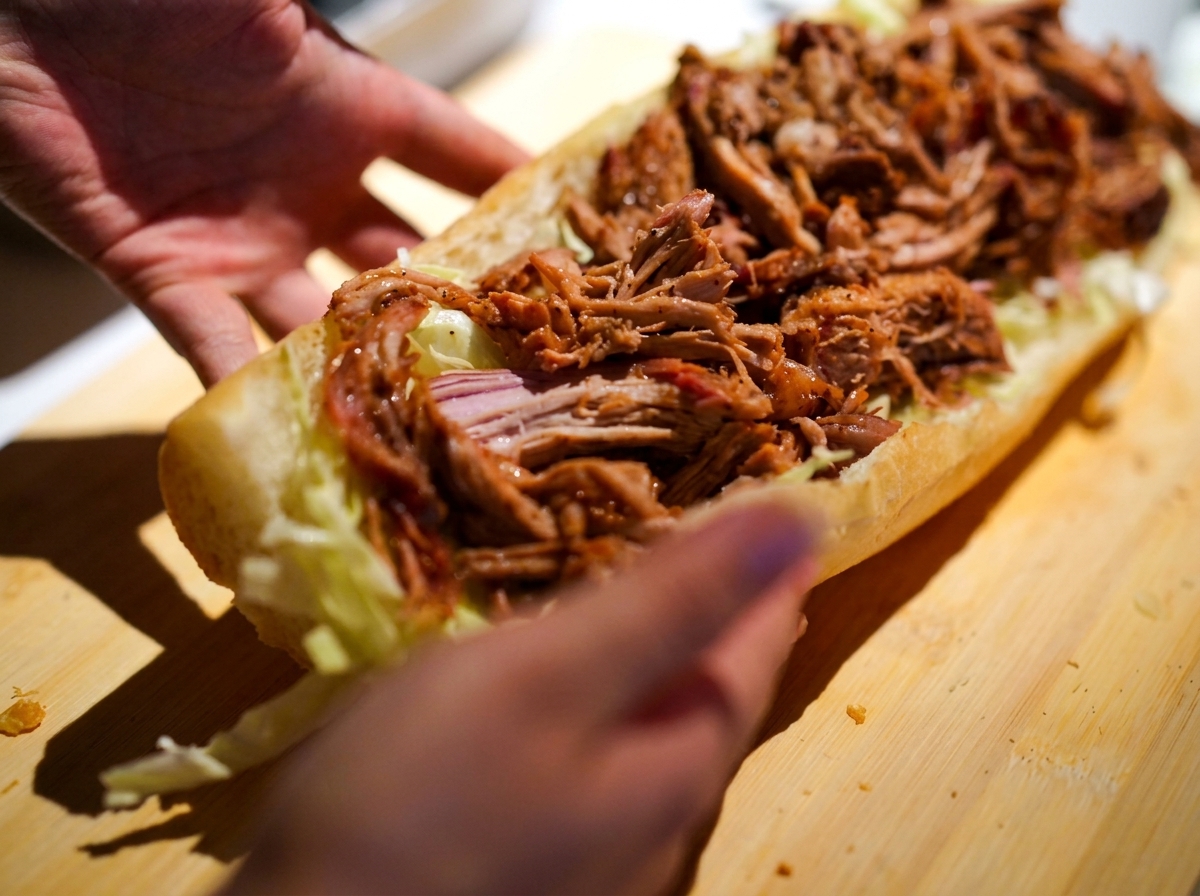
Finish building the sandwich by piling a hearty, generous portion of the warm, sauced pulled pork directly on top of the crisp coleslaw bed. The contrast between the hot, smoky meat and the cool, crunchy slaw creates the ultimate barbecue sandwich bite.
Tip: Serve the sandwich immediately while the pork is still hot and the coleslaw retains its fresh crunch.