Classic Margherita Pizza
Buffalo Mozzarella
Experience the ultimate 30-second Margherita pizza. Using a high-heat cast iron method, this recipe delivers a beautifully blistered crust topped with creamy buffalo mozzarella and fresh basil.
Authentic Neapolitan-style pizza relies on intense heat to achieve its signature airy, leopard-spotted crust. While professional pizza ovens reach scorching temperatures, you can creatively replicate this environment at home using a preheated upside-down cast iron pan. The combination of pliable high-hydration dough, low-moisture tomato sauce, and fresh buffalo mozzarella creates a perfectly balanced, artisan-quality pie in a matter of seconds.
Ingredients
- 1 portion high-hydration pizza dough
- as needed professional dusting flour or semolina
- 3–4 tbsp thick pizza sauce
- 1 handful fresh basil leaves
- 4–5 thick slices fresh buffalo mozzarella
- 1–2 tbsp extra virgin olive oil
Instructions
- 1Preheat the oven
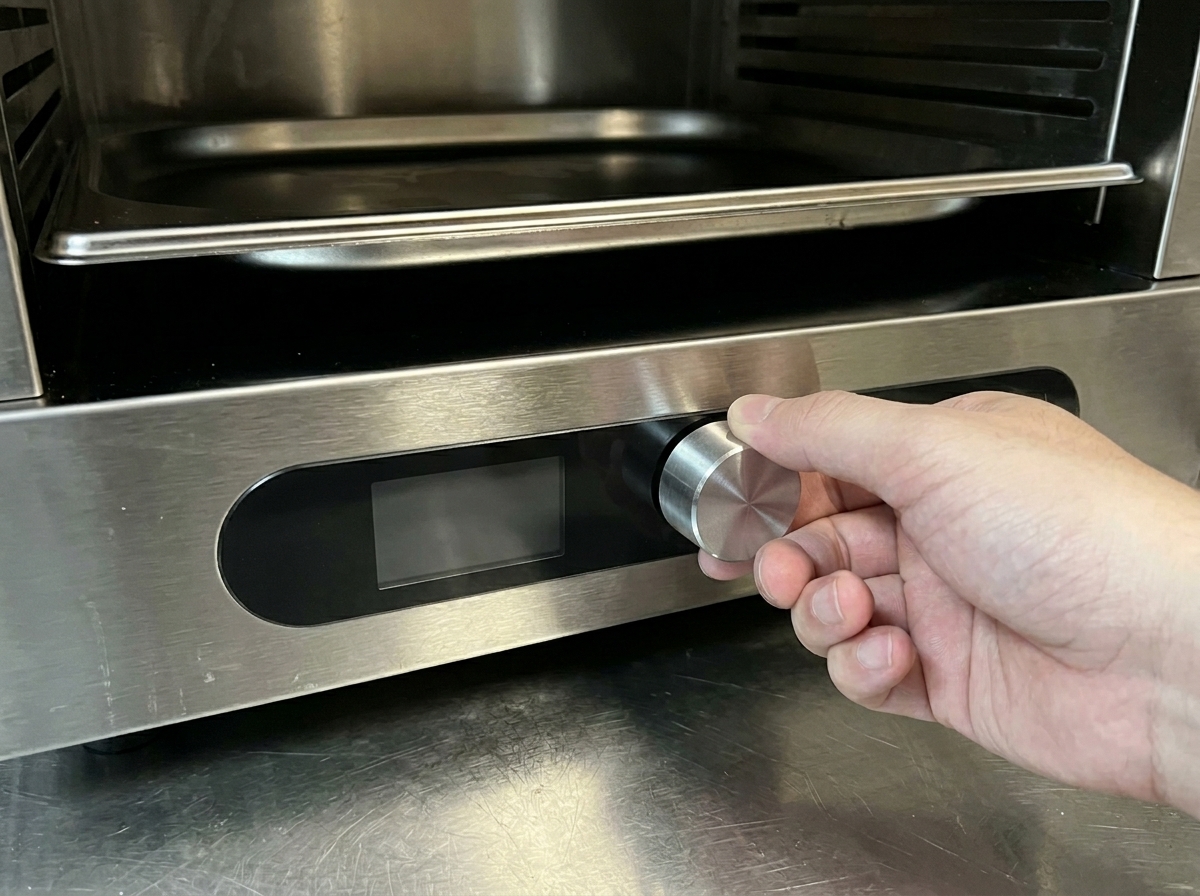
Turn the dial on your high-temperature oven to preheat it to 800 degrees. High heat is essential for a fast bake and a perfectly blistered crust.
Tip: If using a standard home oven, preheat it to its maximum temperature for at least 45 minutes to ensure it is as hot as possible. - 2Prepare the baking surface
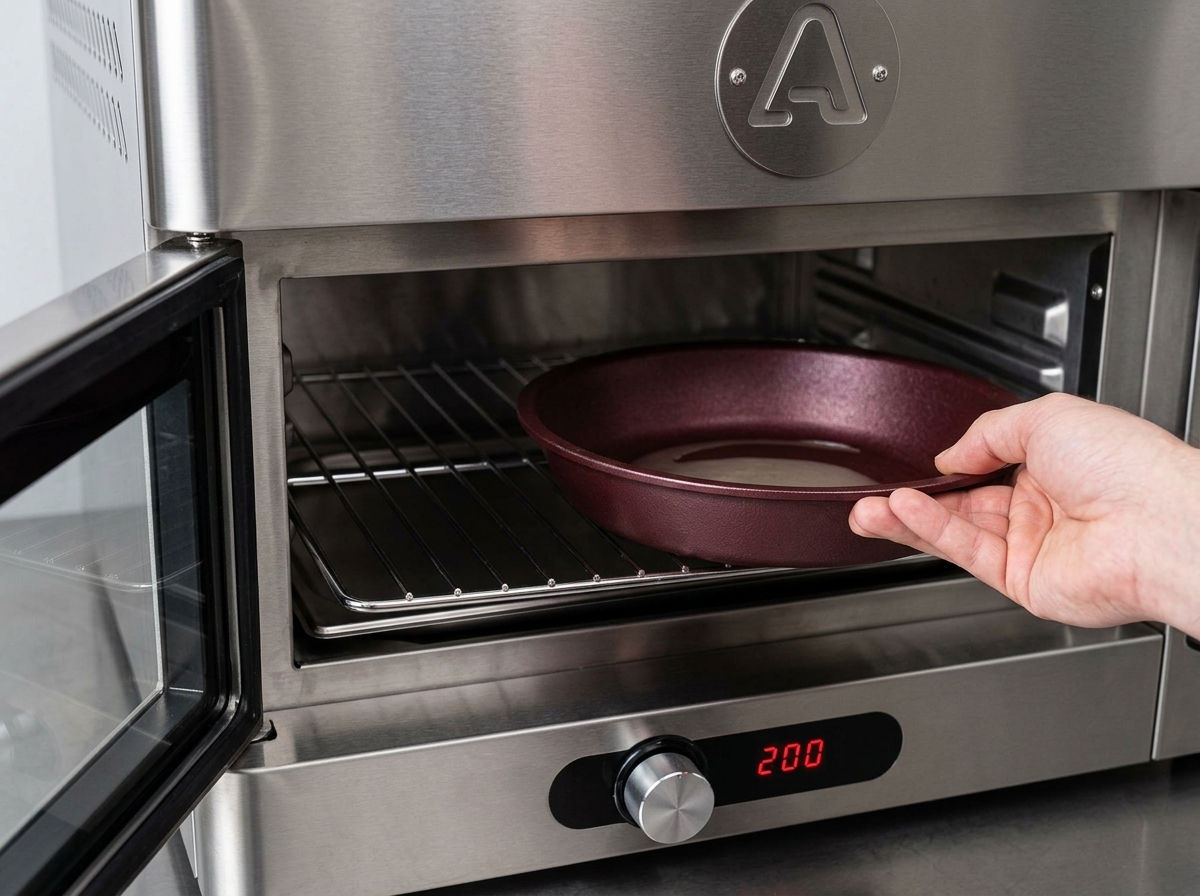
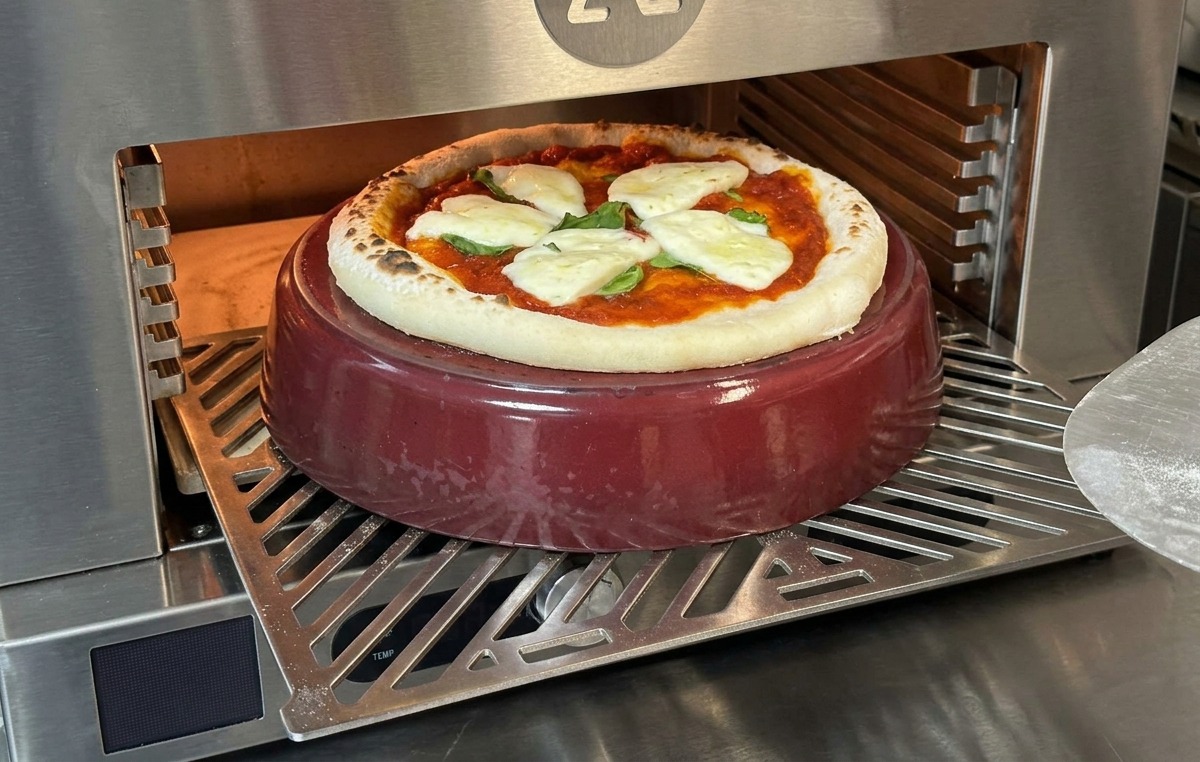
Place an upside-down cast iron pan onto the middle rack inside the oven. Lower the oven temperature to 700 degrees. The cast iron will heat up quickly and serve as a great substitute if you do not have a baking stone.
Tip: An upside-down cast iron pan provides a flat, highly heat-conductive surface, which is perfect for crisping up the pizza base. - 3Dust the dough
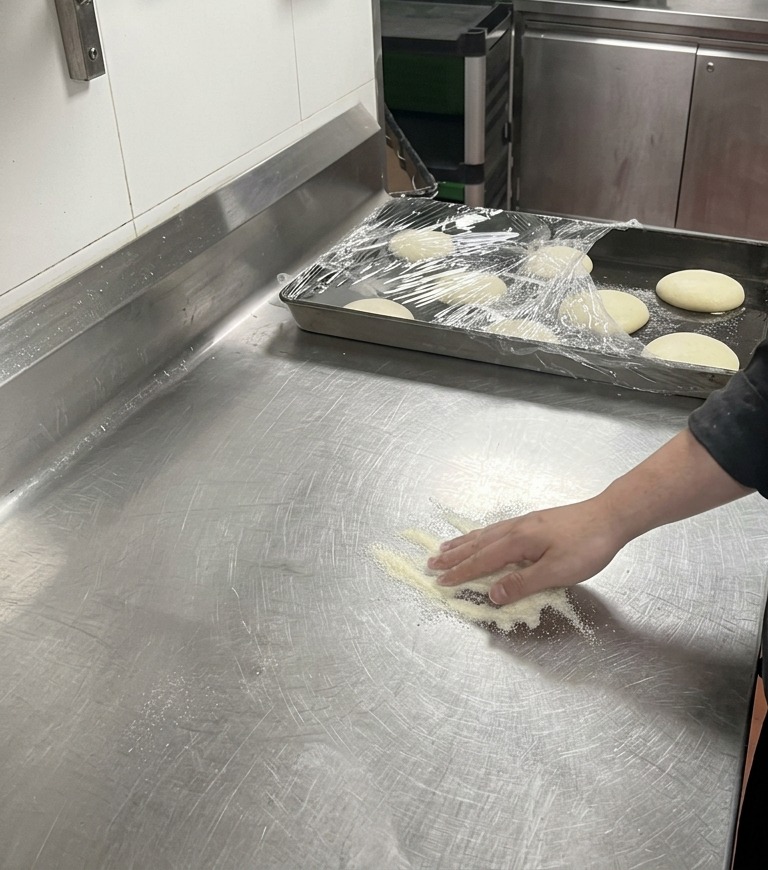
Place a portioned ball of raw pizza dough onto a pile of dusting flour on a stainless steel counter. Press down gently to coat the bottom of the dough, making it easier to handle.
Tip: Using professional dusting flour is ideal as it prevents the high-hydration dough from sticking without making it overly tough. - 4Stretch the dough
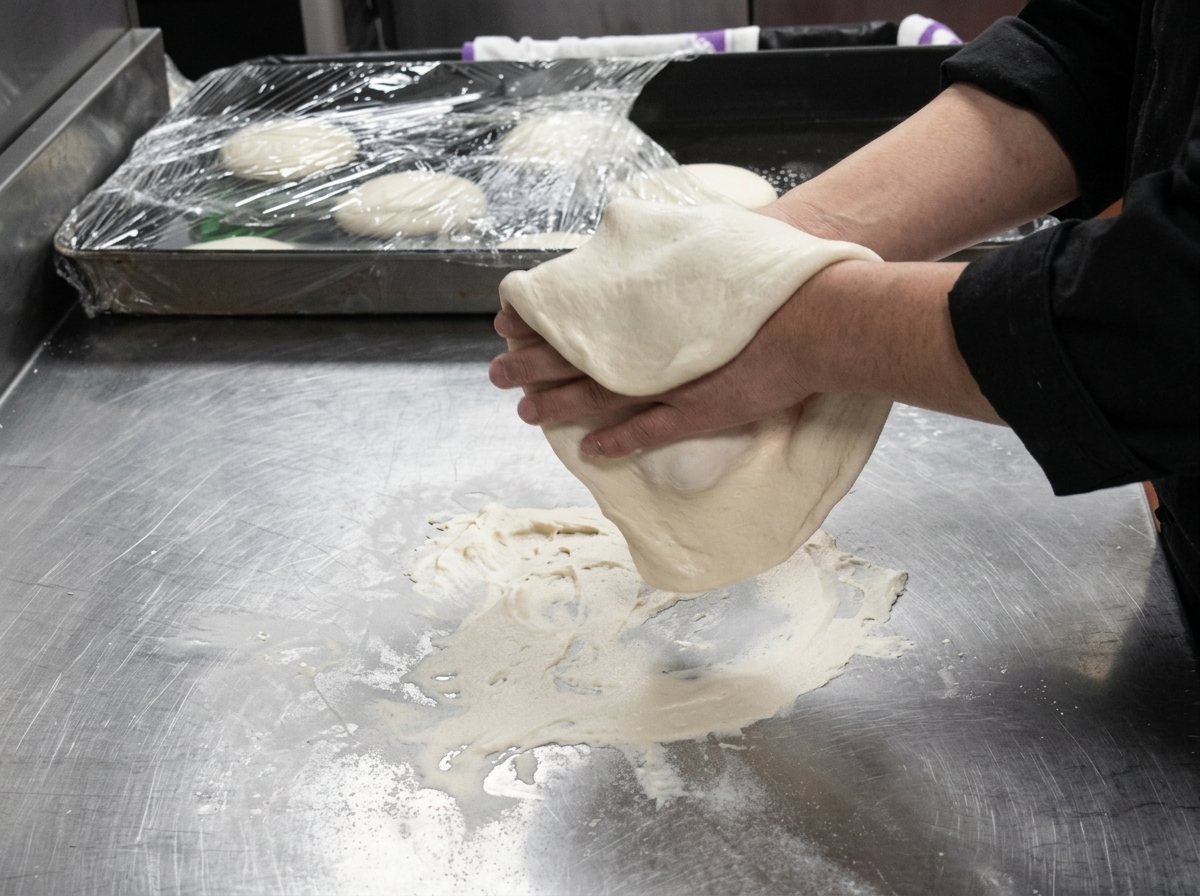
Pick up the dough and gently stretch it in the air using your hands. Since the dough has good hydration, it will be pliable and stretch out easily without tearing.
Tip: Let gravity do most of the work; gently rotate the dough along its edges while holding it up to maintain an even thickness. - 5Shape the crust
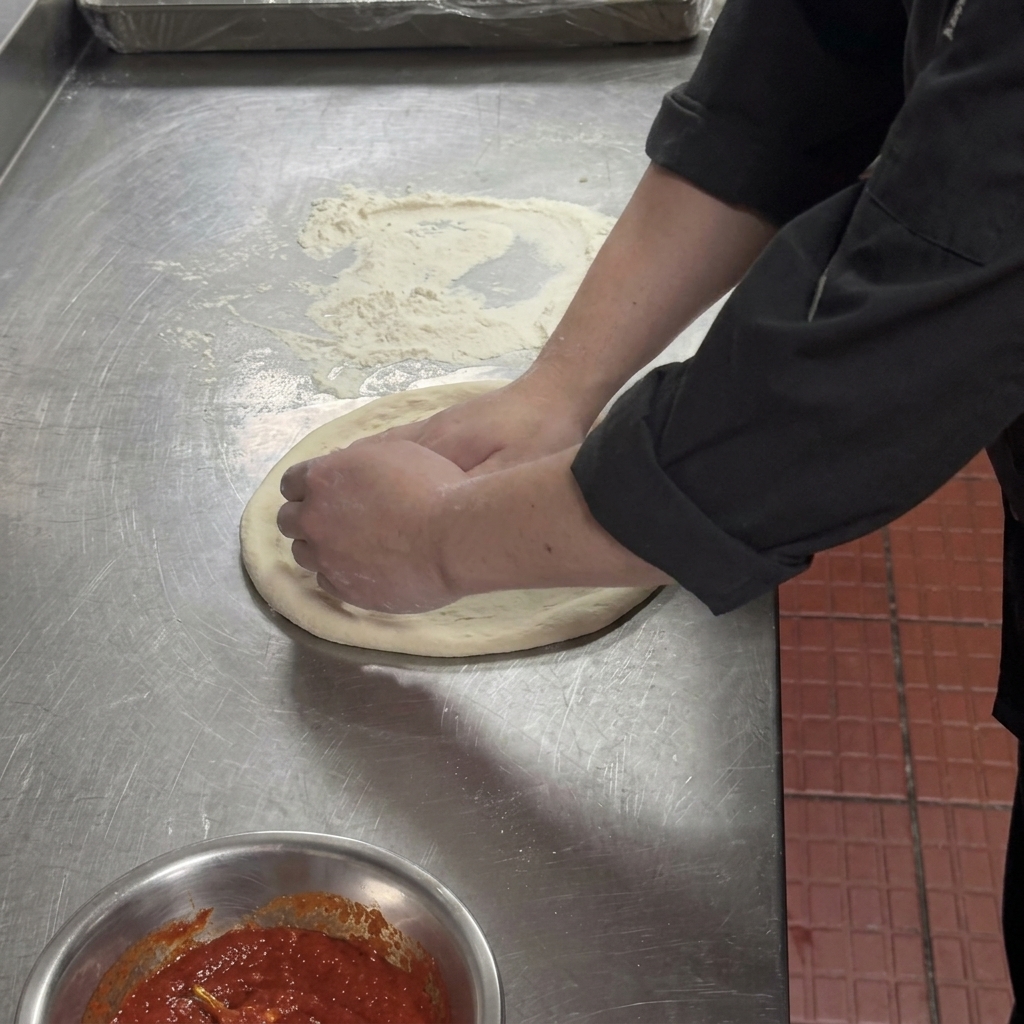
Place the stretched dough flat on the counter. Use your fingers to press along the perimeter, leaving about a thumbs width around the edge untouched to form the crust.
Tip: Avoid flattening the outer rim so the trapped air can expand in the oven, creating a puffy and airy crust. - 6Add the sauce
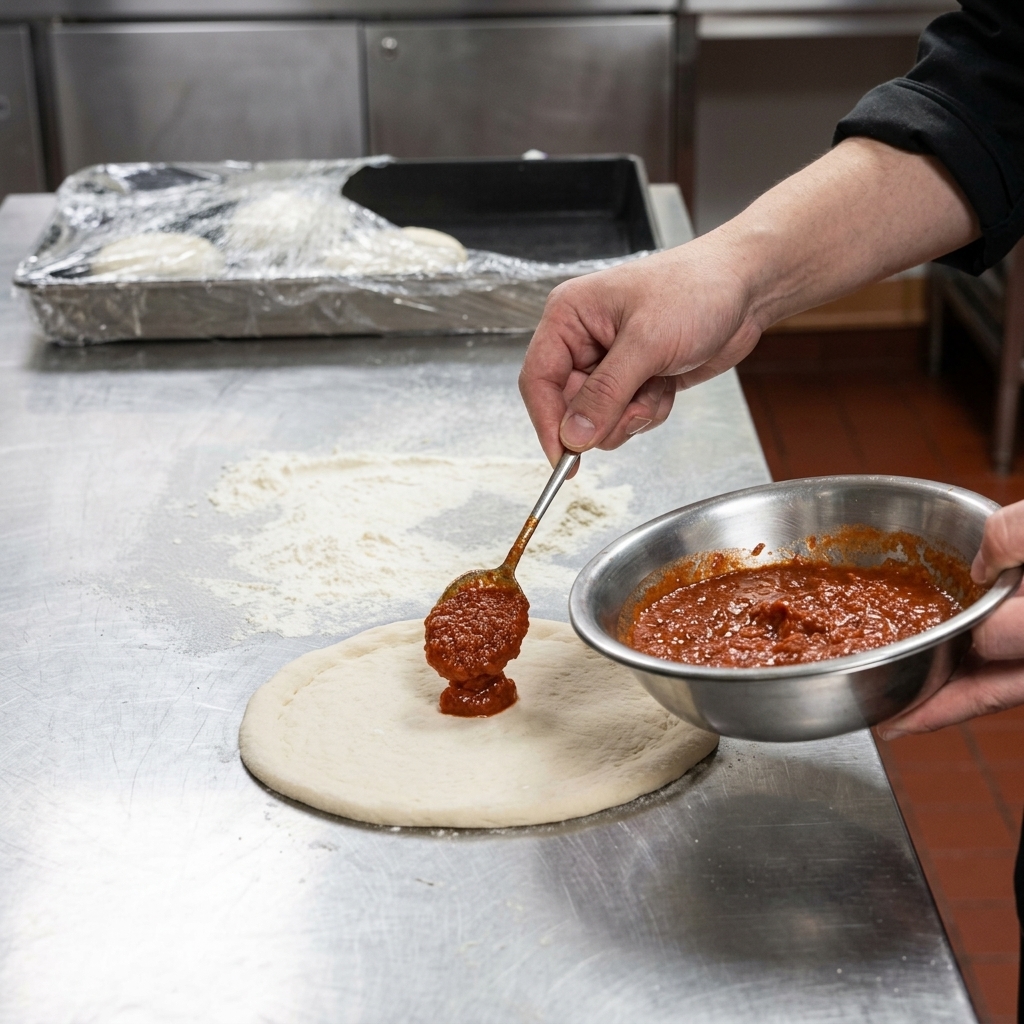
Ladle thick pizza sauce onto the center of the dough and use the back of a spoon to spread it evenly outward in a circular motion.
Tip: It is better to use a thick sauce with less moisture; this prevents the pizza base from becoming soggy during the quick baking process. - 7Add fresh basil
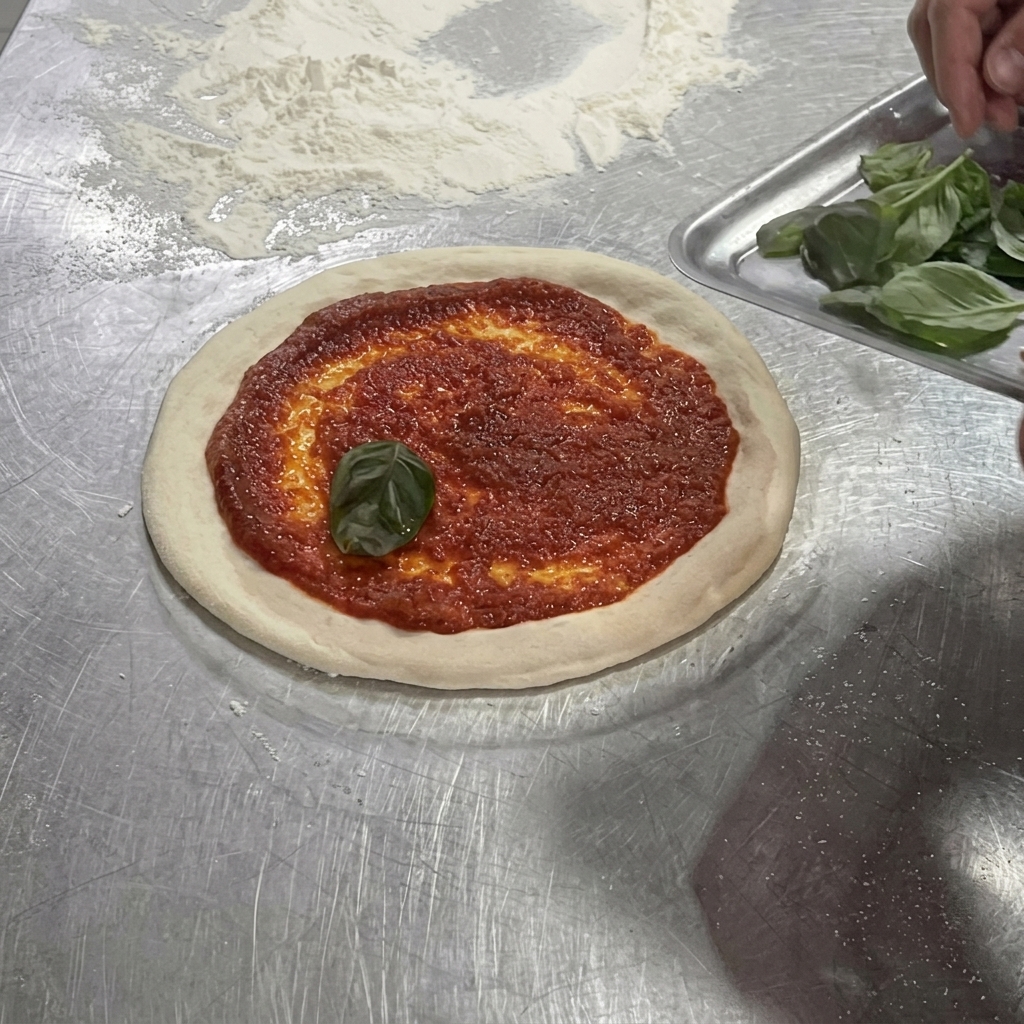
Tear or place fresh basil leaves directly over the pizza sauce before adding the cheese. Layering the basil underneath the cheese protects the delicate leaves from the intense heat of the oven, preventing them from burning while infusing the sauce with aromatic flavor.
Tip: Gently tear the basil leaves by hand rather than chopping them with a knife; this prevents bruising and preserves their vibrant aromatic oils. - 8Add the mozzarella
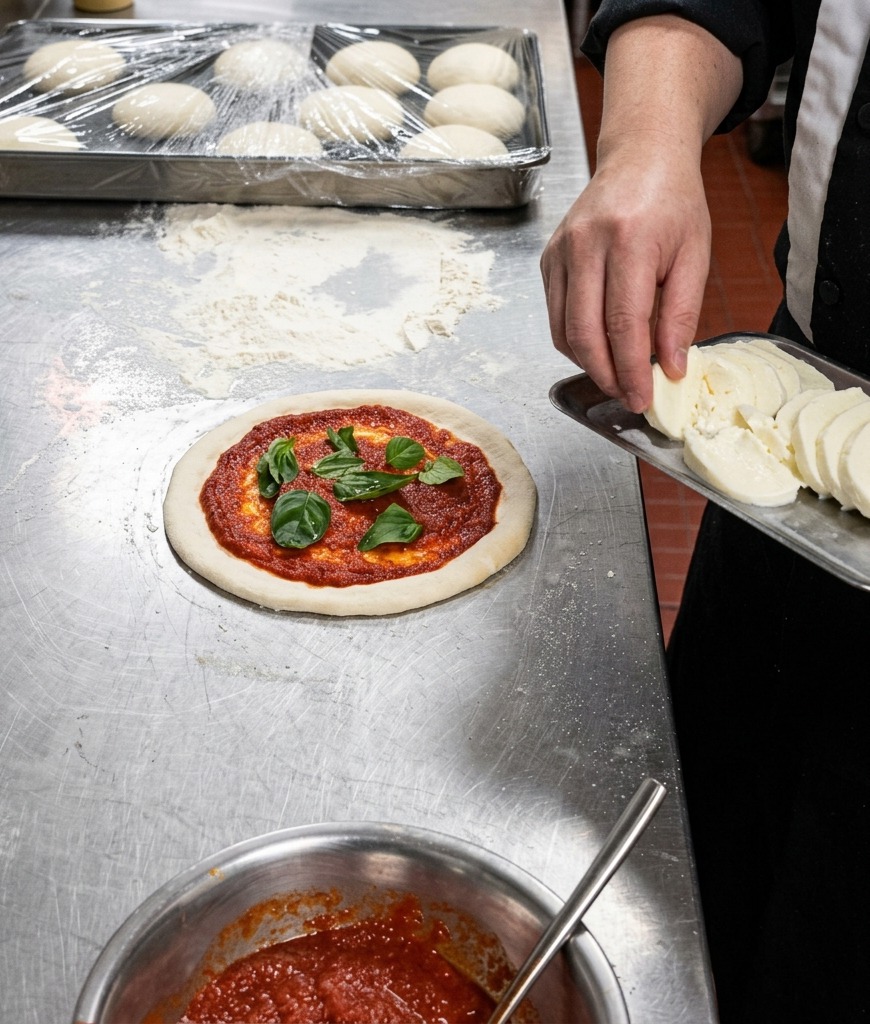
With the base prepared, arrange thick slices of fresh buffalo mozzarella evenly over the sauced dough and basil. Using fresh mozzarella adds a rich, creamy texture and distinct flavor that melts beautifully under high heat.
Tip: Pat the fresh mozzarella dry before slicing if its stored in water. Reducing the moisture content helps prevent the pizza base from becoming soggy during the quick bake. - 9Drizzle with olive oil
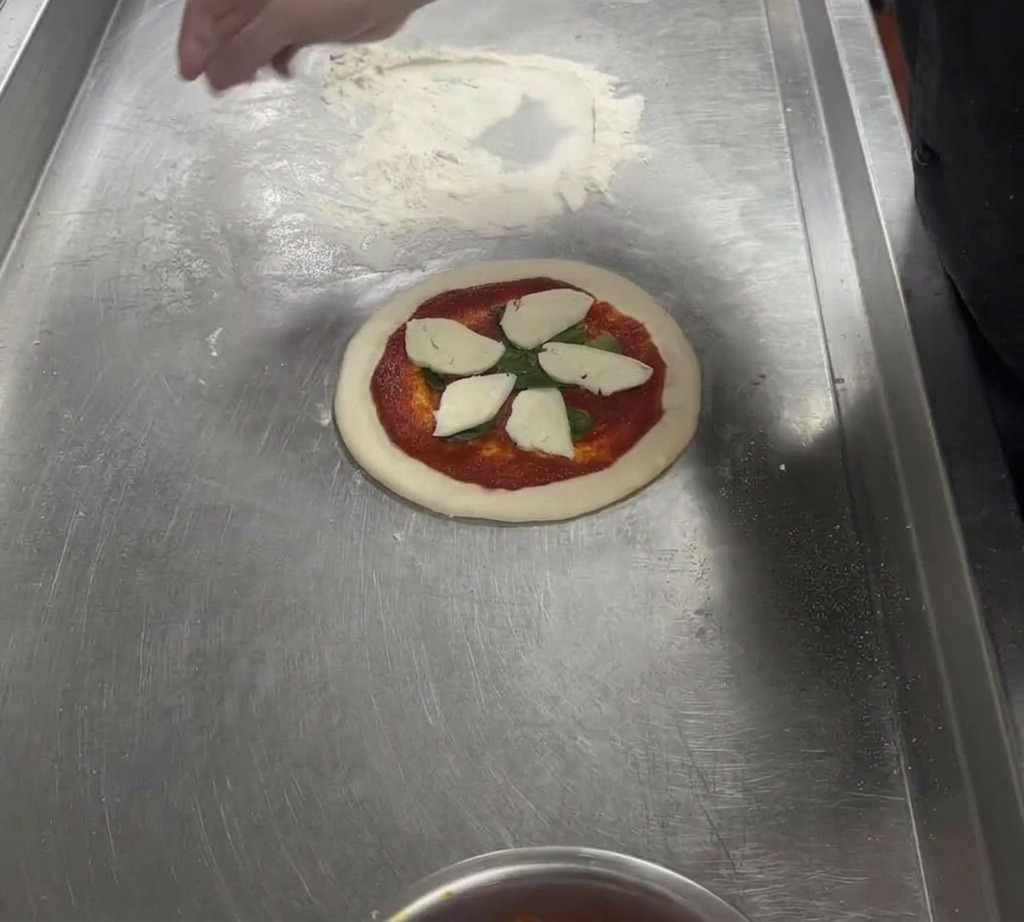
Finish the unbaked pizza by squeezing a light drizzle of extra virgin olive oil over the cheese and sauce. This adds richness and helps the toppings meld beautifully during the extremely quick bake.
Tip: A quick, light drizzle is all you need—too much oil will pool and make the center of the pizza greasy. - 10Transfer to the oven
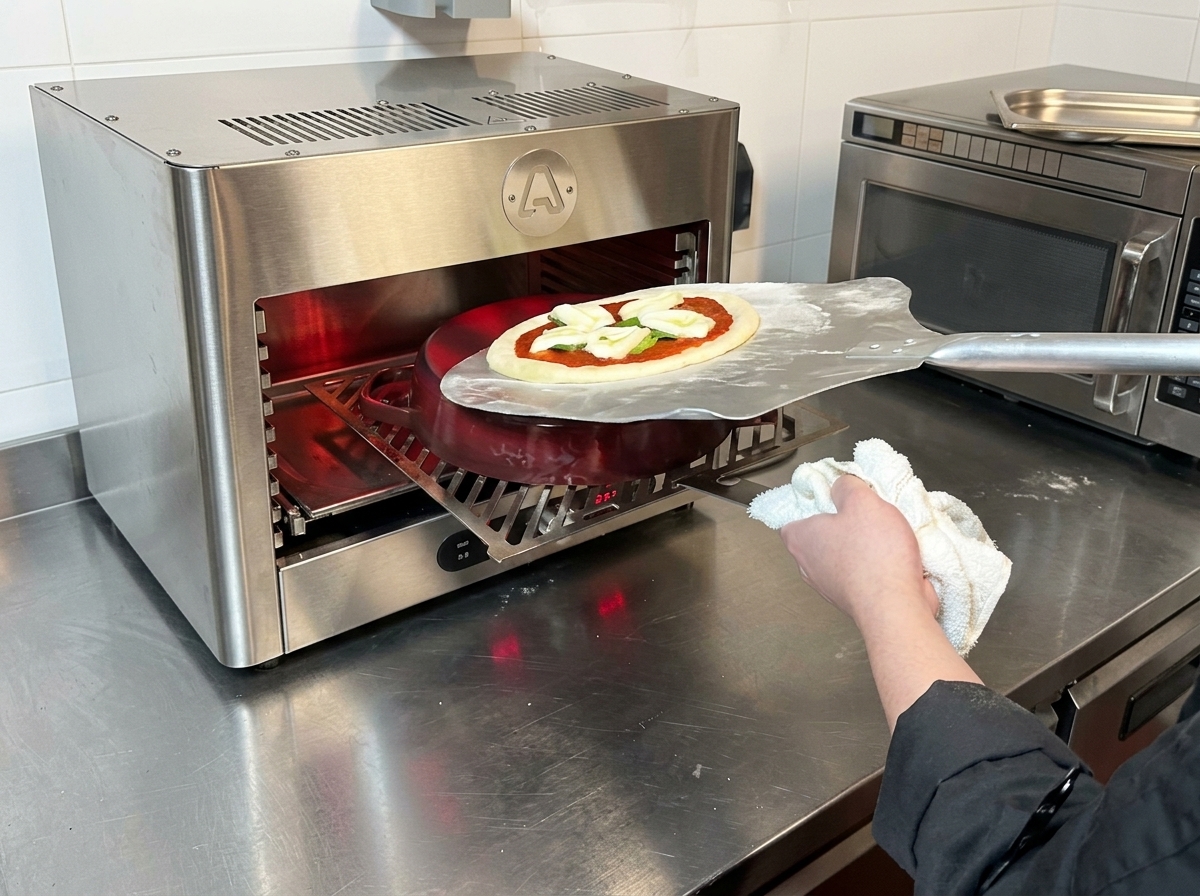
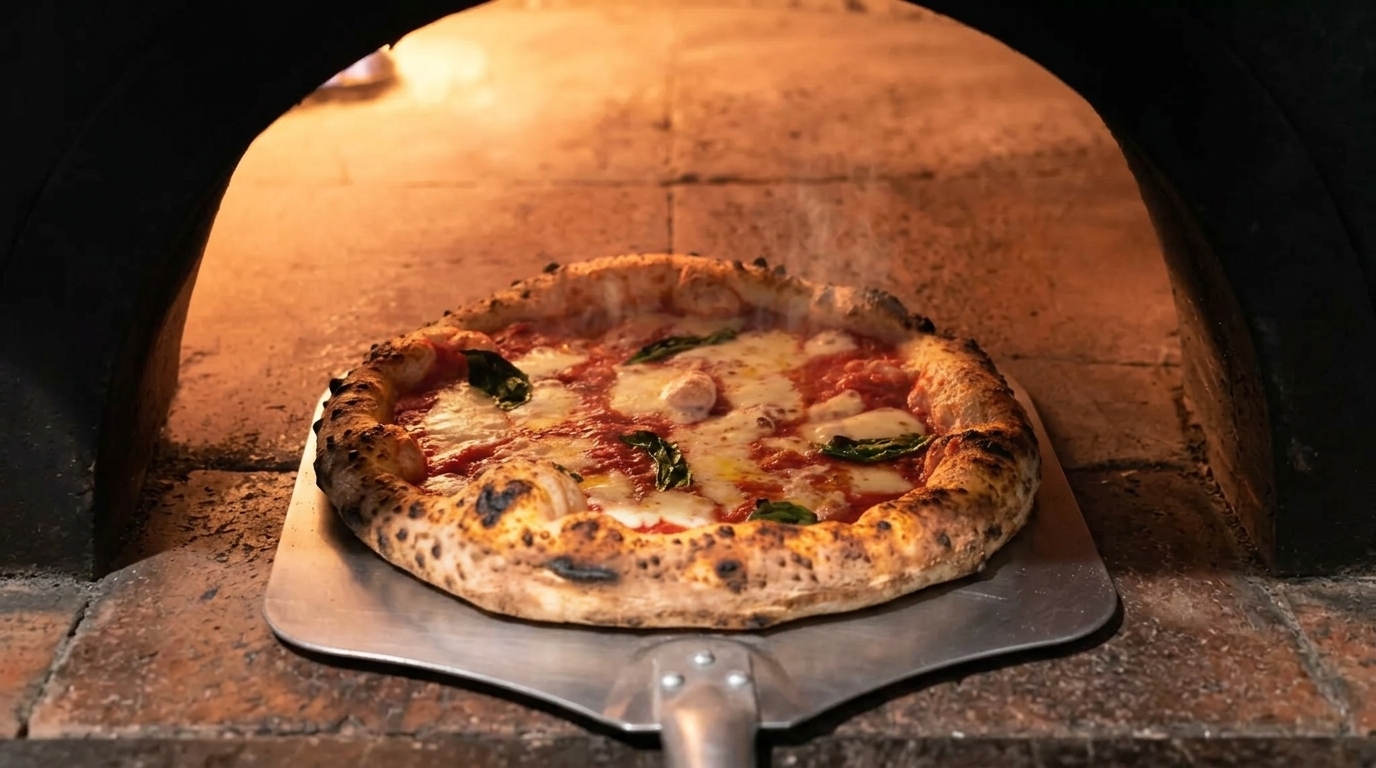
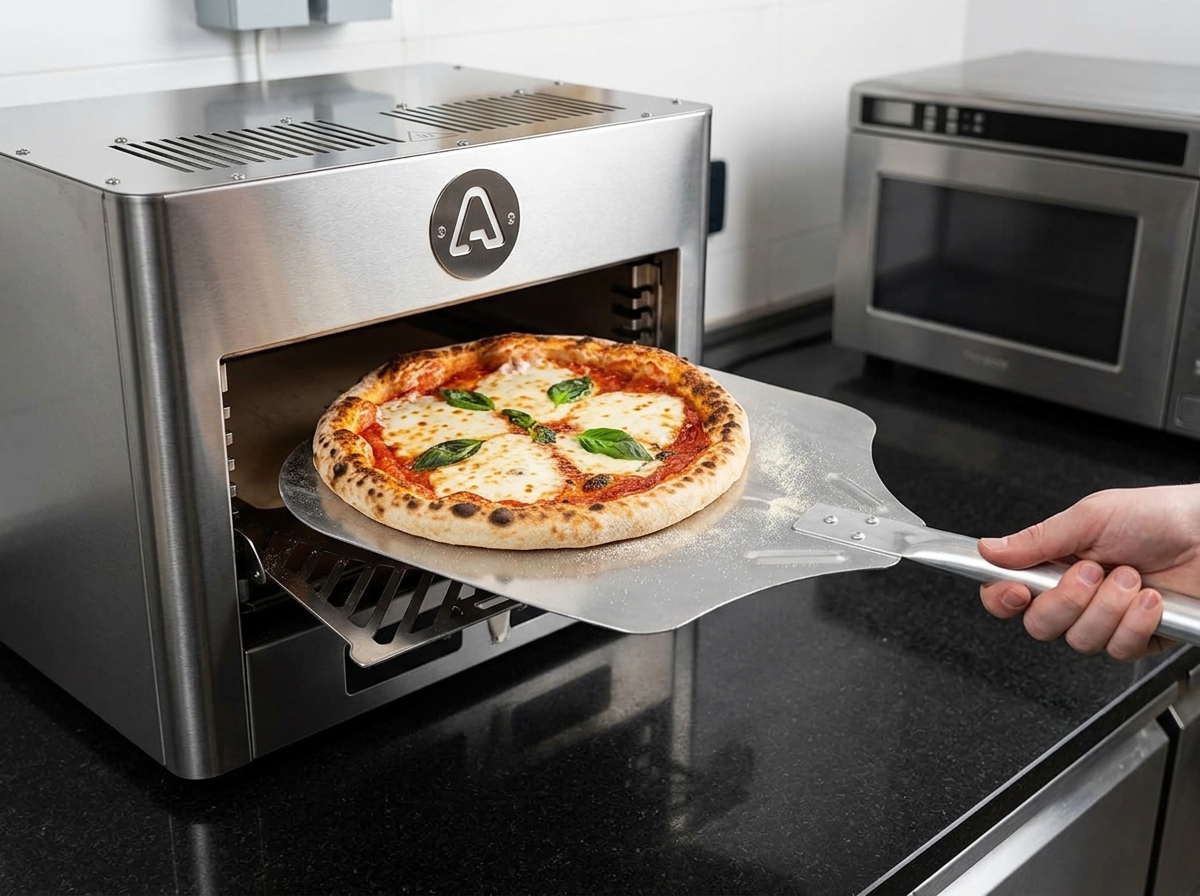
Using a metal pizza peel, carefully slide the assembled pizza onto the preheated cast iron pan inside the high-temperature oven. Make sure the pan is extremely hot before transferring the dough to ensure a quick bake and a crispy bottom crust.
Tip: Dust your pizza peel lightly with flour or semolina before placing the dough on it so the pizza slides off easily. - 11Rotate for even baking
Halfway through the cooking time, check the crust. Since high-temperature ovens can have hot spots, gently rotate the pizza using a peel to ensure the crust puffs up and browns evenly on all sides.
Tip: Keep an eye on the crust—at 700°F to 800°F, a pizza can go from perfectly spotted to burned in just a few seconds. - 12Remove from the oven
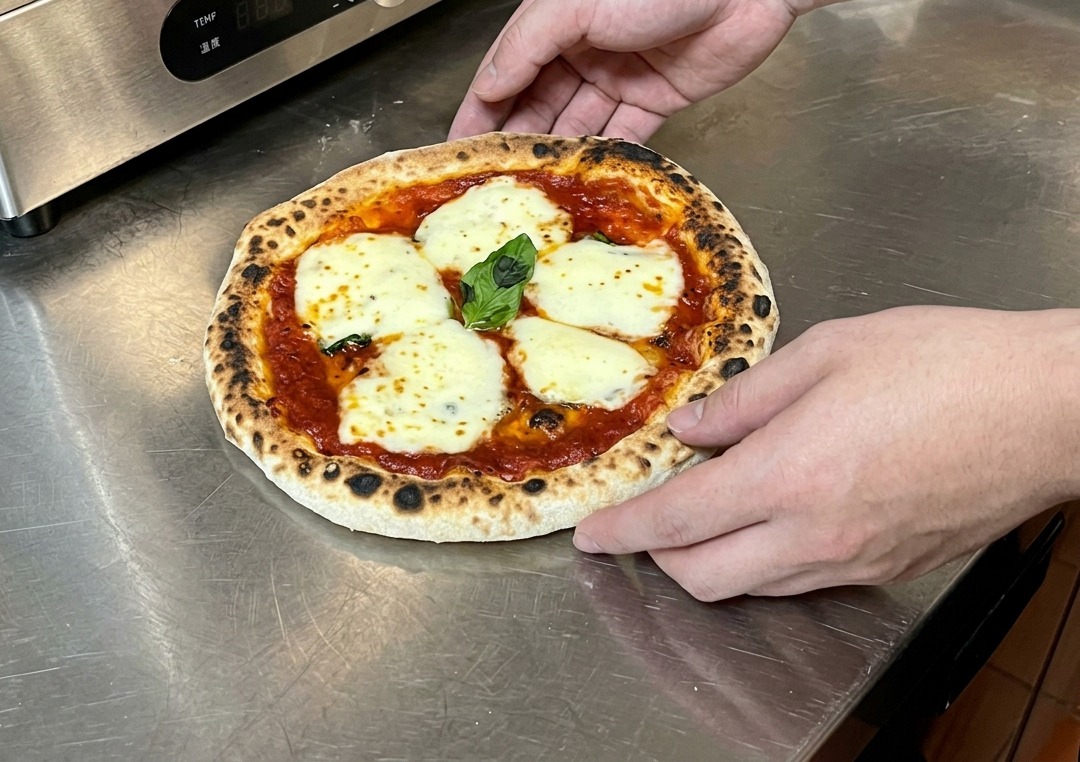
Once the pizza is fully baked and has developed those classic charred leopard spots around the crust, use the pizza peel to carefully remove it from the oven. The extremely high heat bakes the pizza in just about 30 seconds, creating a perfectly airy and crispy crust.
Tip: Let the pizza rest for a few moments before slicing to allow the cheese to set slightly. - 13Check the undercarriage
Lift the edges of the pie to inspect the bottom crust. A perfect bake should reveal a crispy and browned undercarriage with slight charring, proving the cooking surface was adequately preheated.
Tip: If using a cast iron pan as a makeshift pizza stone, make sure it preheats fully with the oven to achieve that signature crispy bottom. - 14Garnish with fresh basil

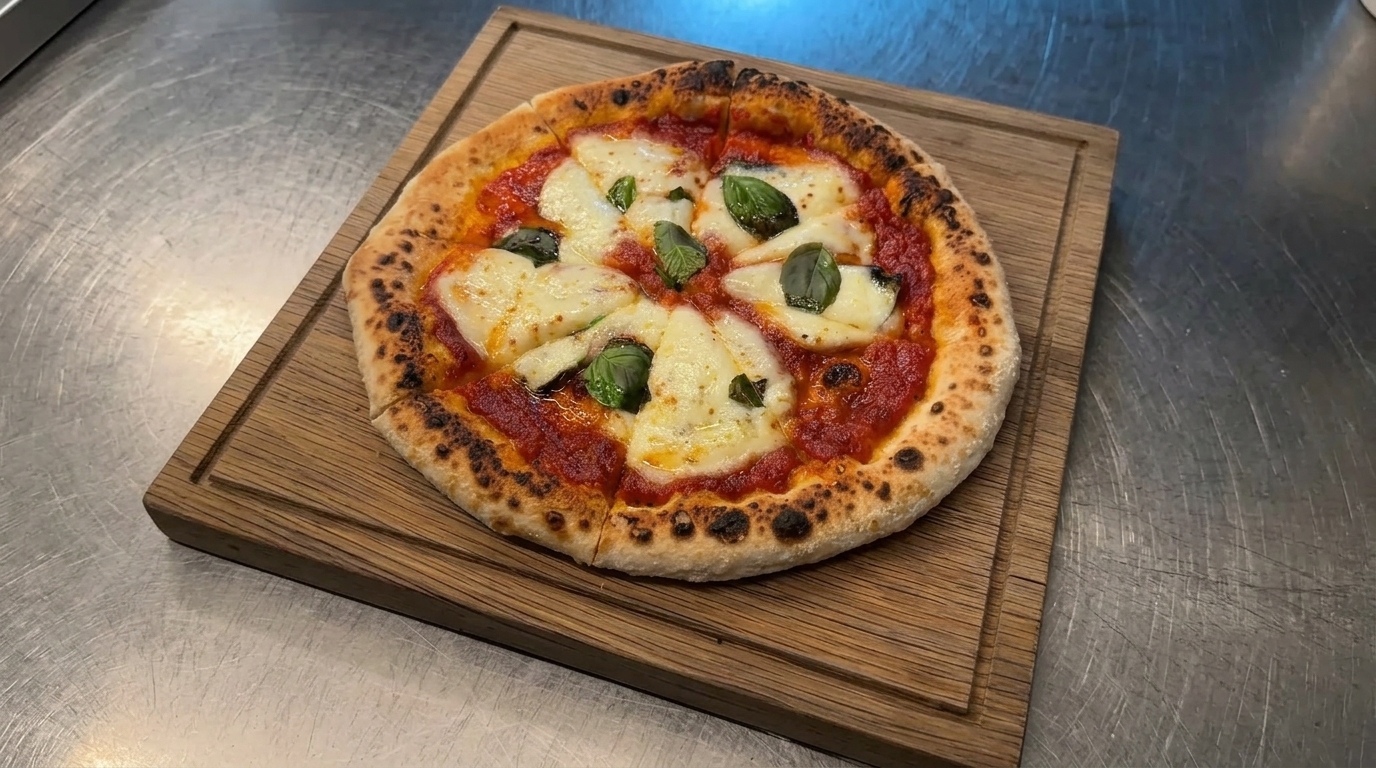
Transfer the pie to a wooden serving board. While the crust is still piping hot and the cheese is bubbling, scatter a few additional fresh basil leaves on top. The residual heat will instantly release the aromatic oils from the herbs.
Tip: Always add a final garnish of delicate herbs like fresh basil after baking. If exposed to the extreme heat of the oven, the leaves will burn and turn bitter. - 15Slice and serve
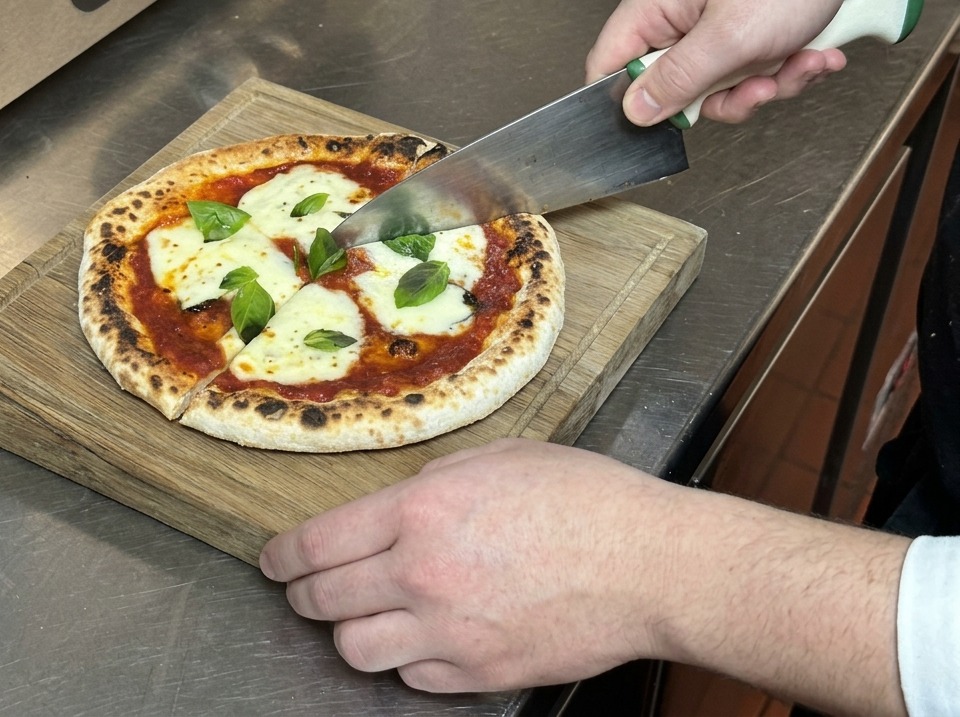
Use a large chef knife to slice the meal into wedges directly on the board. The high heat should have created a crust that is crispy on the outside and airy and fluffy on the inside.
Tip: A single and firm downward press with a large knife is often cleaner than a dull rolling cutter, preventing the fresh toppings from dragging.