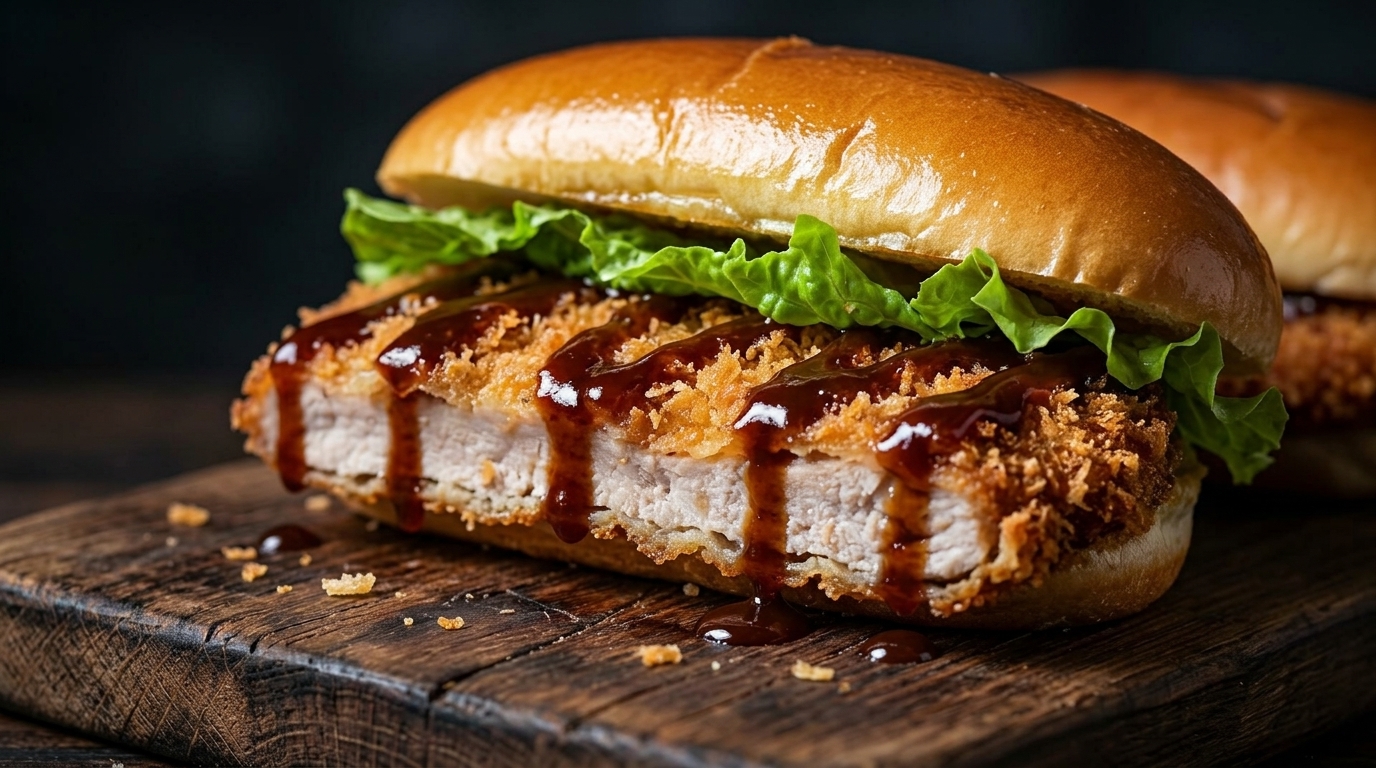
Anime-Inspired Japanese Fried Pork Chop Sandwich (Katsu Sando)
Recreate this anime inspired Japanese fried pork chop sandwich. It features a juicy crispy panko crusted pork cutlet tucked into a soft homemade bun.
Inspired by the culinary moments of Morioh Town in JoJos Bizarre Adventure this sandwich takes the classic Japanese katsu sando to a whole new level. Instead of using traditional square milk bread it opts for a freshly baked butter brushed oblong bun. The combination of a crispy golden fried pork cutlet crisp lettuce and savory barbecue sauce makes it an incredibly satisfying bite.
Ingredients
- 1 batch homemade bread dough (flour, milk, yeast, oilbutter)
- 2 pieces pork tenderloin or pork shoulder
- to taste seasoning powder or salt and pepper
- 12 cup white flour
- 1 egg, beaten
- 1 cup panko breadcrumbs
- as needed cooking oil for frying
- 1 tbsp melted butter (for brushing buns)
- 1 tbsp milk (for washing buns)
- to taste barbecue sauce
- to taste fresh lettuce leaves
Instructions
- 1Activate the yeast
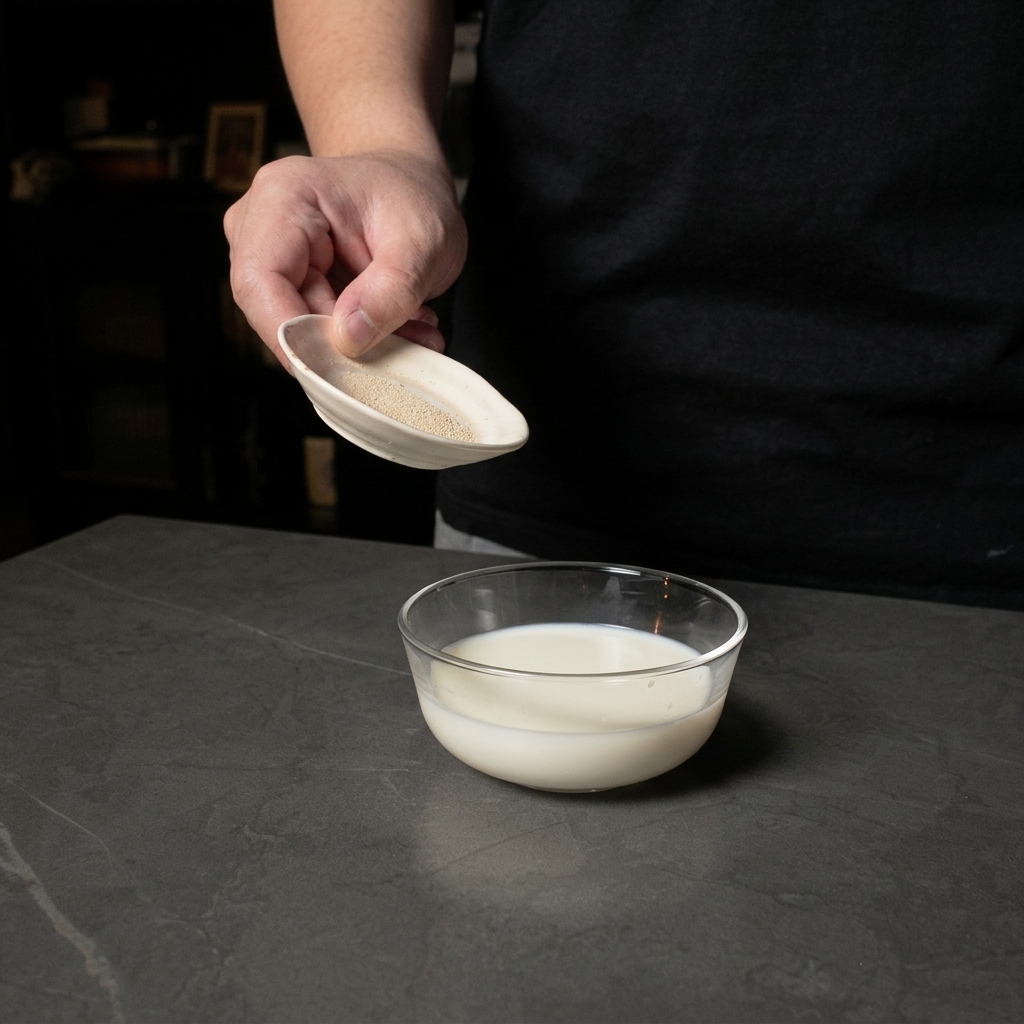
Begin by adding the yeast powder to a small bowl of lukewarm milk. Stir gently to ensure the yeast is well-distributed and let it sit for a few minutes until it becomes slightly frothy, which indicates the yeast is active and ready for the dough.
Tip: Make sure the milk is warm to the touch (around 35-40°C), but not hot, as excessive heat can kill the yeast. - 2Combine the dough ingredients
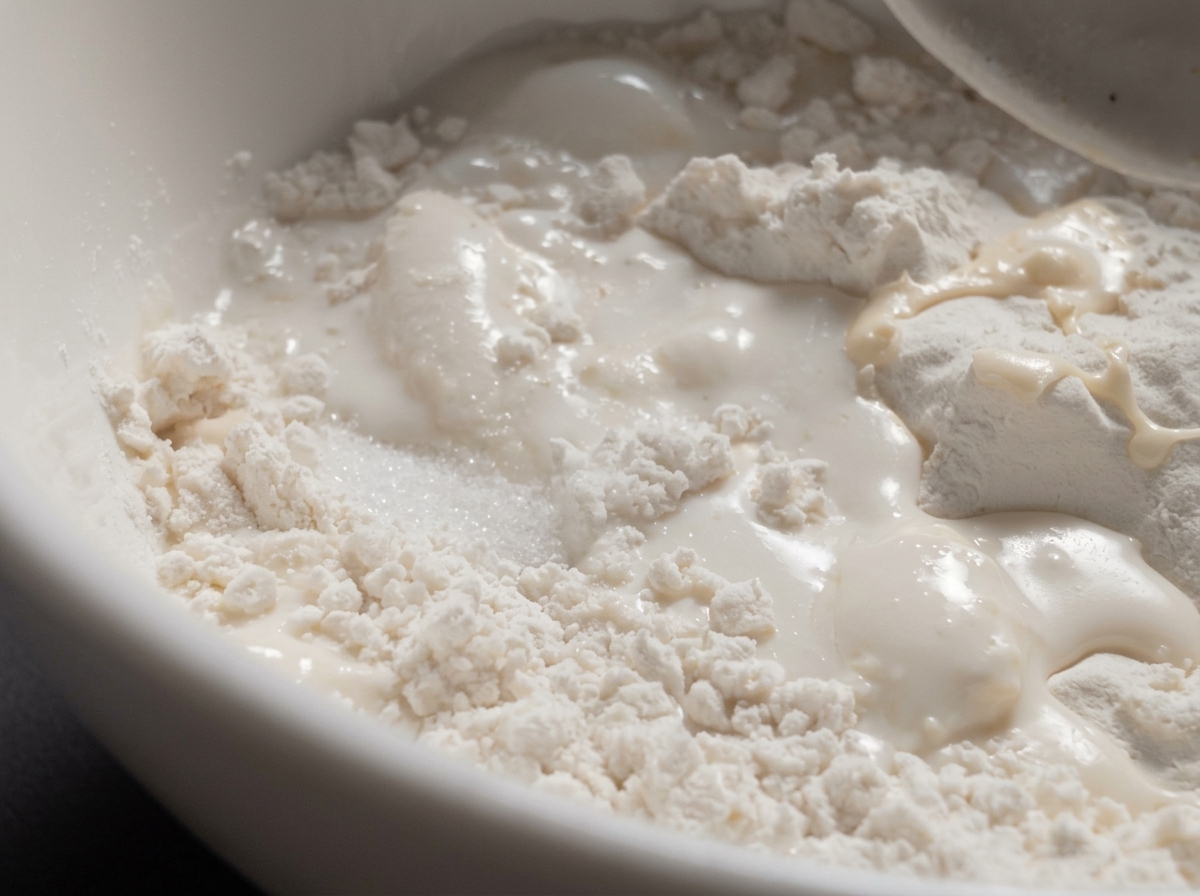
Add the oil to the bowl containing the flour and the milk-yeast mixture. Combining these fats with the dry ingredients will help create a softer, more supple bread texture once baked.
Tip: If you dont have oil, melted butter can be used as a flavorful substitute for a richer dough. - 3Deflate the risen dough
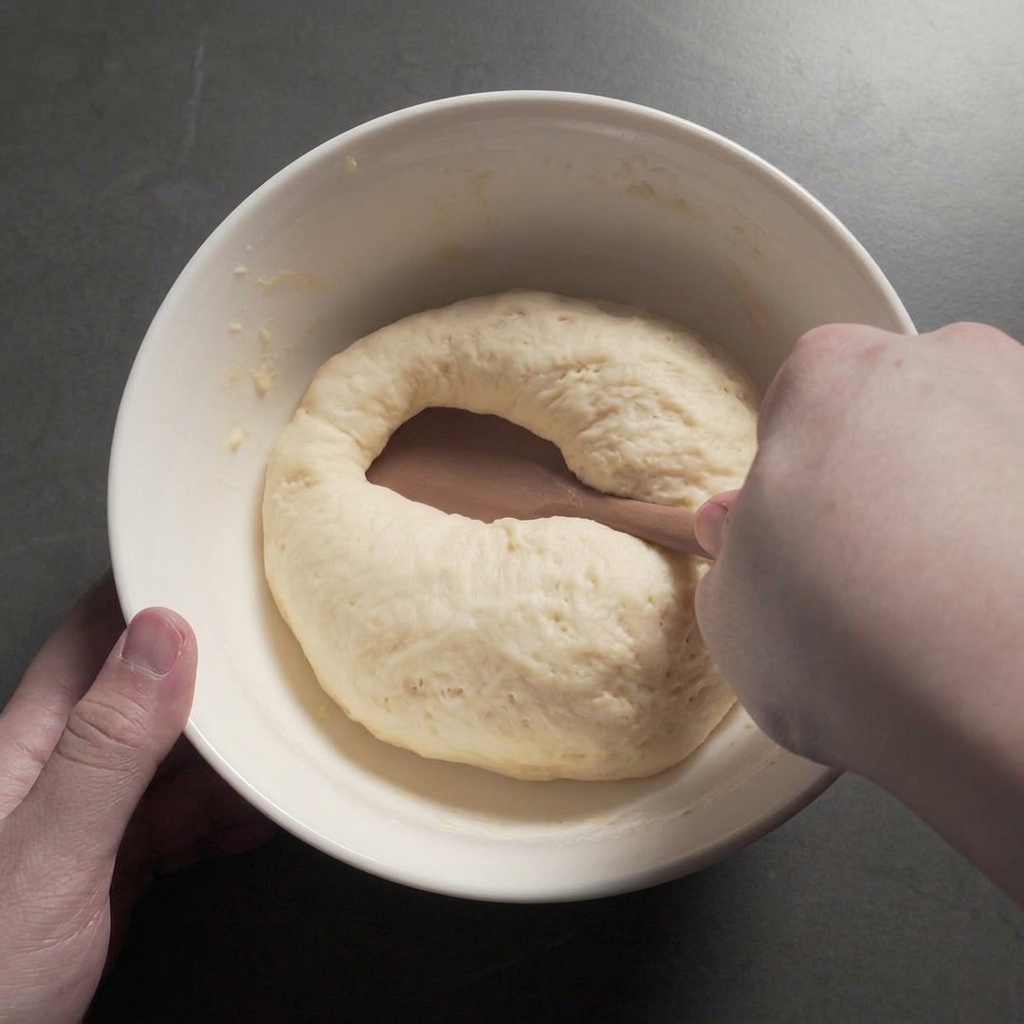
Once the dough has doubled in size, use a spatula or your hand to gently punch it down. This process releases the large air bubbles built up during fermentation, ensuring a more even crumb structure in the finished bread.
Tip: Dont be too aggressive; you just want to remove the excess gas, not flatten the life out of the dough. - 4Shape into a smooth ball
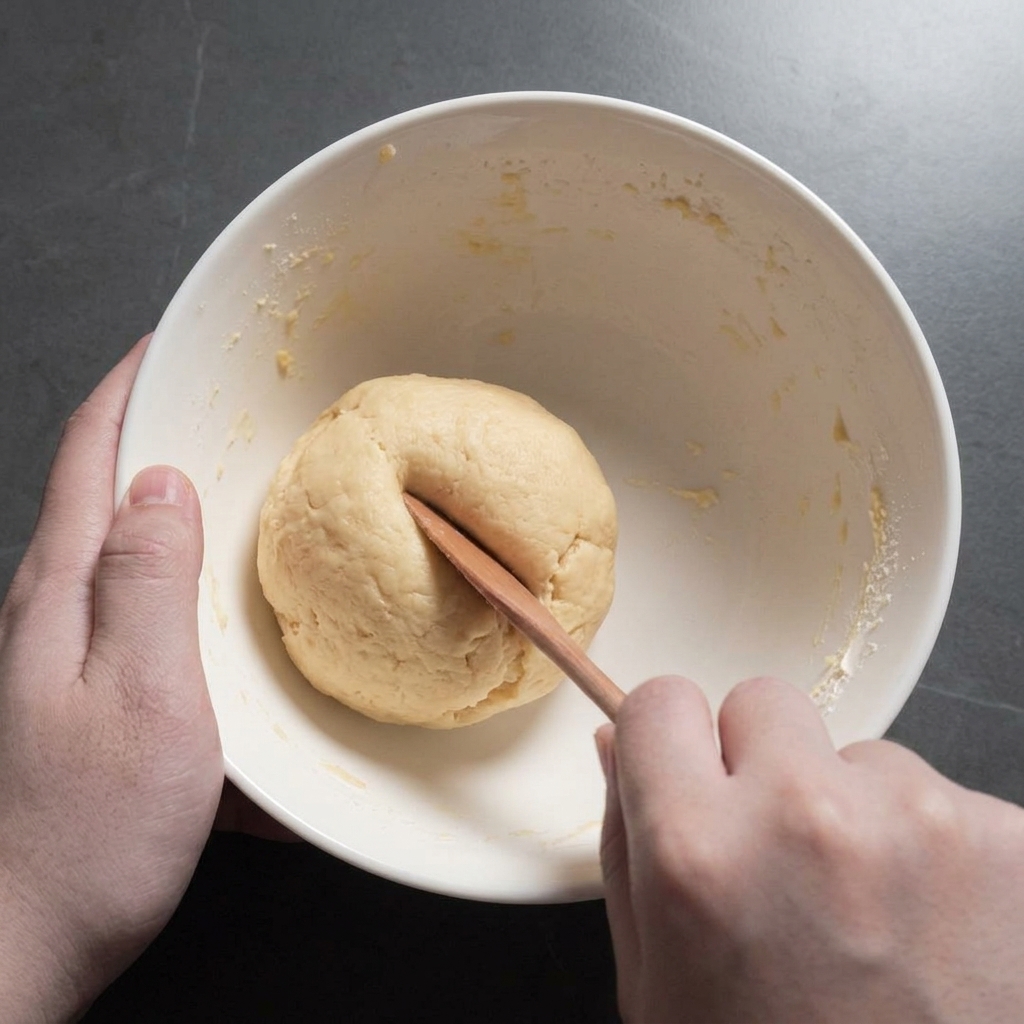
After deflating, fold the edges of the dough toward the center until it forms a cohesive, smooth sphere. This prepares the dough for its final resting period before rolling out.
Tip: If the dough is sticking to the bowl, you can lightly grease your hands with a tiny bit of oil. - 5Roll out the dough
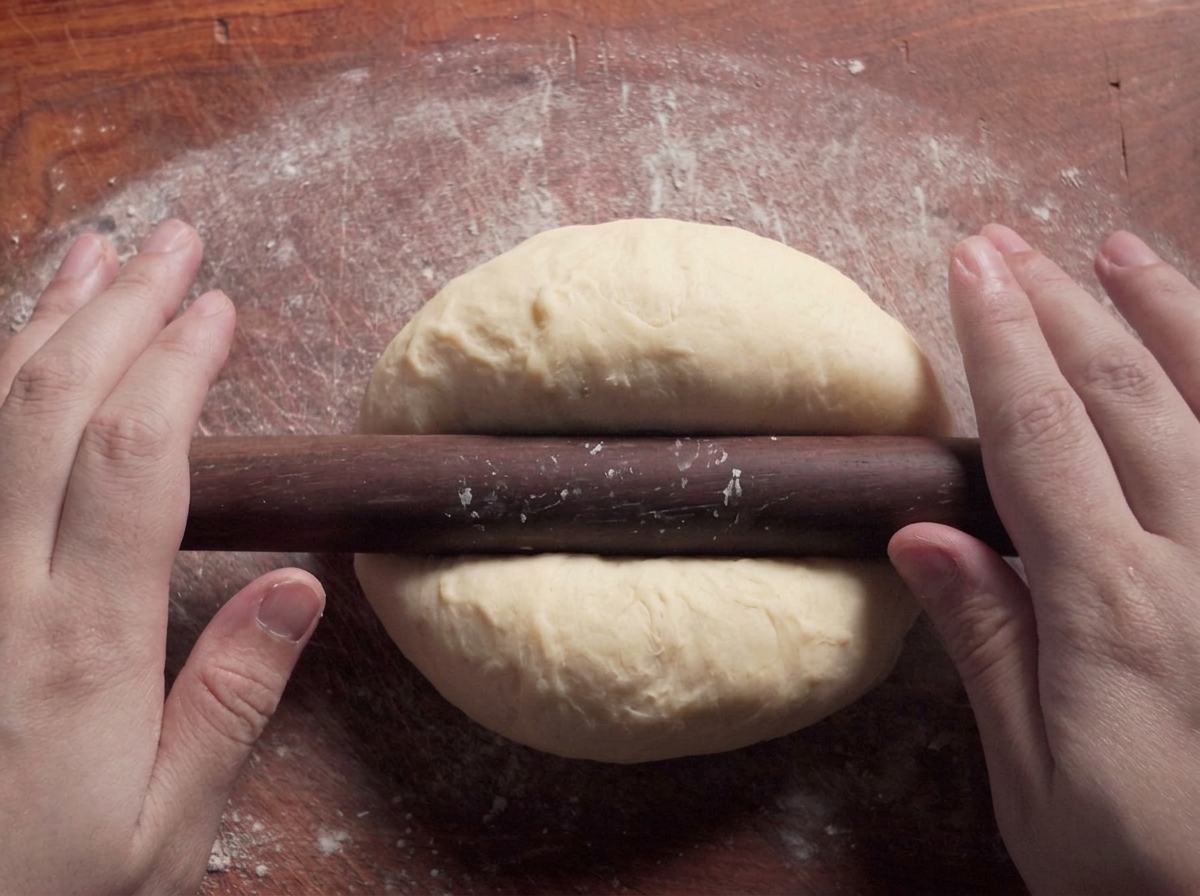
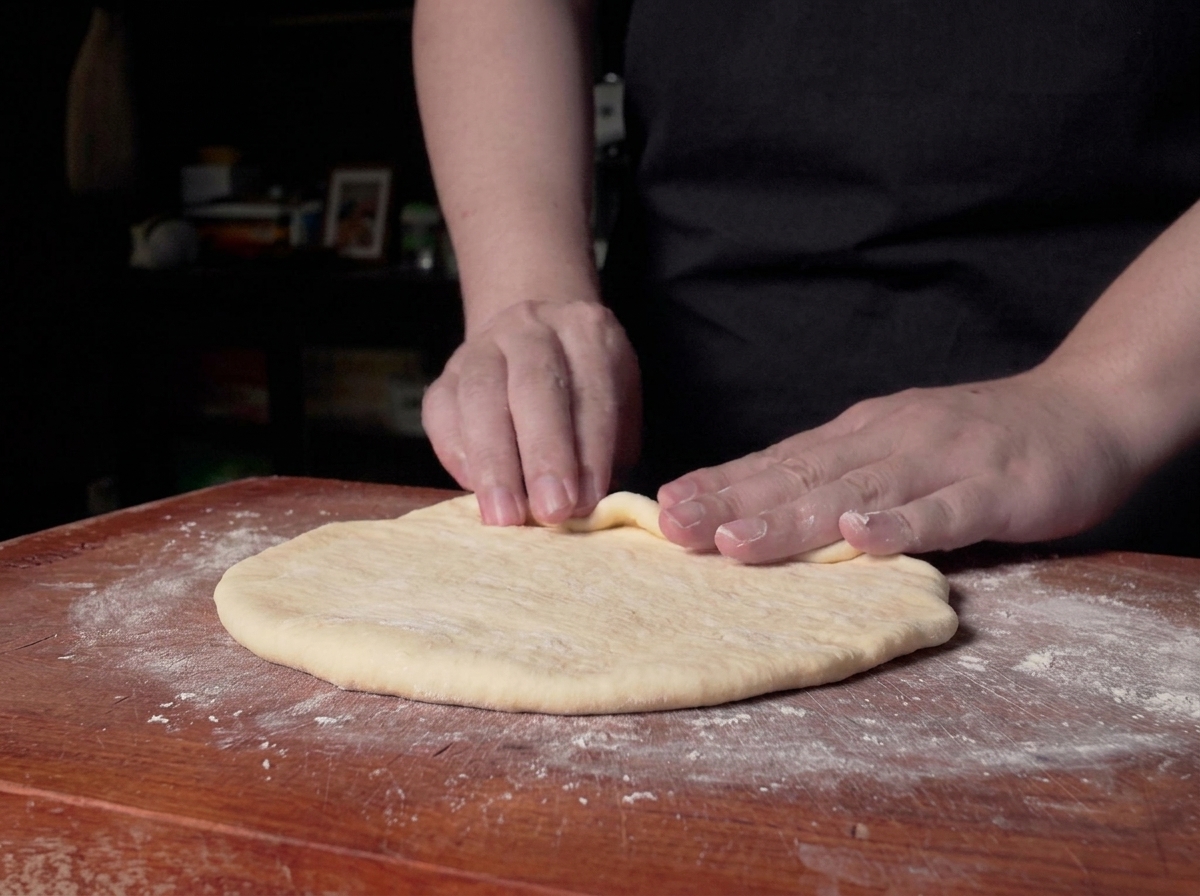
After a ten-minute rest, place the dough on a lightly floured surface. Use a rolling pin to flatten it out into a uniform rectangular shape, which will make it easier to roll into a clean log.
Tip: Resting the dough for 10 minutes before this step is crucial; it relaxes the gluten so the dough doesnt snap back when rolled. - 6Form the bread log
Carefully roll the edge of the flattened dough inward, rolling it tightly all the way to the bottom to form a log shape. Pinch the seams and ends firmly to seal them, ensuring the bread holds its shape during the final proofing and baking.
Tip: Rolling tightly prevents large gaps from forming inside the bread as it bakes. - 7Seal the dough
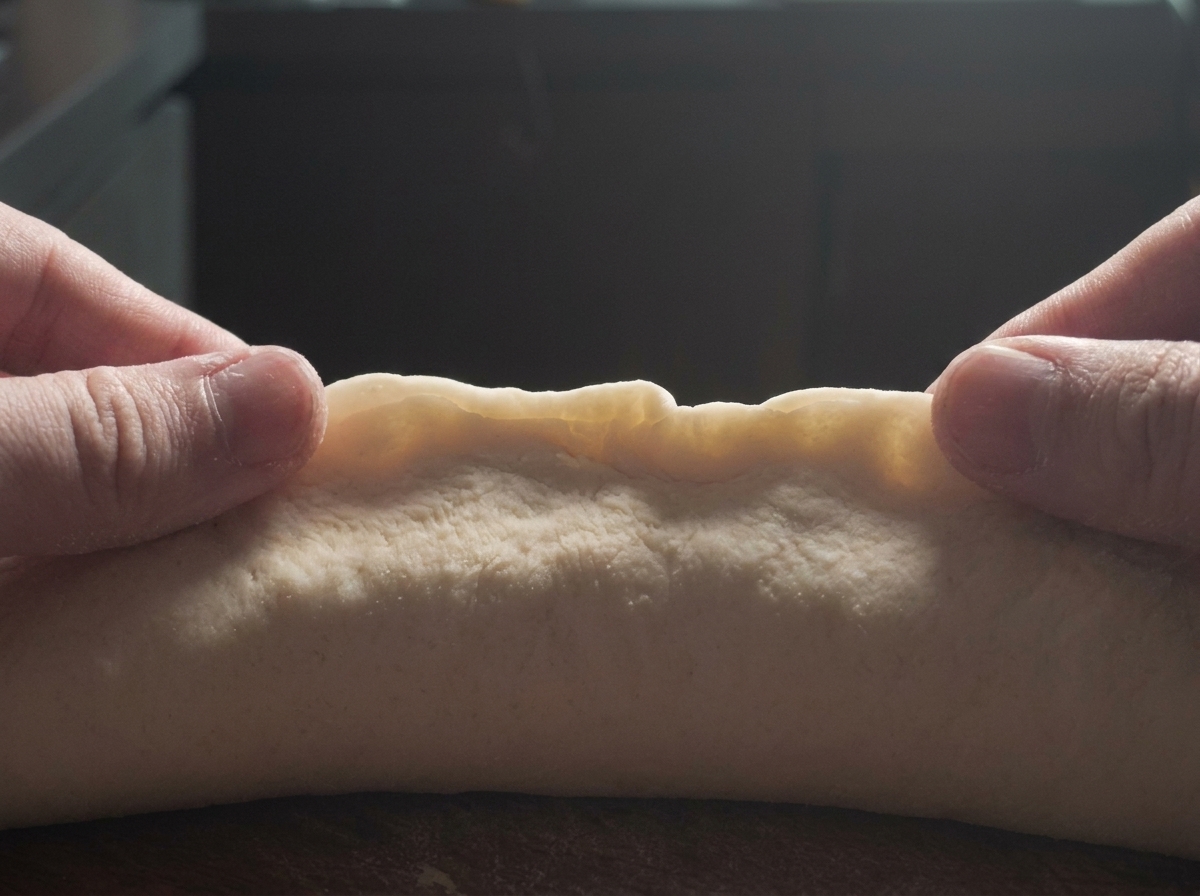
Carefully pinch the seam of the rolled dough log tightly closed with your fingers. This dumpling-like sealing technique ensures the dough maintains its structural integrity and doesnt split open during the final proofing or baking.
Tip: If the dough resists sealing, lightly dampen your fingertips with a tiny bit of water to help the edges stick together. - 8Apply a milk wash
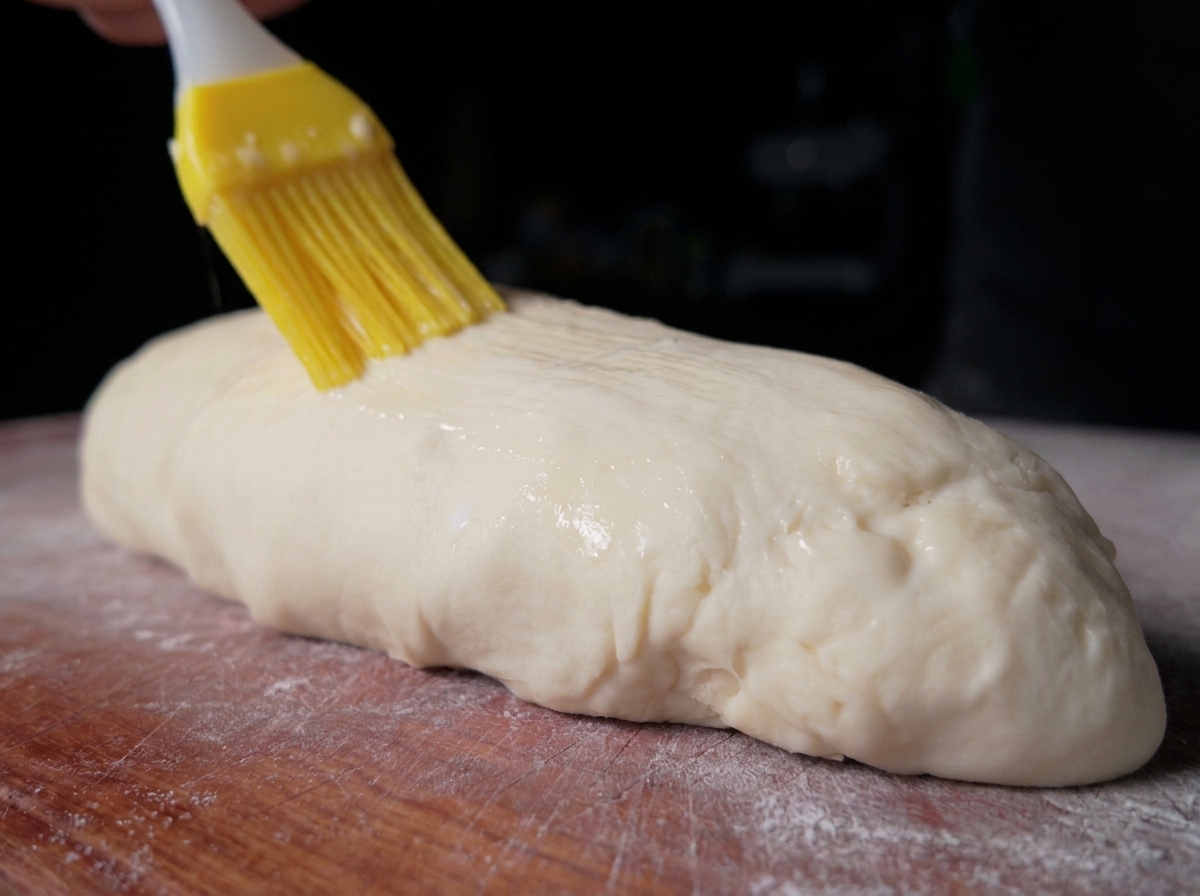
Once the shaped dough has fermented to about 1.5 times its original size, gently brush a thin, even layer of milk over its surface. This milk wash promotes a beautiful, golden-brown crust as the bread bakes.
Tip: Use a soft-bristled brush and a very light touch to avoid deflating the proofed dough. - 9Brush with Butter
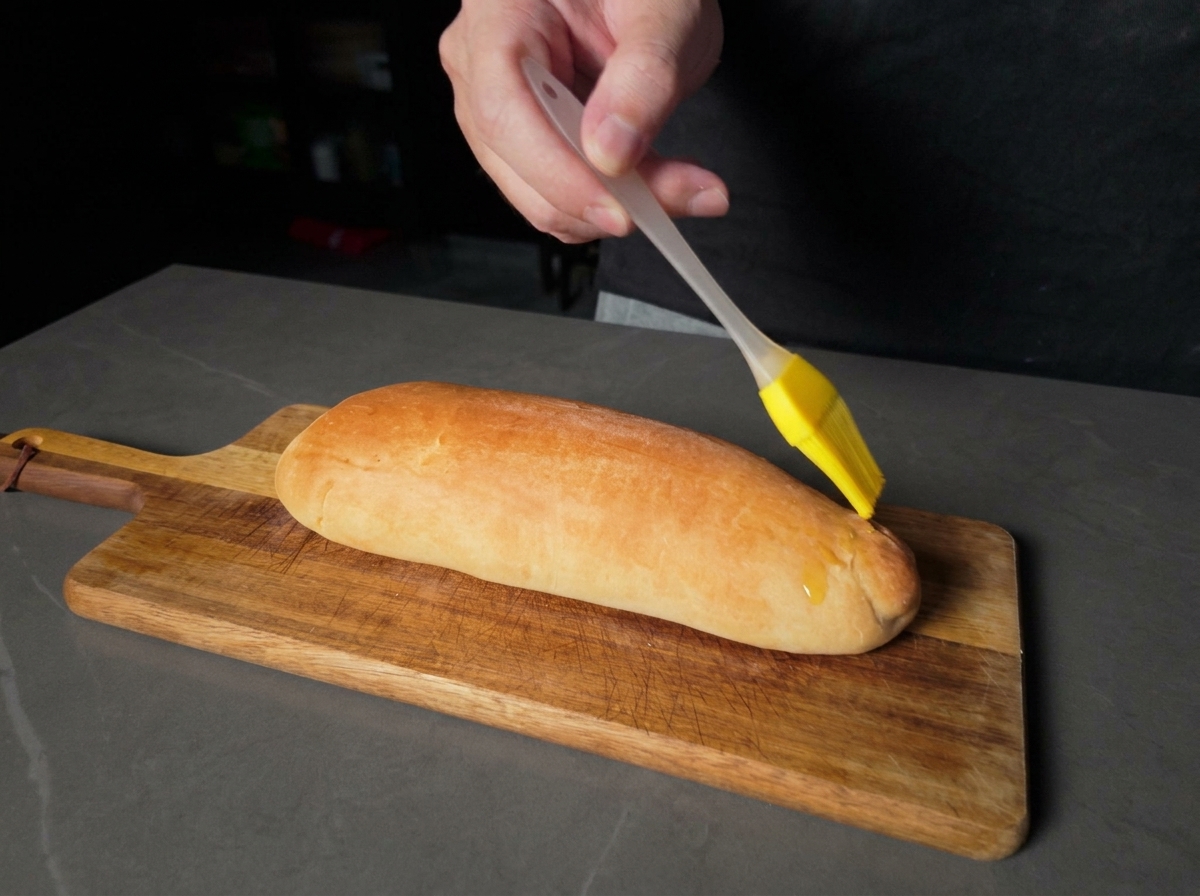
While the freshly baked bread is still hot from the oven immediately brush a layer of melted butter over the surface. This quickly elevates the texture softening the crust and adding a rich savory aroma to the bun.
Tip: Applying butter while the bread is hot helps the crust absorb the fat keeping it tender rather than hard. - 10Score the meat
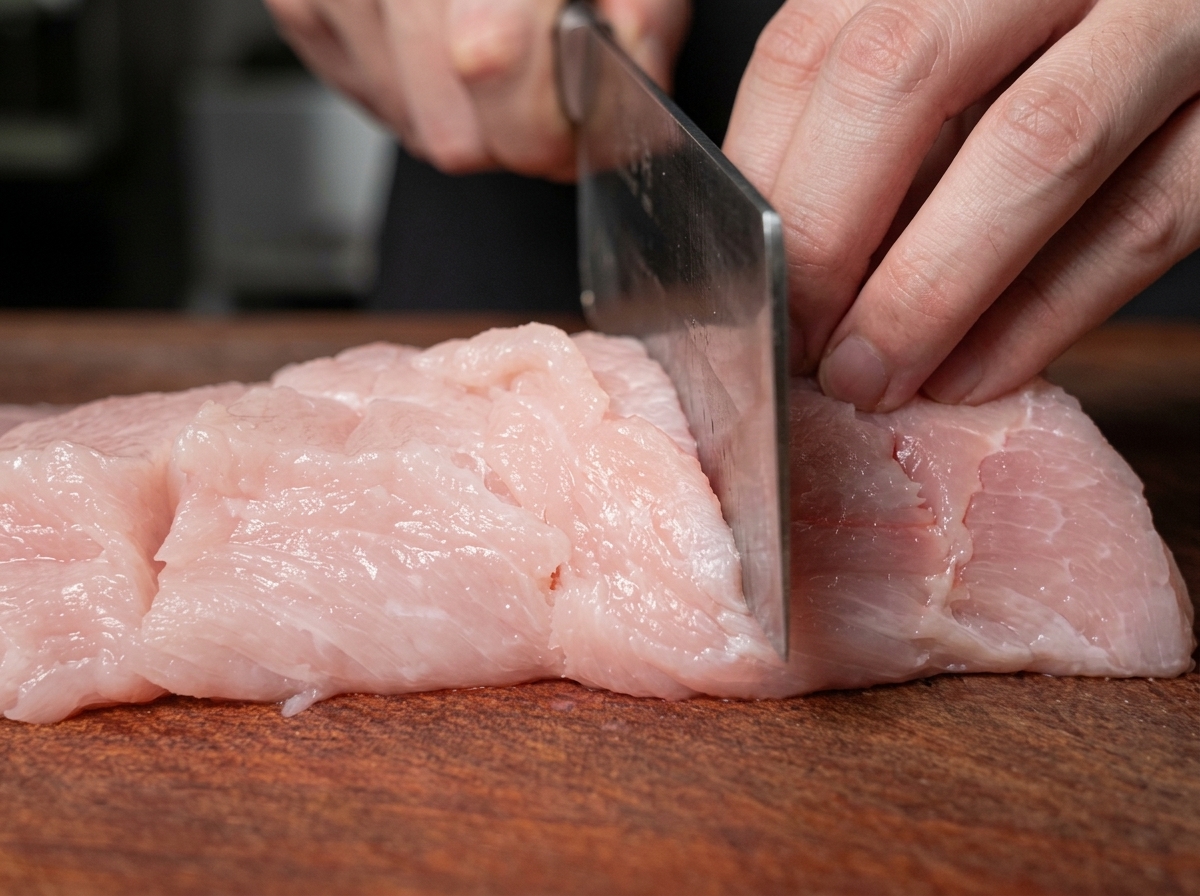
Using a sharp kitchen knife or cleaver lightly score the surface of the raw pork loin. This simple tenderizing technique helps prevent the meat from curling up when it hits the hot oil and allows flavors to penetrate deeper.
Tip: Make shallow cuts just into the surface of the meat and do not cut all the way through. - 11Season the pork
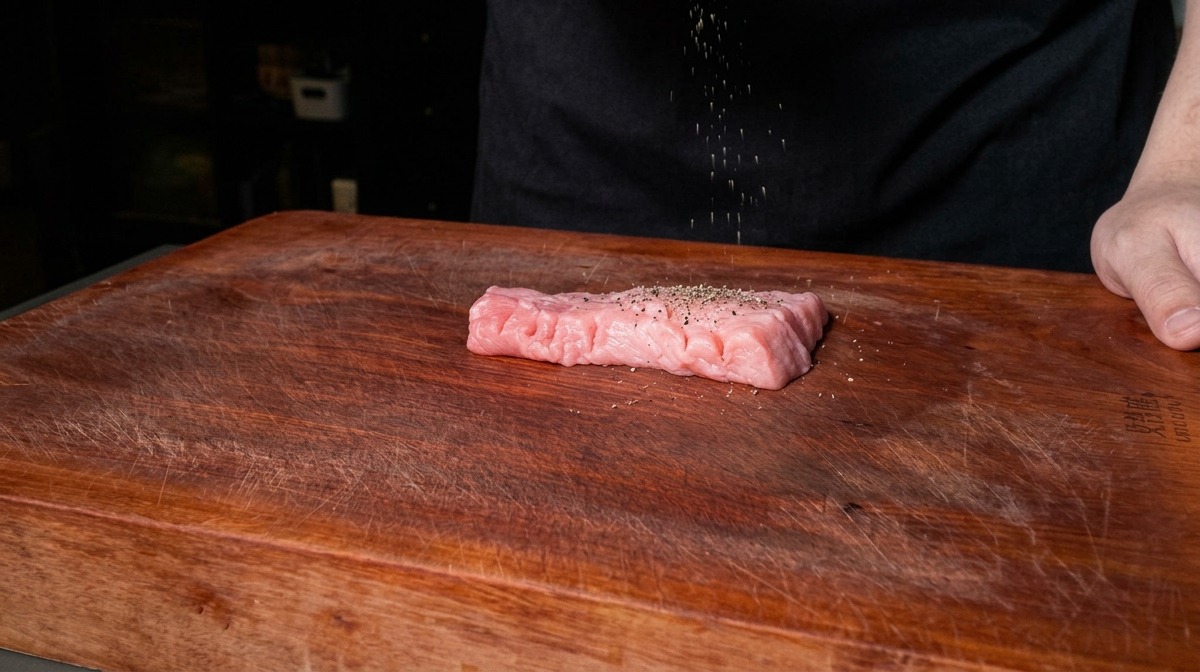
Sprinkle your chosen seasoning evenly over the prepared piece of raw pork loin. This ensures the meat is flavorful all the way through before it is breaded and deep-fried.
Tip: Season both sides of the meat and gently pat the seasoning in so it adheres well. - 12Dredge the Pork in Flour
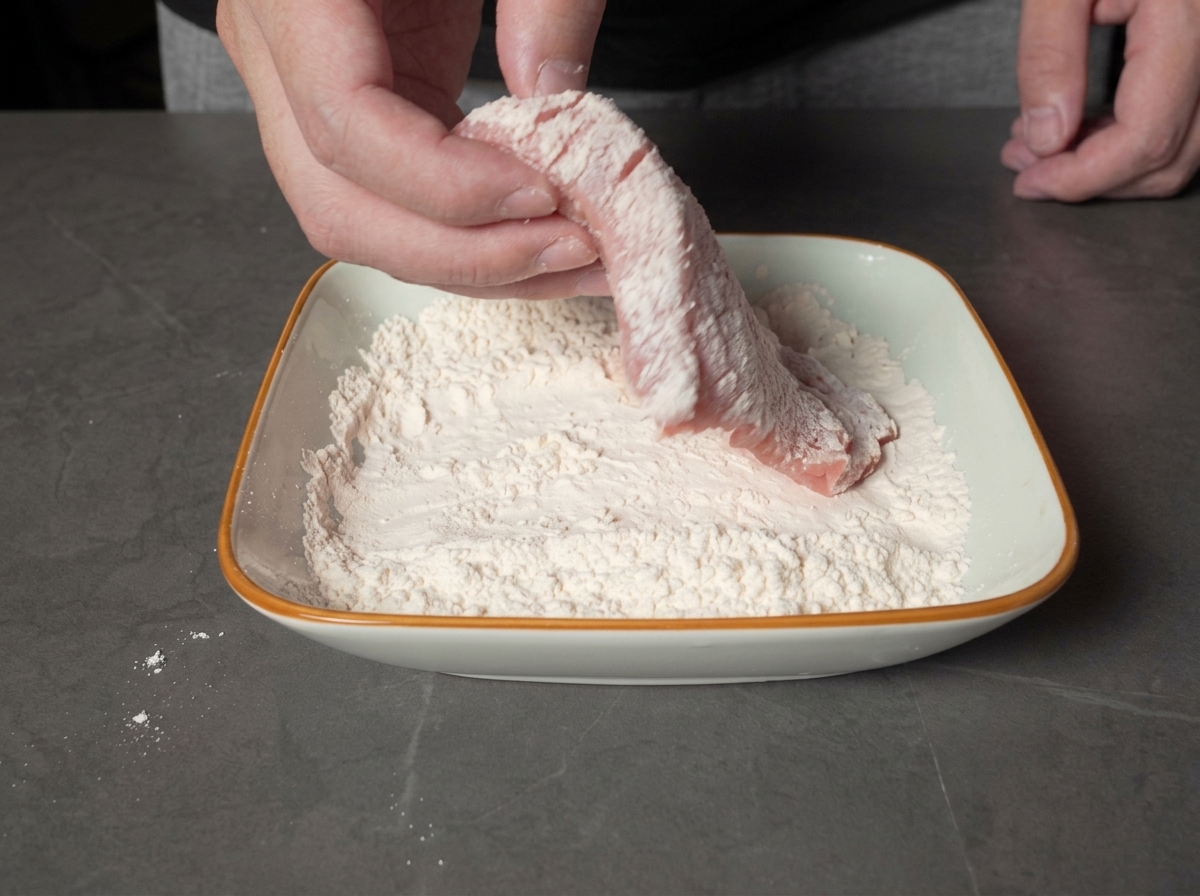
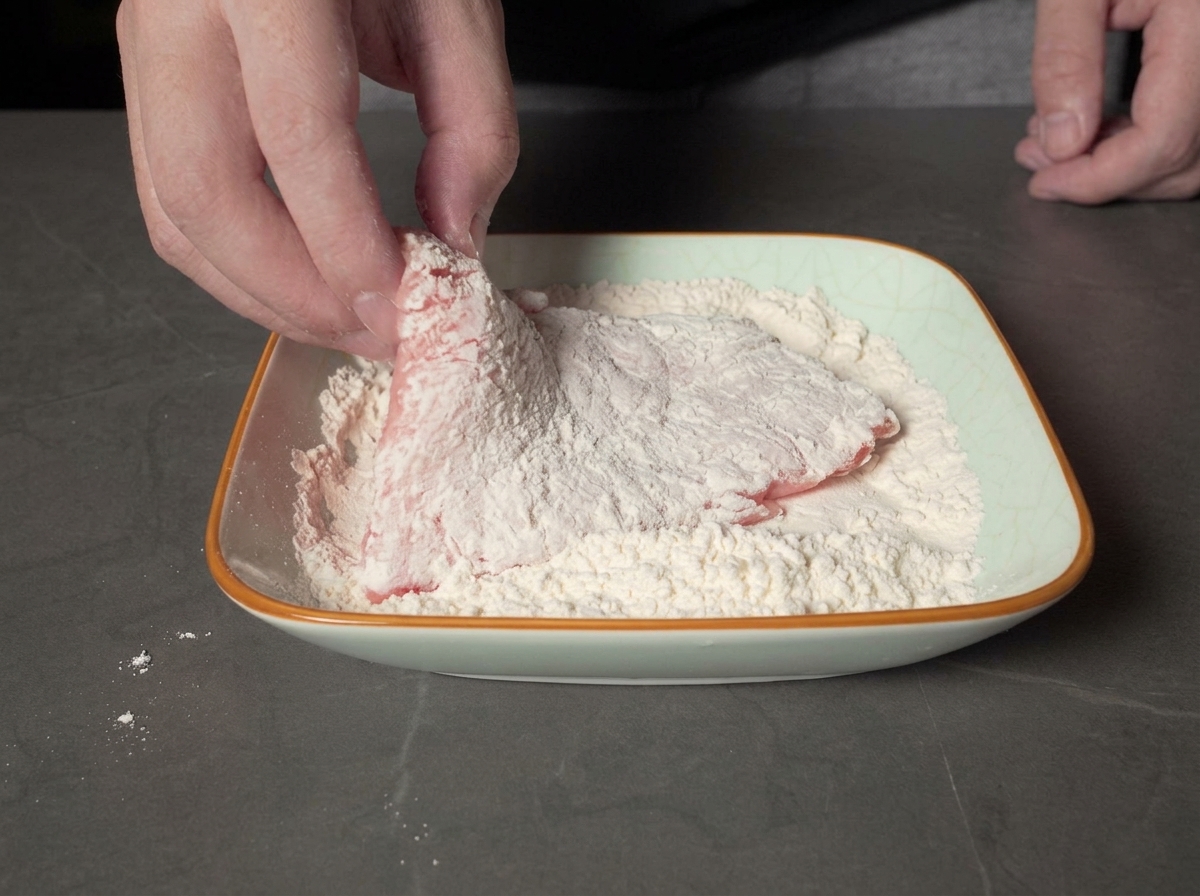
Take the prepared pork cutlet and dredge it thoroughly in a shallow bowl of white flour. Ensure all sides and edges are evenly coated, pressing the meat gently into the flour so it adheres well. Tap off any excess flour before moving to the egg wash.
Tip: An even coating of flour gives the egg wash something to grip onto, preventing your crispy breading from sliding off during frying. - 13Dip in Egg Wash
Transfer the floured pork cutlet into a shallow dish of beaten egg wash. Make sure to coat both sides completely, as this wet layer is essential for the panko breadcrumbs to adhere properly.
Tip: Pat the pork completely dry with a paper towel before dredging to ensure an even, thin coating without clumping. - 14Coat in Breadcrumbs

Lift the pork chop from the egg wash, letting any excess liquid drip off, and press it firmly into a bowl of panko breadcrumbs. Ensure every part of the meat is generously covered for maximum crispiness.
Tip: Use one hand for dry ingredients and the other for wet ingredients to avoid breading your own fingers. - 15Fry the Pork Chop
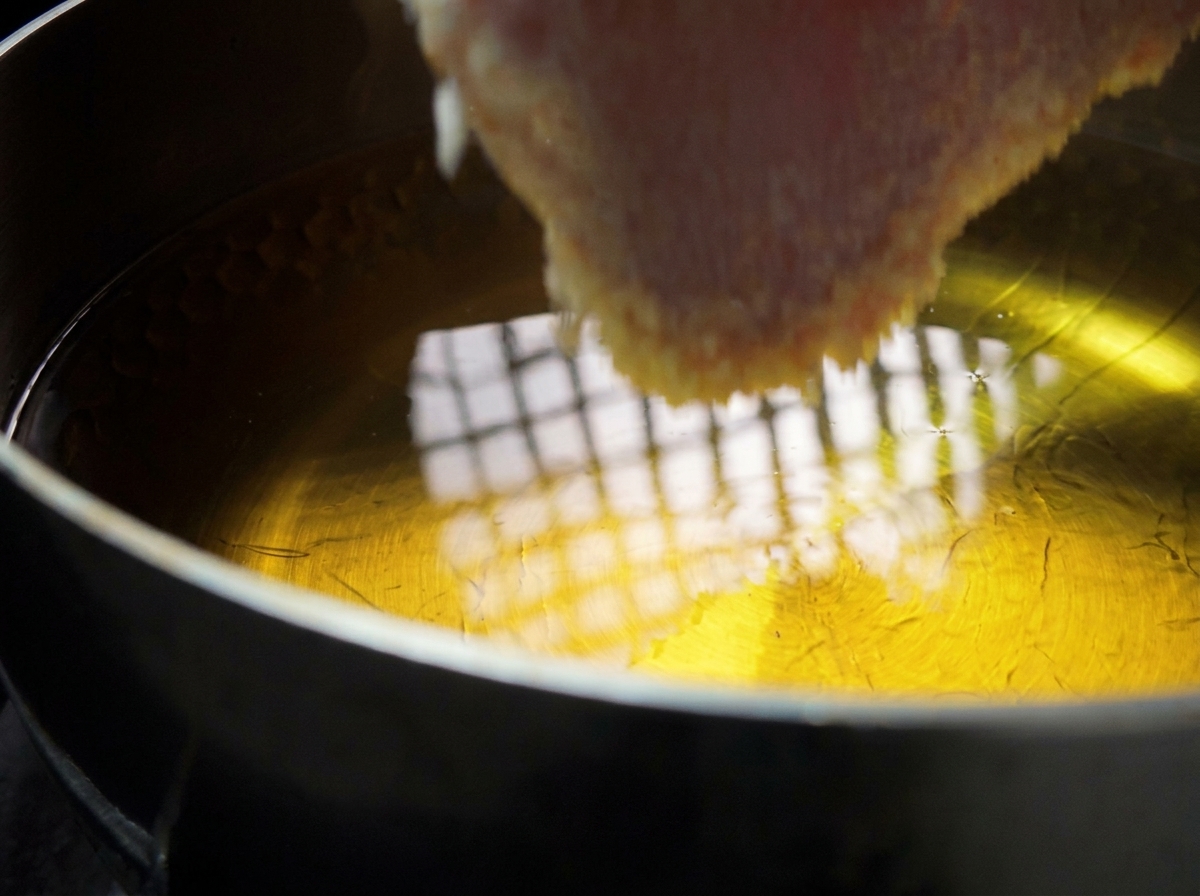
Heat the cooking oil until dense little bubbles form around a wooden chopstick within three to four seconds. Carefully lower the fully breaded pork cutlet into the hot oil, letting it slip away from you to prevent splashing.
Tip: Once the pork is in the oil, wait for the crust to set before attempting to flip it, otherwise the breading may fall off. - 16Fry to Golden Brown
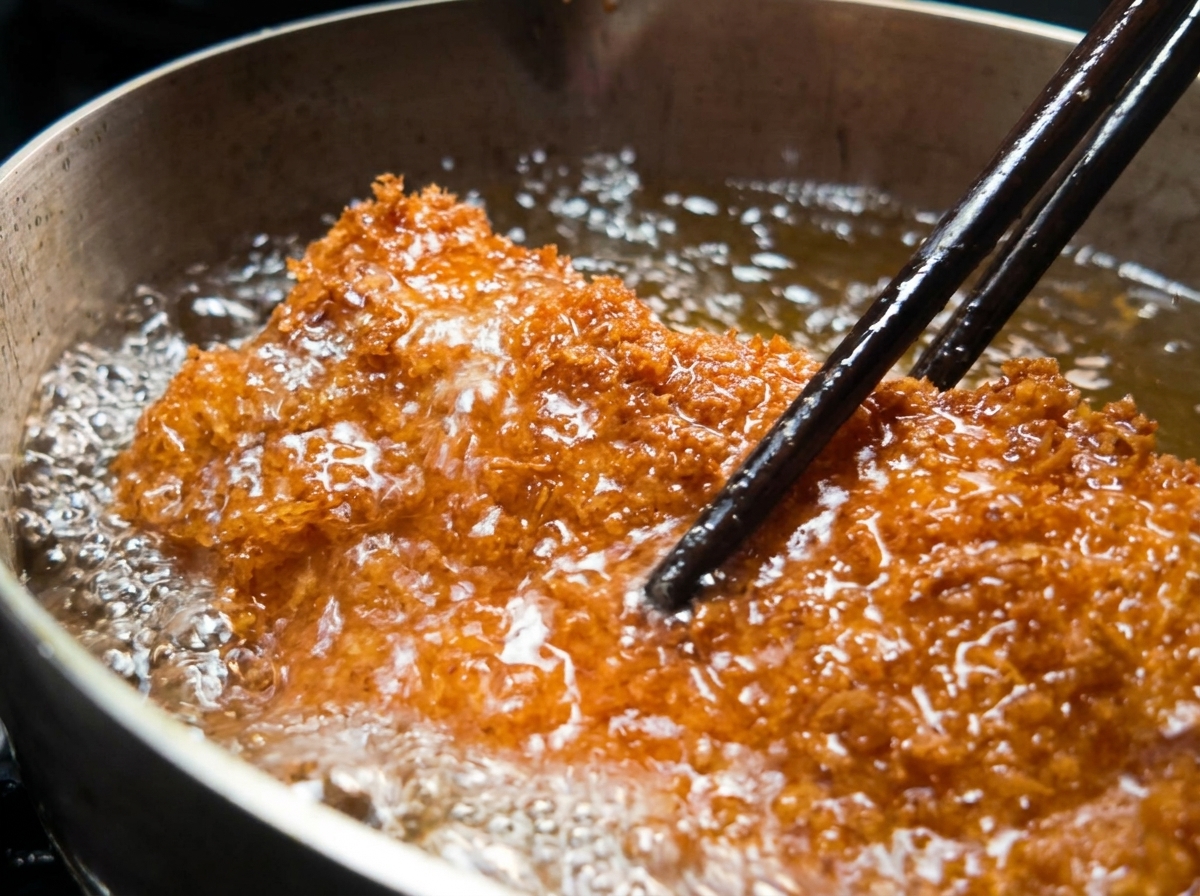
Continue frying the pork chop until the panko crust turns a deep, crispy golden brown on all sides. For an extra crispy exterior, you can remove it, let it rest briefly, and fry it a second time.
Tip: Listen to the sizzling sound; as the moisture cooks out, the bubbling will subside and the frying sound will become sharper.