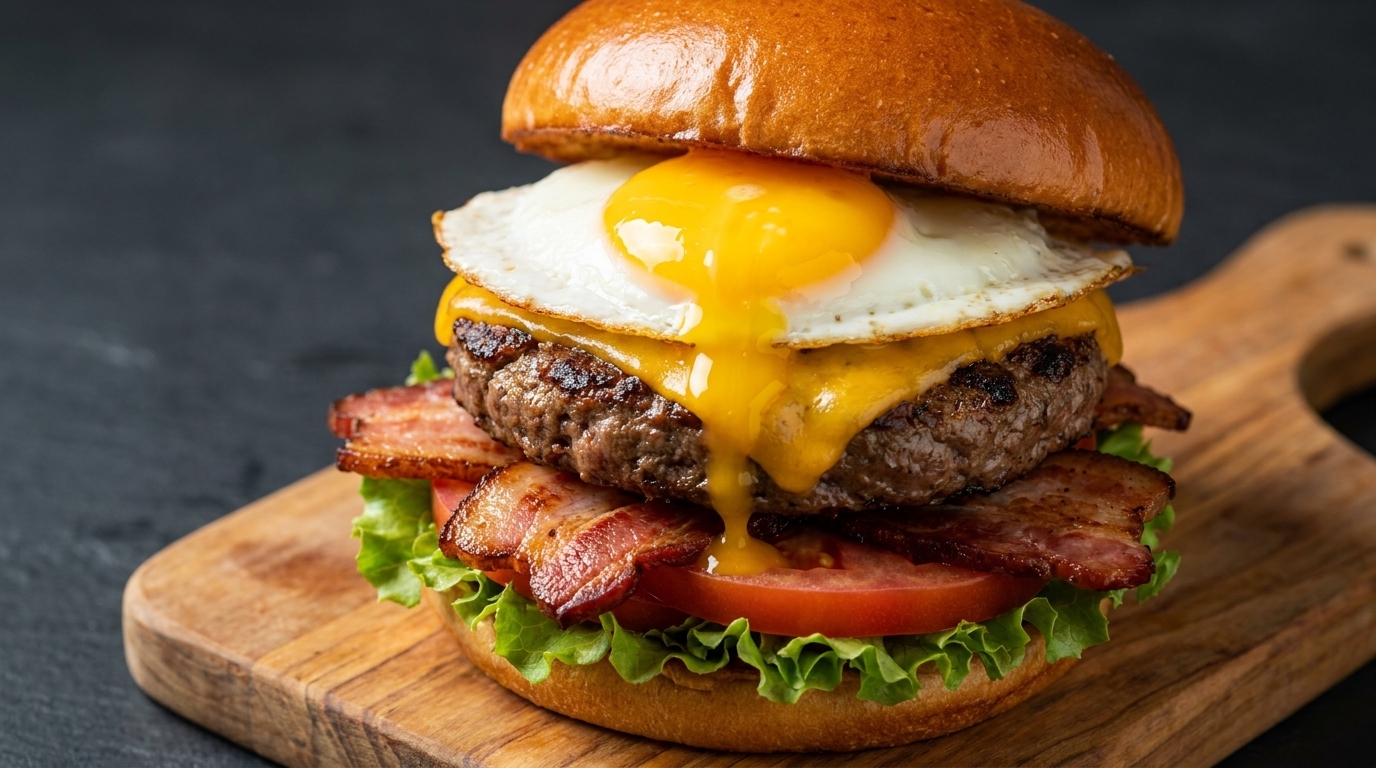
Sunny-Side-Up Egg and Bacon Burger
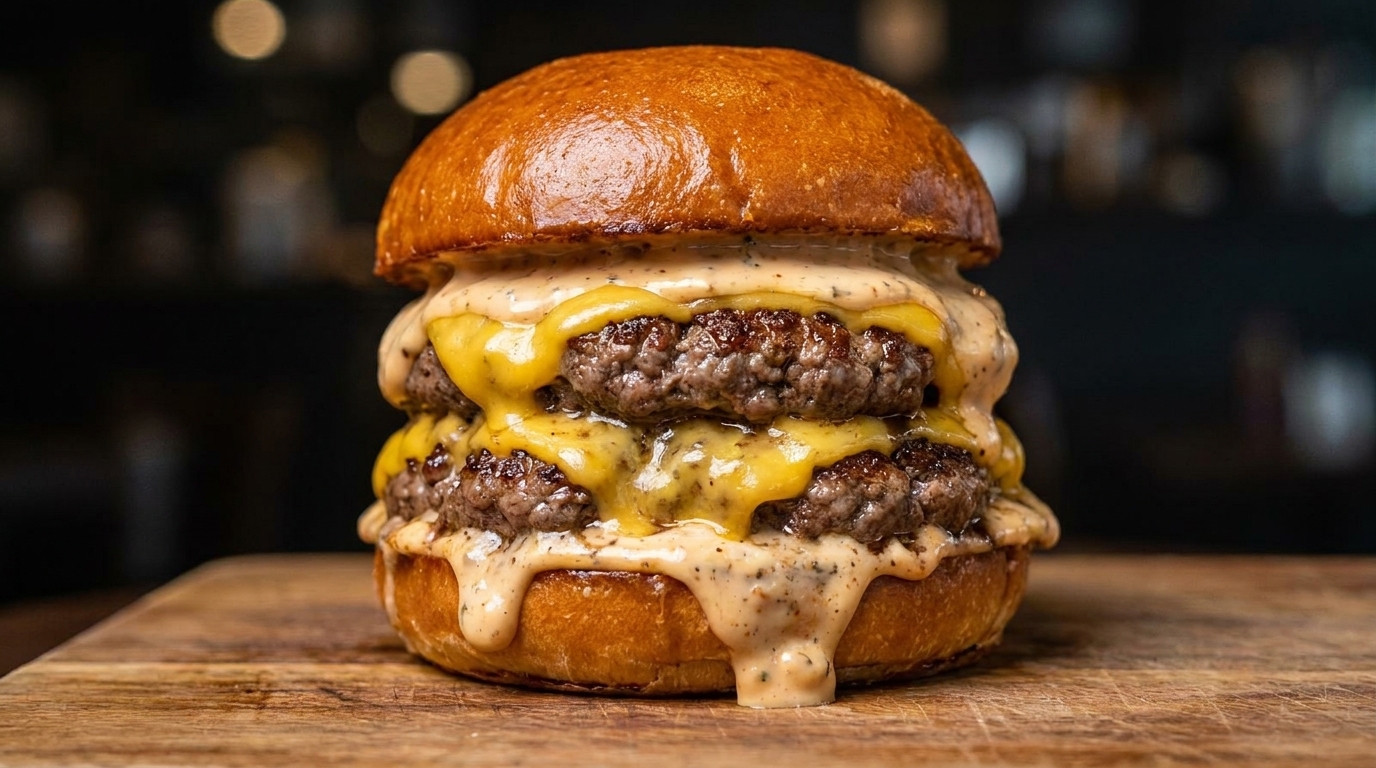
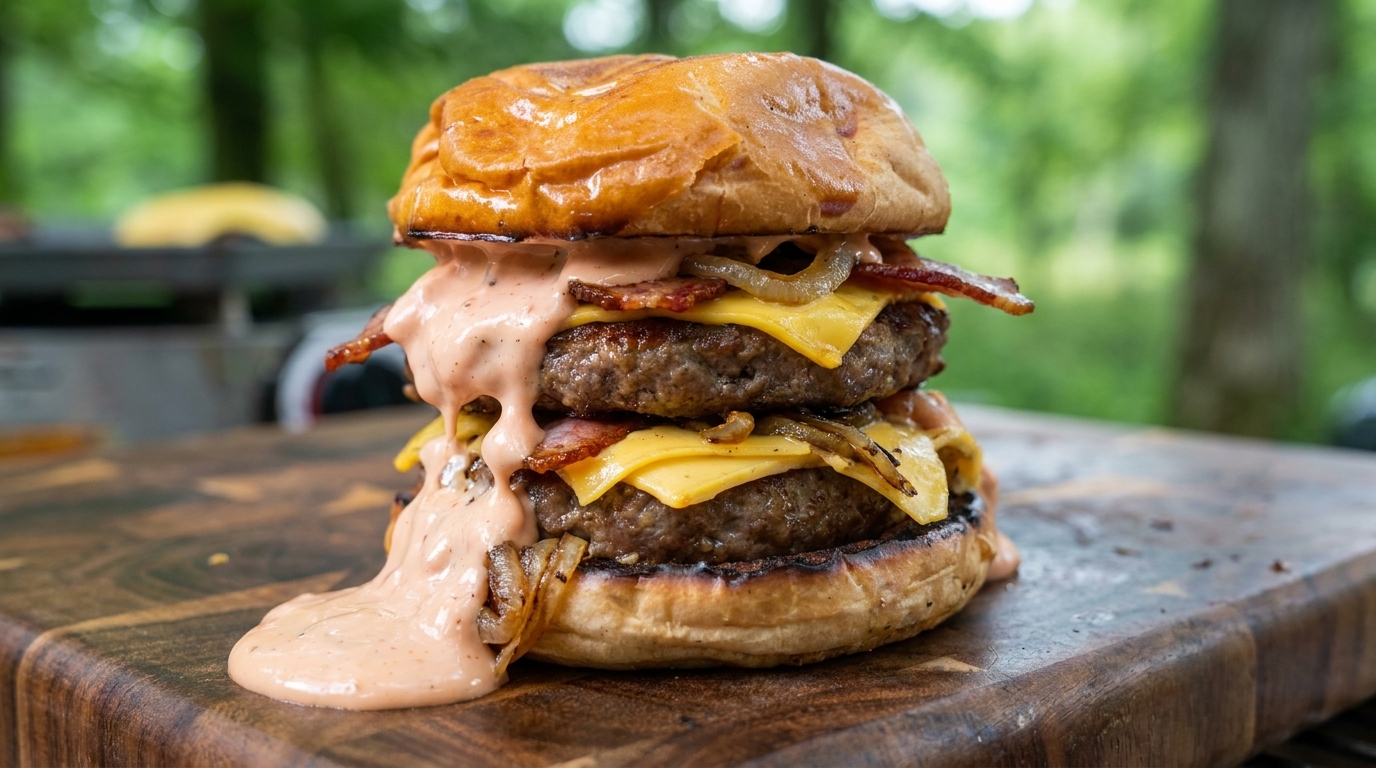
Secret Sauce
A towering breakfast-inspired burger featuring a juicy beef patty, crispy bacon, and a perfectly runny sunny-side-up egg on a buttery brioche bun.
The combination of a rich egg yolk and savory beef is a hallmark of modern street food culture. This recipe elevates the classic cheeseburger with salted butter-toasted buns and a signature American-style sauce. It is an indulgent masterpiece that brings the flair of a professional griddle to your home kitchen.
Ingredients
- 1 brioche burger bun
- 1 tbsp butter
- 150 g ground beef
- 1 tsp sea salt
- 12 tsp black pepper
- 14 purple onion
- 1 slice cheddar cheese
- 2 strips bacon
- 1 pasteurized egg
- 2 tbsp American-style burger sauce
- 1 leaf lettuce
- 2 slices tomato
- 2 slices pickled cucumber
Instructions
- 1Toast the burger buns
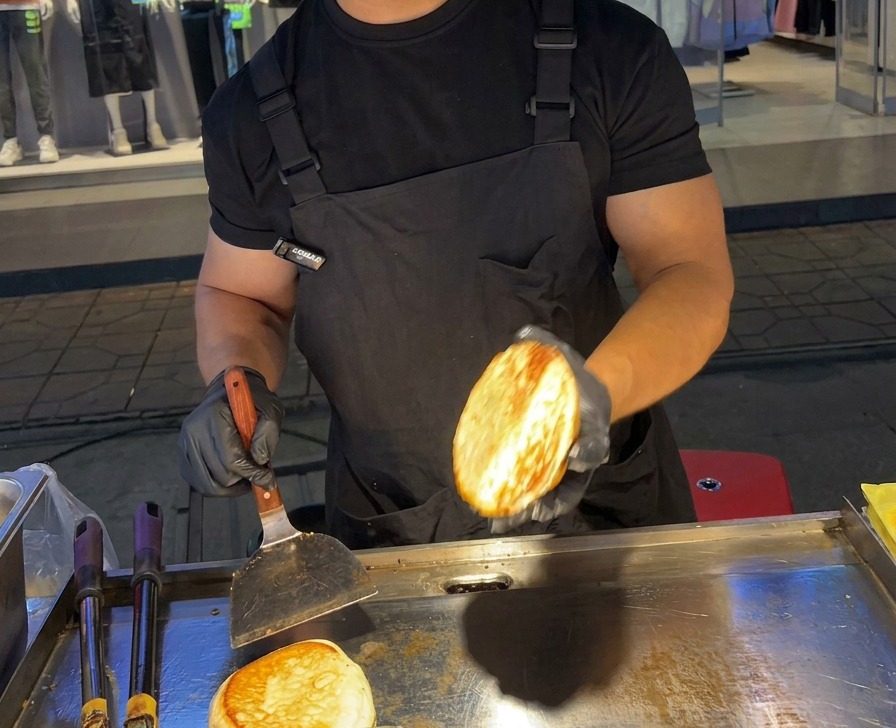
Slice the burger buns in half and spread a layer of butter on the inner sides. Place them face-down on a flat griddle and toast until the surface is crispy and reaches a deep golden-brown color, which provides a sturdy and flavorful base for the burger.
Tip: Apply gentle pressure with a spatula while toasting to ensure the entire surface of the bun makes even contact with the heat. - 2Flatten the burger patty
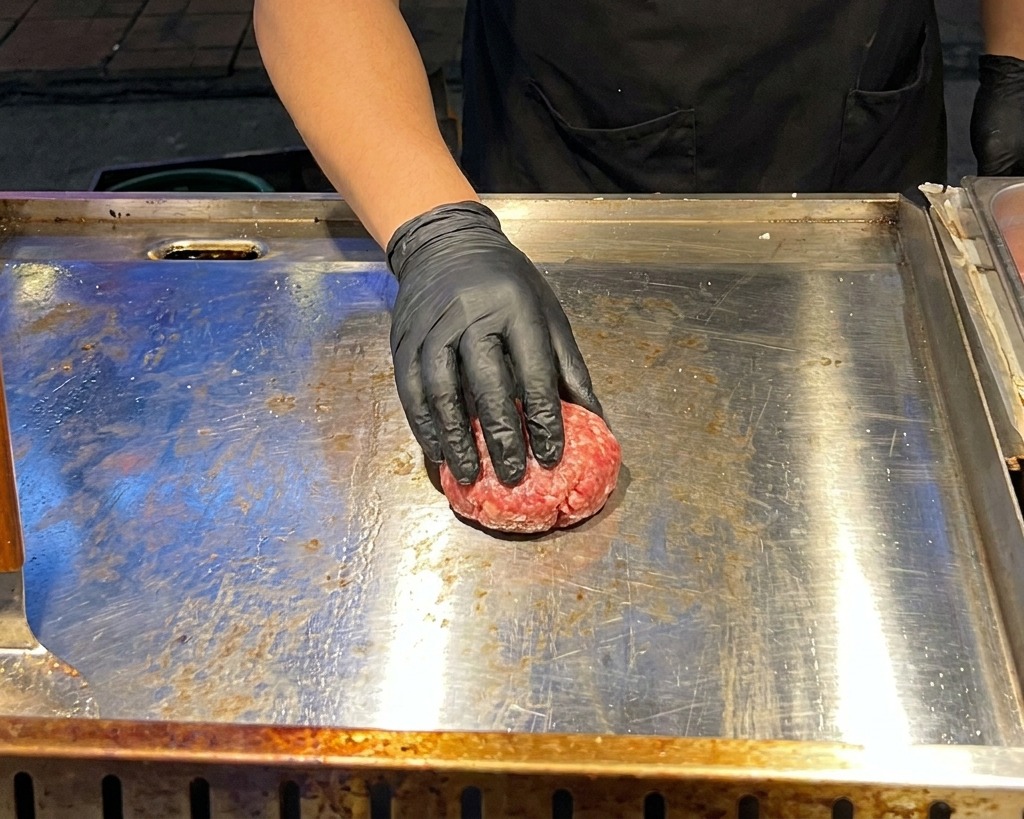
Place your pre-formed meatball onto the hot griddle surface. Use a heavy metal press or a sturdy spatula to firmly press down on the meat until it reaches a thickness of about 1.5 centimeters. This ensures the beef makes full contact with the heat for an even, savory sear.
Tip: Apply the pressure immediately after the meat hits the griddle to start the Maillard reaction quickly and lock in flavor. - 3Season the beef
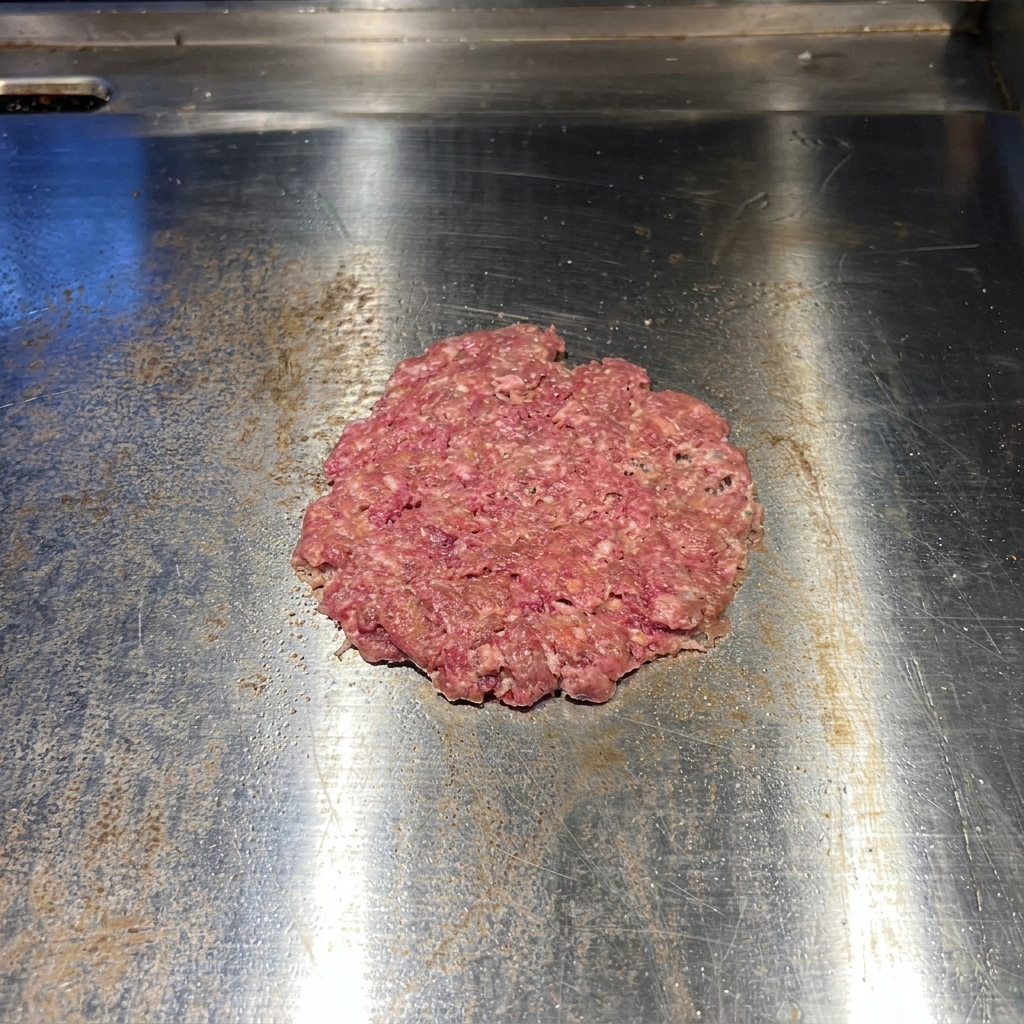
While the bottom of the patty begins to sear, generously season the top side with sea salt and freshly cracked black pepper. Seasoning the meat while it is still raw on top allows the spices to better adhere to the surface before the first flip.
Tip: Season from about 10 inches above the patty to ensure the salt and pepper are distributed evenly across the entire surface. - 4Grill the purple onions
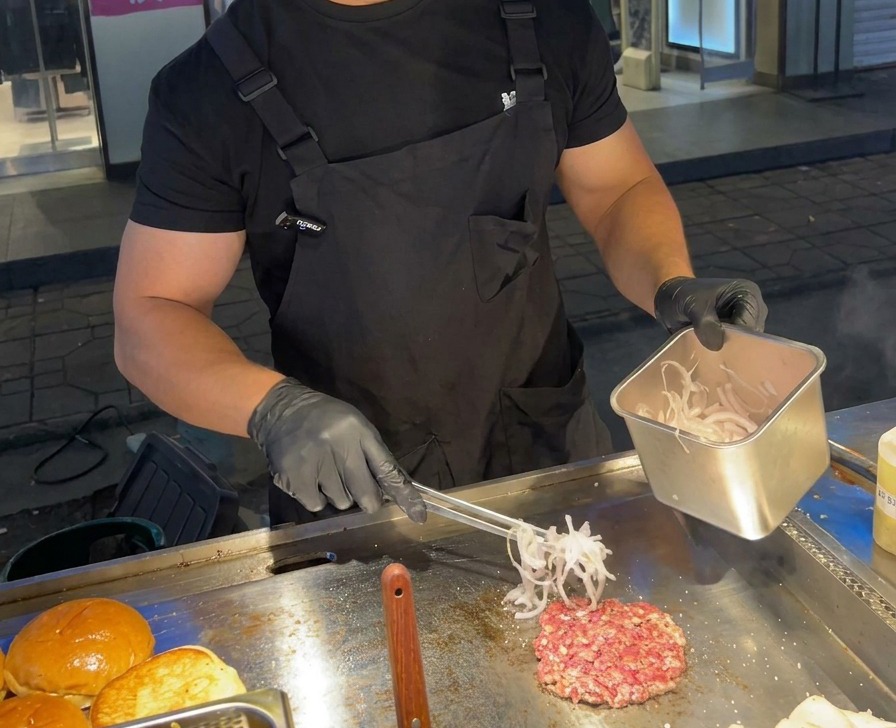
Add a handful of thinly sliced purple onions onto the griddle right next to your beef patty. Grill them until they soften and begin to caramelize, releasing a sweet aroma that complements the savory meat.
Tip: Keep the onions in a small pile initially to trap steam and soften them quickly before spreading them out to brown. - 5Flip and stack the patty
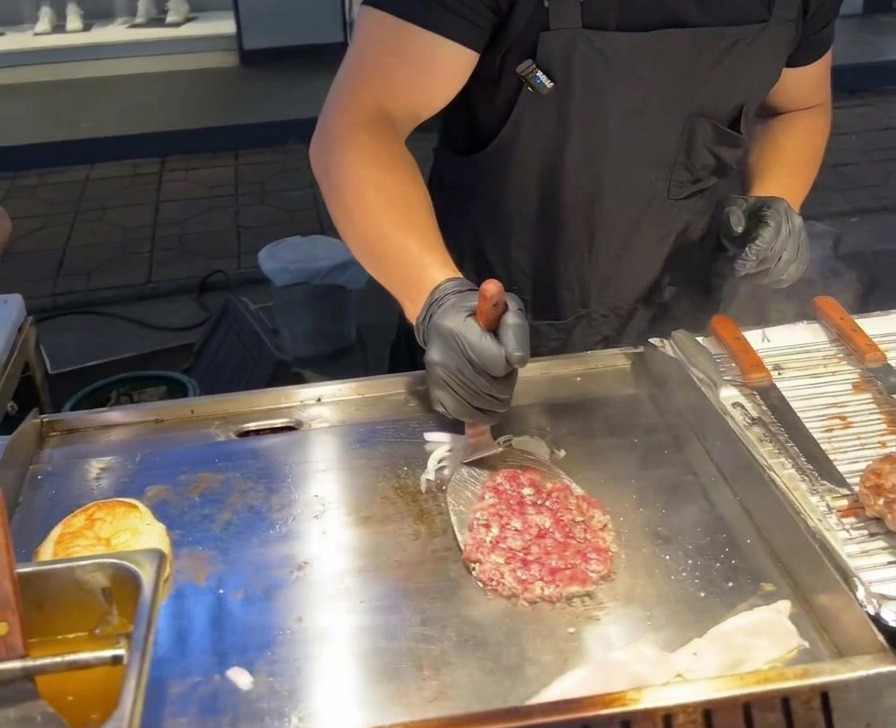
Once the bottom of the beef patty is well-seared, use a spatula to flip it over. Immediately move the patty directly on top of the grilled purple onions so the meat absorbs their flavor while finishing its cook time.
Tip: Ensure the onions are sufficiently softened before placing the meat on top to ensure a cohesive texture in the final burger. - 6Melt cheese on the patty
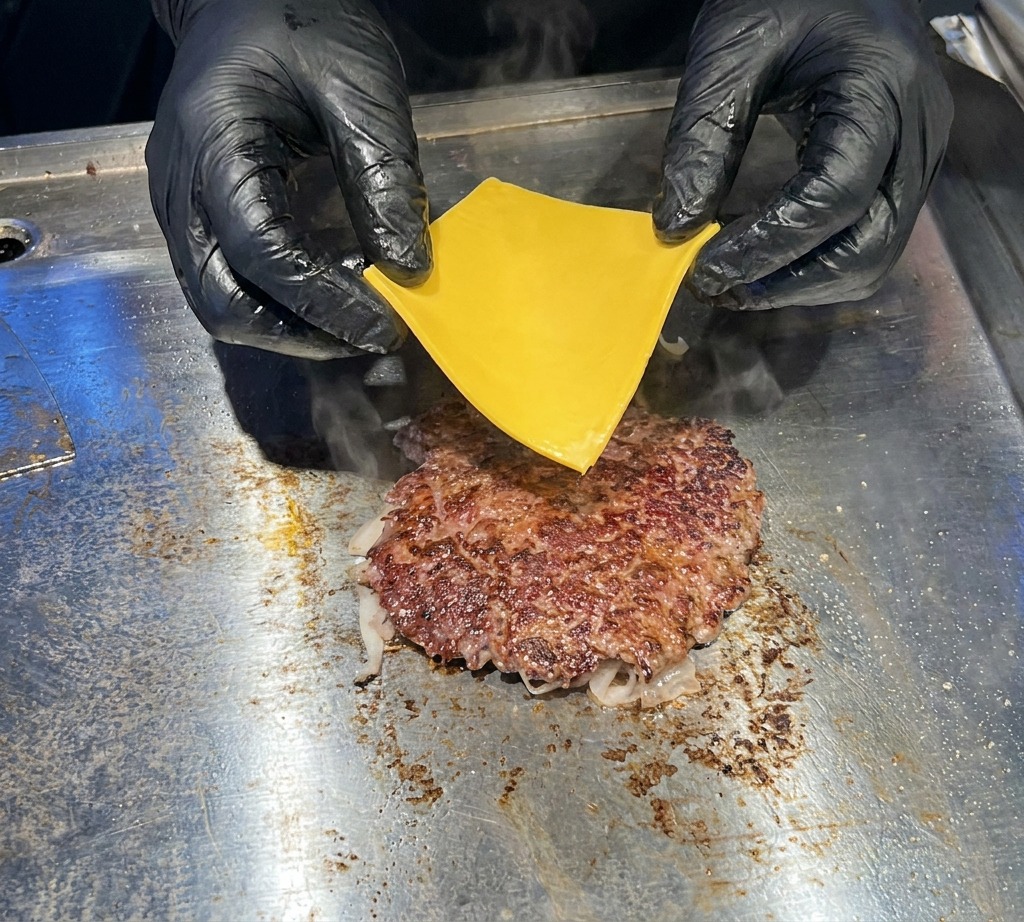
While the beef patty is still searing on the griddle, place a square slice of yellow cheese directly onto the hot surface of the meat. The residual heat will quickly soften the cheese, allowing it to drape over the edges and infuse the burger with a rich, creamy texture.
Tip: If you want the cheese to melt faster without overcooking the meat, place a small metal lid over the patty for a few seconds to trap the steam. - 7Fry the bacon strips
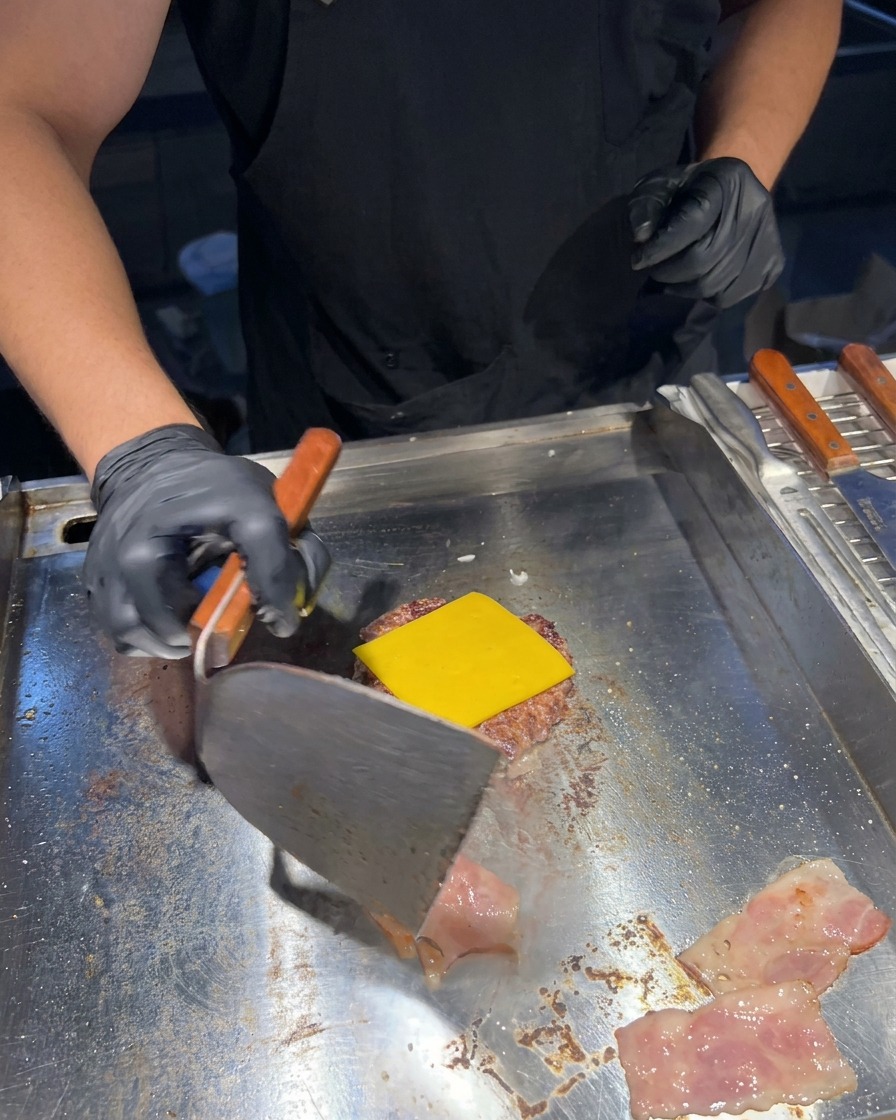
Place thin strips of bacon on the griddle and flip them once the first side is browned and crispy. Continue cooking until the fat is rendered and the bacon reaches a perfect crunch to serve as a salty topping.
Tip: Cook the bacon over medium heat to prevent the fat from splattering excessively while ensuring an even crispness. - 8Fry the egg in a mold
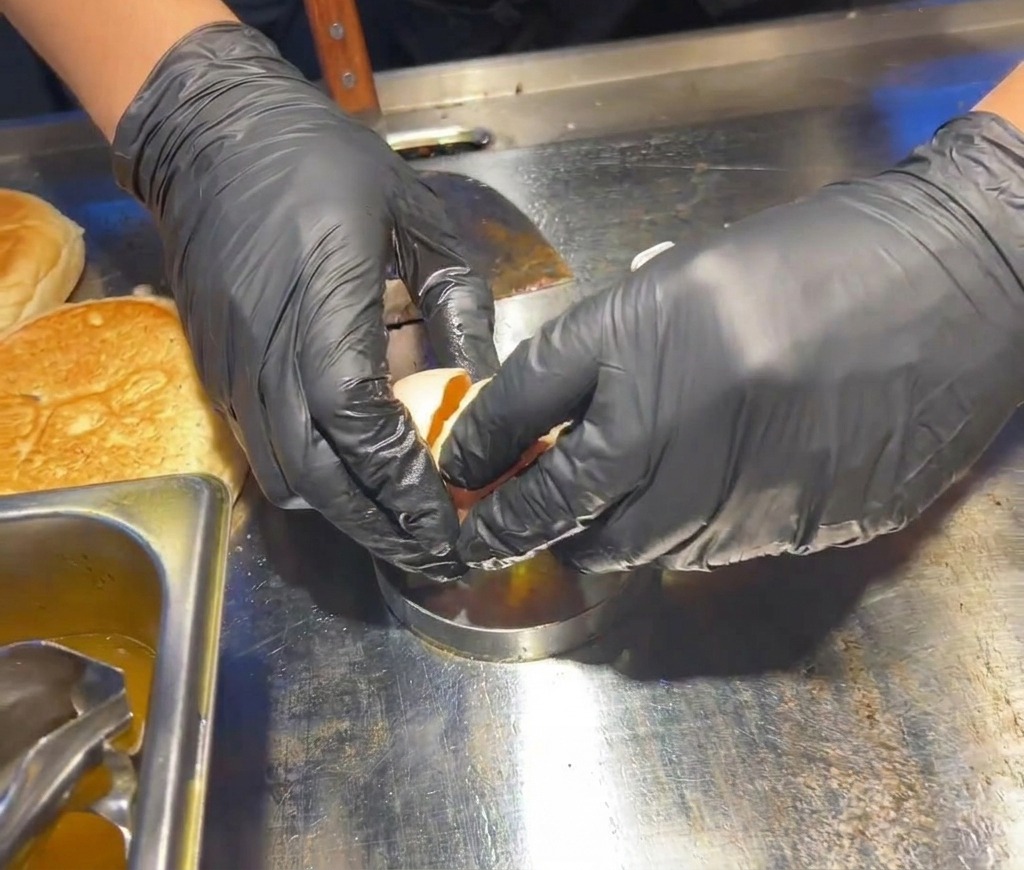
Place a circular metal ring mold on a lower-heat section of the griddle and crack a fresh egg into it. Using a mold ensures the egg remains perfectly round and compact, which makes for a much neater assembly and a better fit for your burger bun.
Tip: Lightly grease the inside of the metal ring with a bit of butter or oil before cracking the egg to ensure it releases cleanly once cooked. - 9Lift the completed stack
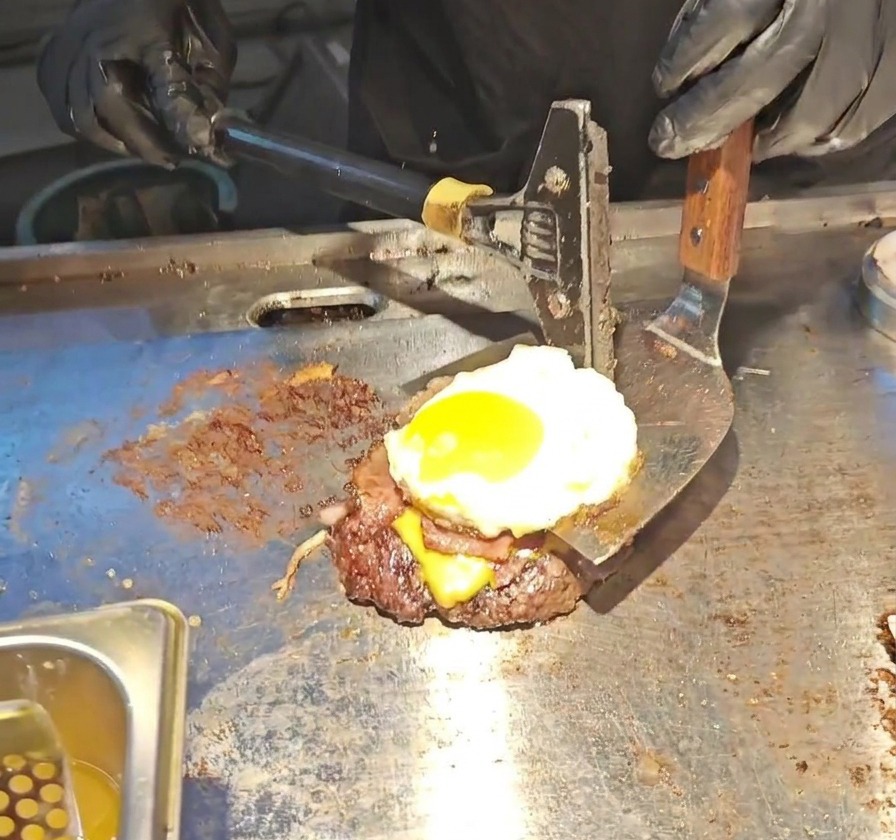
Carefully slide a wide spatula under the base of the patty and onions to lift the entire assembly, including the melted cheese, crispy bacon, and the sunny-side-up egg. This technique keeps the layers intact for a beautiful presentation.
Tip: Wait until the egg white is fully set but the yolk is still runny before attempting to lift the entire stack to the bun. - 10Apply the signature sauce

Squeeze a generous amount of the creamy American-style sauce onto the toasted surfaces of both burger bun halves. The sauce acts as a flavorful glue that holds the fresh vegetables and patty in place while adding a tangy kick.
Tip: Applying the sauce to both the top and bottom buns ensures a consistent flavor profile throughout the entire burger. - 11Layer the vegetables
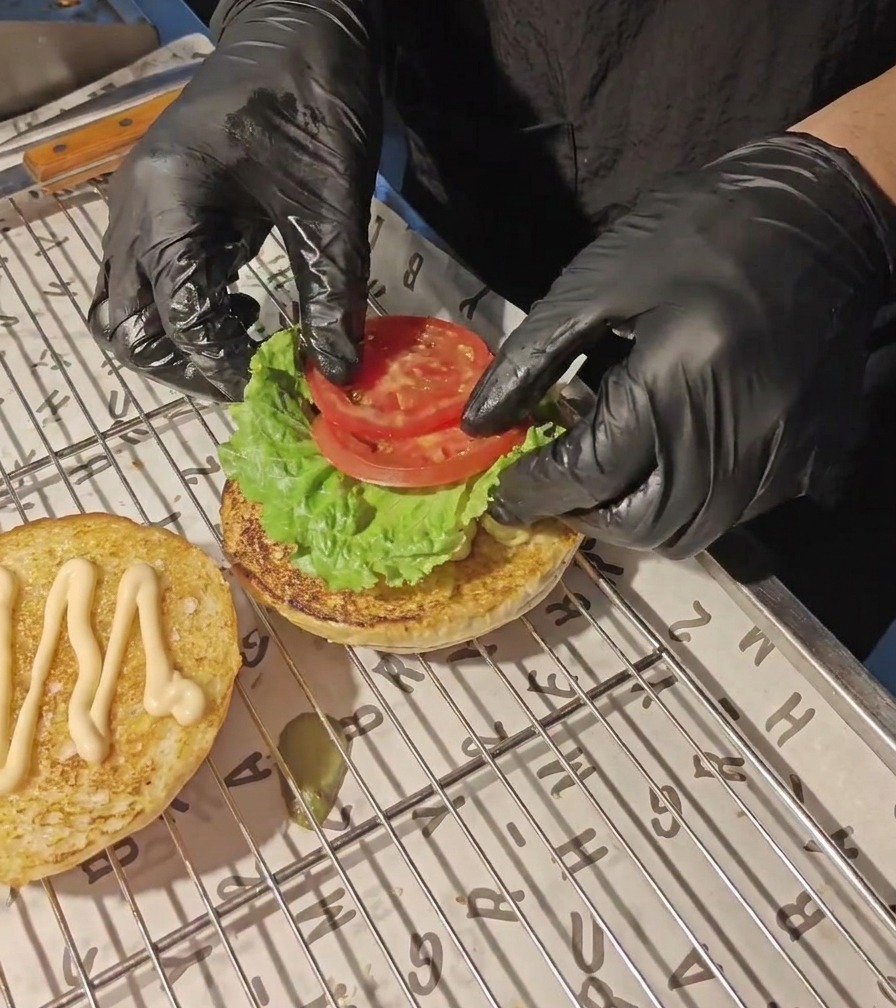
Begin assembling your burger by placing a fresh, crisp lettuce leaf onto the toasted bottom bun. Layer on two slices of ripe tomato. These fresh ingredients provide a cool crunch and acidity to balance the rich meat and egg.
Tip: Shake off any excess water from the lettuce before adding it to keep the bun from getting soggy. - 12Add the patty and egg stack
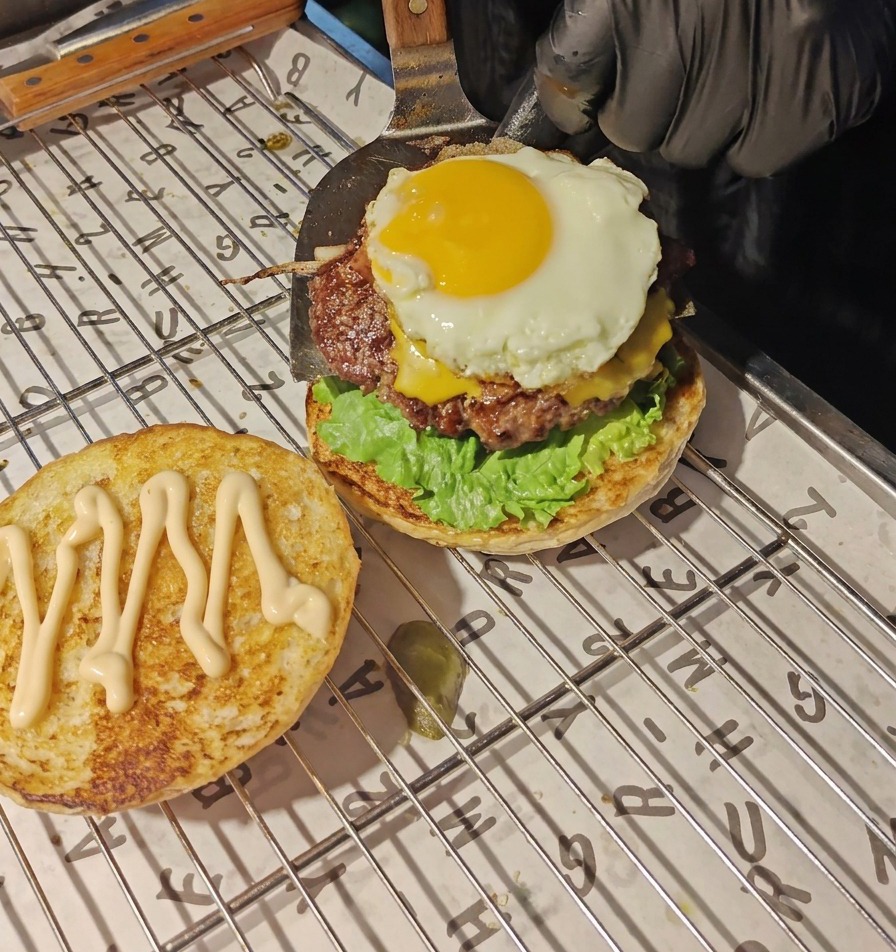
Carefully lift the cooked beef patty, complete with its melted cheese, and the sunny-side-up egg using a spatula. Place the entire stack directly onto the tomato slices. The runny yolk will act as an extra sauce for the burger.
Tip: Slide the spatula slowly under the meat patty to ensure the egg stays perfectly centered on top. - 13Garnish with pickles
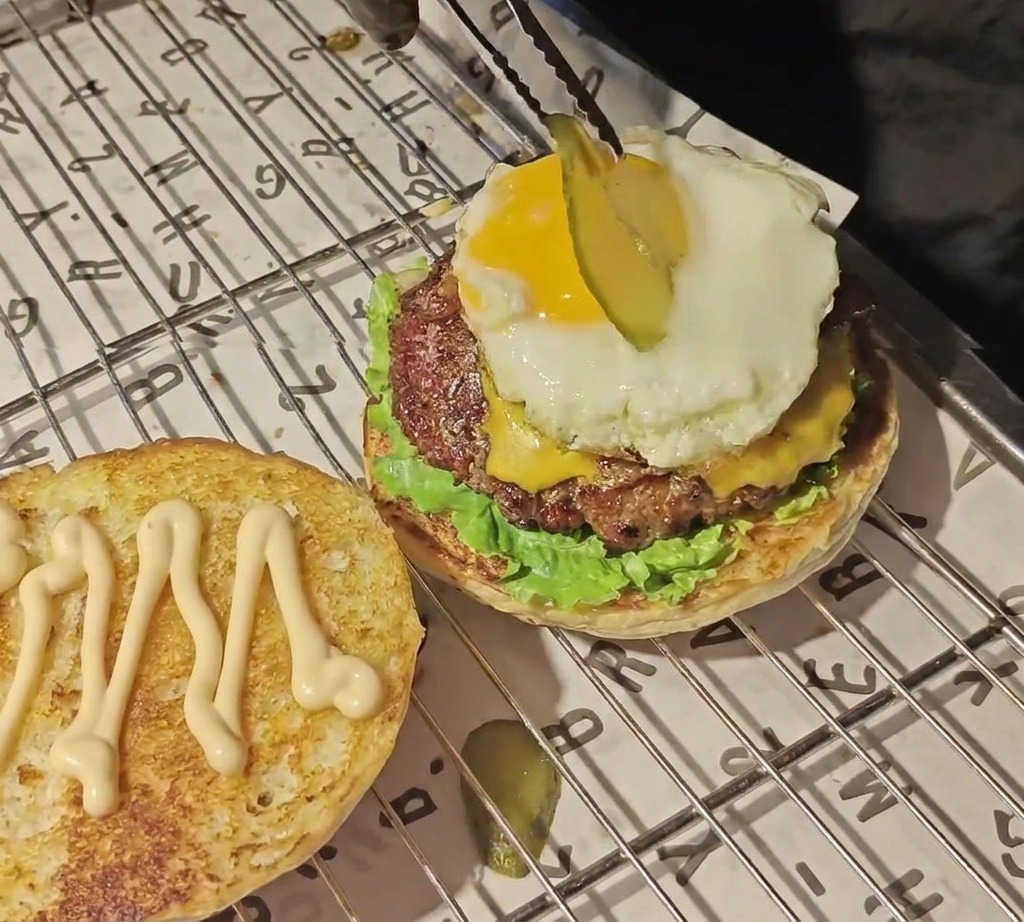
Use tongs to place two slices of pickled cucumber on top of the egg. The tanginess of the pickles cuts through the richness of the yolk and cheese, adding another layer of flavor and texture to every bite.
Tip: Pat the pickle slices dry with a paper towel first so the extra brine does not make the burger messy. - 14Finish the assembly
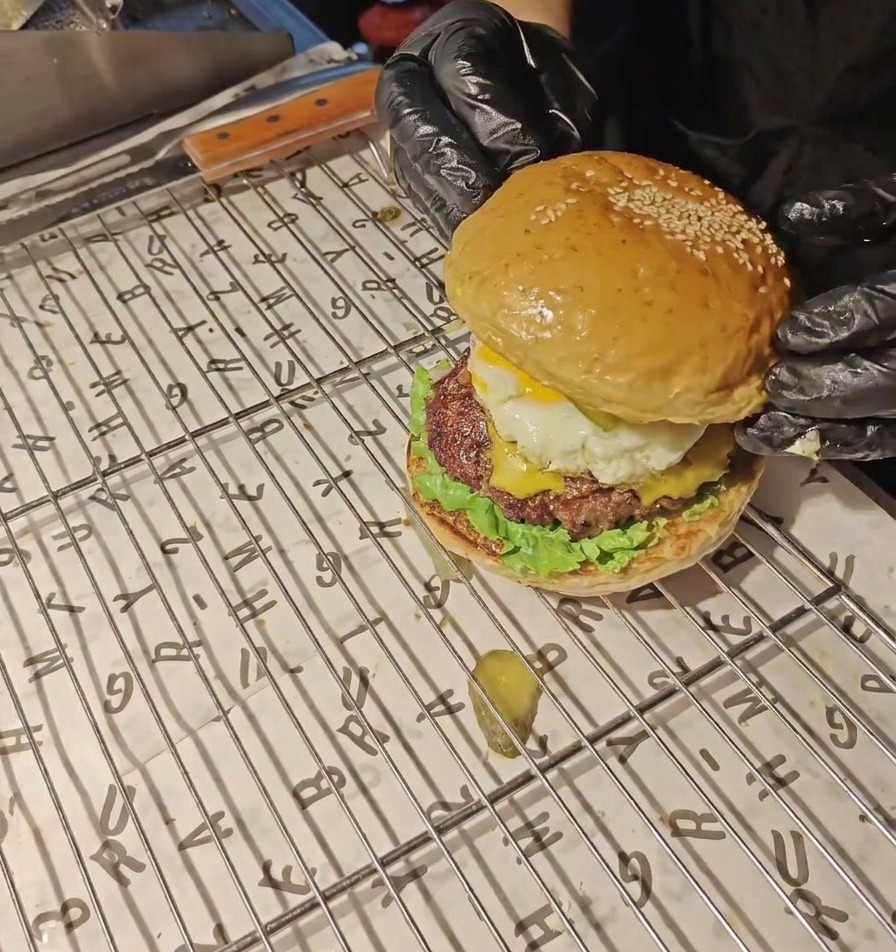
Place the toasted top bun, sprinkled with sesame seeds, over the pickles to complete your burger. Press down very lightly to stabilize the layers while keeping the sunny-side-up egg intact for the perfect presentation.
Tip: If the burger is tall, you can use a bamboo skewer through the center to keep all the layers aligned while serving.