Slow-Roasted Beef Short Ribs
Sticky BBQ Glaze
Experience fall-off-the-bone tenderness with these slow-roasted beef short ribs. Baked low and slow, then finished with a sweet and tangy homemade BBQ glaze.
There is something undeniably satisfying about a large, beautifully marbled cut of meat cooked to perfection. These slow-roasted beef short ribs rely on a gentle, four-hour bake to break down the tough connective tissues, resulting in meat so tender the bone simply slides out. The crowning glory is a rich, spiced barbecue sauce that caramelizes in the final minutes, creating a soul-stirring contrast between the sticky exterior and the juicy, savory meat inside.

Ingredients
- 1 large rack beef short ribs
- 2 tbsp olive oil
- to taste coarse salt and black pepper
- 1 tbsp vegetable oil
- 12 cup white onion, finely minced
- 3 cloves garlic, minced
- 14 cup dark brown sugar
- 2 tbsp apple cider vinegar
- 1 tbsp hot sauce
- 1 cup tomato sauce
- 1 tsp cumin powder
- 1 tsp dried oregano
- 1 tsp chili powder
- 14 tsp cinnamon powder
Instructions
- 1Select the beef ribs
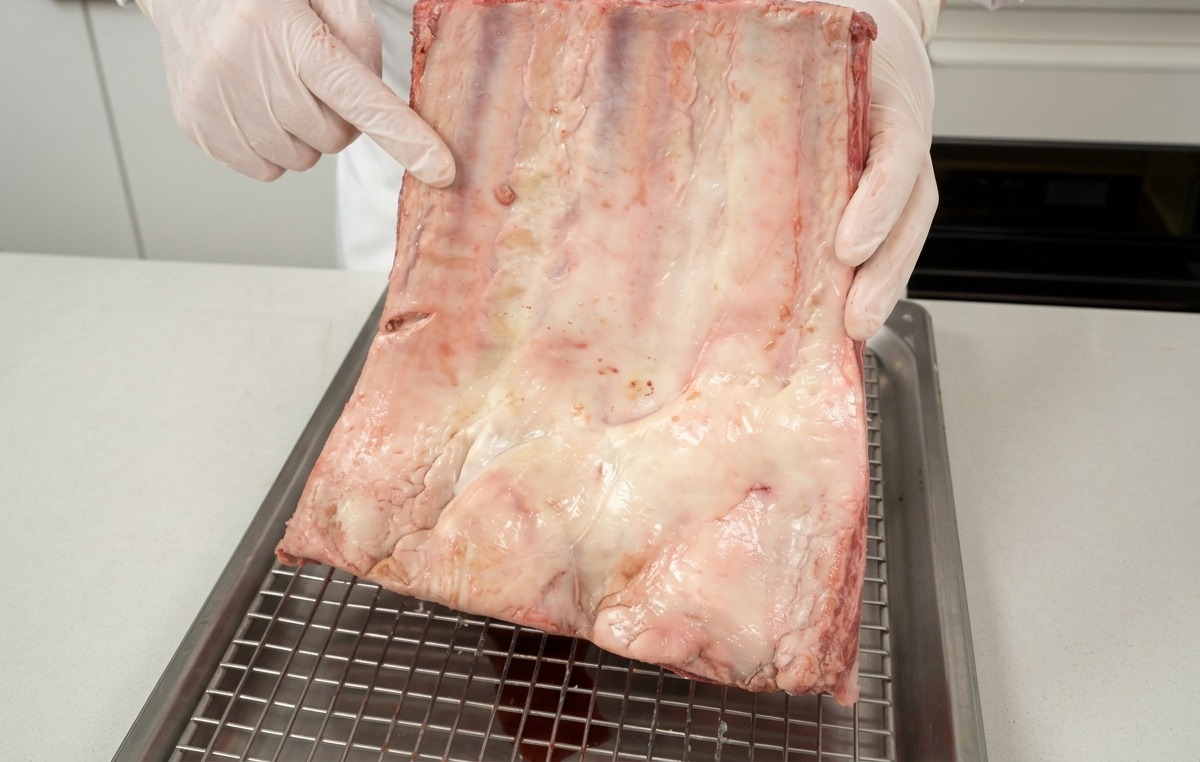
Choose a high-quality rack of beef short ribs with rich, white intramuscular fat marbling. This specific cut is ideal for slow-roasting, as the generous fat content renders down during cooking to keep the meat incredibly tender and juicy.
Tip: Look for even marbling throughout the meat; this ensures consistent flavor and prevents the beef from drying out in the oven. - 2Trim the excess fat
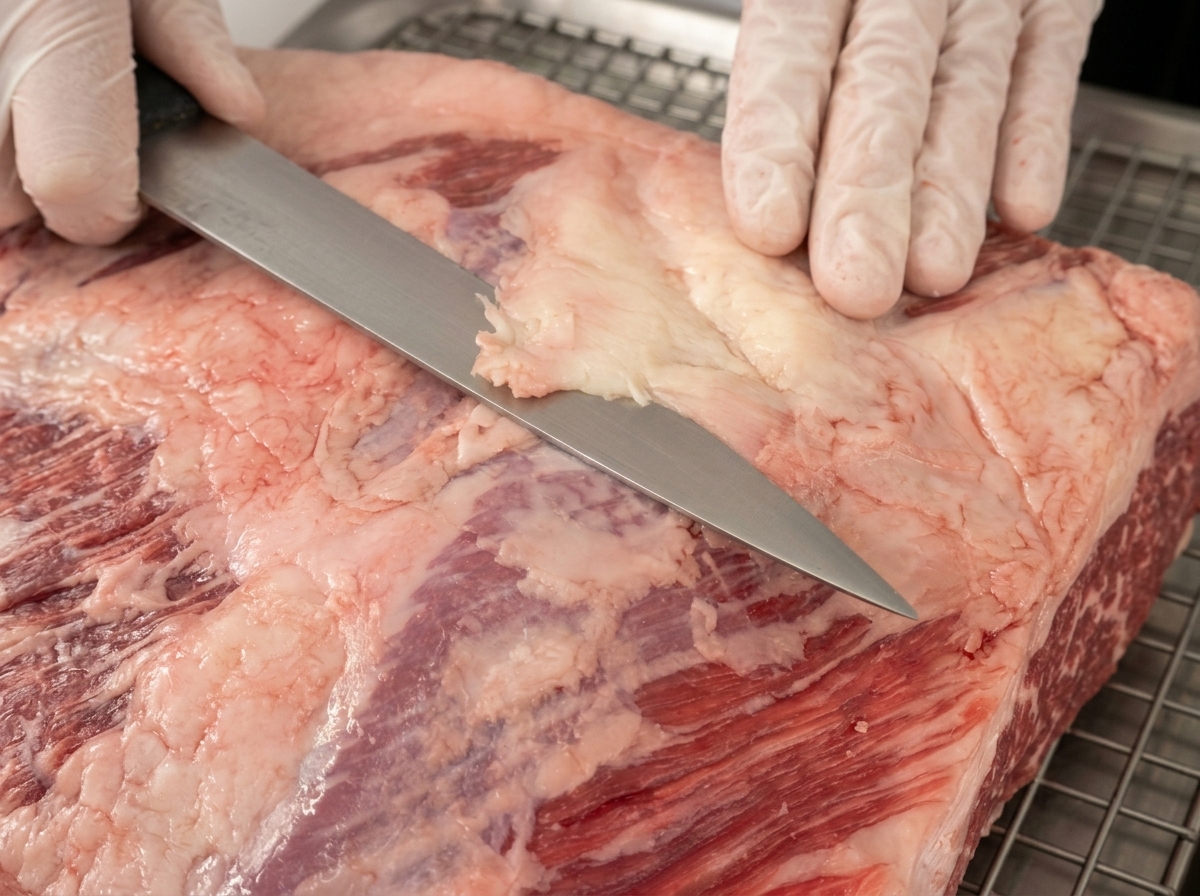
Using a sharp knife, carefully trim away the thick, hard layers of white fat from the surface of the raw beef ribs. Leaving too much exterior fat will prevent the seasoning from penetrating the meat and make the final dish excessively greasy.
Tip: Dont remove all the fat—leave a thin, even layer to baste the meat naturally as it roasts. - 3Season the meat
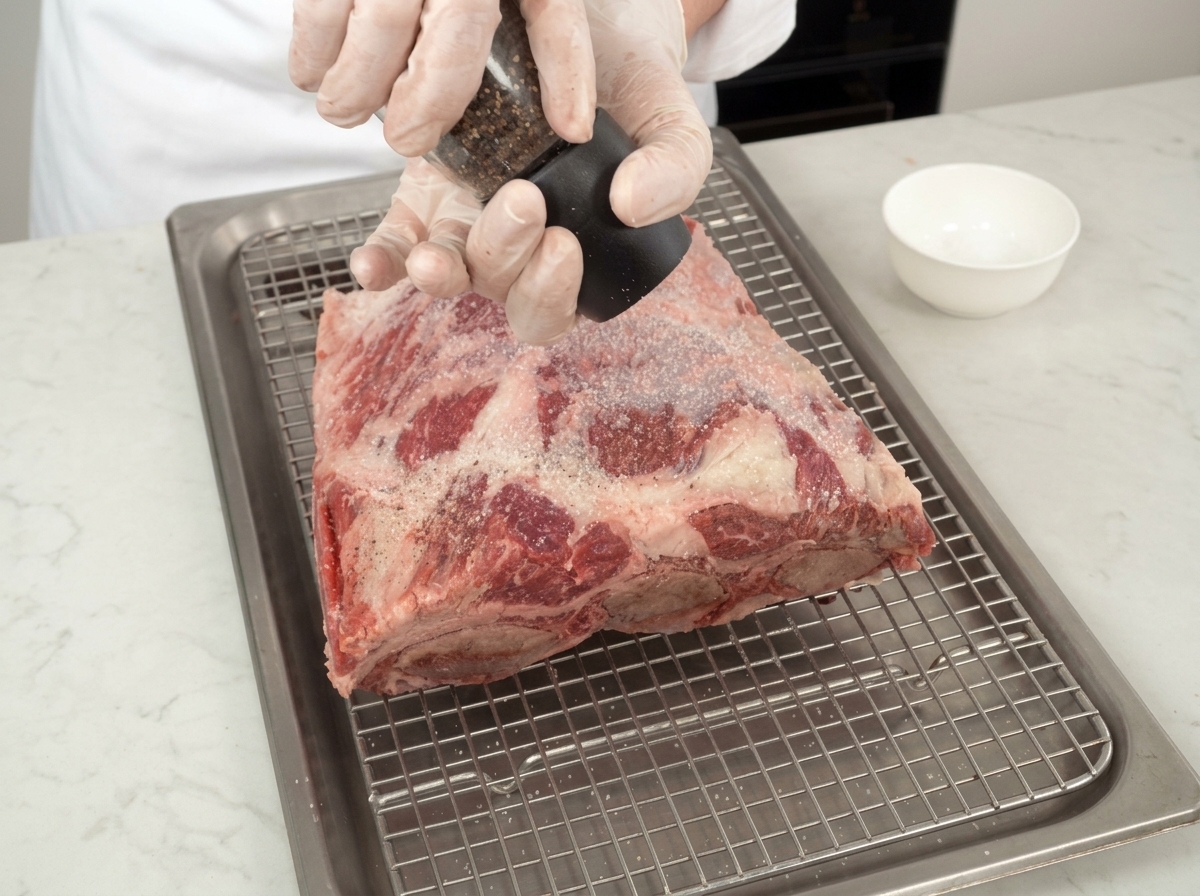
Drizzle the trimmed beef ribs evenly with olive oil, which acts as a binder. Season generously on all sides with coarse salt and freshly ground black pepper. Rub the seasoning firmly into the meat to ensure every bite is deeply flavored.
Tip: Season from high up to ensure an even distribution of salt and pepper over the large surface area of the ribs. - 4Wrap in foil
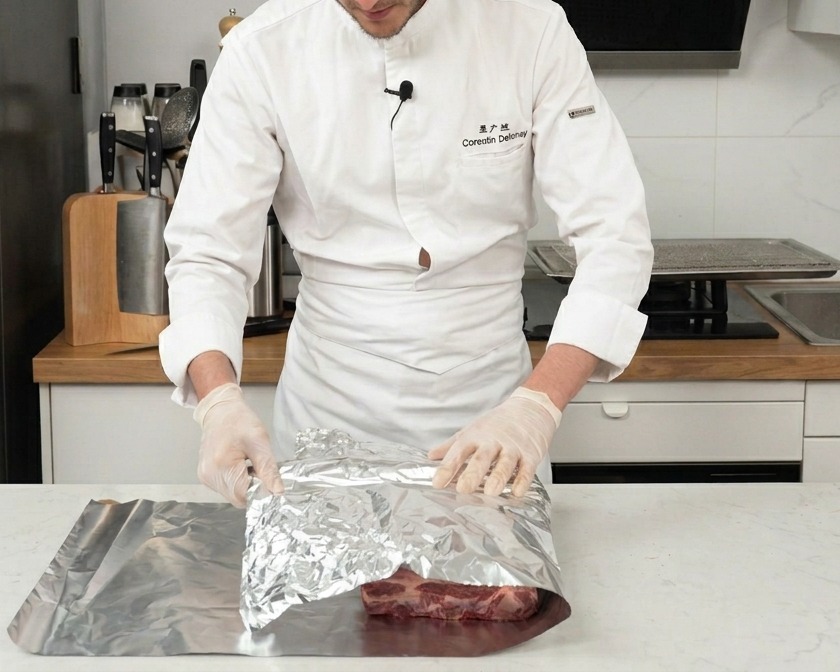
Place the seasoned beef ribs onto a large sheet of heavy-duty aluminum foil. Wrap the meat securely, crimping the edges to create a tight seal. This traps the steam and natural juices during the long roasting process, ensuring the meat becomes fall-off-the-bone tender.
Tip: Use a double layer of foil if yours is thin, as bone edges can easily pierce a single sheet and let moisture escape. - 5Slow roast the beef
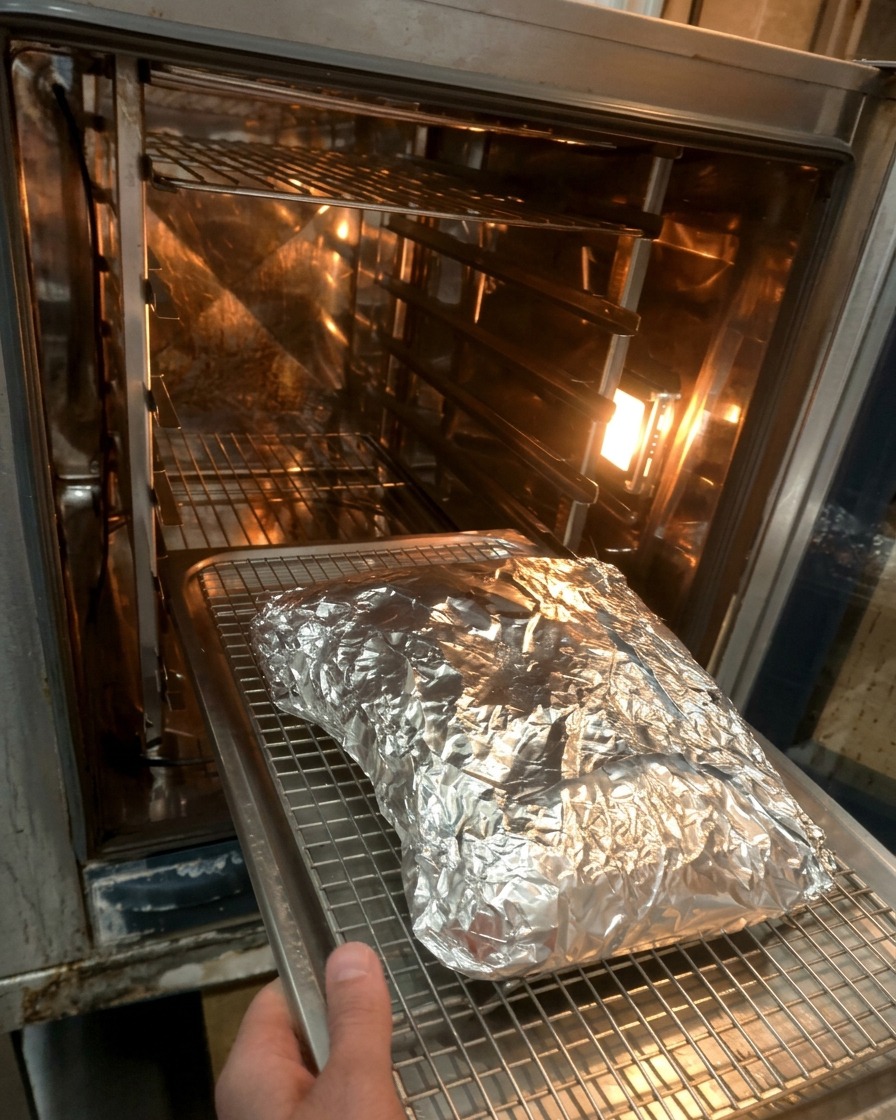
Place the foil-wrapped meat onto a wire roasting rack and transfer it into a preheated oven. Bake at 140°C (285°F) for about four hours. This gentle, low-and-slow cooking method breaks down the tough connective tissues without drying out the meat.
Tip: Placing the wrapped ribs on a wire rack ensures even heat circulation around the entire parcel. - 6Sauté the aromatics
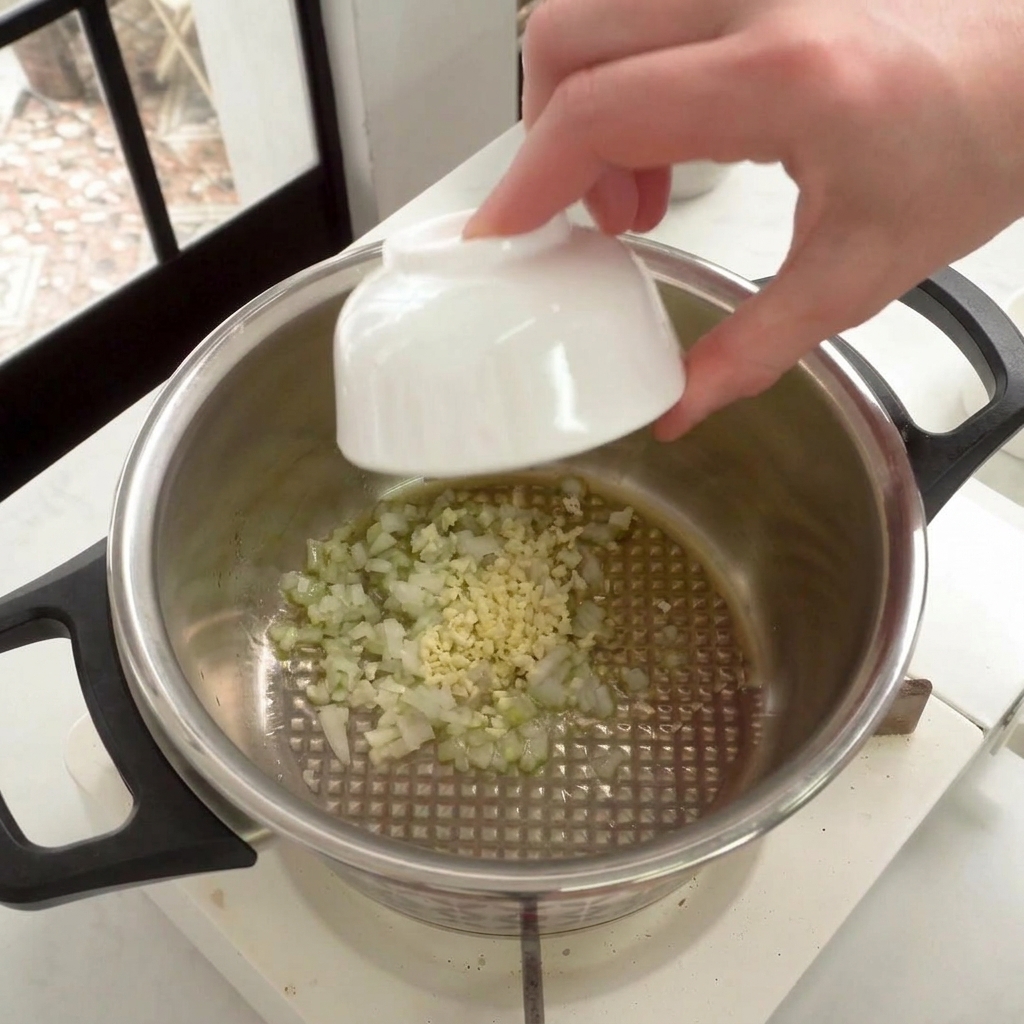
While the beef is roasting, begin preparing the BBQ sauce. Heat a little oil in a small stainless steel pot over medium heat. Add the finely minced white onion and garlic, sautéing them gently until they become softened and fragrant.
Tip: Stir frequently to prevent the garlic from burning, which would introduce a bitter taste to your sauce. - 7Melt the brown sugar
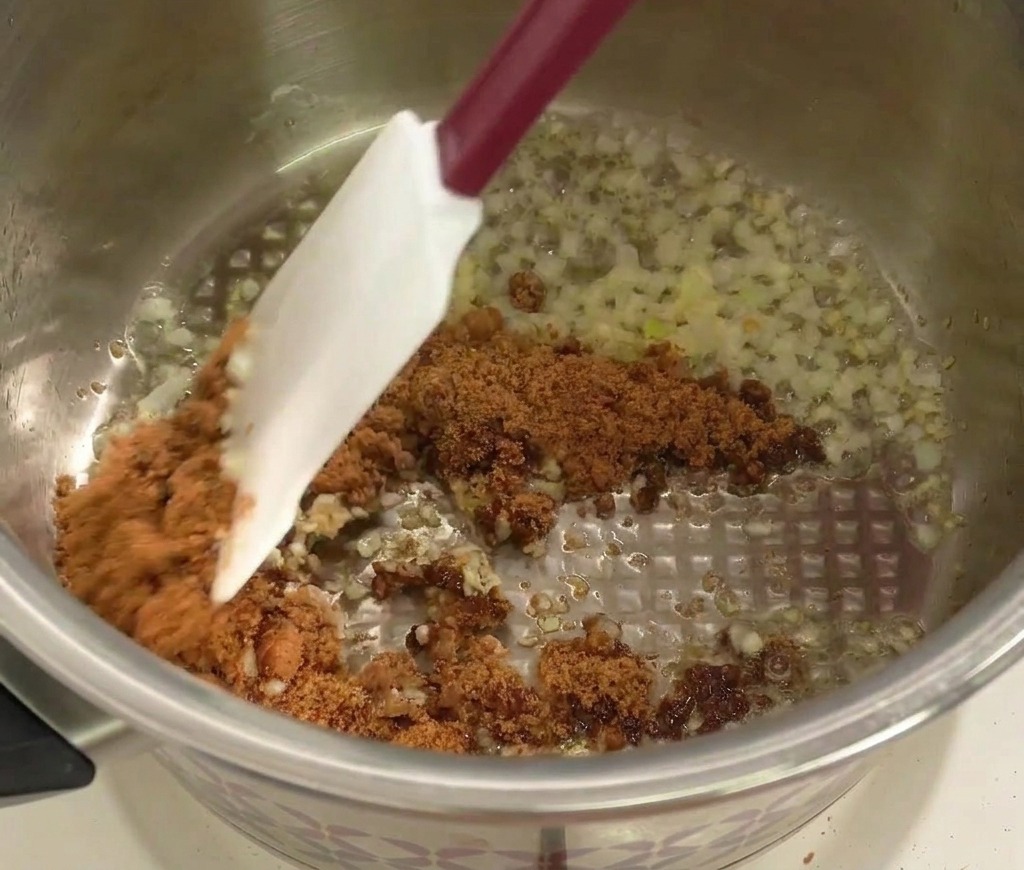
Once the minced onion and garlic are aromatic, add the brown sugar to the pot. Stir continuously with a spatula until the sugar melts completely and begins to caramelize with the aromatics. This forms the sweet, rich foundation of the barbecue sauce.
Tip: Lower the heat slightly when melting the sugar to prevent it from burning, which can introduce a bitter taste to the sauce. - 8Stir in the liquid ingredients
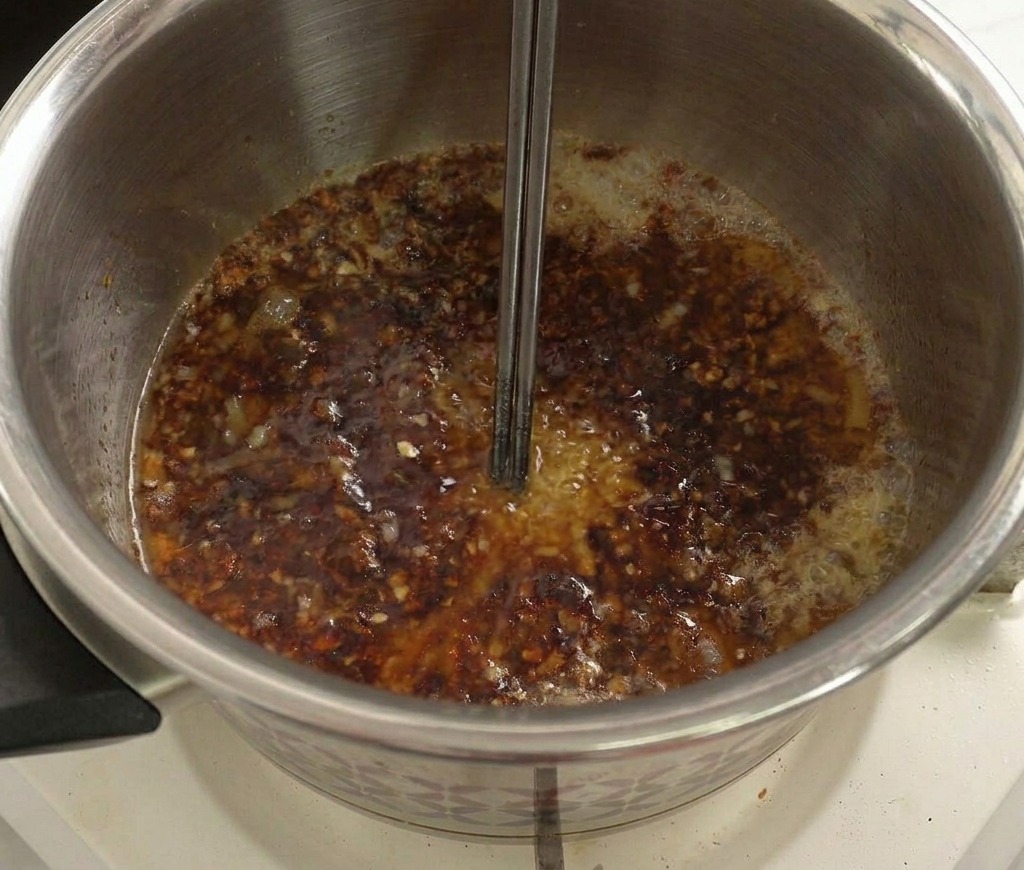
Pour the apple cider vinegar, hot sauce, and tomato sauce into the caramelized sugar mixture. Stir the ingredients together well and bring the mixture to a gentle simmer to allow the flavors to combine and the harshness of the vinegar to mellow out.
Tip: Use a good quality tomato sauce, as it provides the essential tang, body, and color for the barbecue sauce base. - 9Season the barbecue sauce
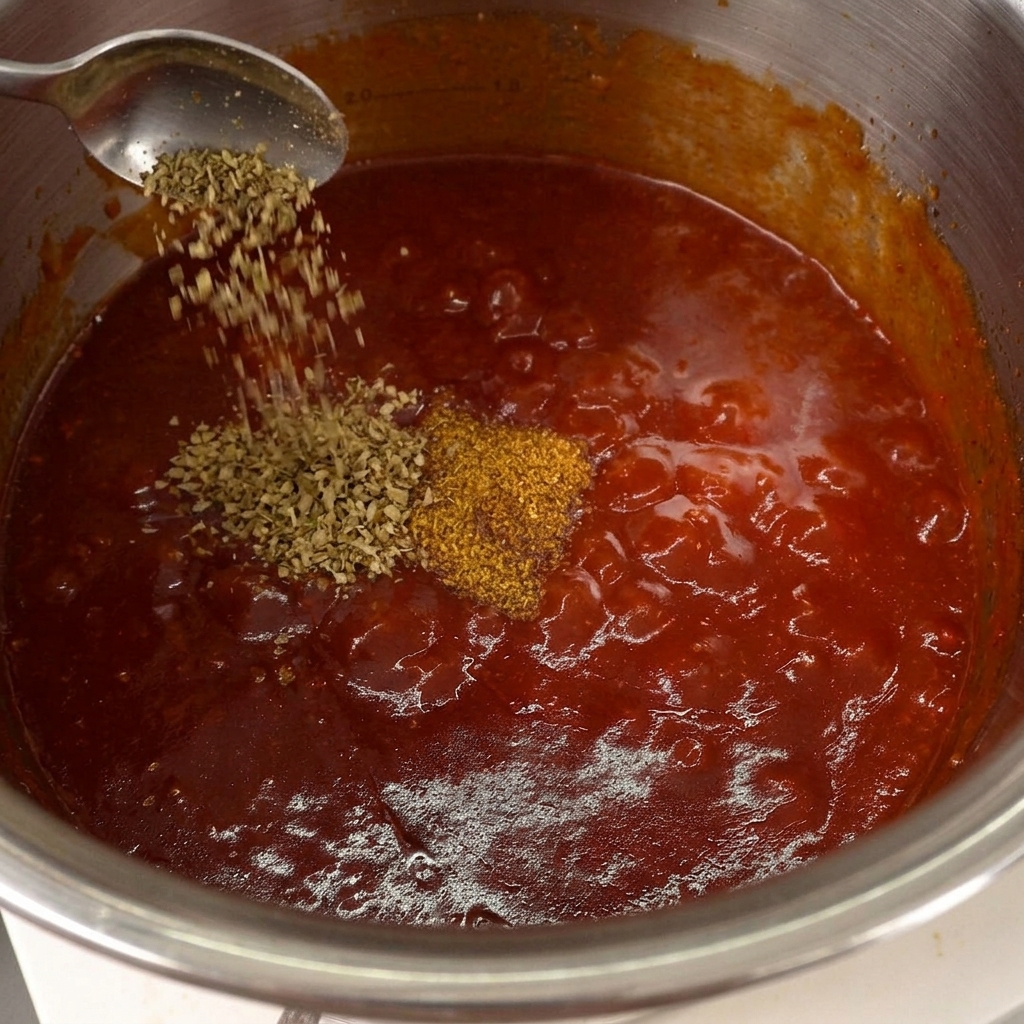
Carefully add the cumin powder, dried oregano, chili powder, and a touch of cinnamon powder to the simmering red sauce. Stir well to fully incorporate the dried spices, letting the sauce gently simmer so it thickens and the spices release their essential oils.
Tip: Simmer the sauce uncovered to help the excess moisture evaporate, giving you a thicker, more concentrated glaze for the ribs. - 10Blend the sauce until smooth
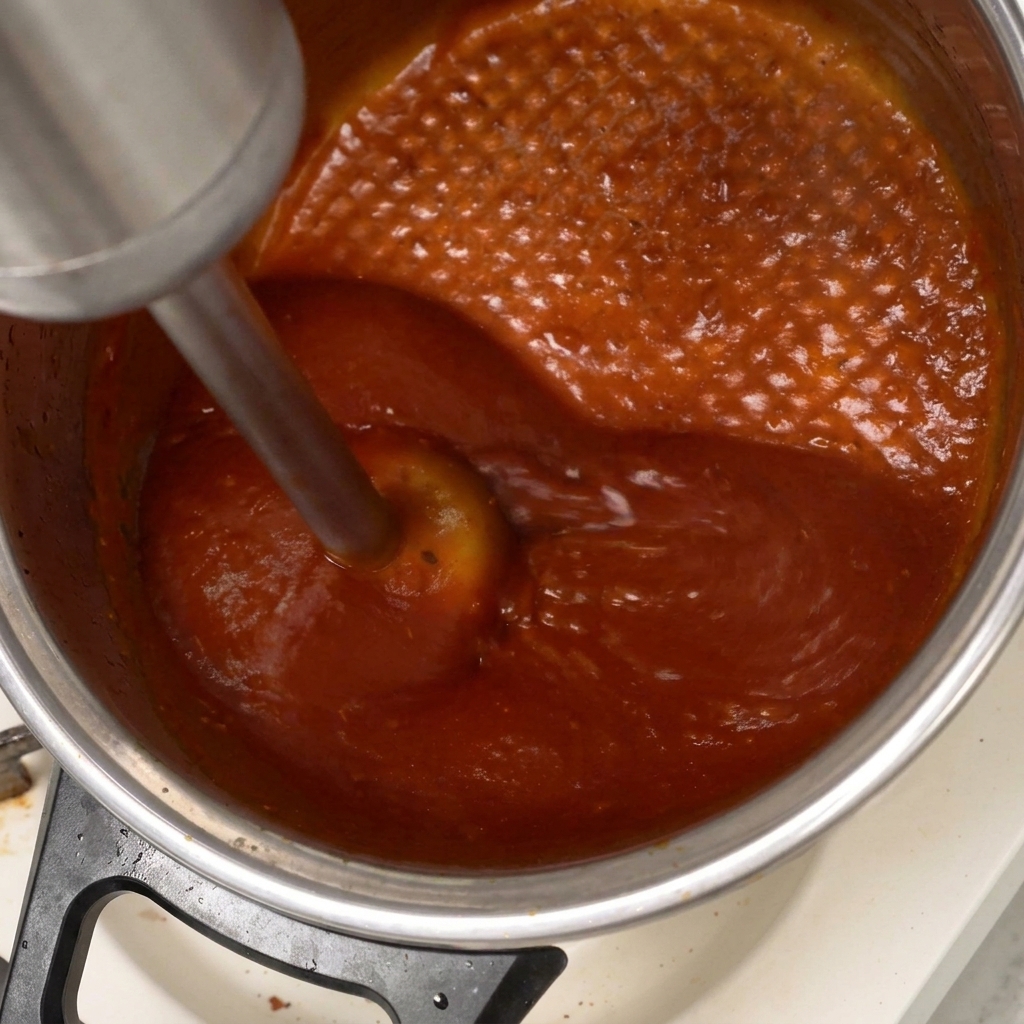
Once the sauce has thickened and the flavors have melded, use an immersion blender to purée the mixture directly in the pot. Blend continuously until the sauce reaches a silky, smooth consistency with no visible chunks of onion or garlic remaining.
Tip: Keep the blender blade fully submerged near the bottom of the pot while mixing to avoid splattering the hot liquid. - 11Glaze the roasted ribs
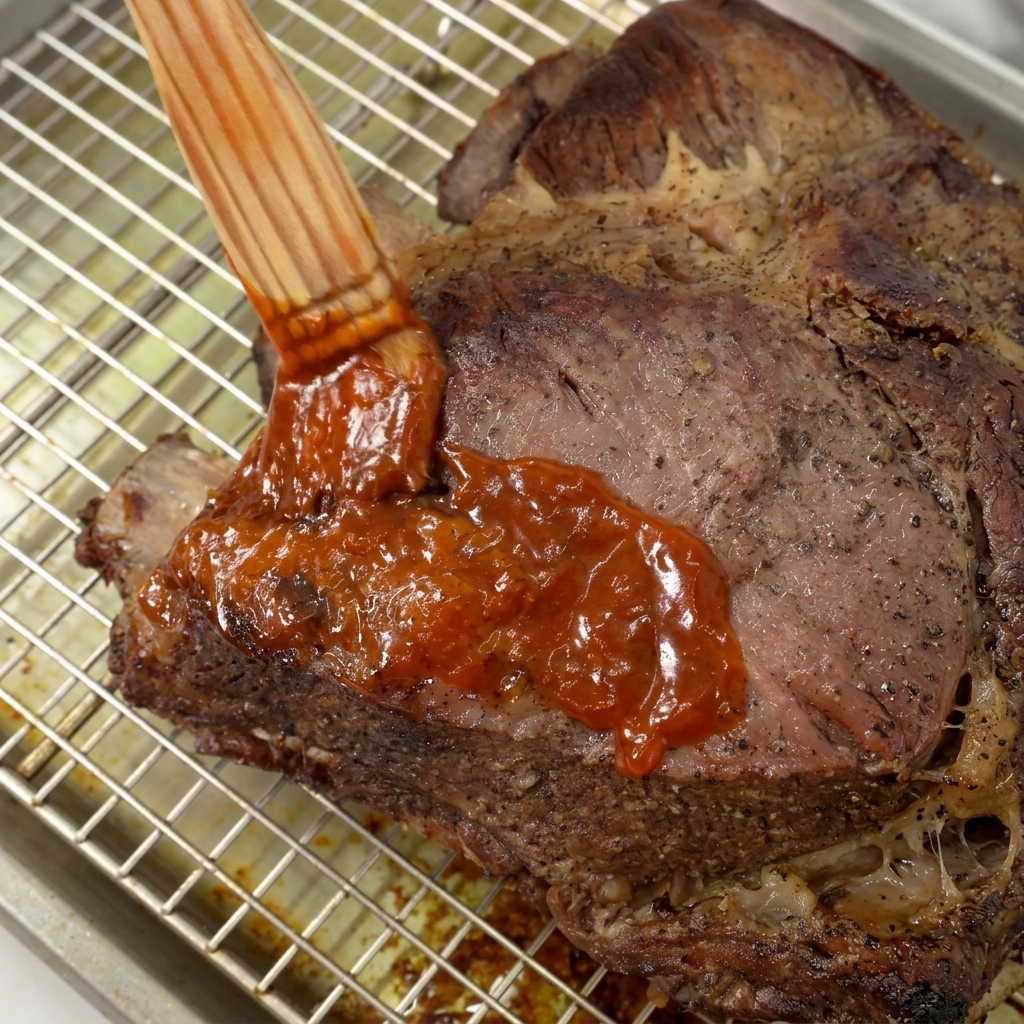
Remove the slow-roasted beef short ribs from their foil wrapping and place them on a wire rack set over a baking sheet. Using a basting brush, generously coat every side of the tender beef ribs with the smooth, warm homemade barbecue sauce.
Tip: Apply the sauce thickly and evenly, ensuring it gets into all the crevices for maximum flavor in every bite. - 12Caramelize in the oven
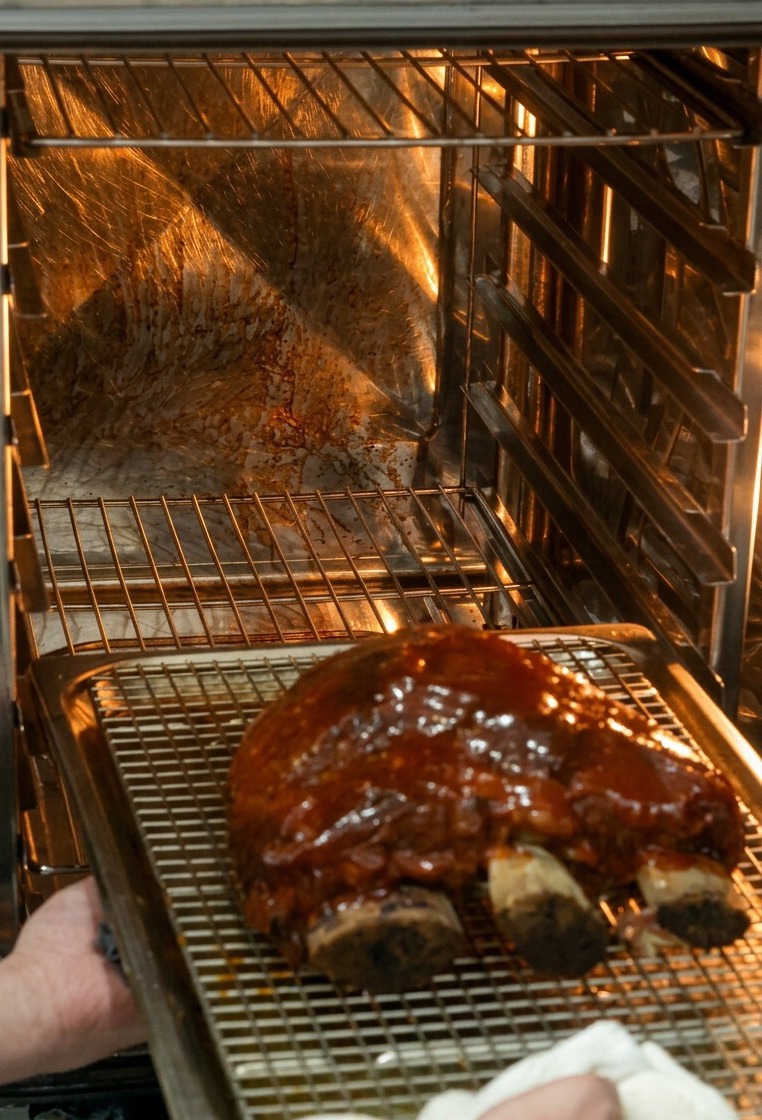
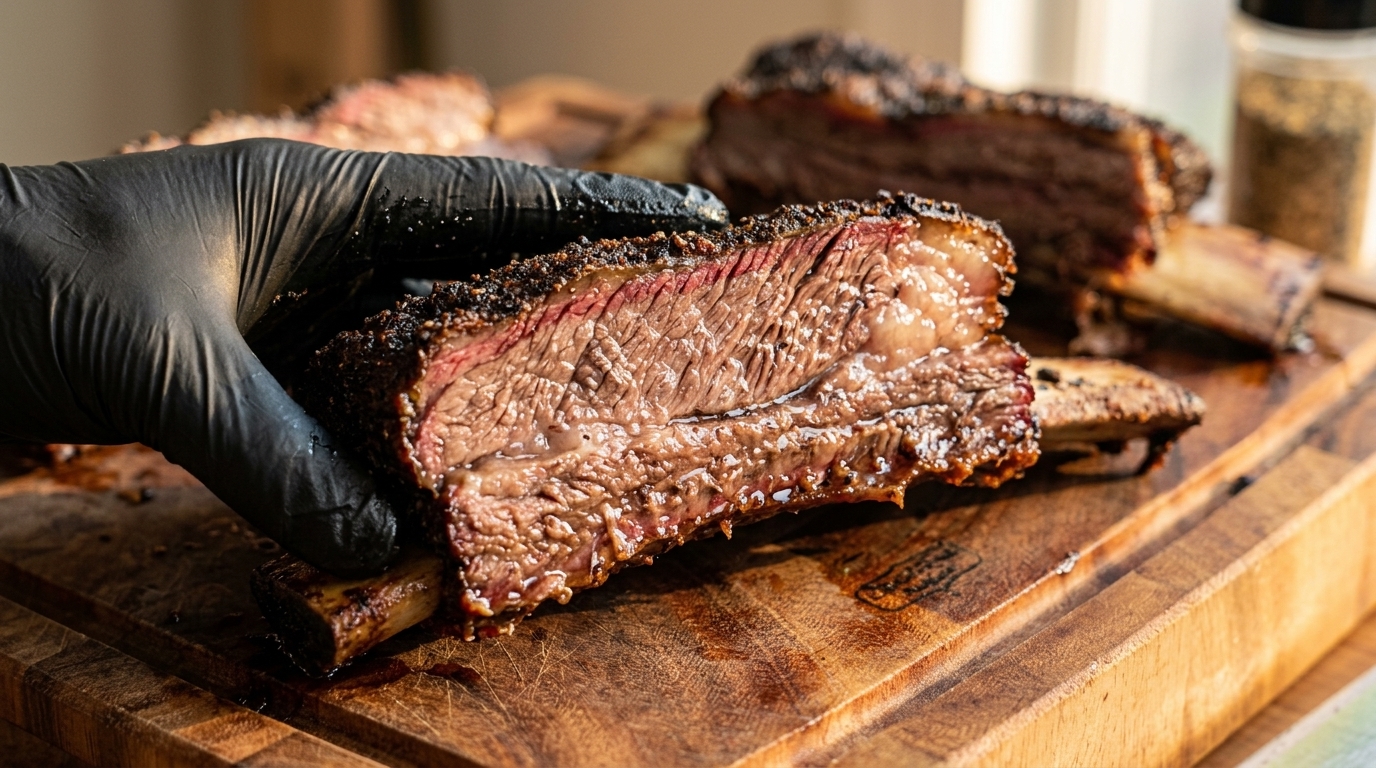
Return the fully glazed beef ribs to the oven, now heated to 200°C. Bake for an additional eight minutes to allow the sugars in the barbecue sauce to caramelize, forming a sticky, slightly charred, and intensely flavorful crust on the outside of the meat.
Tip: Keep a close eye on the ribs during this final high-heat bake; the high sugar content in the barbecue sauce can go from perfectly caramelized to burnt very quickly. - 13Slice and serve the beef ribs
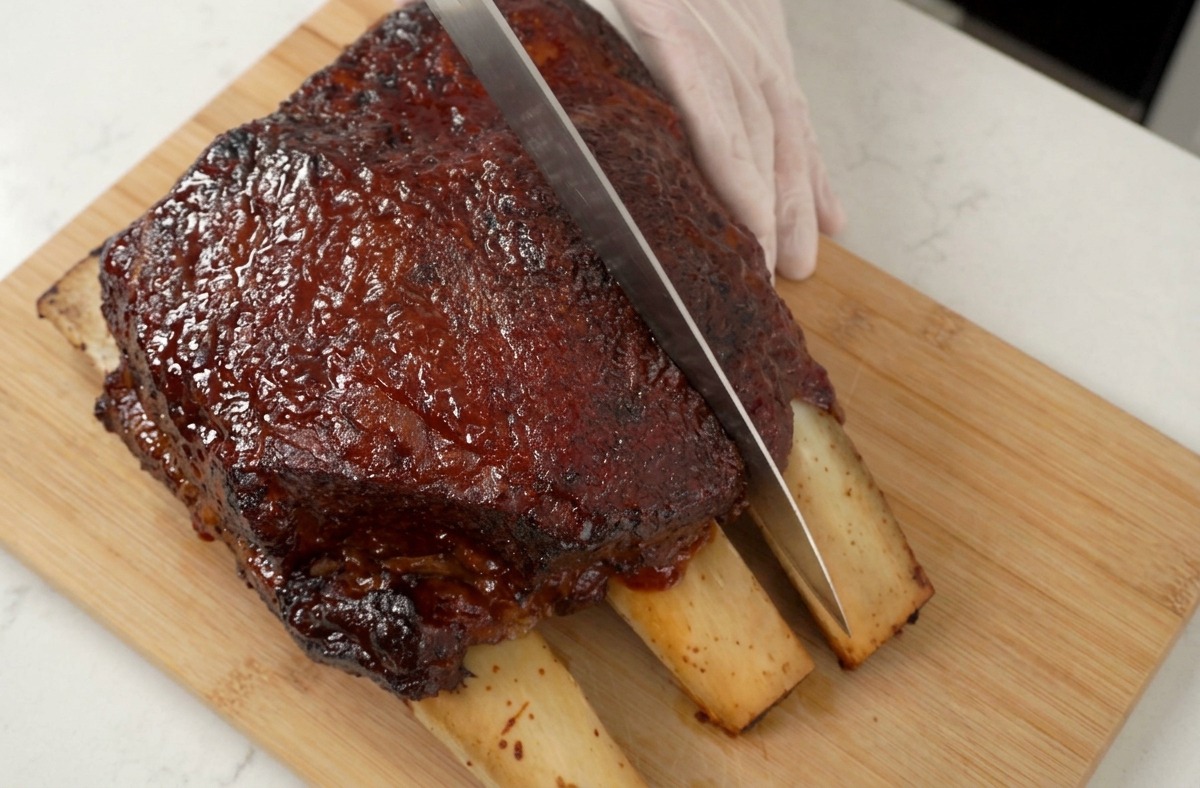
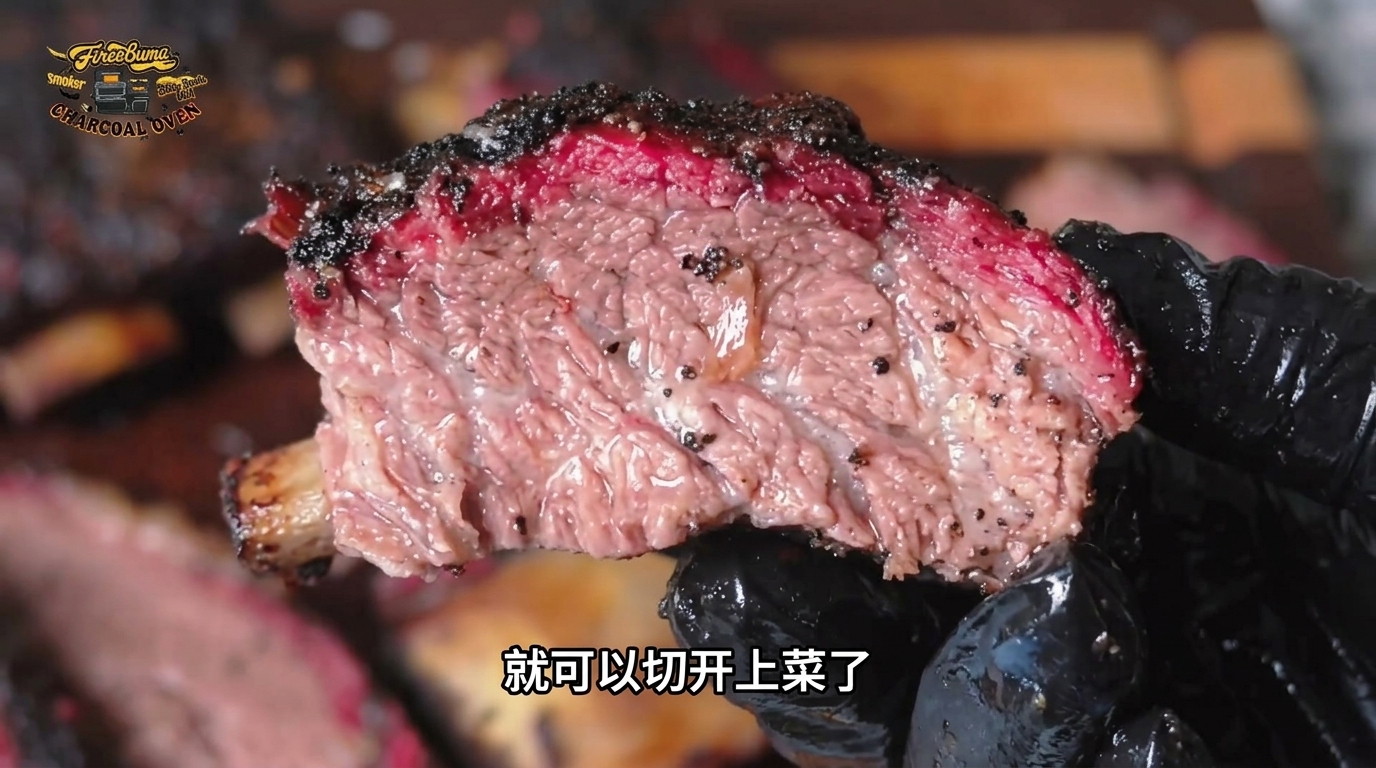
Once the beef ribs have caramelized and rested for a few minutes, use a sharp knife to slice through the tender meat between the bones. The meat should be so succulent that the knife glides through easily, revealing the juicy interior beneath the rich, dark glaze.
Tip: Letting the ribs rest for 10-15 minutes before slicing is crucial; it allows the juices to redistribute, ensuring every bite is moist rather than losing flavor to the cutting board.