Authentic Oyakodon (Japanese Chicken
Egg Bowl)
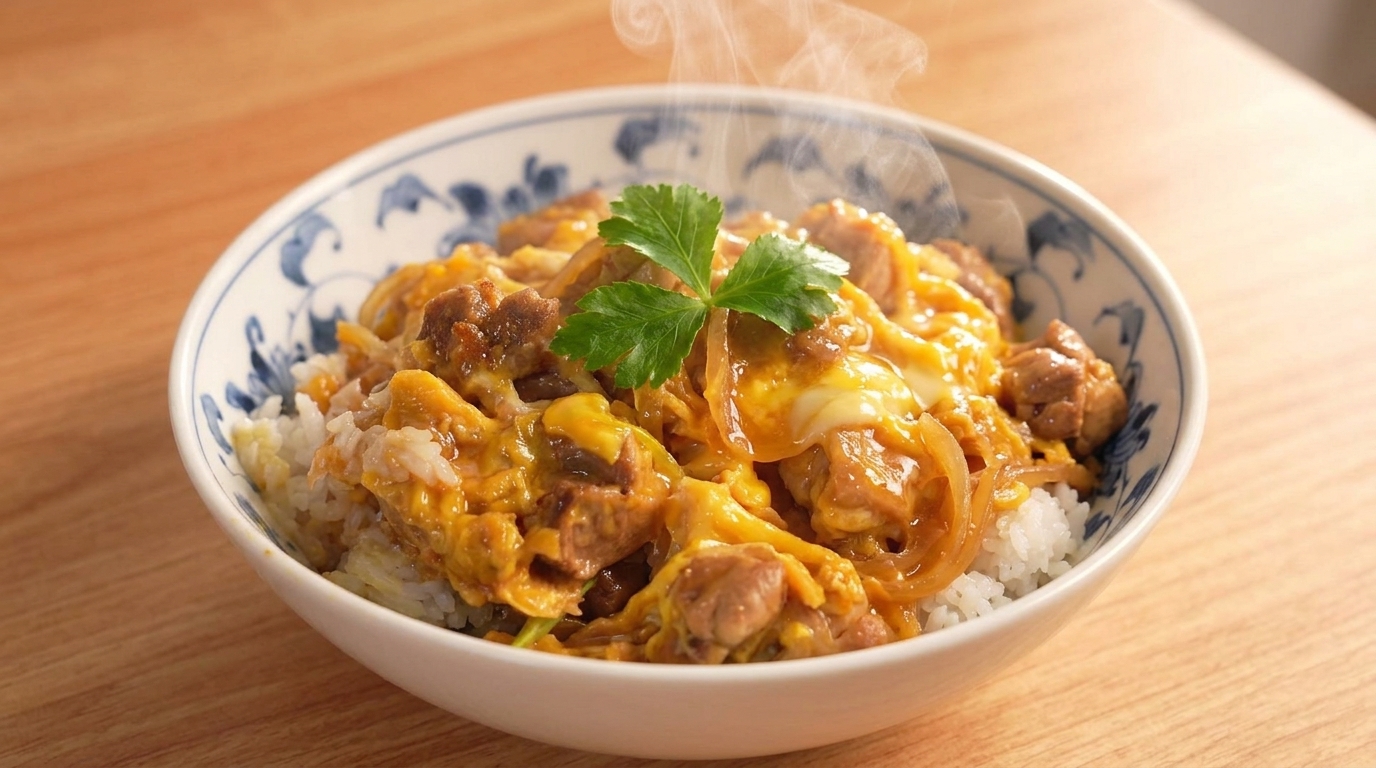
A comforting Japanese soul food staple: tender chicken and onions simmered in a dashi-soy broth, blanketed in a silky, marbled egg topping over rice.
Oyakodon translates literally to parent-and-child bowl, a poetic nod to the chicken and egg used in the dish. It is a cornerstone of Japanese home cooking, prized for its delicate balance of sweet and savory flavors. While many versions skip it, this recipe uses a traditional blanching technique to ensure the cleanest possible flavor and a beautifully springy texture for the chicken.
Ingredients
- 2 boneless chicken thighs
- 12 white onion
- 2 large eggs
- 2 tbsp soy sauce
- 2 tbsp mirin
- 2 tbsp cooking wine or sake
- 1 tsp sugar
- 1 tsp dashi powder
- a few stems fresh mitsuba or radish sprouts
- 2 bowls steamed white rice
Instructions
- 1Prepare the chicken thighs
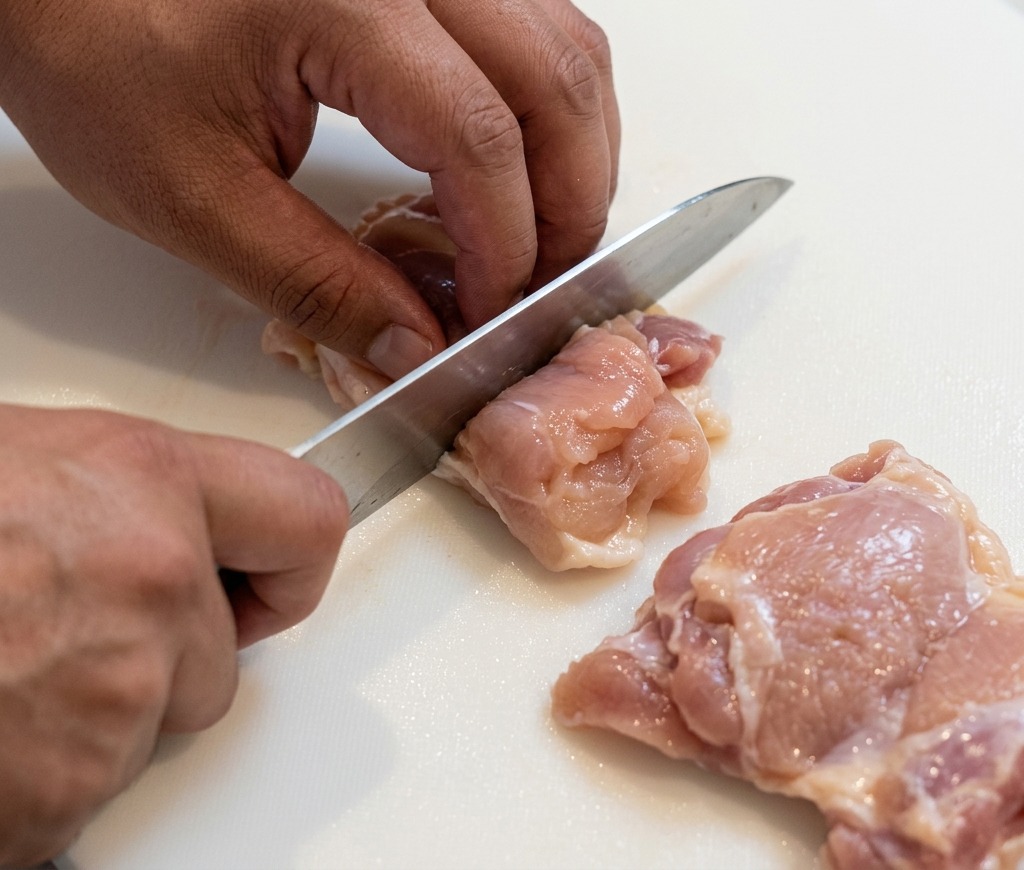
Start by cutting two pieces of chicken thigh into bite-sized chunks. Using thighs instead of breasts ensures the meat remains juicy and tender throughout the cooking process. Aim for uniform pieces so they cook evenly later in the pan.
Tip: For easier cutting, make sure your knife is sharp and slightly trim any large pieces of excess yellow fat if desired. - 2Blanch the chicken
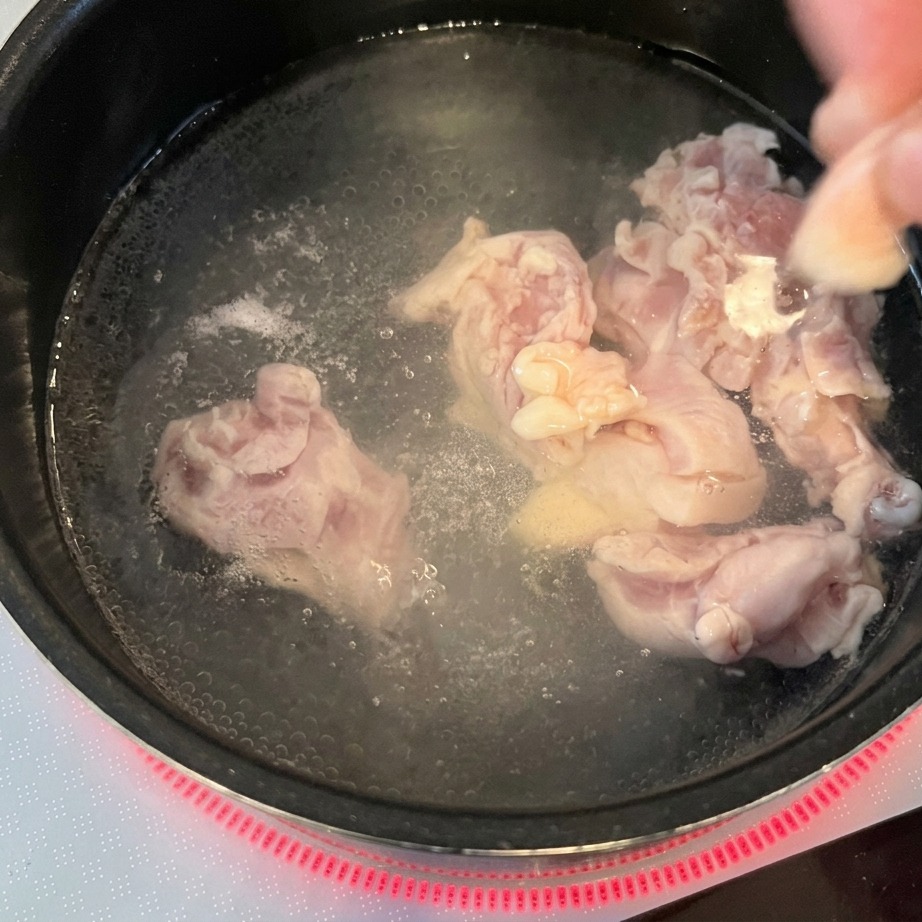
Carefully add the chicken chunks into a pot of boiling water. Blanching the meat is a key technique that removes blood and impurities, leading to a much better, springier texture and a cleaner final sauce.
Tip: You only need to blanch them until the outside turns opaque; dont worry about cooking them all the way through at this stage. - 3Remove impurities with oil paper
While the chicken is blanching, place a piece of oil-absorbing paper directly onto the surface of the boiling water. The paper will soak up the foam and scum that rise to the top, ensuring the broth and meat remain clean and free of unwanted odors.
Tip: Using oil paper is much more efficient than skimming with a spoon as it covers more surface area at once. - 4Slice the onion
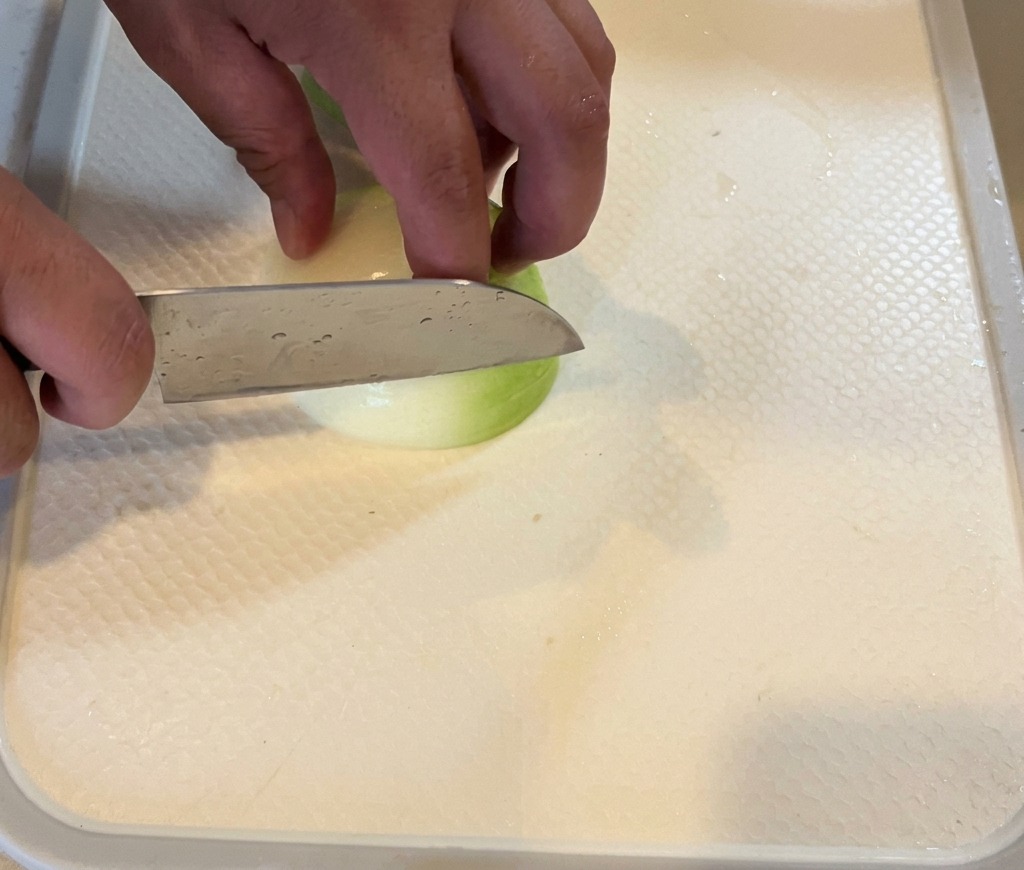
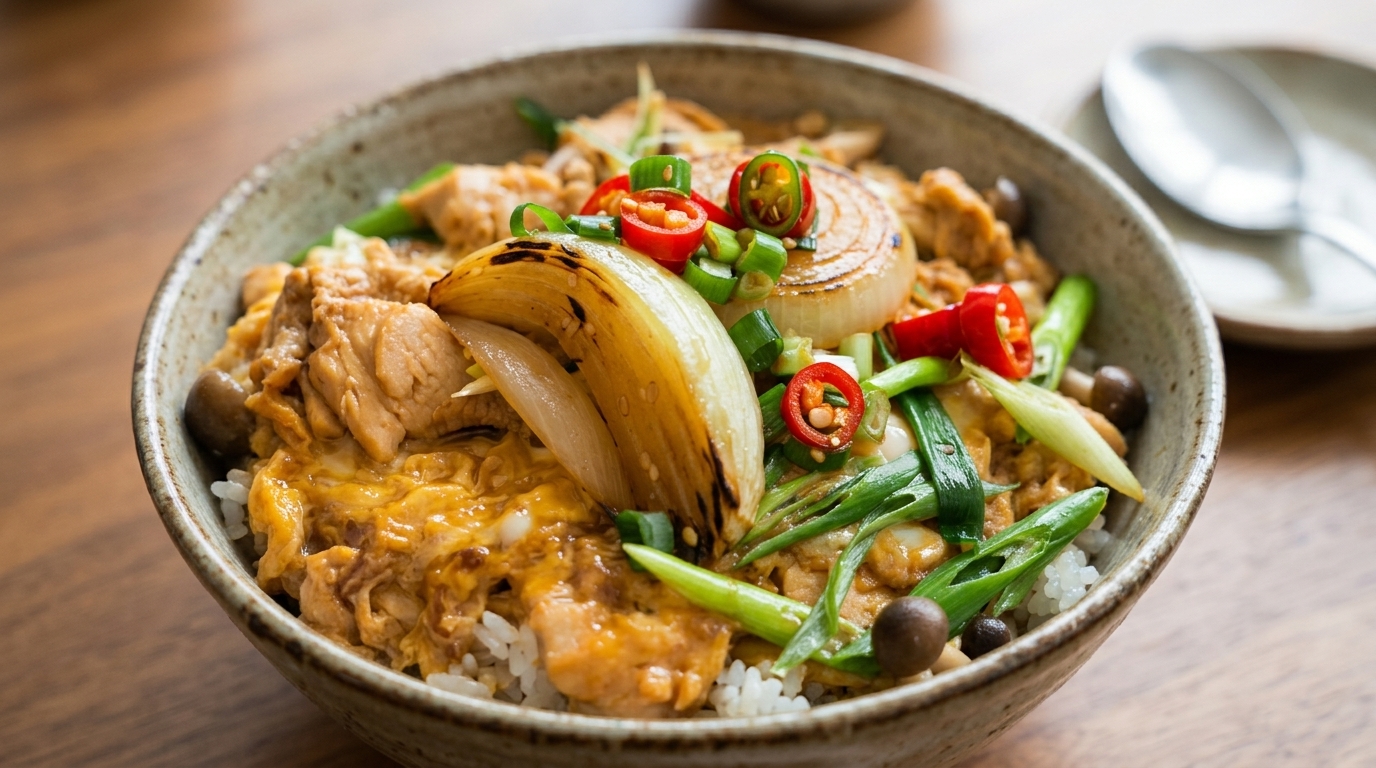
Prepare the aromatics by slicing half of a fresh white onion into thin segments. Onions provide the base sweetness for the dish and will eventually soften beautifully into the savory egg and chicken mixture.
Tip: Slice with the grain of the onion to help the pieces keep their shape during simmering. - 5Mix the Oyakodon sauce
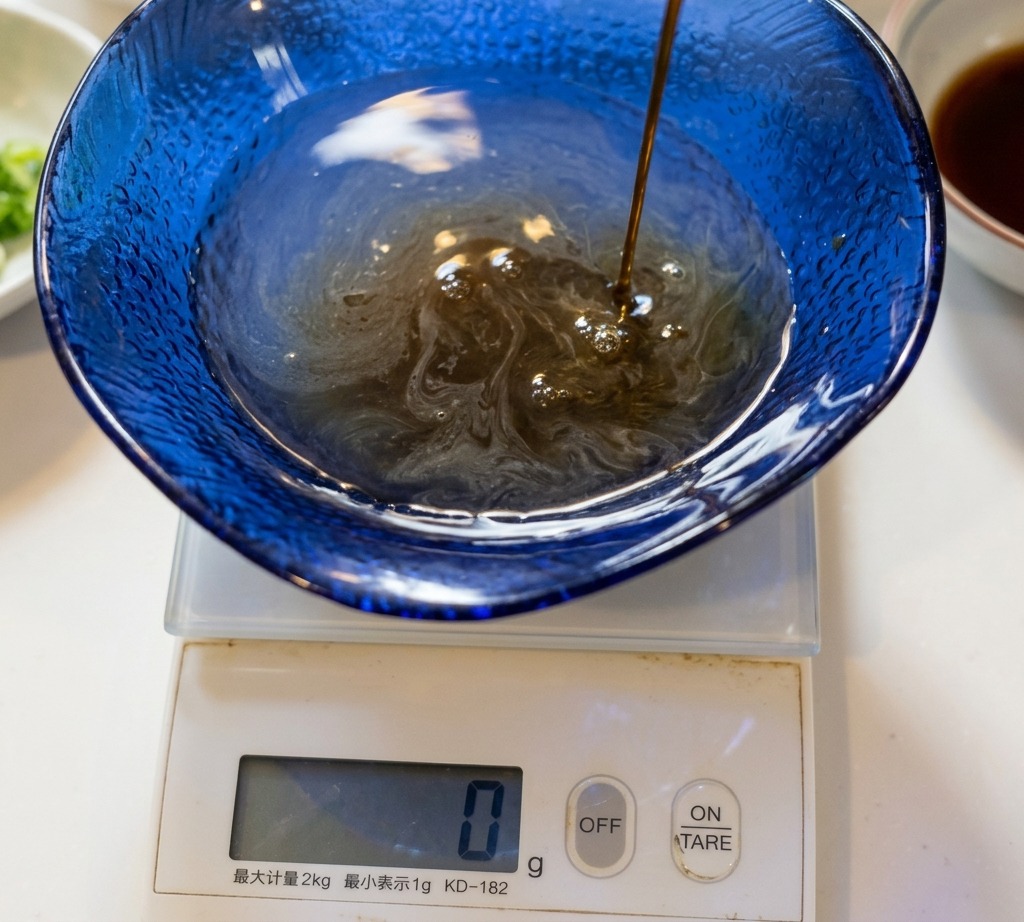
Combine the sauce by mixing two spoons each of soy sauce, mirin, and cooking wine into a bowl. Add a small spoonful of sugar and a dash of dashi powder. Using a kitchen scale ensures the ratios are perfect for that authentic Japanese restaurant flavor.
Tip: If you prefer a saltier sauce, you can slightly increase the soy sauce, but keep the mirin and sugar balanced to maintain the sweet and savory profile. - 6Warm the sauce base
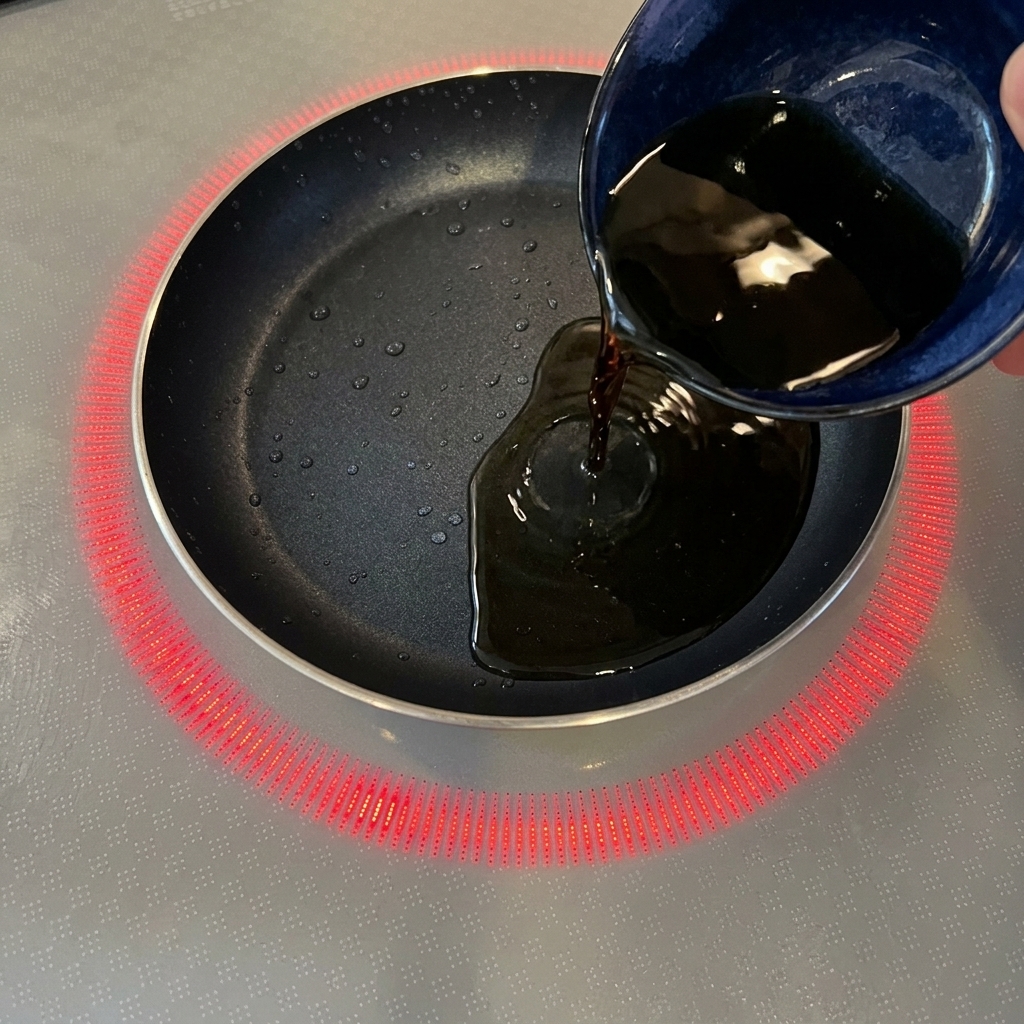
Pour the prepared sauce mixture—containing soy sauce, mirin, cooking wine, sugar, and dashi—into a small frying pan over medium heat.
Tip: Using a smaller pan helps the sauce stay deep enough to properly cook the ingredients without evaporating too quickly. - 7Simmer the chicken
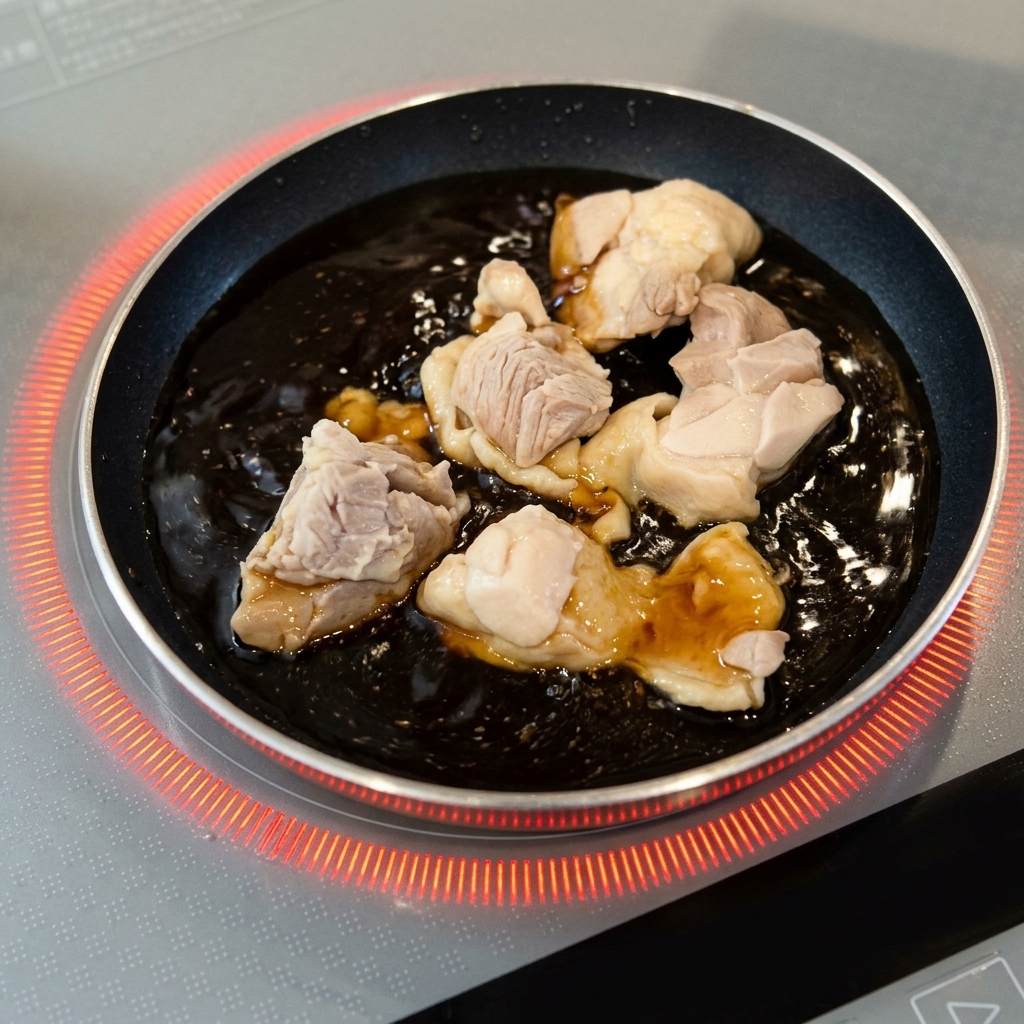
Place the blanched chicken thigh chunks into the pan with the sauce. Allow the meat to simmer for approximately three minutes. This time lets the chicken absorb the savory-sweet flavors of the broth while finishing its cooking process.
Tip: Dont overcook the chicken here; it will continue to cook as you add the egg layers in the next steps. - 8Add the sliced onions
Add the sliced onions to the pan with the chicken and sauce. Simmer for about two minutes until the onions soften and begin to absorb the savory liquid.
Tip: Simmering the onions briefly keeps them slightly crisp; cook for an extra minute if you prefer them completely translucent and soft. - 9Prepare the egg wash
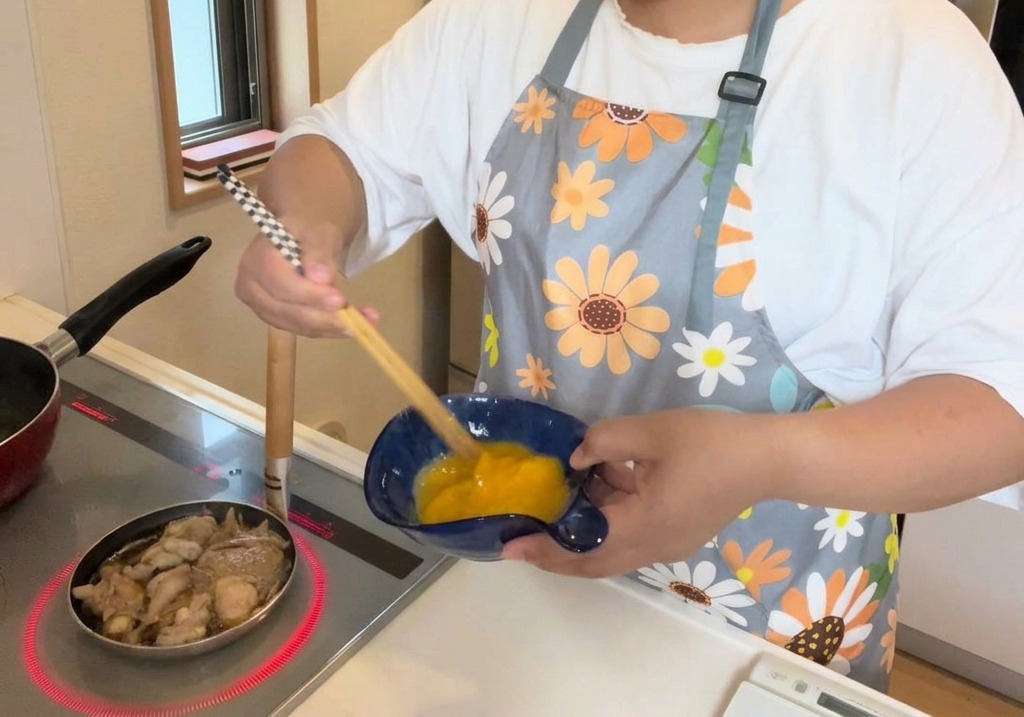
Crack two eggs into a small bowl. Use chopsticks to beat them until the yolks and whites are just combined. This egg wash will be added in two stages later to ensure the Oyakodon has a perfect, fluffy texture.
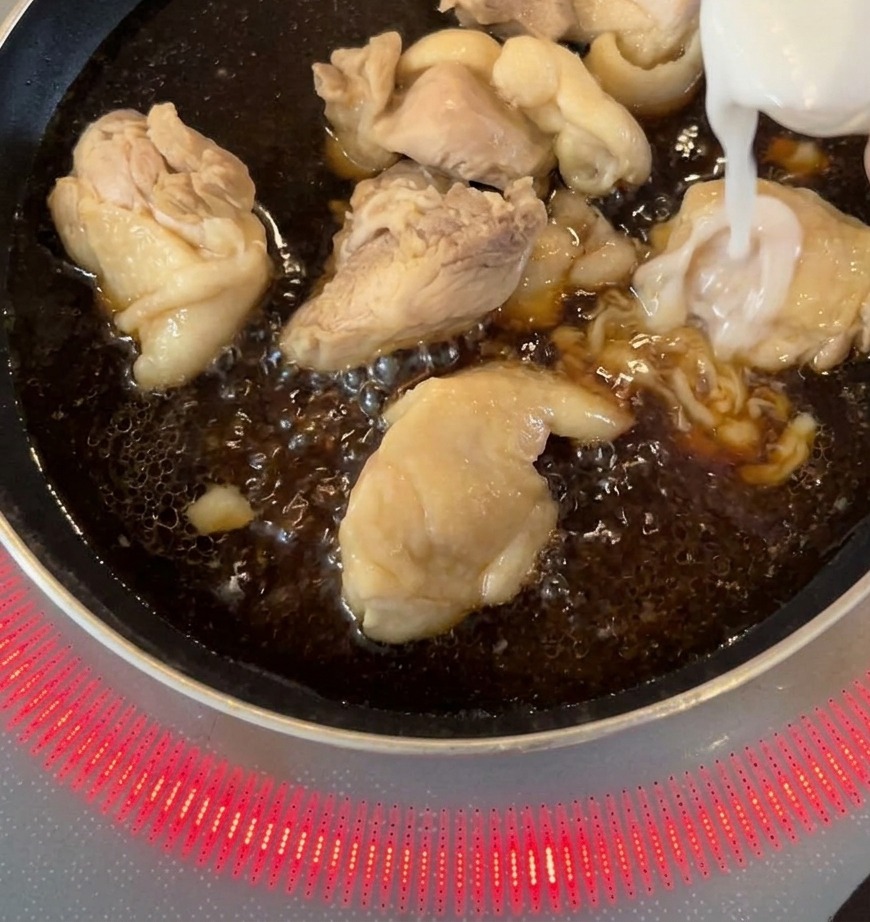
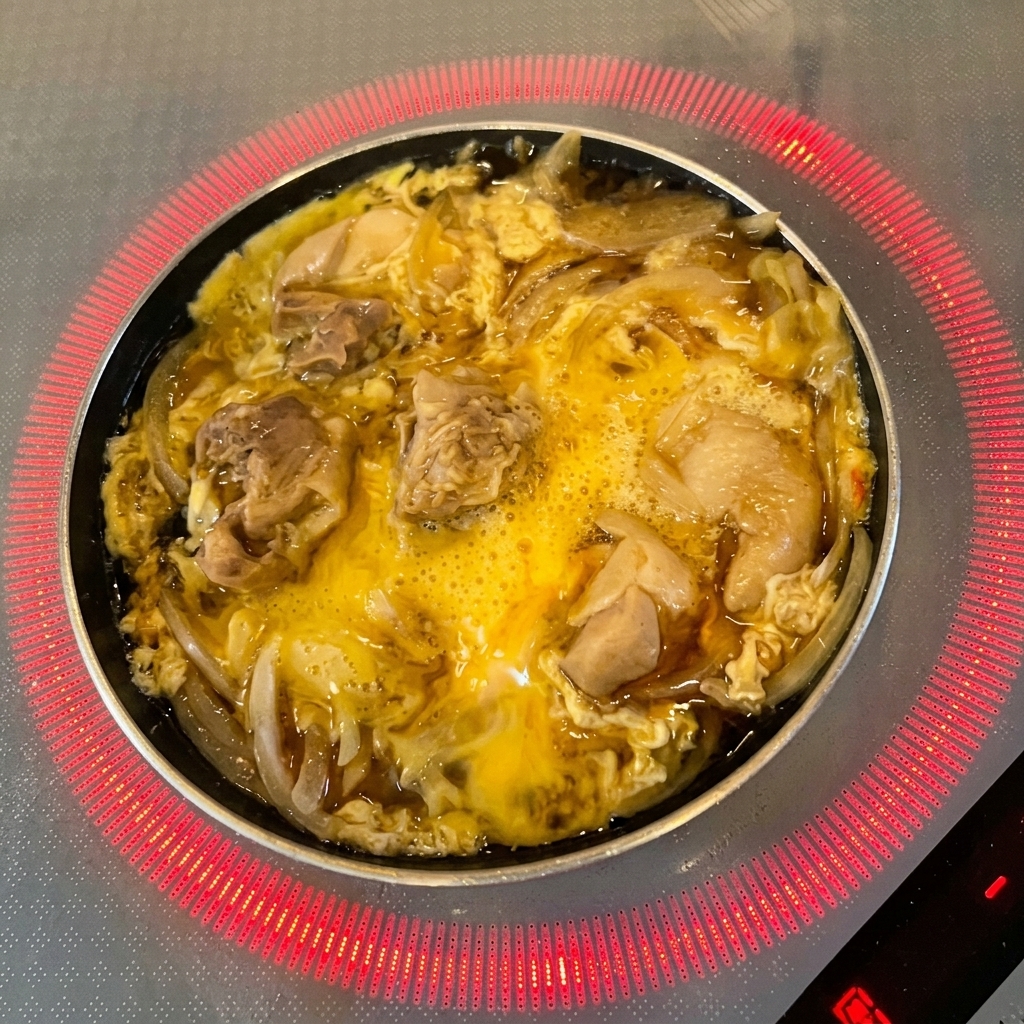
Tip: For a more traditional look, avoid over-beating the eggs; leaving some visible streaks of white and yellow creates a beautiful marbled effect in the final dish. - 10Add the first egg layer

Pour approximately half of the beaten egg wash over the chicken and onions in a circular motion. Let it cook undisturbed until it starts to set.
Tip: Pour the egg in a swirling motion from the center outward to ensure it covers all the chicken and onion pieces evenly. - 11Garnish with mitsuba
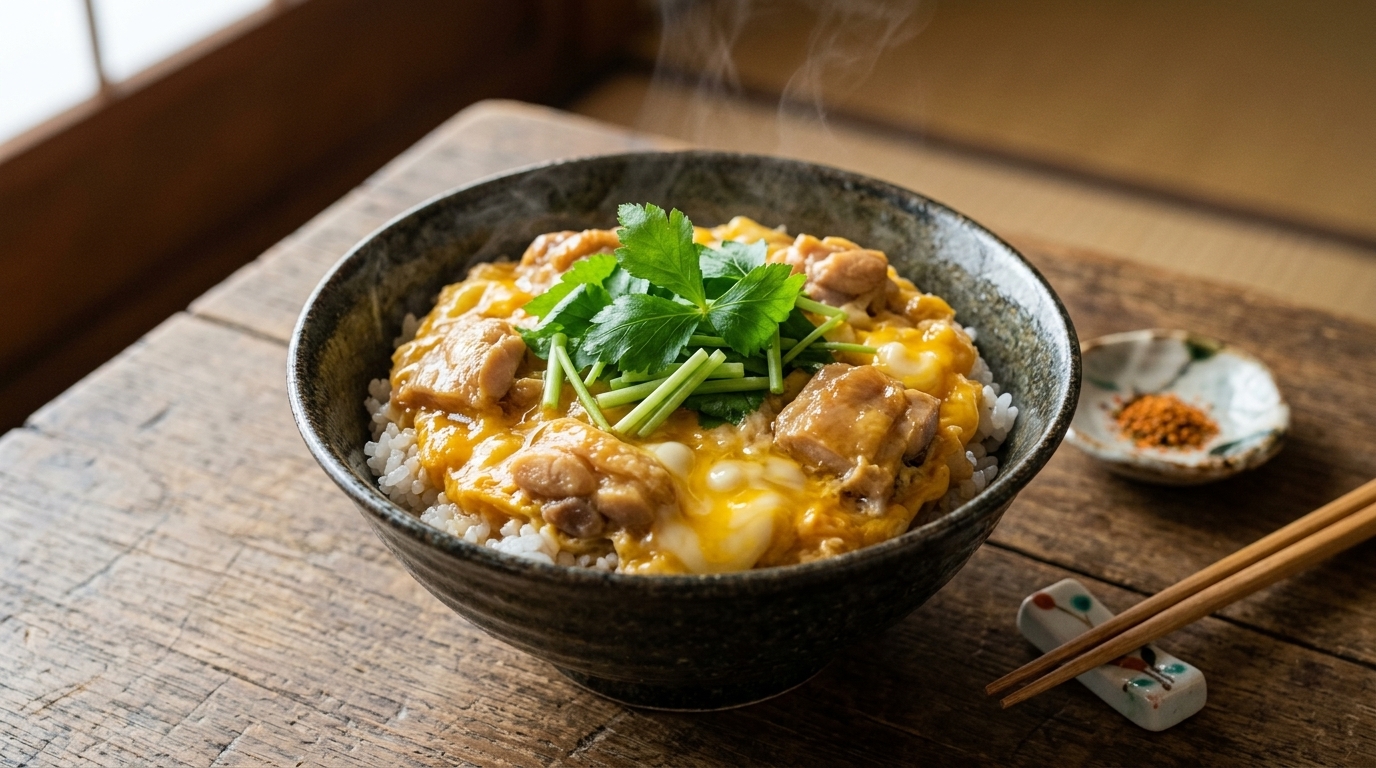
Scatter the fresh mitsuba leaves over the partially set eggs. The residual heat will gently wilt them, releasing their herbal aroma.
Tip: Mitsuba has a delicate flavor similar to celery and parsley; adding it now lets it wilt just enough to release its aroma without losing its bright color. - 12Add the final egg layer
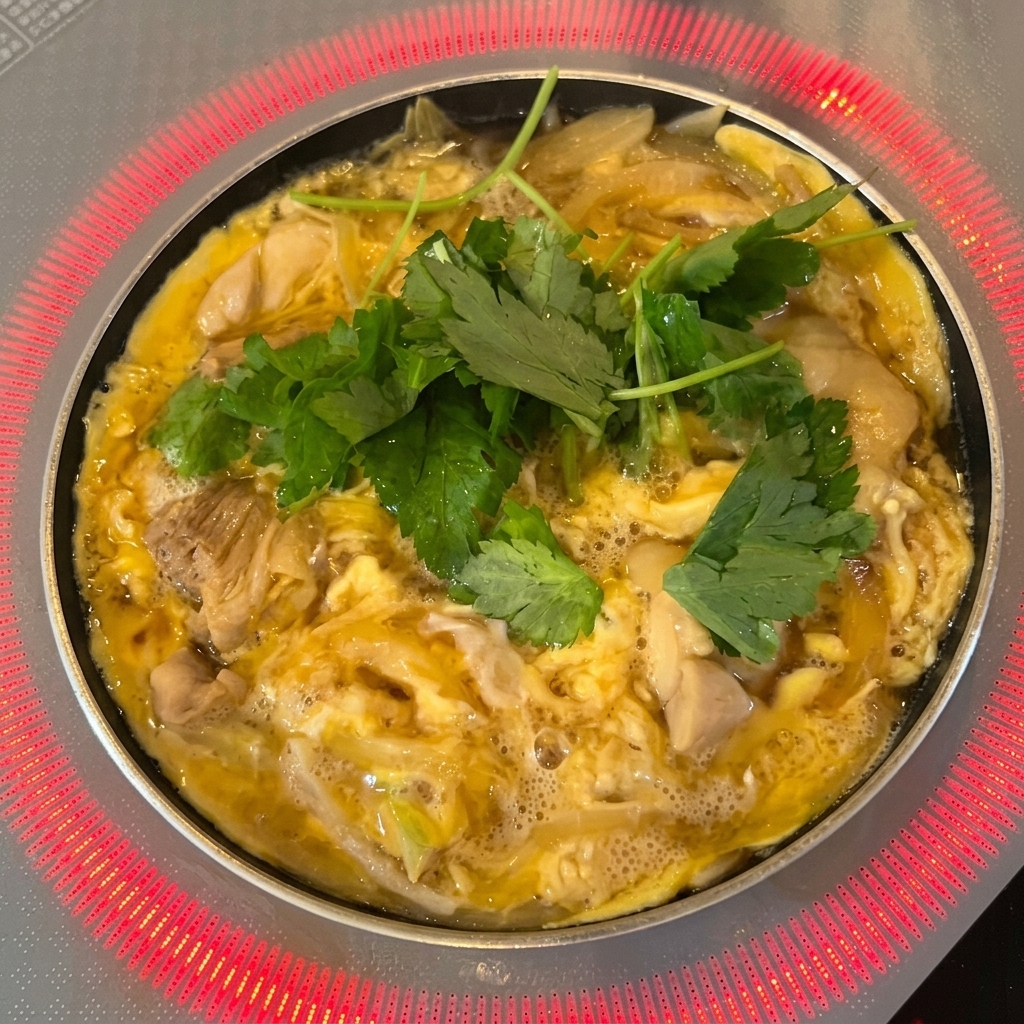
Drizzle the remaining egg wash over the top. Cook for just a few more seconds until the edges are set but the center remains creamy and glossy.
Tip: If mitsuba is unavailable, radish sprouts or roughly chopped cilantro make excellent fresh substitutes. - 13Serve over rice
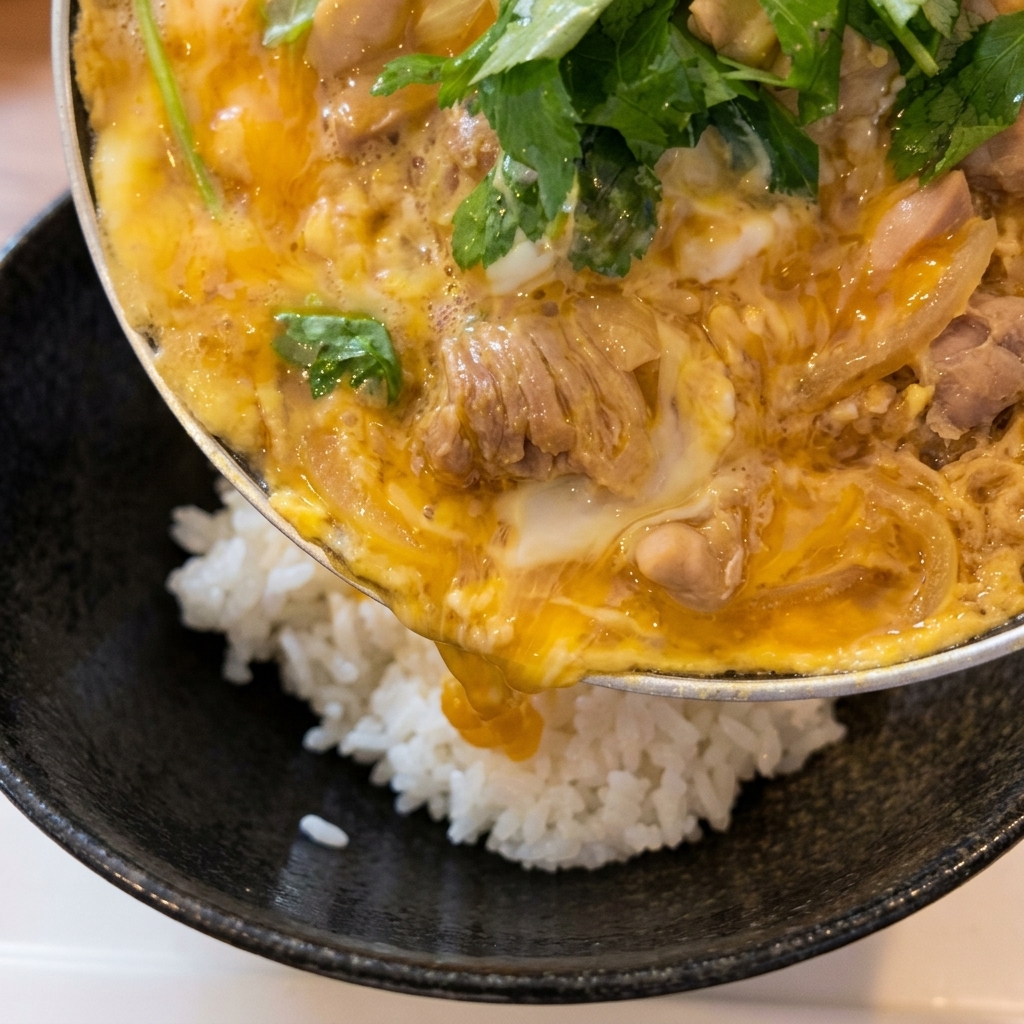
Gently tilt the pan to slide the finished chicken and egg topping onto a bowl of steaming white rice. Ensure the savory sauce pours over the rice as well, as it will soak in and season every grain.
Tip: Use a gentle shaking motion or a small spatula to help the topping slide out in one cohesive piece.