Authentic Parma Ham
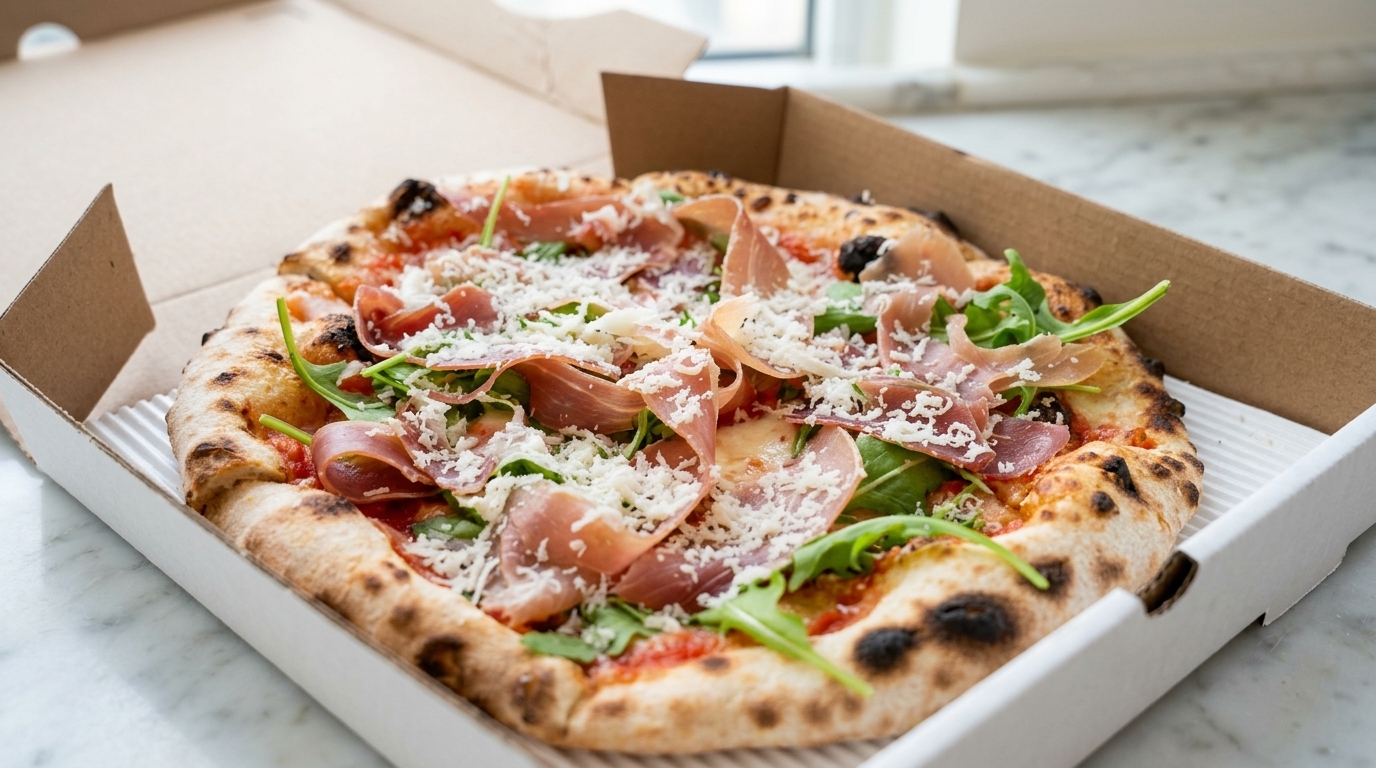
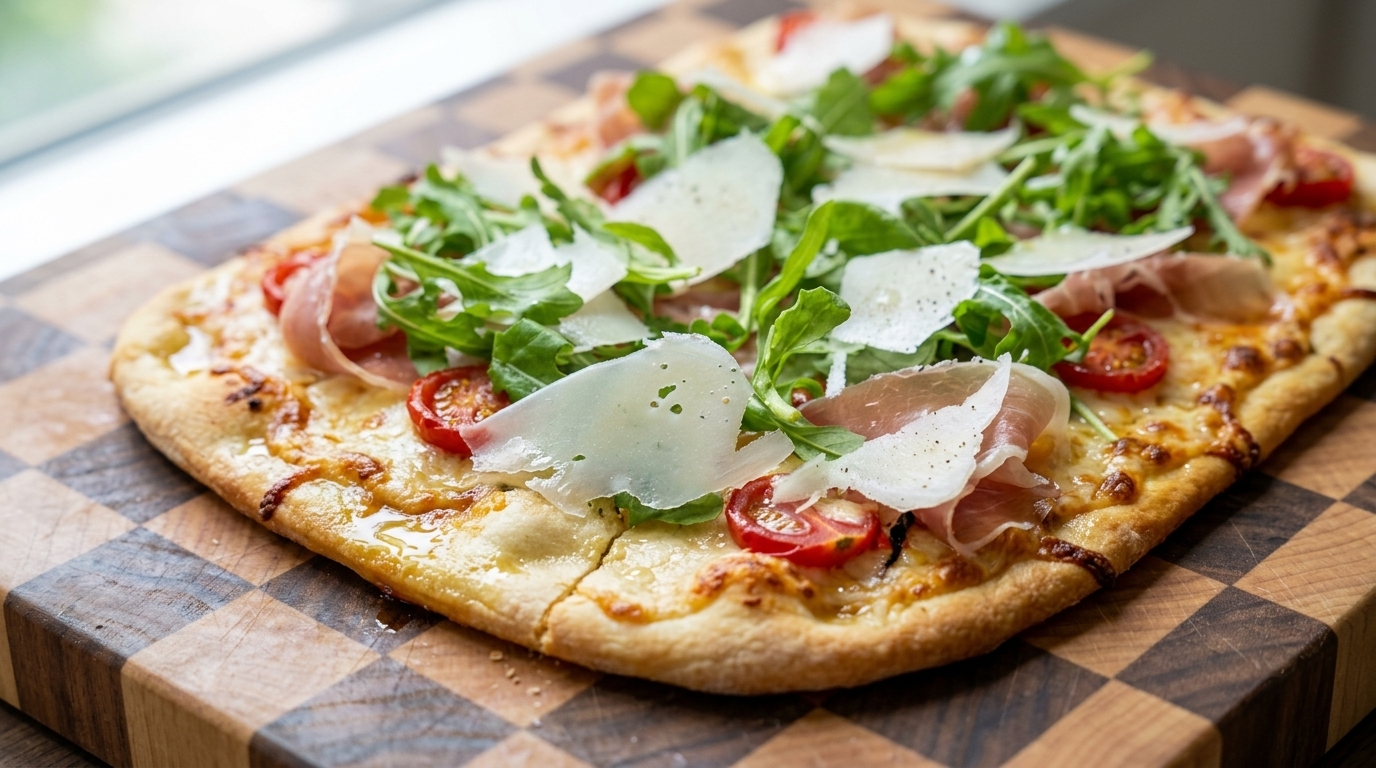
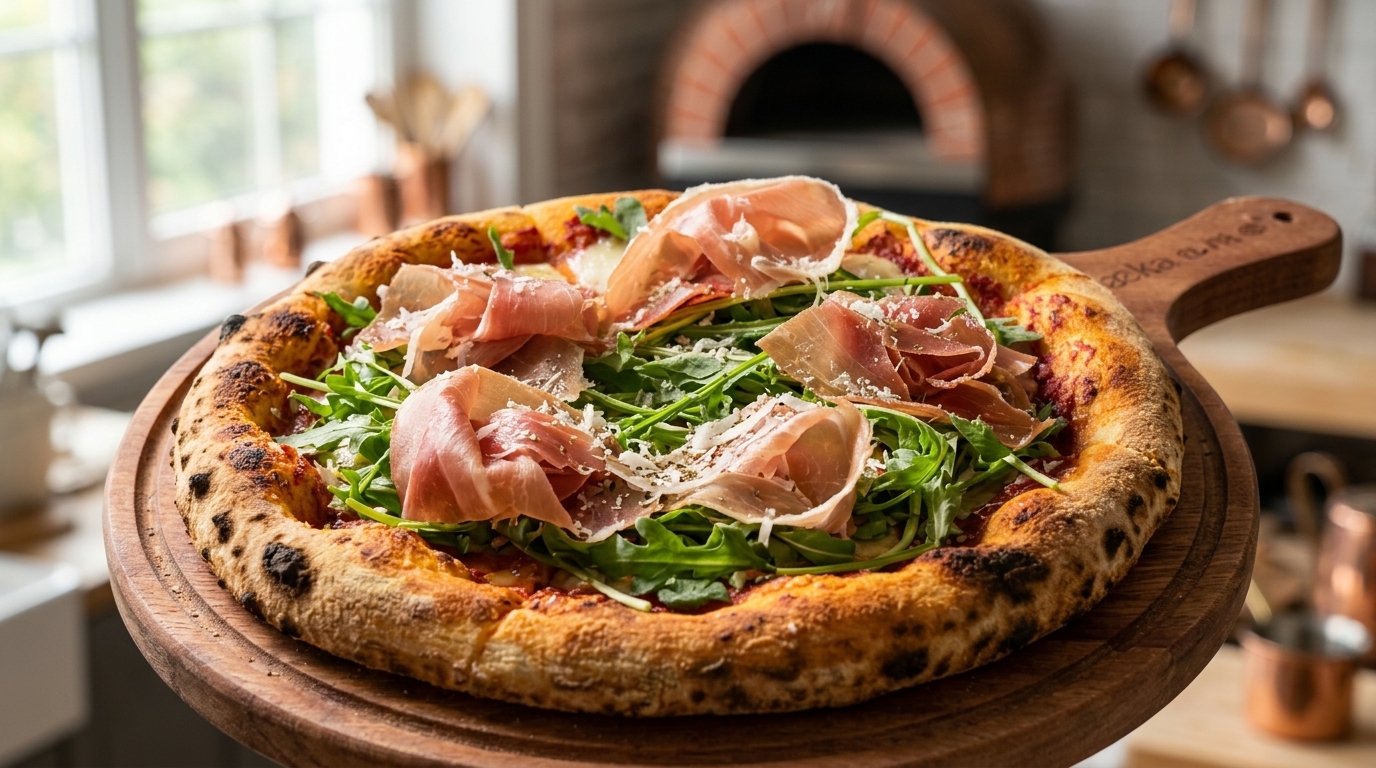
Arugula Pizza (Pizza Prosciutto e Rucola)
Master the art of Italian pizza with this no-knead, cold-fermented dough topped with savory Parma ham, peppery arugula, and rich mozzarella.
This modern Italian staple celebrates fresh and high quality ingredients with a perfect balance of flavors. The magic lies in the contrast between the hot charred crust and the cool fresh toppings added just before serving. A long cold fermentation creates a professional grade dough that is airy and easy to handle.
Ingredients
- 360 g high-gluten flour
- 250 g water
- 20 g olive oil
- 6 g salt
- 2.5 g dry yeast
- 100 g mozzarella cheese
- 80 g Italian pizza sauce
- 1 cup fresh arugula
- 6 slices Parma ham
- to taste Parmesan cheese
- to taste dried parsley
Instructions
- 1Prepare the yeast mixture
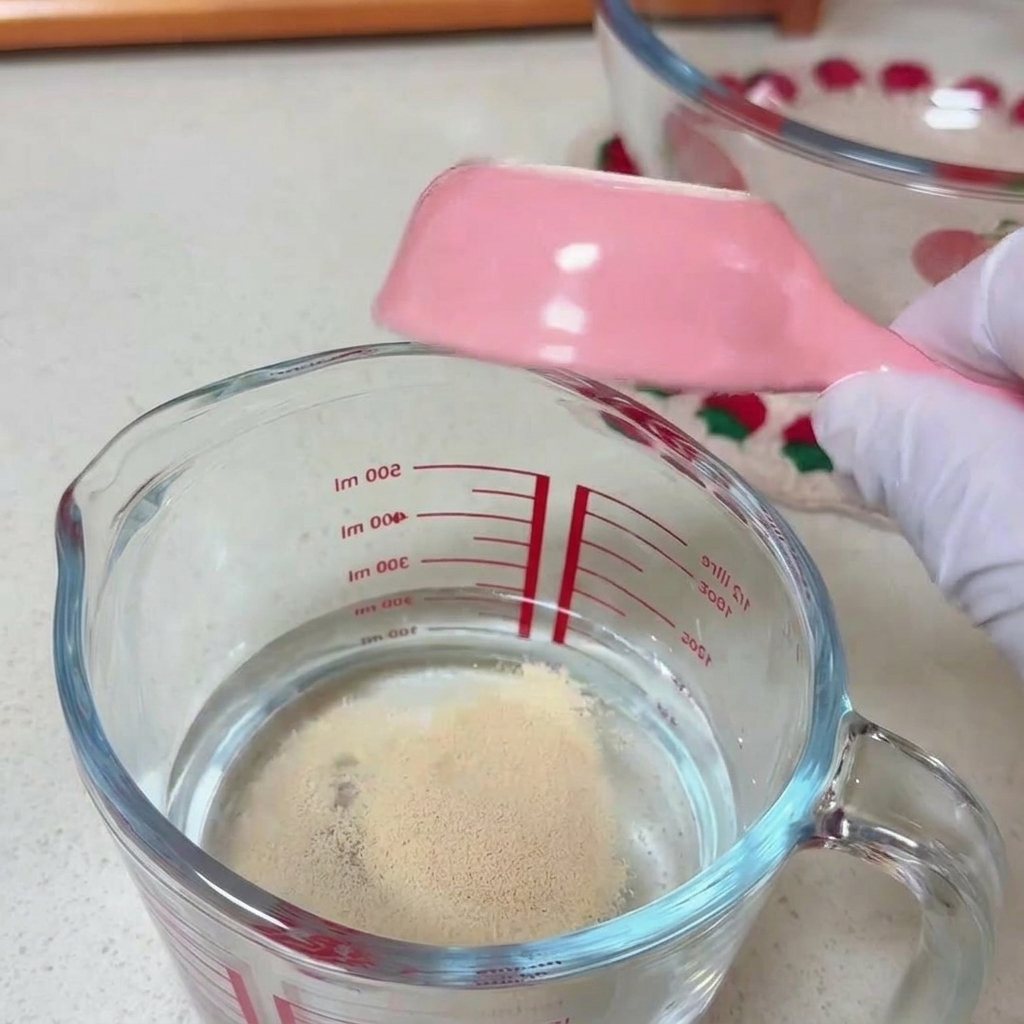
Begin by adding 2.5g of dry yeast into a measuring cup filled with 250g of water. Use a small spoon to stir the mixture gently until the yeast granules are mostly dissolved. This step ensures the yeast is properly hydrated and ready to leaven the dough.
Tip: Using room temperature water is ideal; if the water is too cold, the yeast will stay dormant longer, slowing down the overall fermentation process. - 2Combine the liquid and dry ingredients
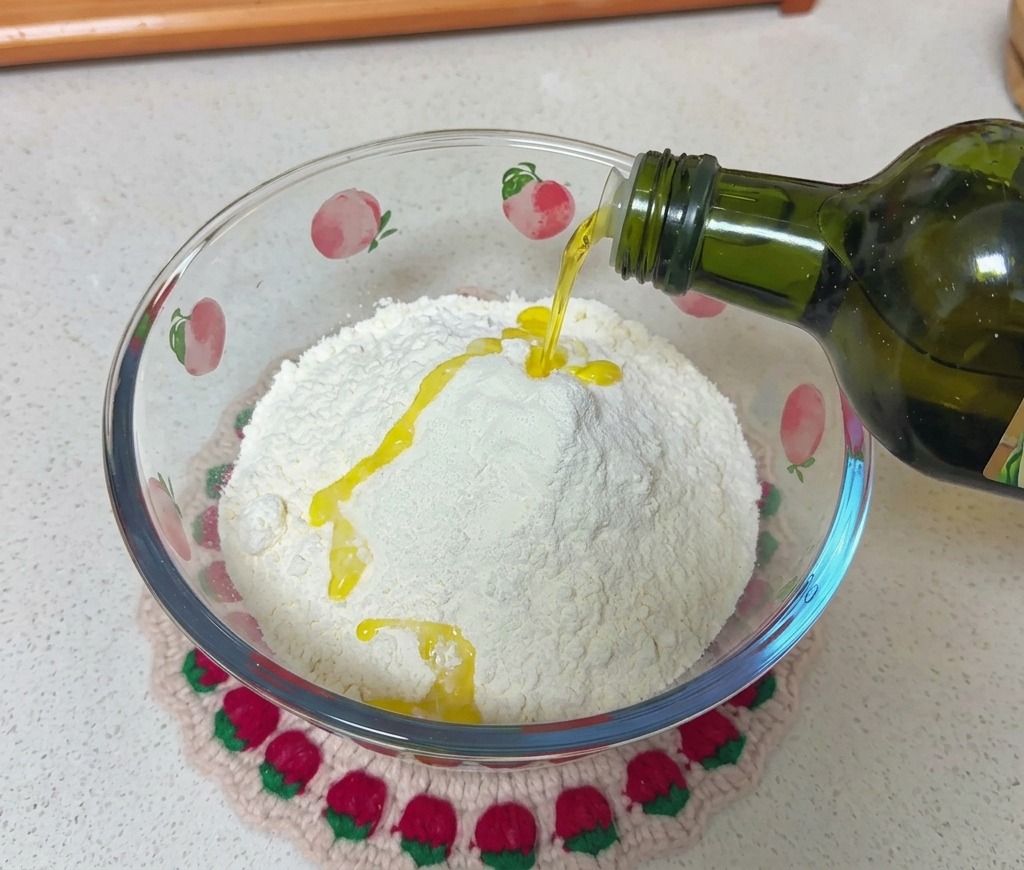
In a large glass bowl, combine 360g of high-gluten flour and 6g of salt. Pour 20g of olive oil into the center of the flour, followed by the prepared yeast and water mixture. These ingredients will form the foundation of your thin and crispy pizza crust.
Tip: High-gluten flour is essential for Italian-style pizza as it provides the necessary structure and chewiness that all-purpose flour cannot replicate. - 3Mix the ingredients
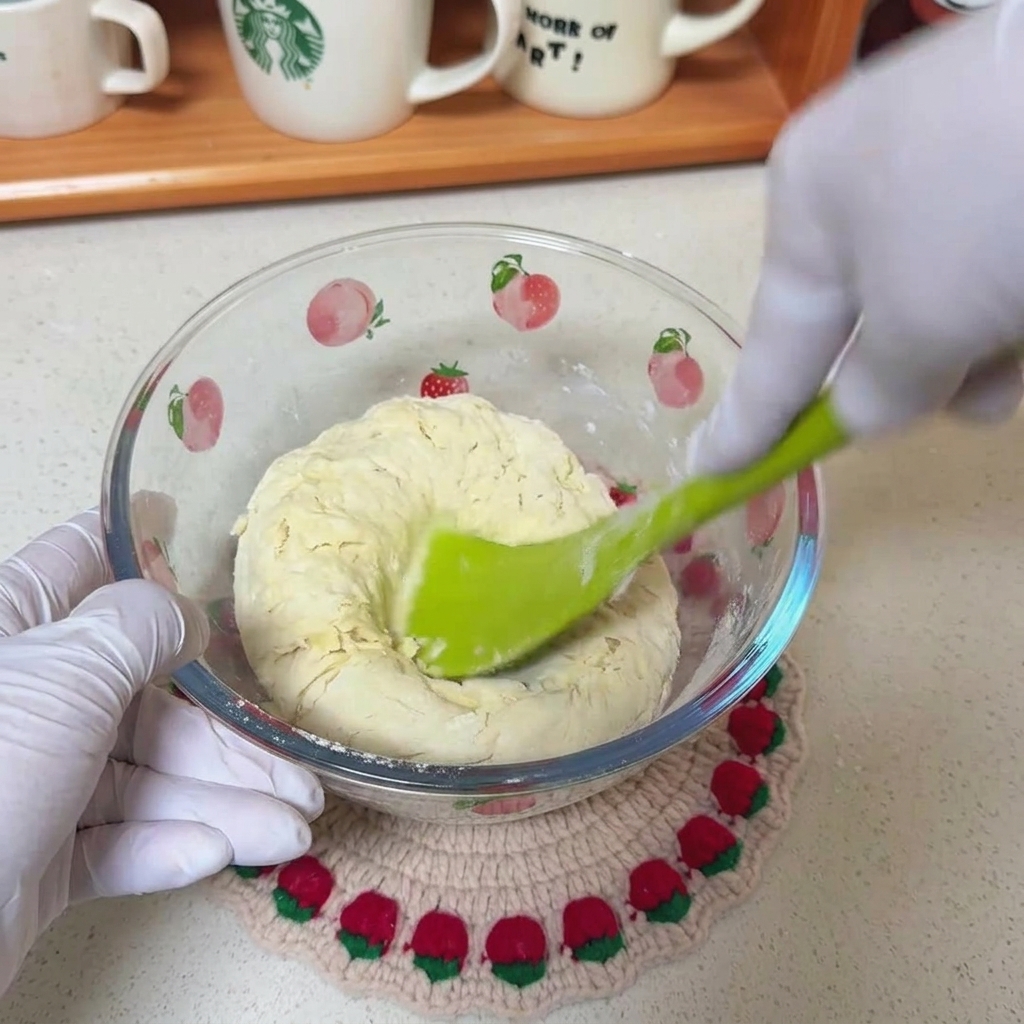
Use a spatula to stir the flour and liquid mixture together until all dry patches disappear. The goal is to form a shaggy dough where all components are fully integrated before the resting period begins.
Tip: Avoid overworking the mixture because the gluten structure will develop on its own during the fermentation process. - 4Perform stretch and fold
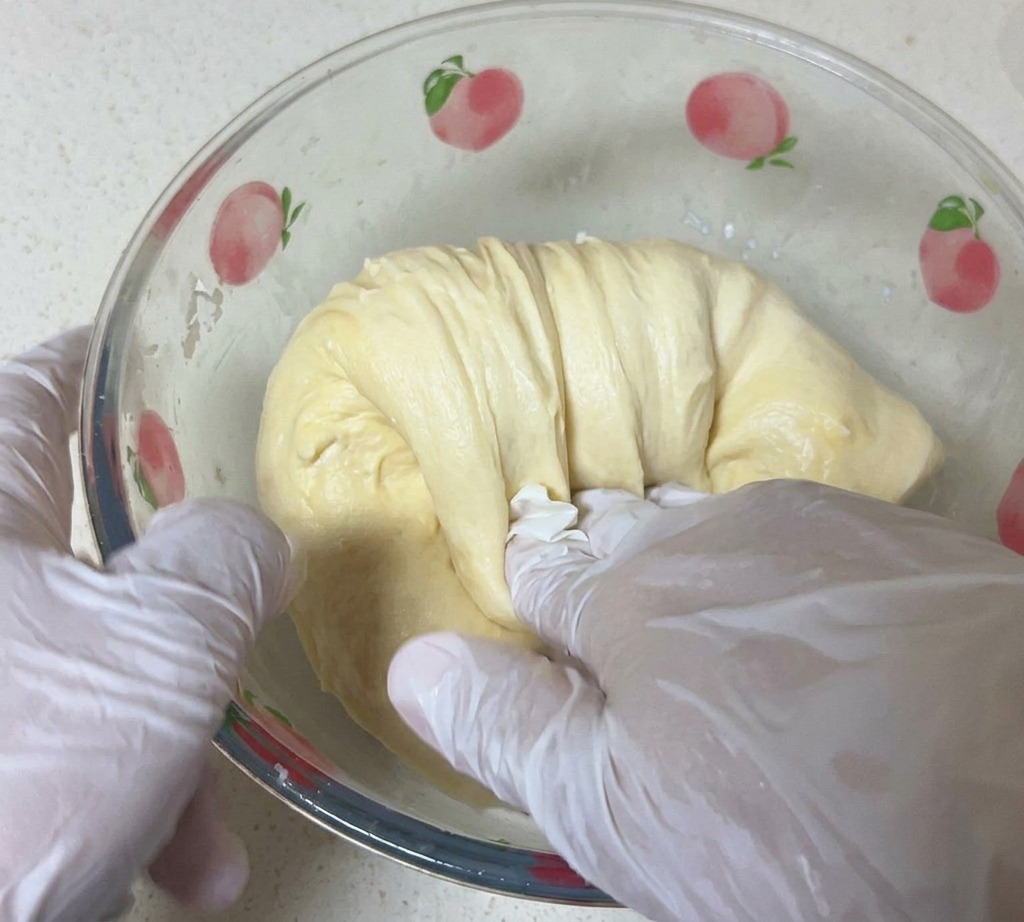
After the dough has rested for 40 minutes, use gloved hands to perform the first round of the stretch and fold technique. Reach under one side of the dough, pull it upward, and fold it over the center. Rotate the bowl and repeat this process on all sides to strengthen the gluten structure without kneading.
Tip: Wet your gloved fingers slightly if the dough is sticking; this makes the folding process much smoother and easier to manage. - 5Perform the windowpane test
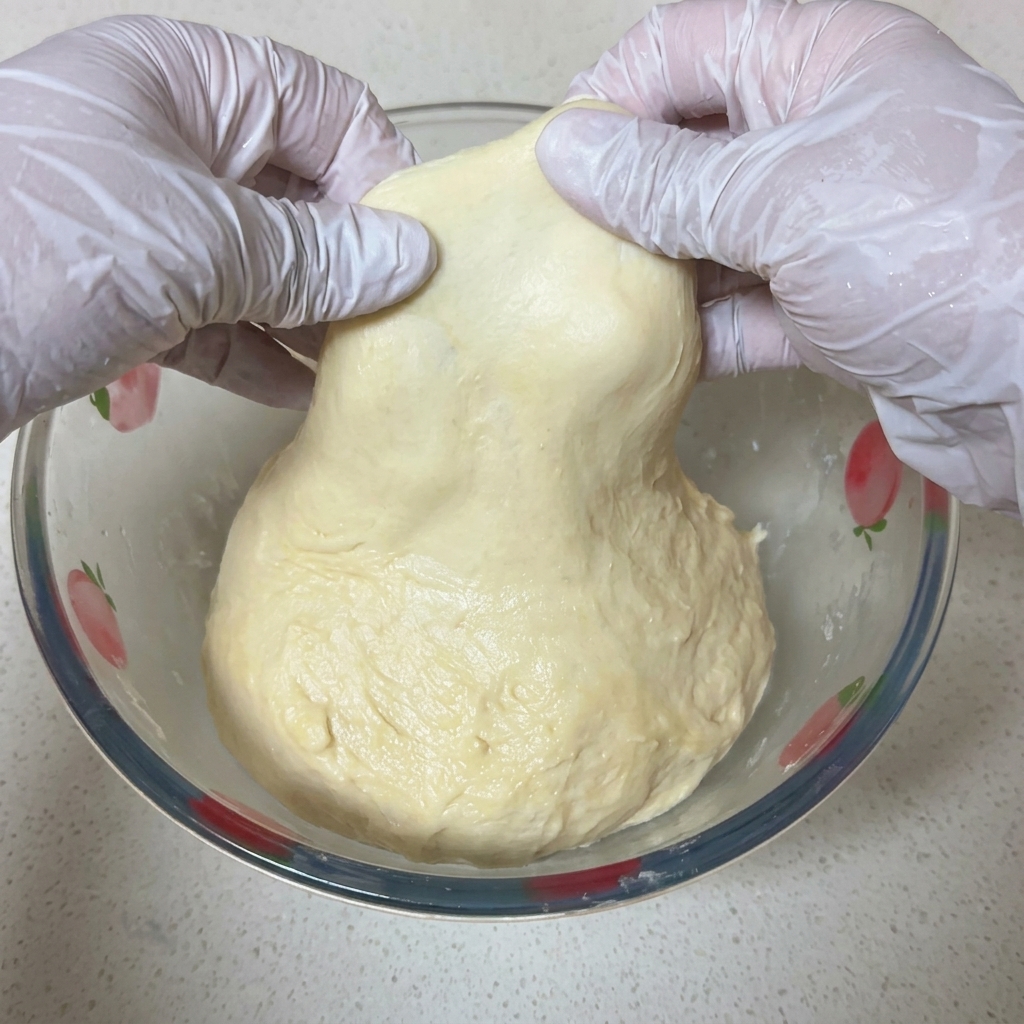
After the second round of stretching and folding, check the doughs gluten development. Gently pull a small piece of the dough apart with both hands to see if it forms a thin, translucent membrane without tearing. This confirms that the dough has enough strength for a perfect rise.
Tip: If the dough tears immediately, it needs more development; simply let it rest for another 40 minutes and perform one more set of folds. - 6Divide and cold ferment
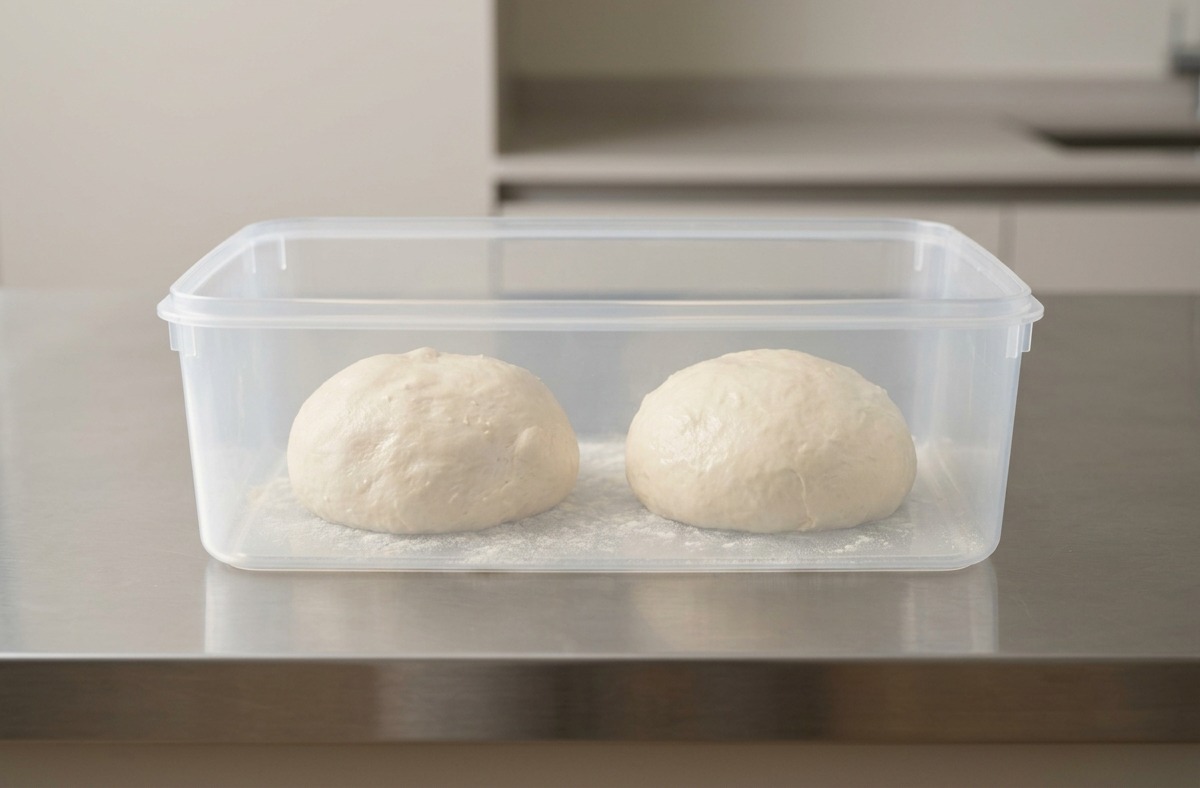
Divide the smooth dough into two equal portions and shape them into neat, rounded balls. Place these into a clear plastic fermentation box, ensuring they are spaced far enough apart to grow. Let them ferment in the refrigerator overnight until they reach about 1.5 times their original size.
Tip: Cold fermentation is a professional secret that develops a much deeper flavor and a better crust texture compared to a quick room-temperature rise. - 7Shape the pizza base
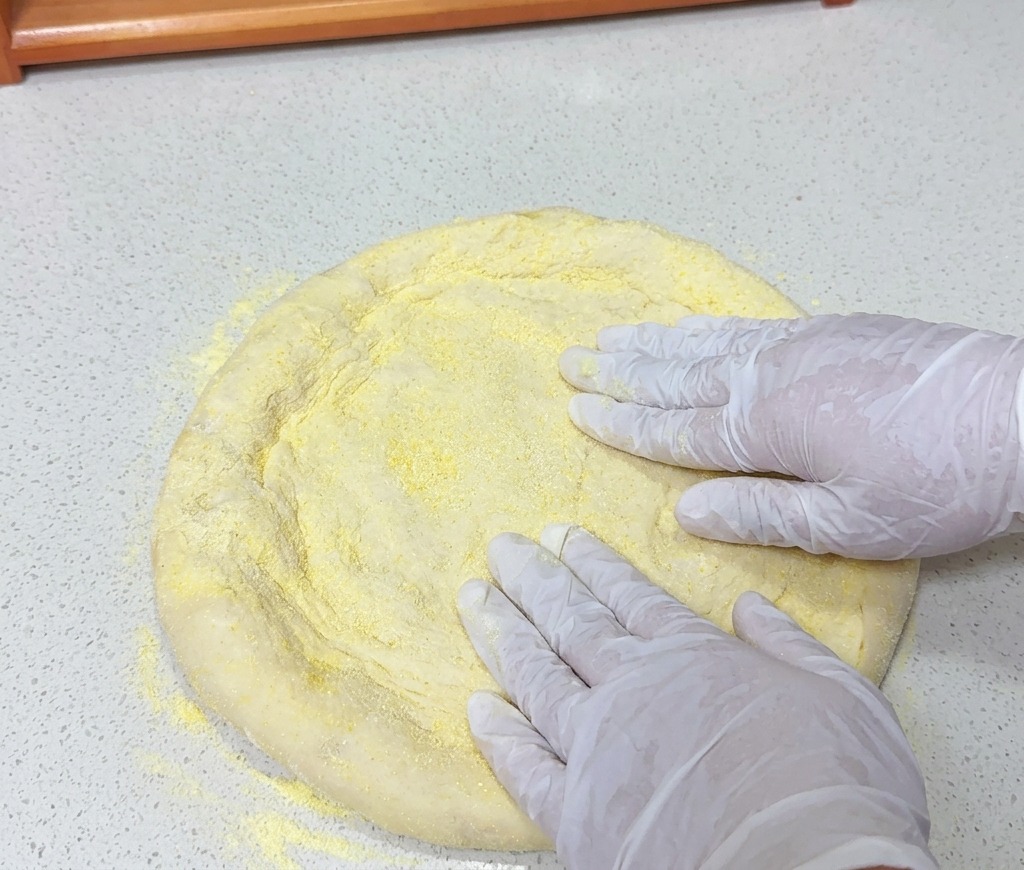
Take one portion of the fermented dough and place it onto a surface dusted with flour or cornmeal. Using your fingertips, gently press and dimple the dough from the center outwards to create a circular shape. This helps distribute air bubbles and forms the characteristic raised edge of the crust.
Tip: Avoid using a rolling pin, as it will deflate the air bubbles you worked hard to create during fermentation, resulting in a denser crust. - 8Add the pizza sauce
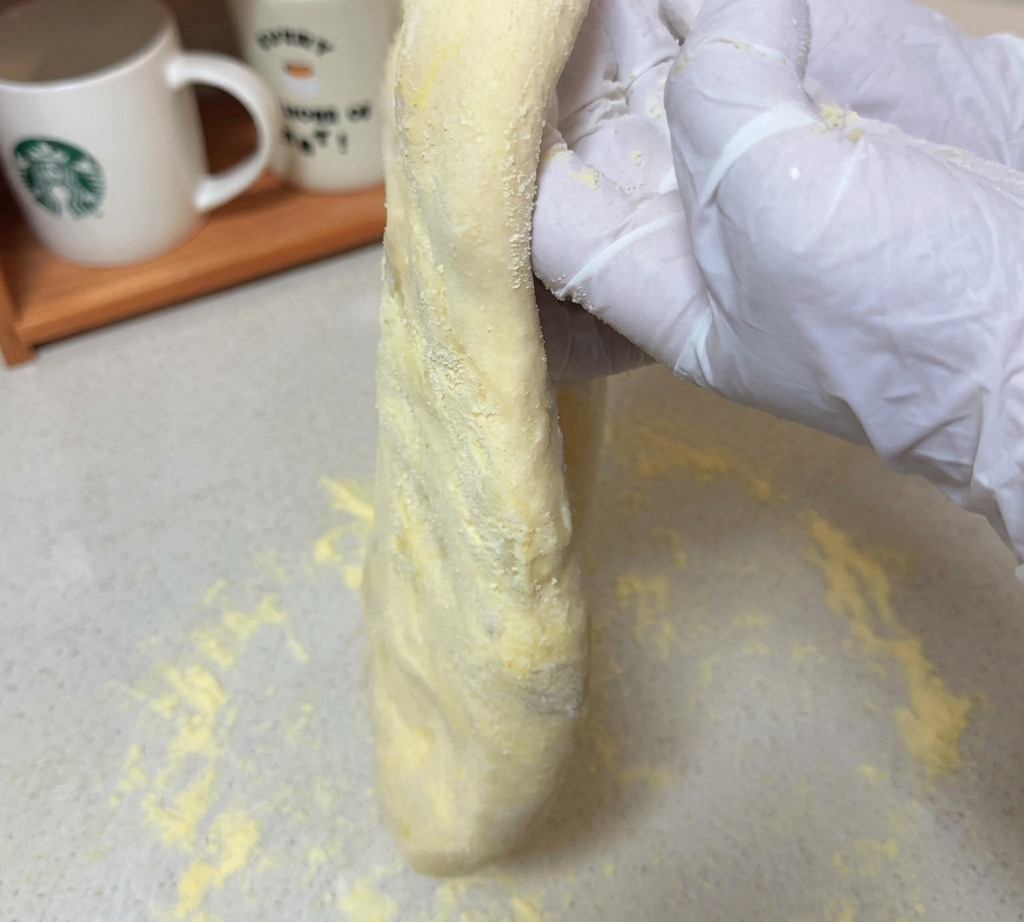
Hold the stretched pizza dough vertically to shake off excess flour, then lay it flat. Pour a generous amount of red Italian pizza sauce directly onto the center of the dough base. The sauce serves as the flavorful foundation for your toppings.
Tip: Make sure the dough is evenly stretched before adding the sauce to prevent the base from becoming soggy in thinner spots. - 9Spread the tomato sauce
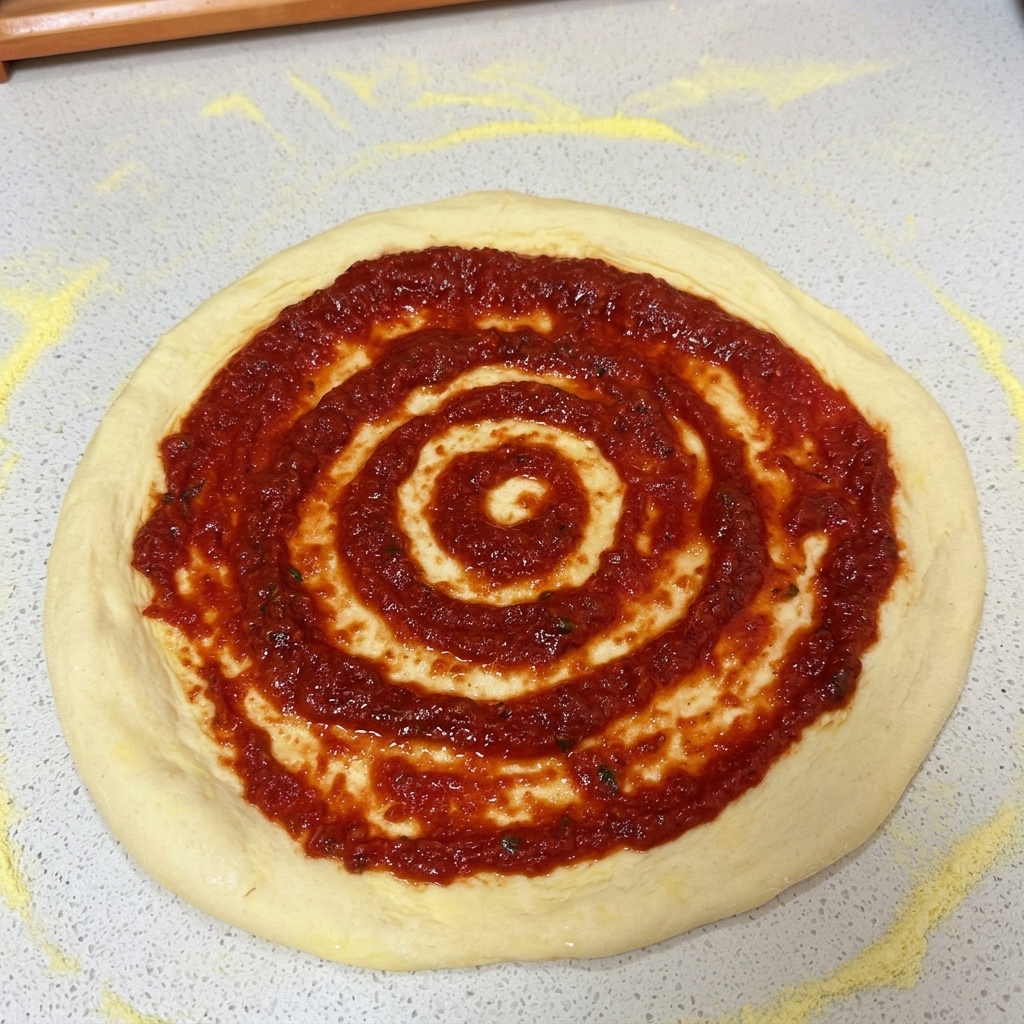
Place a small amount of sauce in the center and use a spoon to spread it in a spiral motion toward the edges. Keep a small border of dough clear to create a thick and crunchy crust during the bake.
Tip: Avoid over saucing the base because a thin layer helps maintain a crispy texture and prevents the dough from becoming soggy. - 10Top with mozzarella cheese
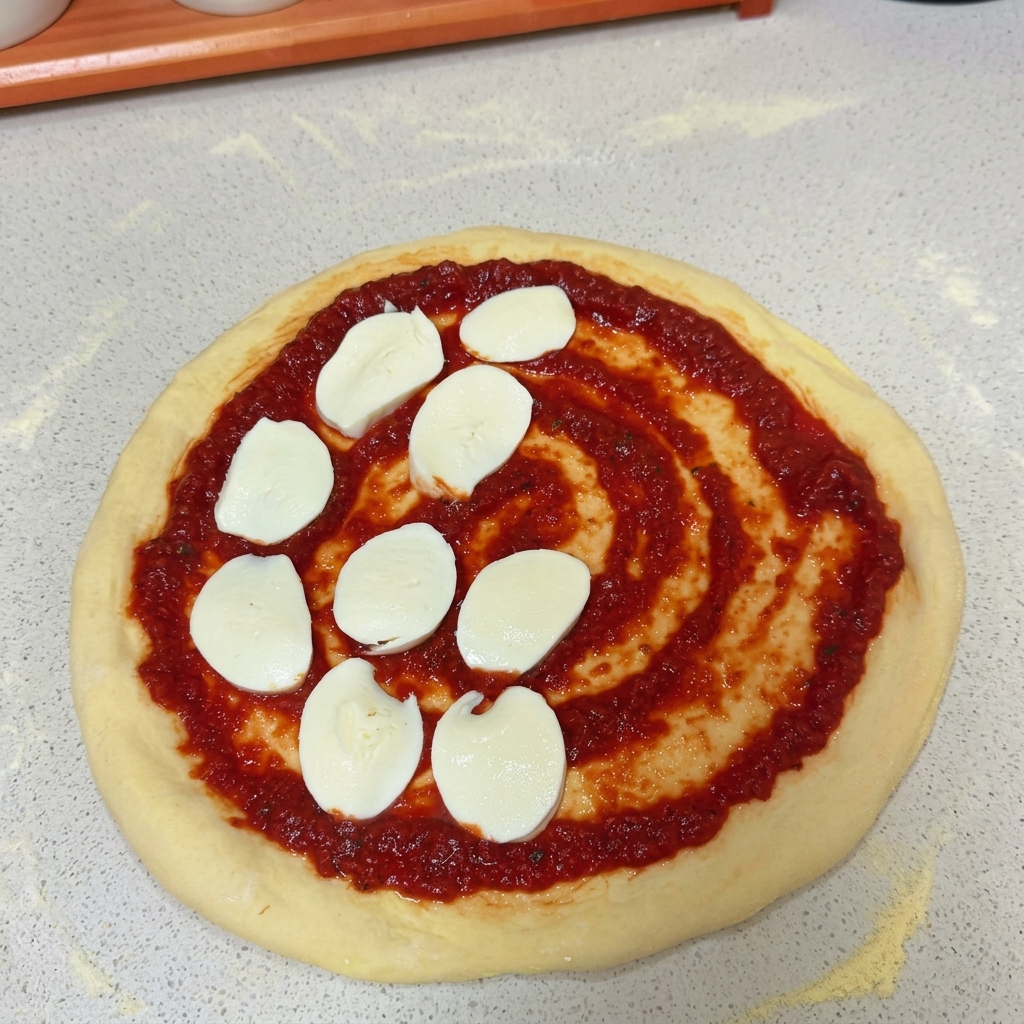
Place fresh slices of white mozzarella cheese on top of the sauce, arranging them in a circular pattern. The spacing allows the cheese to melt and spread evenly while still letting the vibrant red sauce peek through for a classic Italian look.
Tip: If using fresh mozzarella, pat it dry with a paper towel first to remove excess moisture and prevent a watery pizza. - 11Bake the pizza
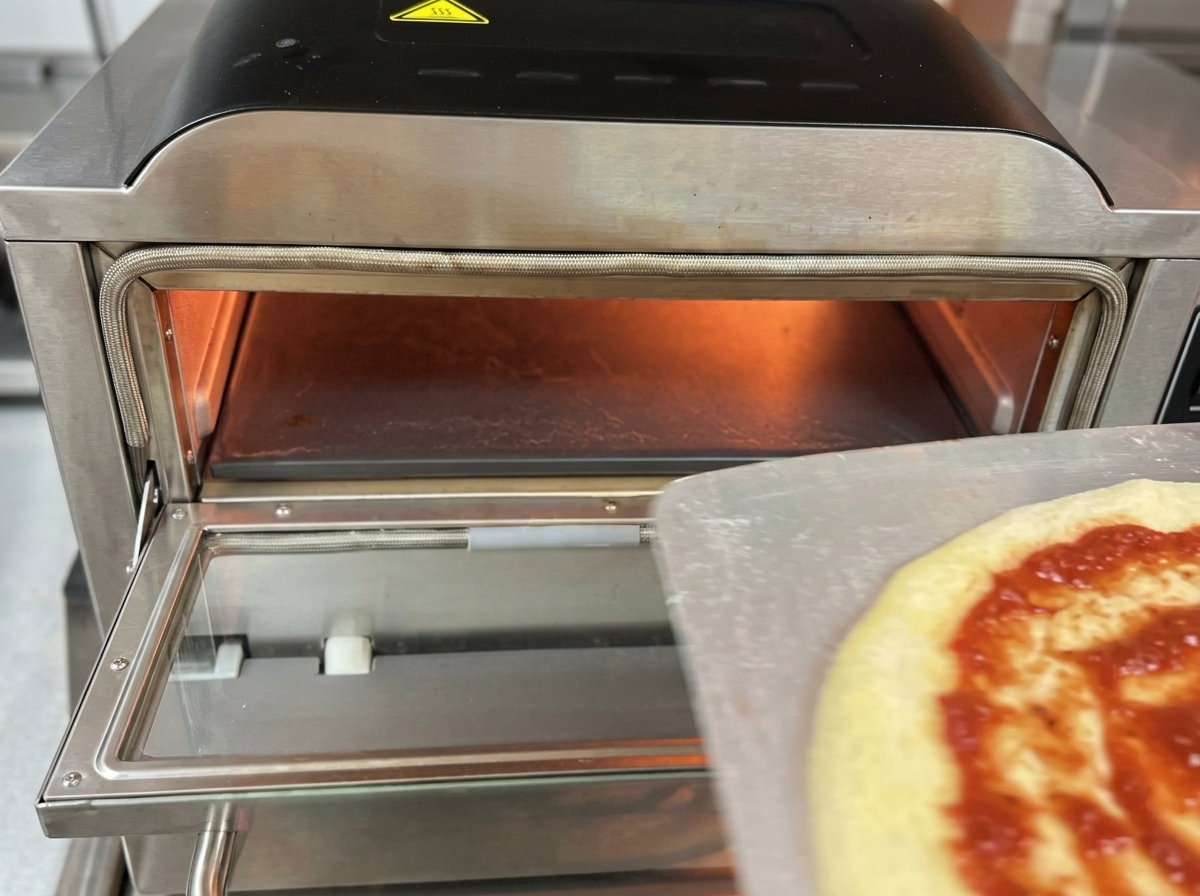
Slide the prepared pizza from the peel into the preheated oven. Bake at 430°C top heat and 380°C bottom heat for approximately 2 minutes. The extreme heat will puff the crust and melt the cheese rapidly. Once removed, top immediately with fresh arugula and Parma ham.
Tip: Ensure your pizza peel is lightly floured or dusted with semolina to prevent the dough from sticking when you slide it into the hot oven.