Slow-Roasted BBQ Pulled Beef
Master the art of melt-in-your-mouth BBQ pulled beef with a low-and-slow oven technique that transforms lean cuts into juicy, flavor-packed shreds using a savory spice rub and rich aromatics.
BBQ pulled beef is a cornerstone of American comfort food, though its roots lie in the slow-cooking traditions of various cultures. This particular method emphasizes a dry-rub sear to lock in juices, followed by a gentle braise in a cast iron Dutch oven. The result is a versatile protein that serves as a perfect base for everything from rustic sandwiches to modern fusion tacos.
Ingredients
- 4.5 kg beef (lean cuts like brisket or chuck)
- 12 cup all-purpose flour
- 2 tbsp brown sugar
- 1 tbsp paprika
- 1 tbsp onion powder
- 1 tbsp garlic powder
- 1 tsp cumin powder
- 500 ml beef broth or chicken stock
- 1 bottle BBQ sauce
- 3 tbsp cooking oil
- to taste salt and black pepper
- optional chili powder
Instructions
- 1Pat the beef dry
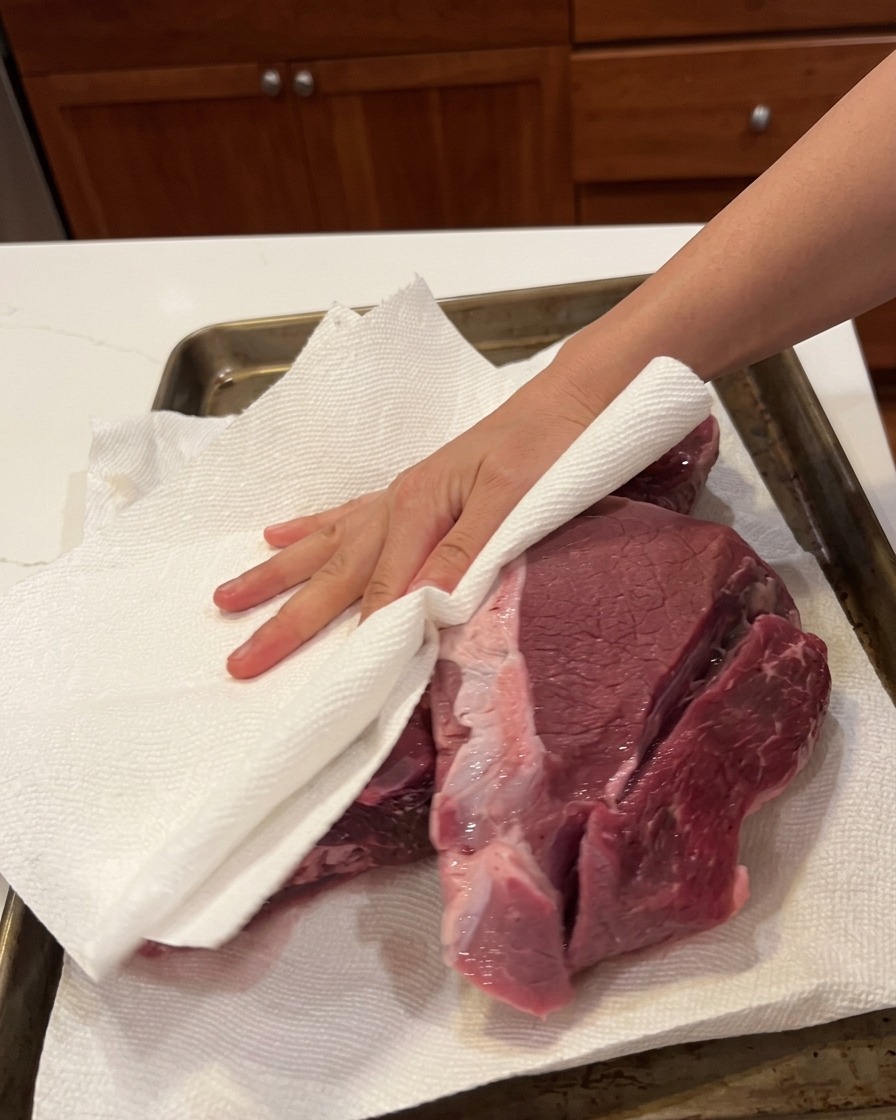
Use paper towels to thoroughly pat the raw beef dry on all sides. This removes excess moisture from the surface, ensuring a better sear later and allowing the lean meat to stay juicy.
Tip: Removing surface moisture is crucial for achieving a good crust during the searing step. - 2Add flour to bowl
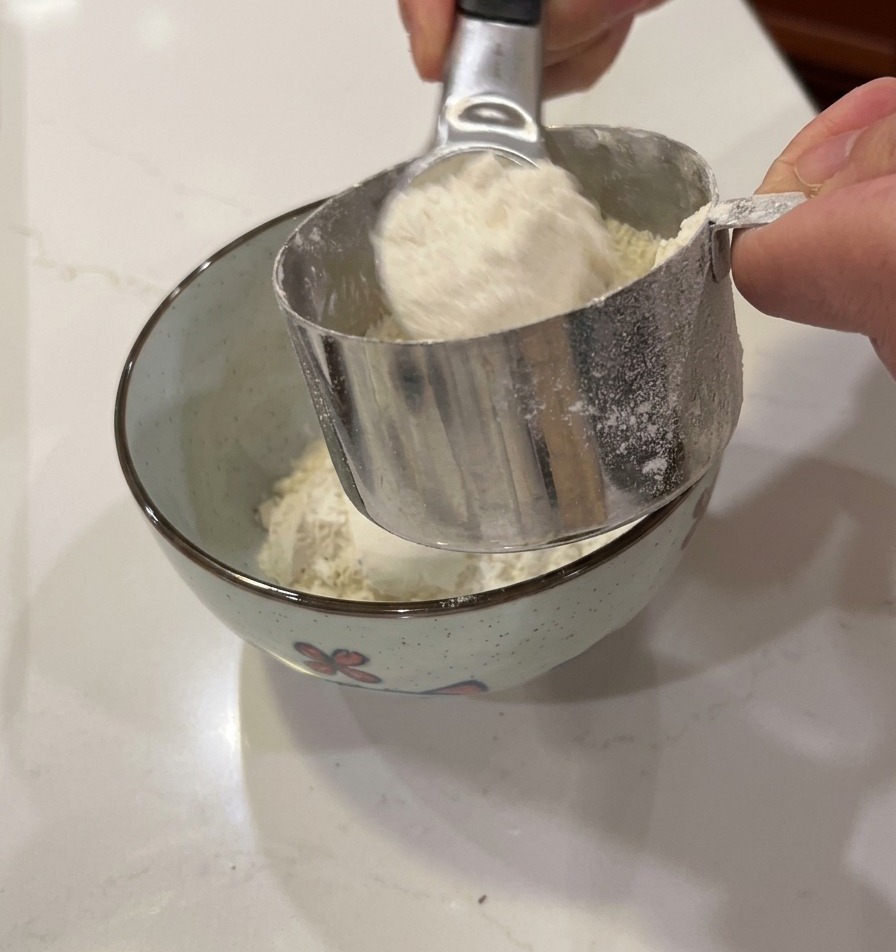
Pour the measured flour into a small mixing bowl. This flour will serve as the base for the spice rub, helping the seasonings adhere to the meat and creating a fragrant crust when seared.
Tip: You only need a thin layer of flour to coat the beef. You can prepare a larger batch of the dry mix and store the extra in a bag for next time. - 3Mix the spice rub
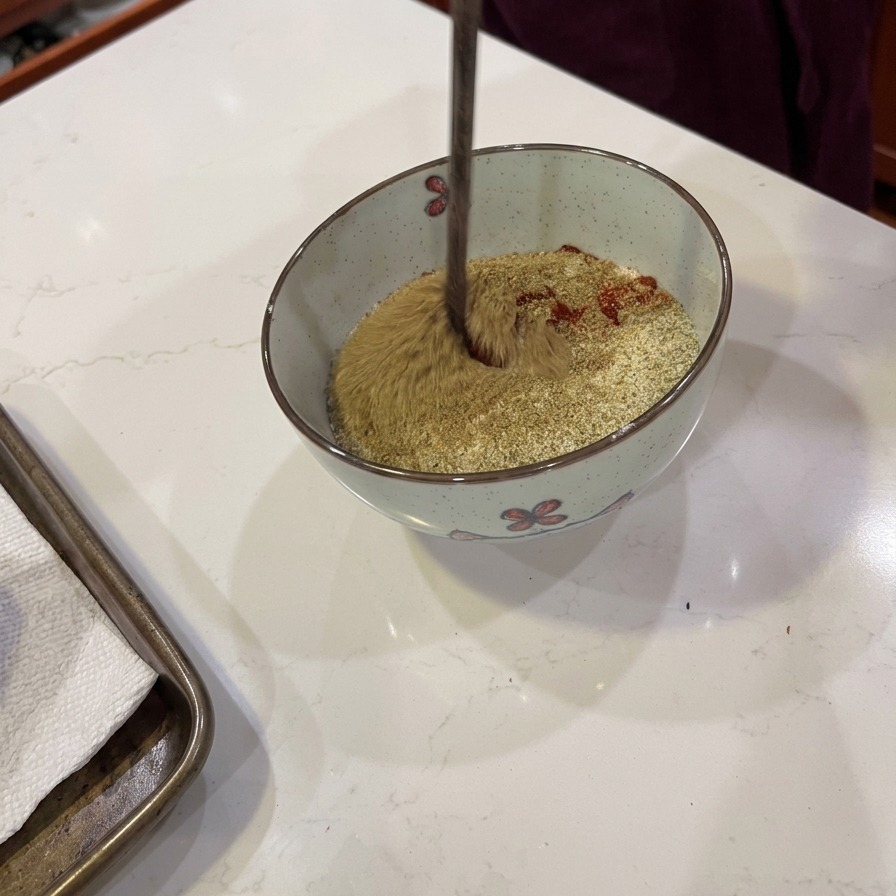
Add your preferred spices to the flour—such as brown sugar, paprika, onion powder, garlic powder, and cumin powder. Stir thoroughly until all the dry ingredients are evenly incorporated.
Tip: If you like it spicy, you can add chili powder. Adjust the amounts of each spice to suit your personal liking. - 4Season the beef
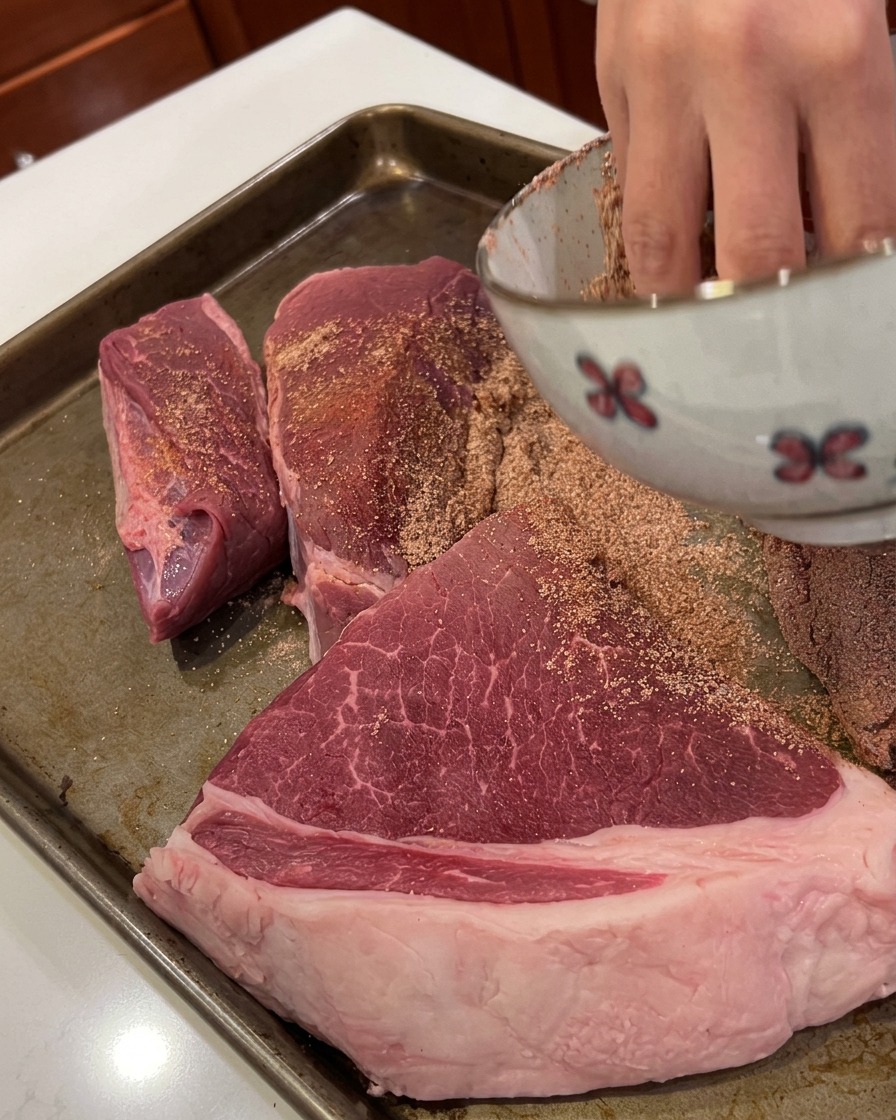
Cut the beef into large, manageable chunks and arrange them on a baking sheet. Generously sprinkle the prepared dry spice and flour mixture evenly over the pieces of meat.
Tip: Ensure you have enough rub to create a thin layer over the entire surface of the beef cuts. - 5Rub in the spices
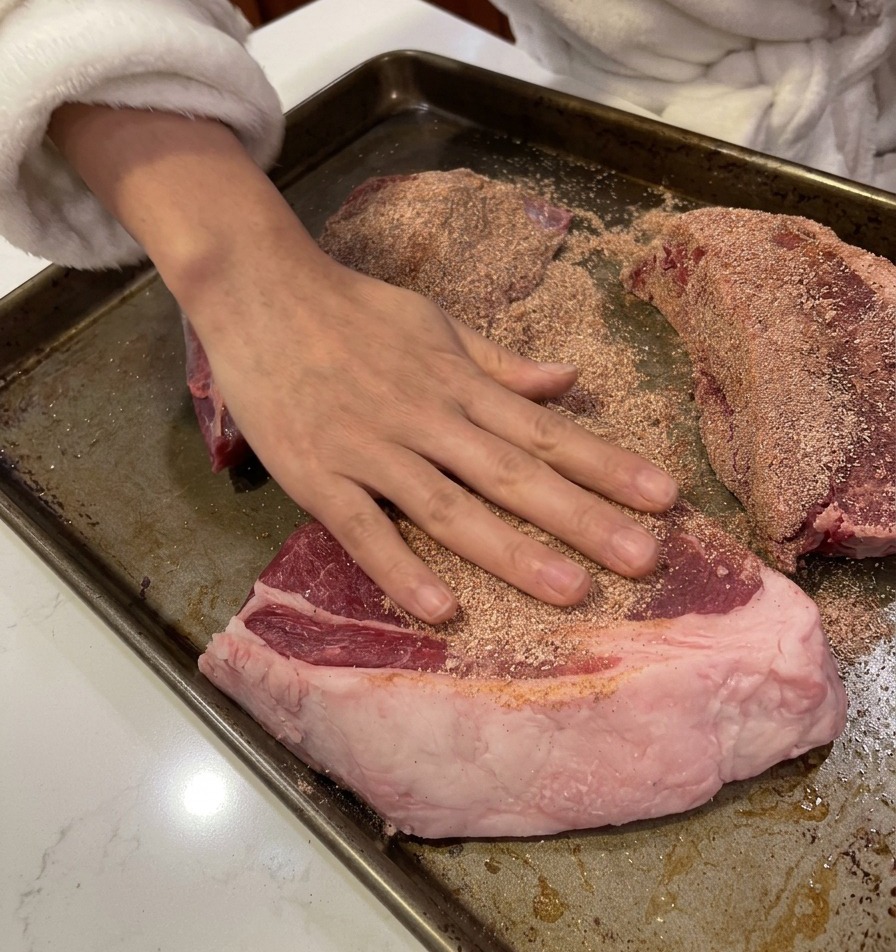
Use your hands to massage the seasoning mix into the beef. Make sure to coat every side thoroughly, pressing the rub in so it sticks to the meat.
Tip: Pressing the rub firmly into the meat ensures the flavors penetrate well and helps form a crispy crust when cooking. - 6Sear the beef
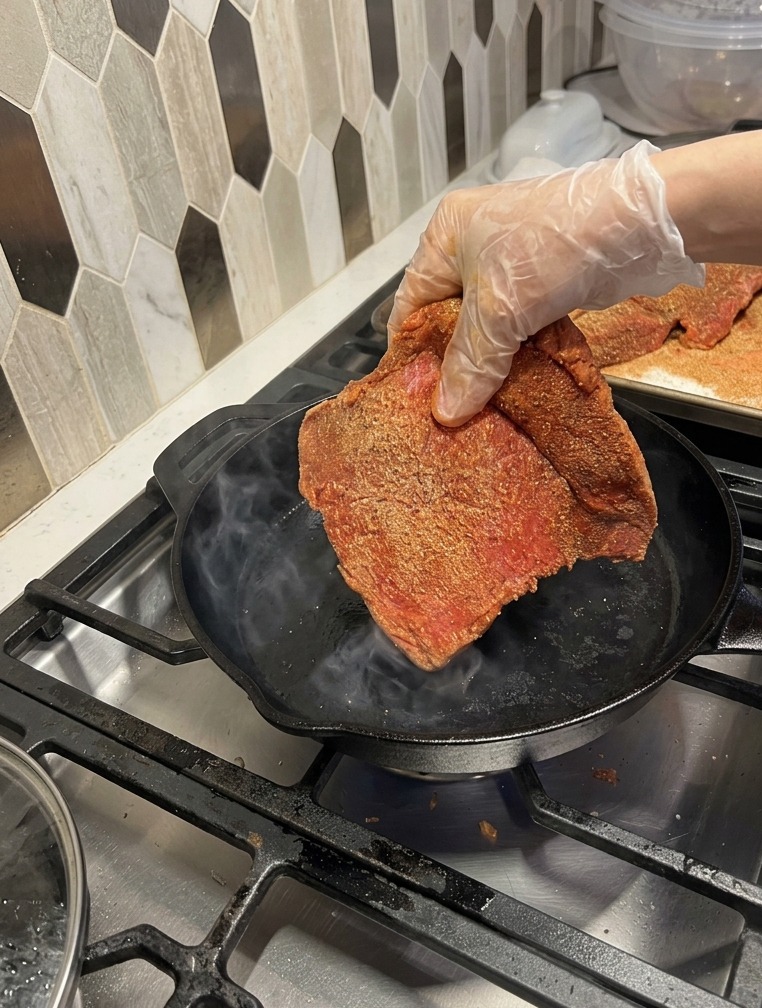
Heat oil in a pan and carefully place the spice-coated beef into the skillet. Sear all four sides of the meat, letting it cook for about 2 to 3 minutes per side until a fragrant, brown crust forms.
Tip: Do not skip this searing step; searing the flour-coated beef in hot oil makes it incredibly fragrant and prevents the meat from drying out. - 7Sear in multiple batches
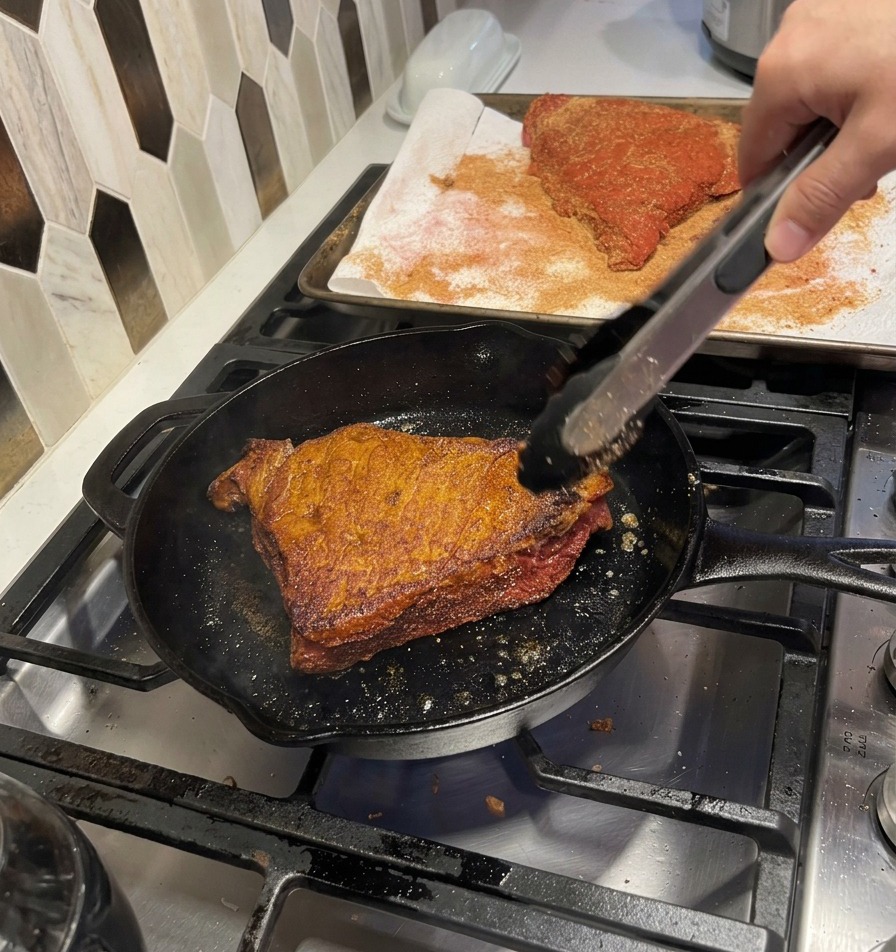
Because you are working with a large quantity of meat, avoid overcrowding the pan by searing the chunks in smaller groups. Add extra cooking oil between batches if the pan becomes too dry to ensure every piece develops a rich and flavorful crust.
Tip: Leaving enough space between the beef chunks allows the moisture to evaporate quickly so the meat sears rather than steams. - 8Transfer to a roasting pot
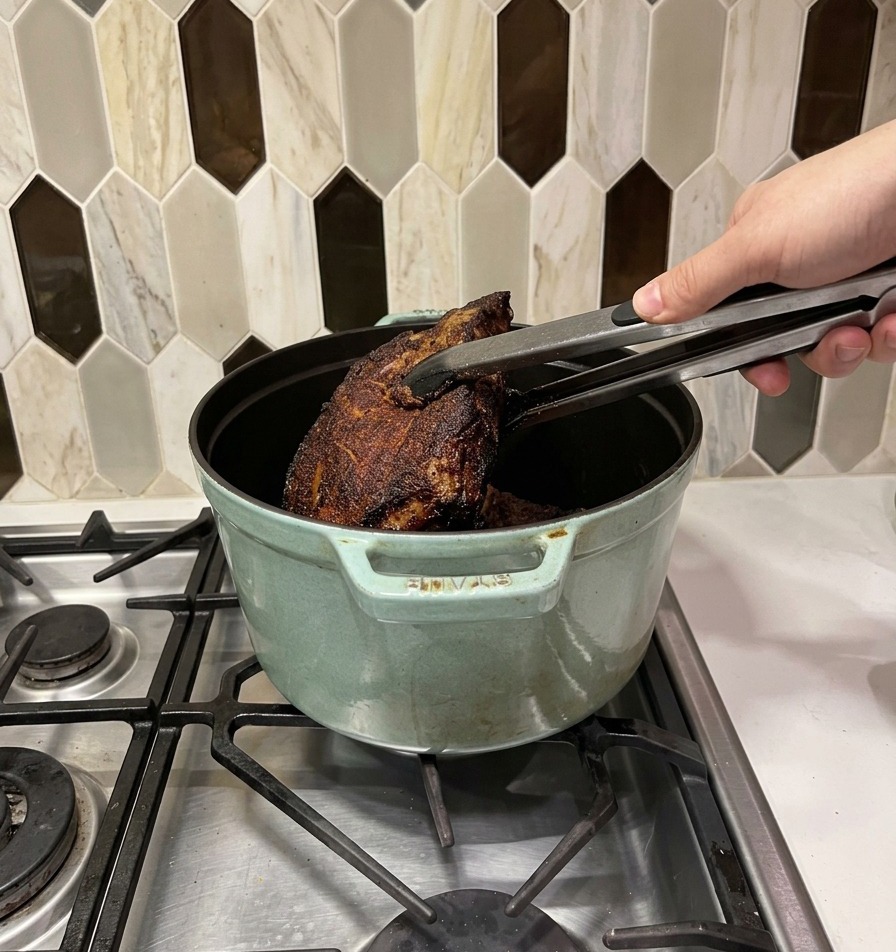
Once all sides of the beef are heavily seared, carefully remove them from the skillet. Transfer the browned chunks into a heavy cast iron pot or Dutch oven for the slow-cooking process.
Tip: A cast iron pot is ideal for oven roasting as it distributes heat evenly and has a tight-fitting lid to keep the meat incredibly tender and juicy. - 9Add the cooking liquid
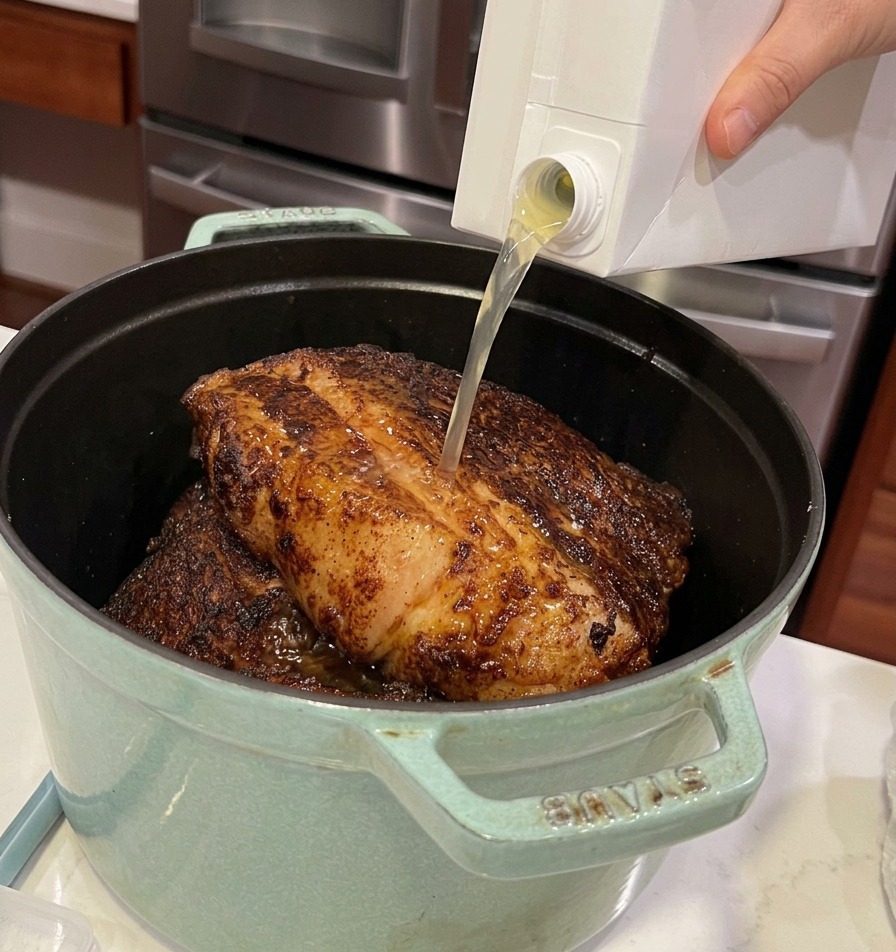
Pour a small amount of chicken stock or beef broth over the seared meat in the pot. You dont need to add too much liquid, as the beef will naturally release its own juices while it cooks.
Tip: Beef broth provides a deeper flavor profile, but chicken stock works perfectly fine as a substitute if you dont have beef broth on hand. - 10Slow roast in the oven
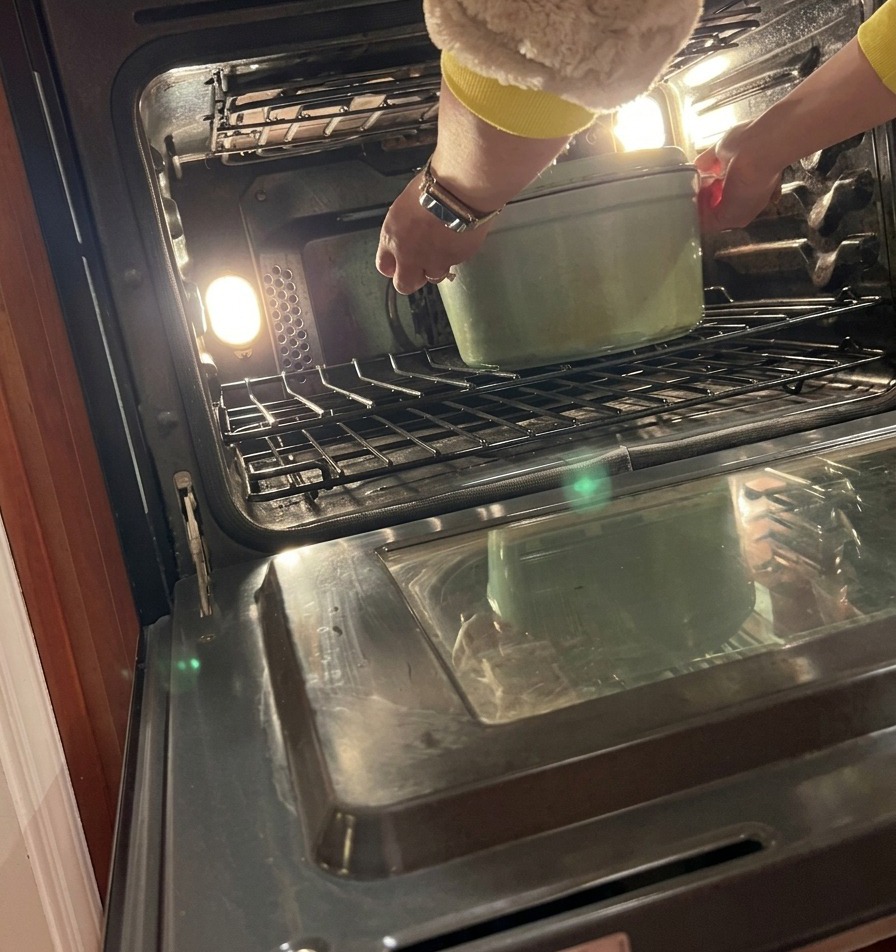
Cover the pot tightly with its lid and place it on the center rack of a preheated oven at 135°C (275°F). Allow the meat to slow roast, estimating about one hour of cooking time per pound of beef.
Tip: This low and slow method breaks down the connective tissues perfectly. It is highly hands-off; you can even leave it in the oven to gently roast overnight. - 11Check for tenderness
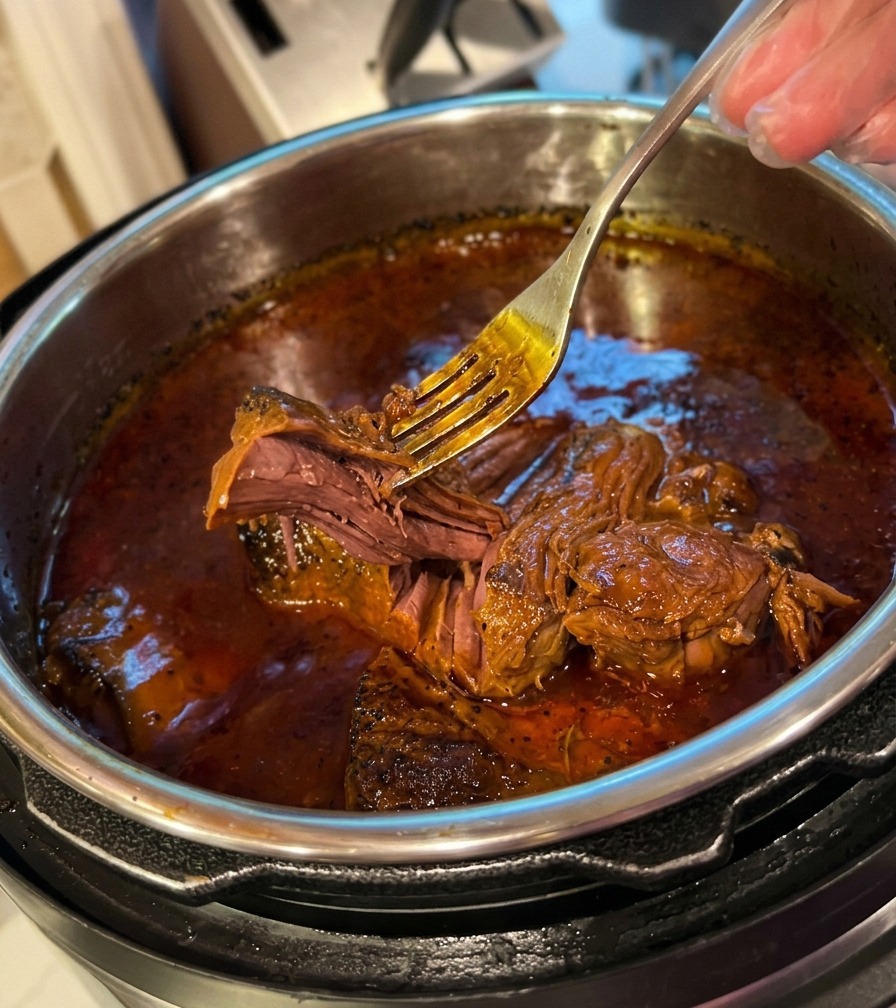
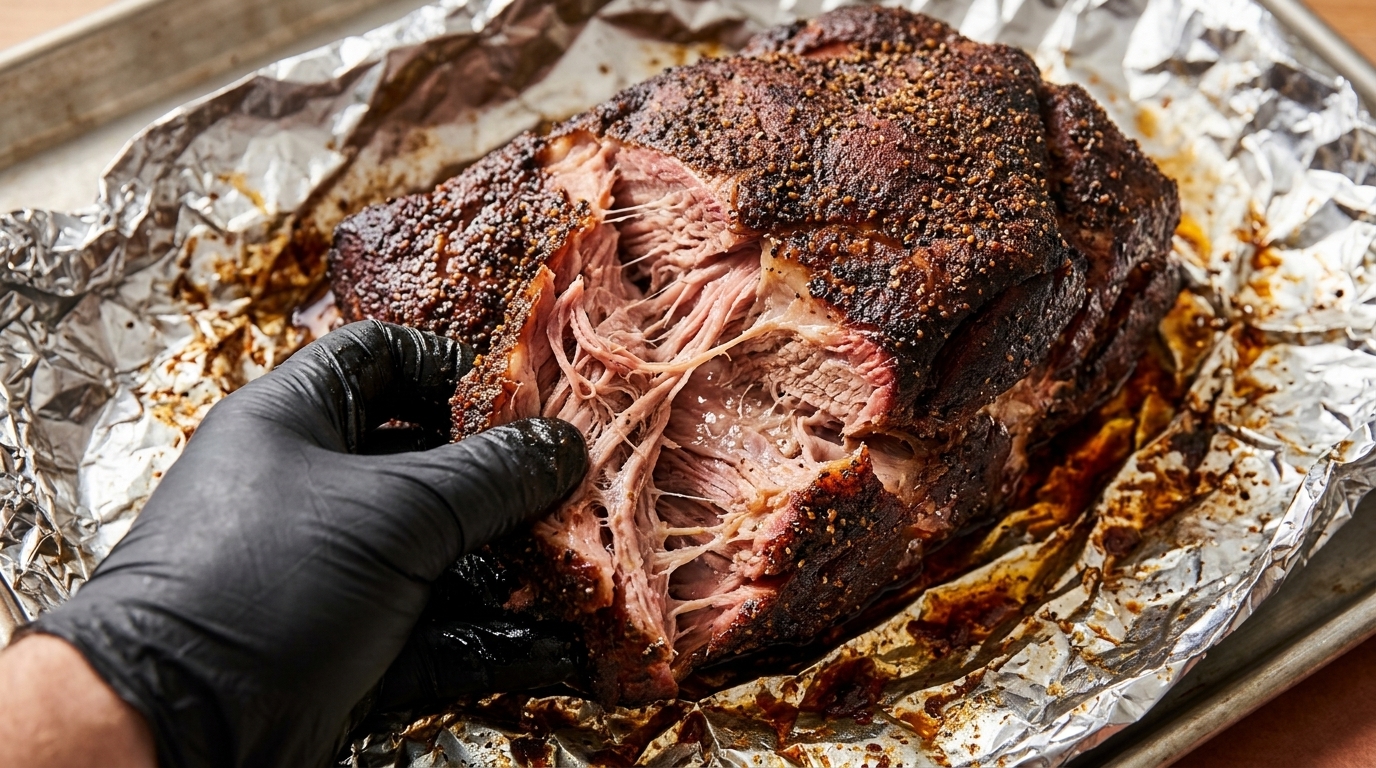
After the estimated cooking time is complete, check the meats tenderness. Take a fork and gently pull at the beef; if it shreds and pulls apart effortlessly, it is fully cooked and ready.
Tip: If the meat is still tough and doesnt yield easily to a fork, it simply needs more time. Return it to the oven and continue cooking until tender. - 12Reduce and Add BBQ Sauce

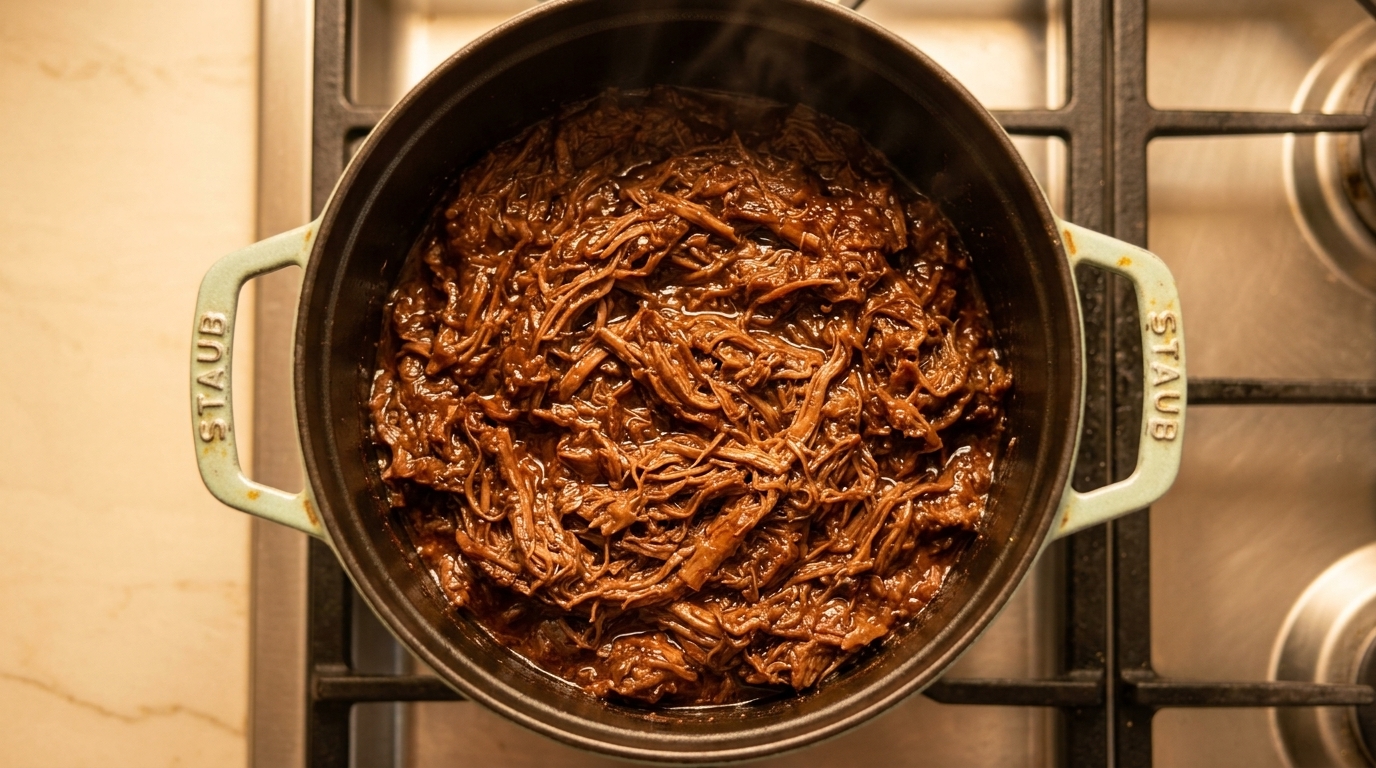
Remove the meat from the pot. Simmer the remaining liquid until it reduces by half to concentrate the flavors, then stir in the BBQ sauce. This creates a thick, clingy glaze for the beef.
Tip: If you have excess broth before reducing the sauce, scoop some out and save it—it makes an excellent, flavorful base for beef noodle soup. - 13Season the Sauce
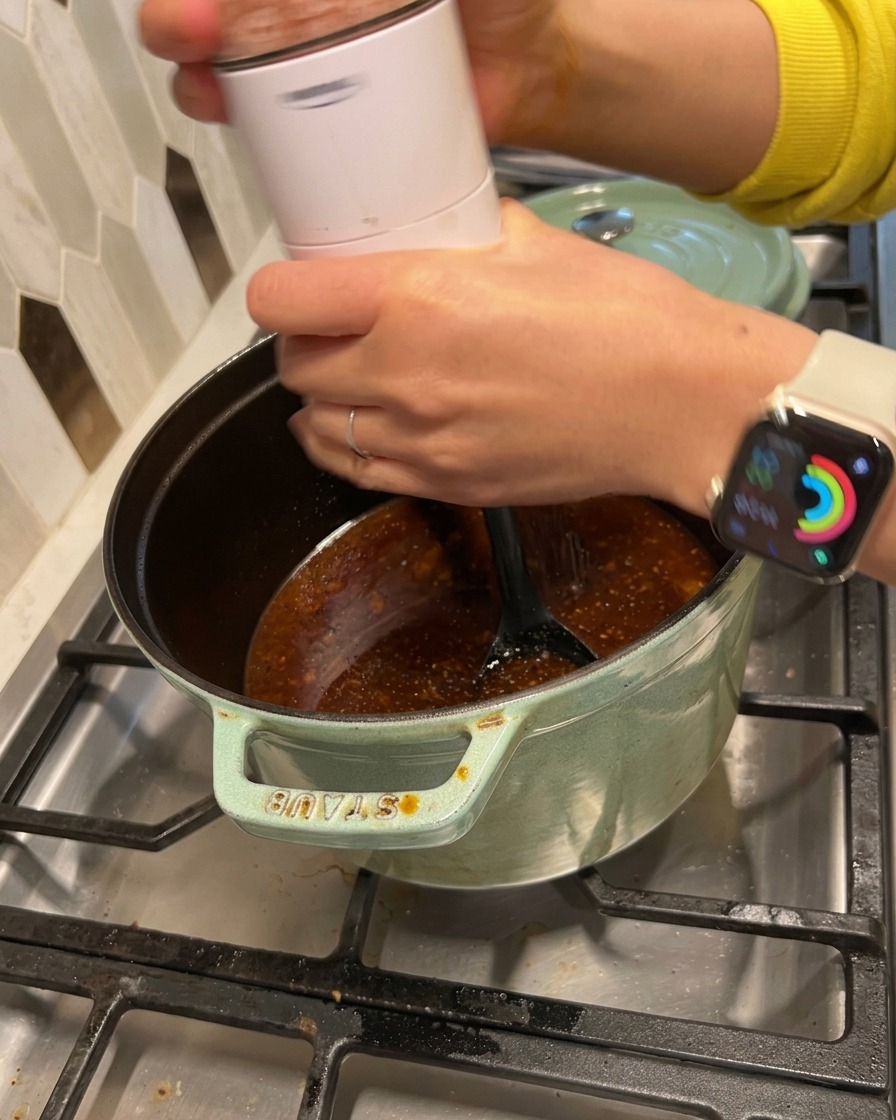
Taste the reduced sauce and adjust the seasoning to your preference. Grind fresh black pepper and salt directly into the simmering sauce to balance the flavors before combining it with the meat.
Tip: Always taste your sauce before adding salt, as the BBQ sauce and beef broth may already provide enough sodium. - 14Shred the Beef

Transfer the cooked beef to a large metal mixing bowl. Using two forks, gently pull the meat apart to shred it into fine strands. The beef should be tender enough to pull apart easily.
Tip: If the meat resists shredding and doesnt pull apart easily, return it to the pot or pressure cooker for additional cooking time until fully tender. - 15Combine Meat and Sauce

Once the sauce has reduced to your desired thickness, return the shredded beef to the cast iron pot. Use a spatula to fold the meat into the sauce until every strand is evenly coated.
Tip: Let the mixed beef sit in the warm sauce for a few minutes off the heat so it absorbs maximum flavor before serving.