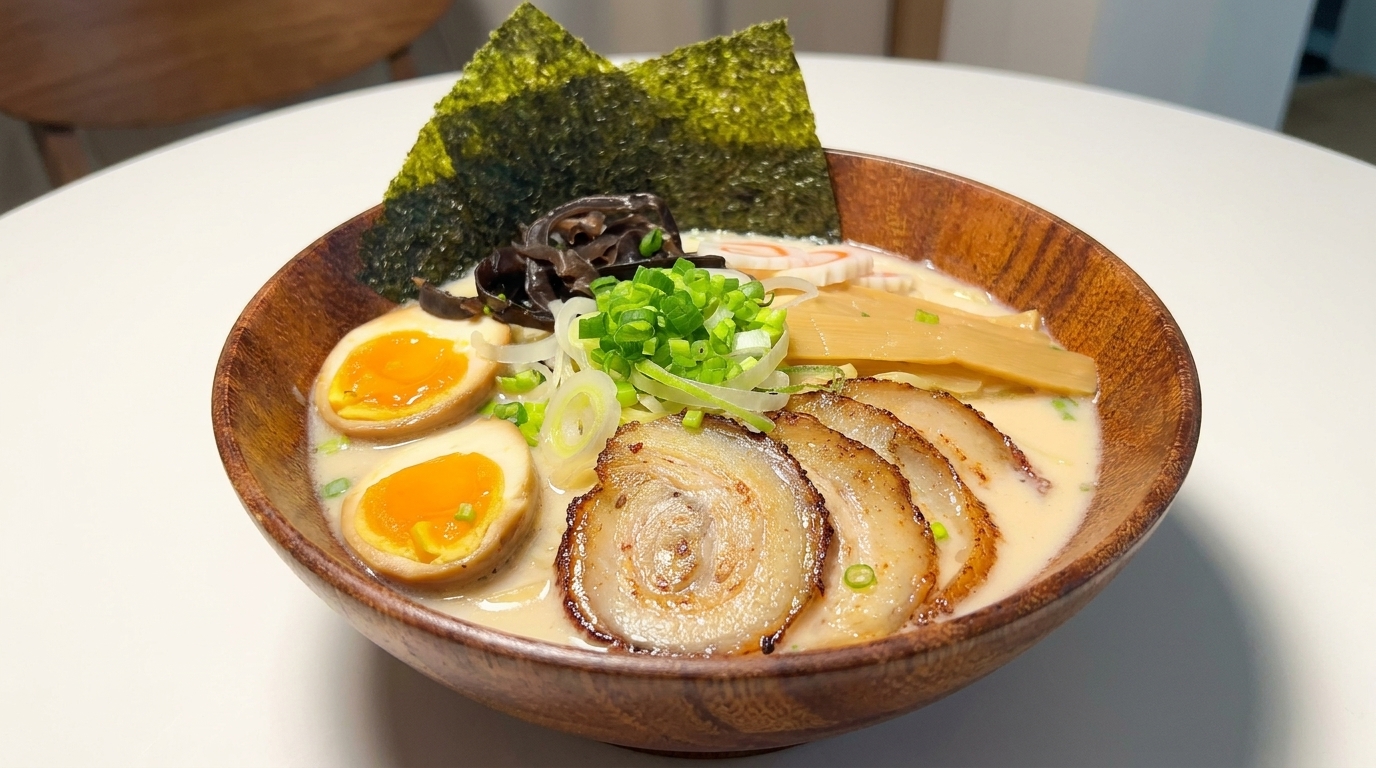
Rich & Creamy Japanese Tonkotsu Ramen
Homemade Chashu
Create a comforting bowl of Japanese Tonkotsu ramen at home. Featuring a rich, milky broth, perfectly cooked noodles, and incredibly tender homemade rolled pork chashu.
Tonkotsu ramen, originating from Fukuoka on the island of Kyushu, is beloved worldwide for its deeply savory, milky-rich pork broth. While traditional tonkotsu broth takes days of rolling boil to extract collagen from pork bones, this accessible version elevates a high-quality ramen base with incredibly tender, slow-braised homemade pork belly chashu and classic toppings for an authentic experience at home.
Ingredients
- 500 g pork belly (skinless)
- 1 tbsp cooking oil
- 2 star anise
- 2 bay leaves
- 4 cloves garlic
- 1 leek
- 12 cup dark soy sauce
- 2 cups water or light broth
- 2 eggs
- 2 packs premium instant Tonkotsu ramen (with liquid base)
- 14 cup sweet corn kernels
- to taste chopped green onions
- 2 sheets nori (seaweed)
Instructions
- 1Prepare the pork belly
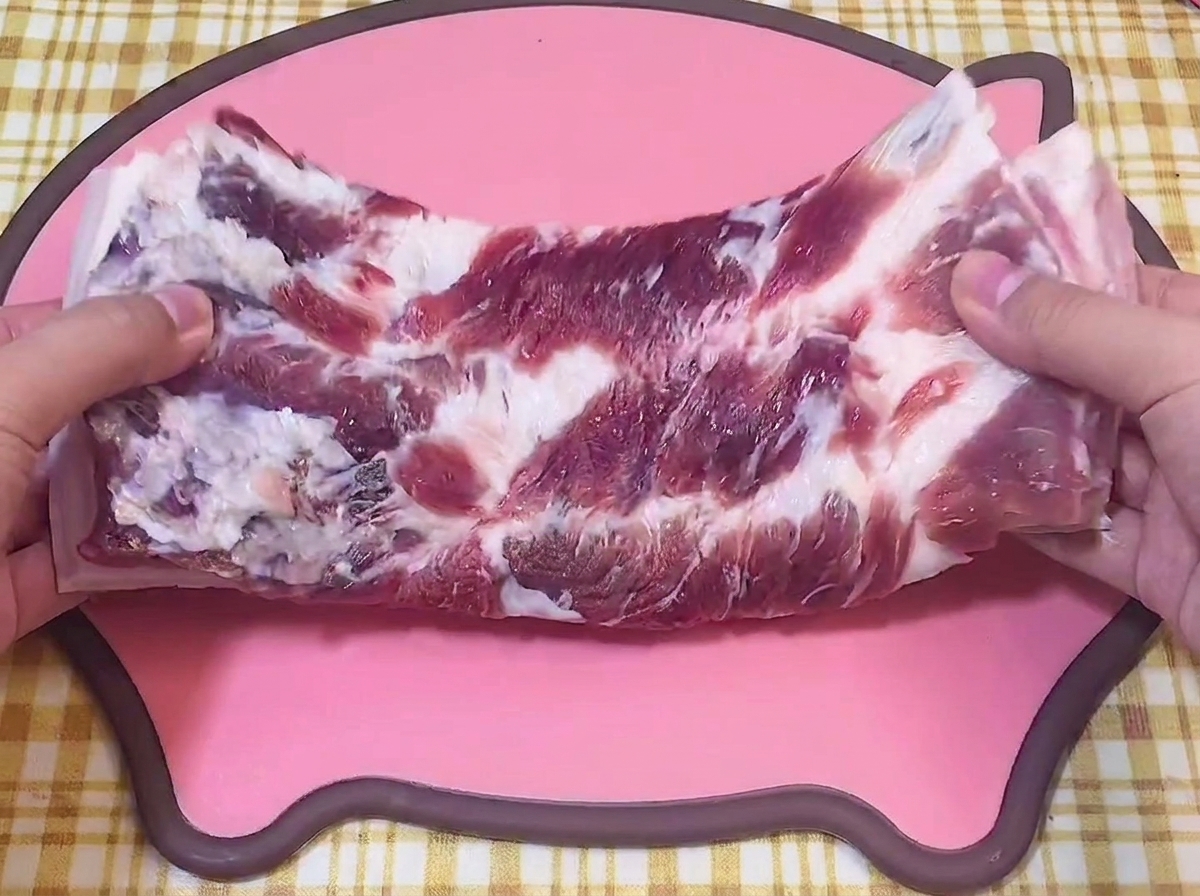
Lay out a fresh piece of raw pork belly on a clean cutting board. Ensure the meat is patted dry with a paper towel, which makes it easier to handle and slice for the upcoming steps.
Tip: Choose a piece of pork belly with a good, even balance of fat and lean meat to ensure the best texture and flavor. - 2Roll the pork belly
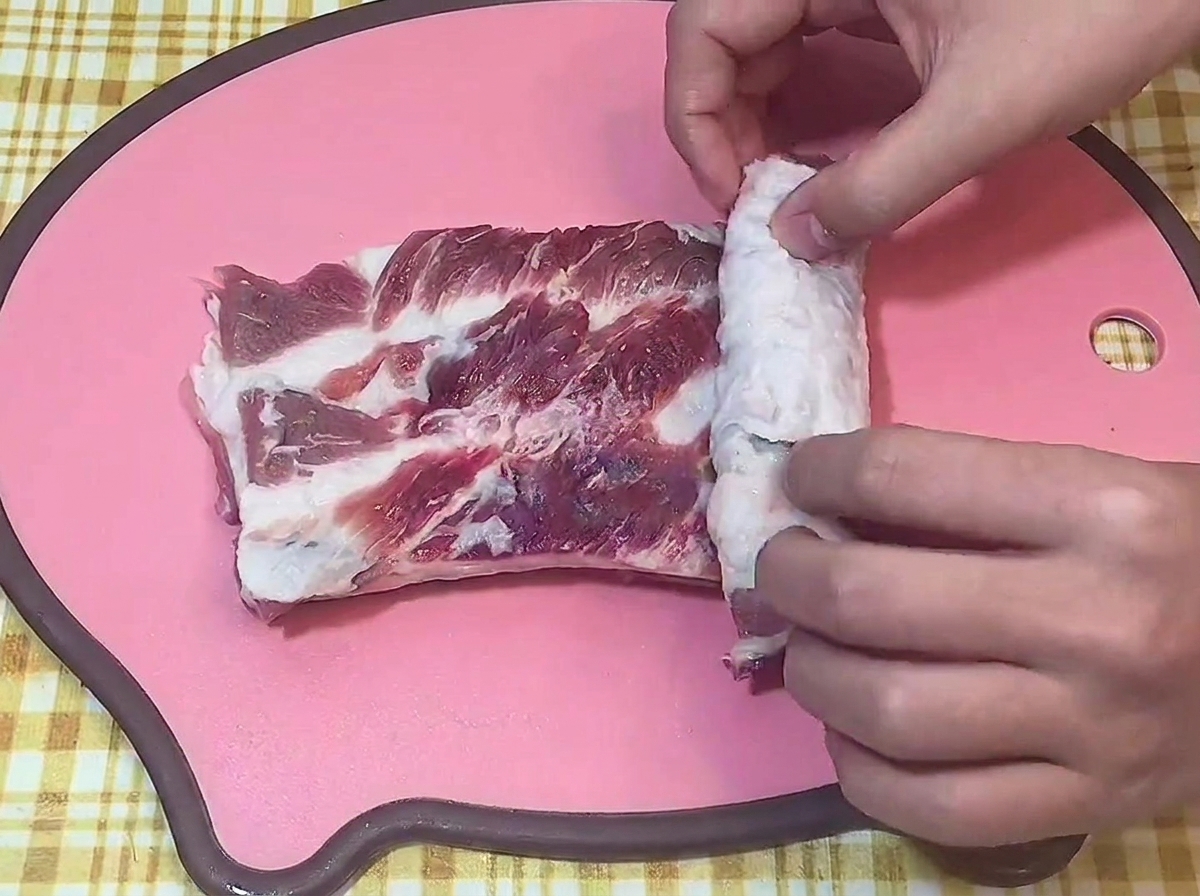
Carefully slice the pork belly to thin it out if necessary, then tightly roll it from one end to the other to form a neat cylinder. Rolling the meat tightly helps it maintain a uniform shape during the cooking process.
Tip: If the meat feels too stiff to roll, letting it rest at room temperature for about 10-15 minutes can make it more pliable. - 3Tie the pork roll
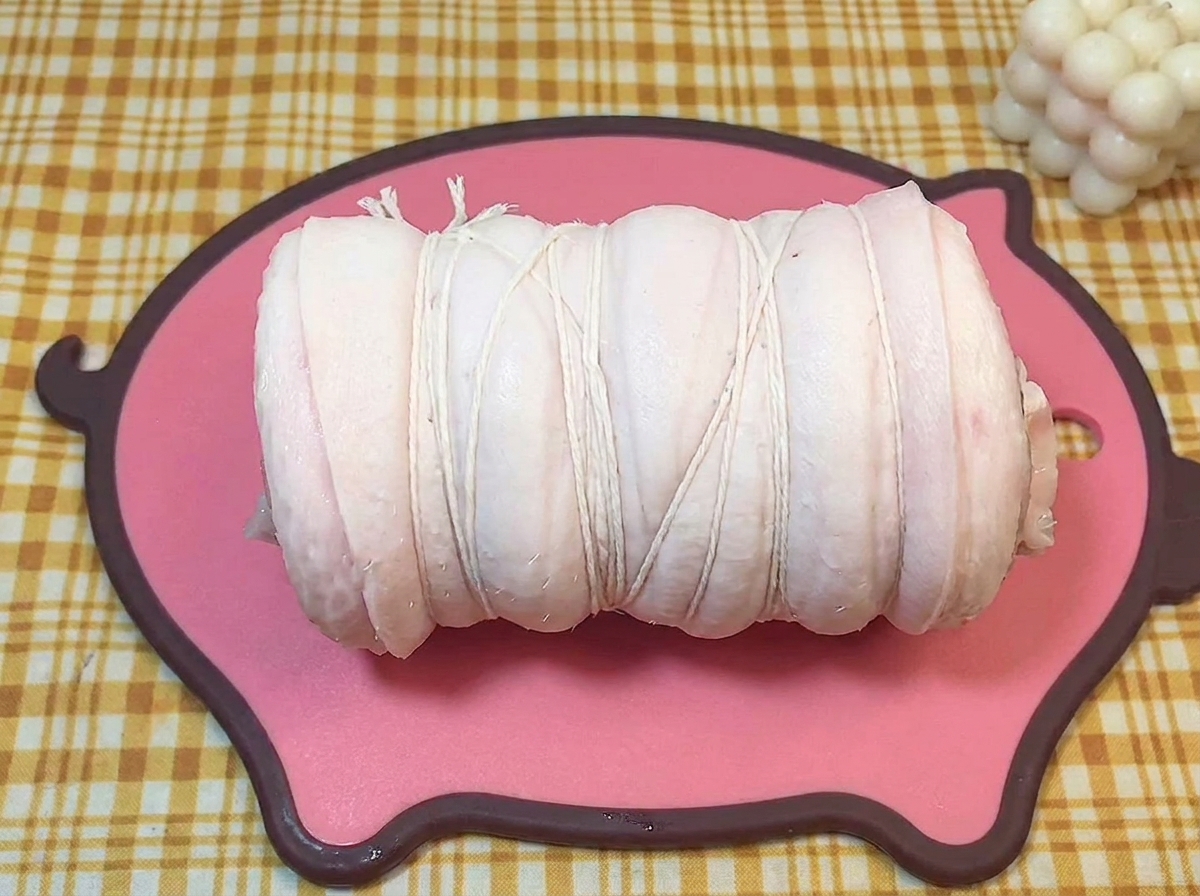
Secure the rolled pork belly using food-safe cooking twine. Wrap the twine firmly around the meat at regular intervals and tie it off, ensuring the roll stays completely intact while it cooks and stews.
Tip: Always use 100% cotton butchers twine, as synthetic strings can melt or release harmful chemicals when exposed to heat. - 4Begin searing the pork
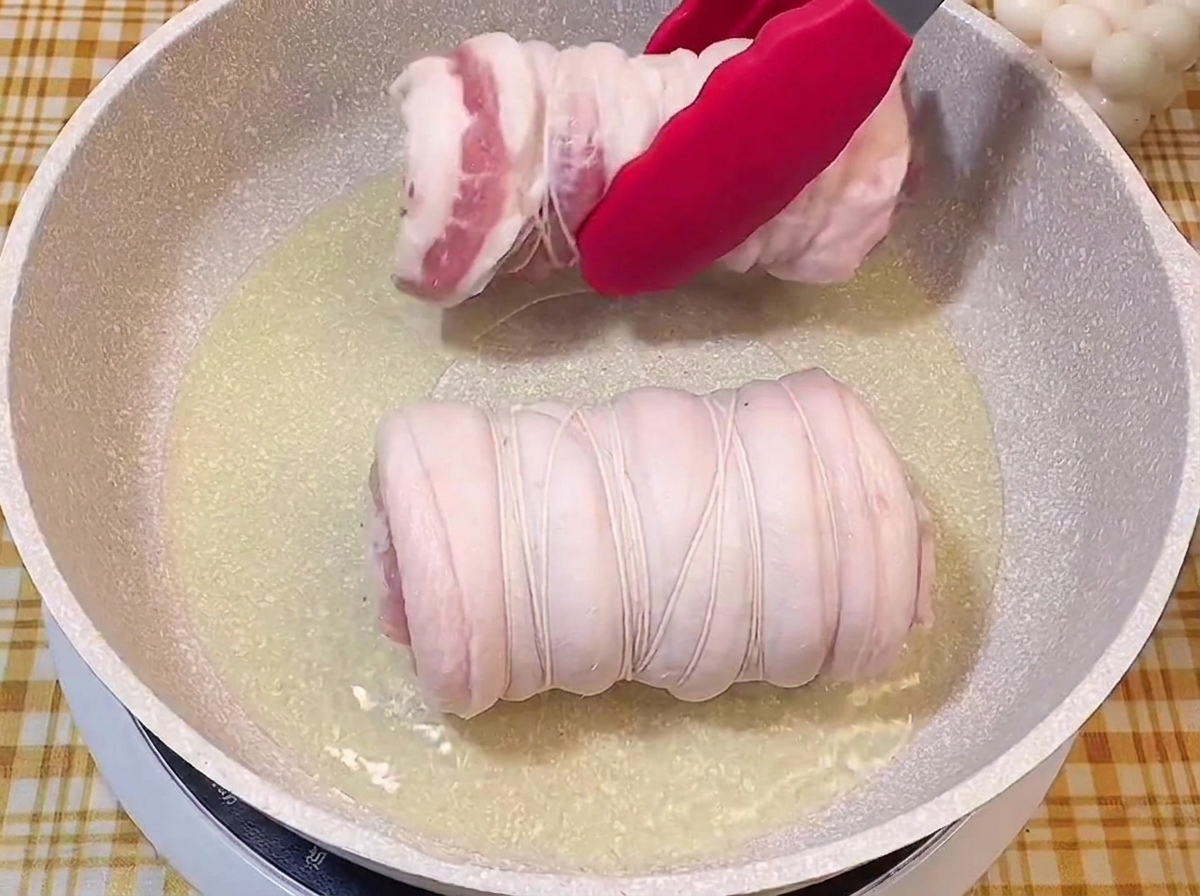
Heat a layer of cooking oil in a wide skillet or pan over medium-high heat. Using tongs, carefully lower the tied pork rolls into the hot oil to begin searing the exterior.
Tip: When placing the meat into the pan, always lay it away from your body to prevent any hot oil from splashing toward you. - 5Brown on all sides
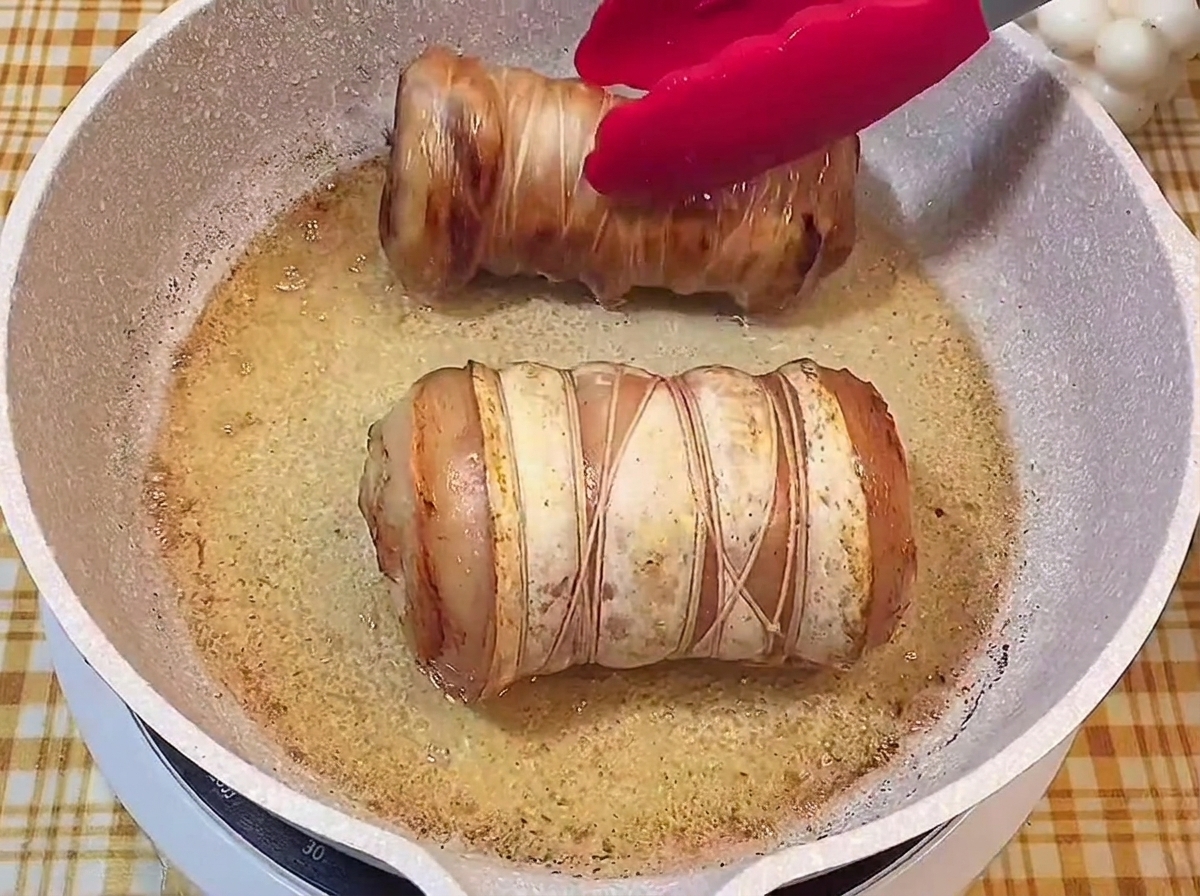
Fry the pork rolls, rotating them occasionally with tongs, until every side is deeply browned and develops a crispy crust. This caramelization adds a rich, savory depth of flavor to the final dish.
Tip: Dont rush the searing process; a deep, even golden-brown crust is essential for locking in the meats shape and building a complex flavor base. - 6Add aromatics and clear liquid
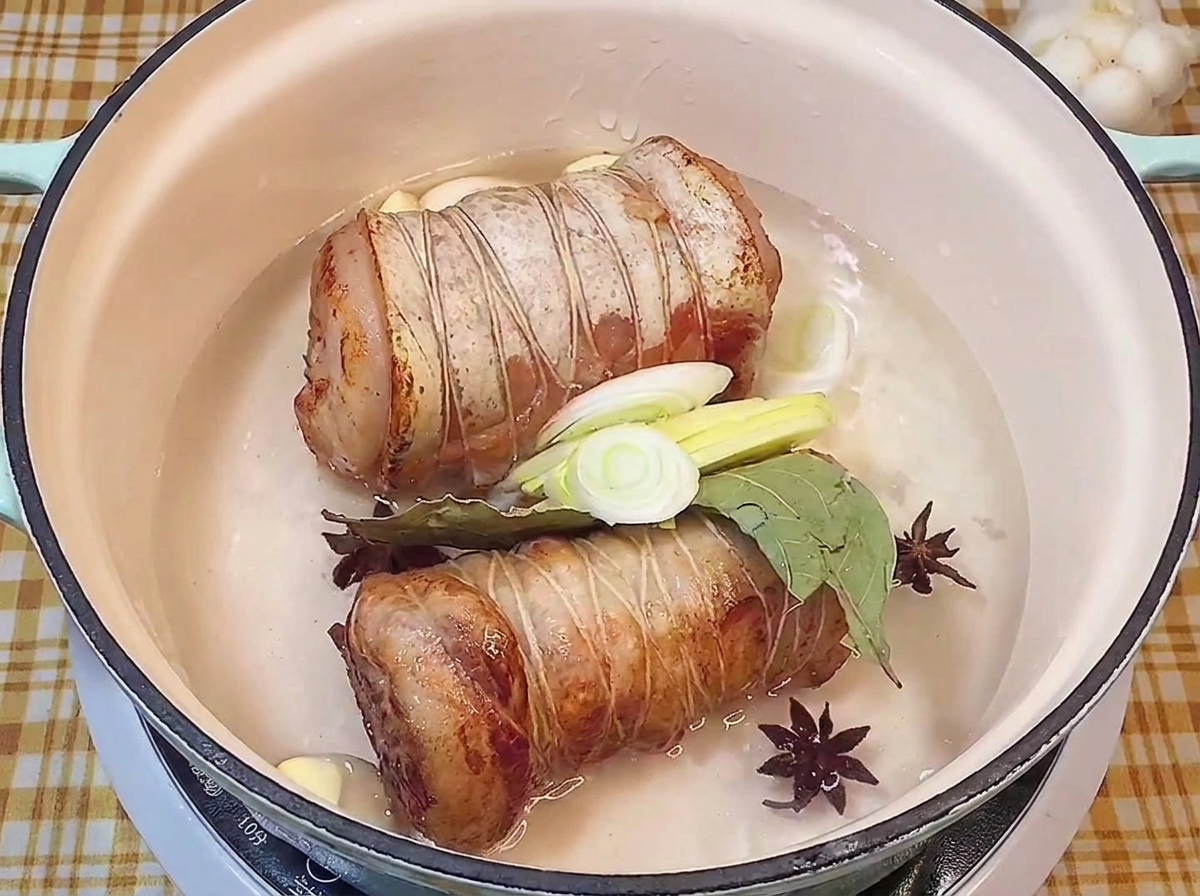
Transfer the seared pork rolls into a deep pot. Add aromatics like star anise, bay leaves, garlic cloves, and sliced leeks, then pour in enough clear liquid—such as water or a light broth—to partially submerge the ingredients.
Tip: Toasting the dry spices (like star anise) lightly in a dry pan before adding them to the pot can awaken their essential oils, resulting in a much more fragrant broth. - 7Add dark soy sauce and braise
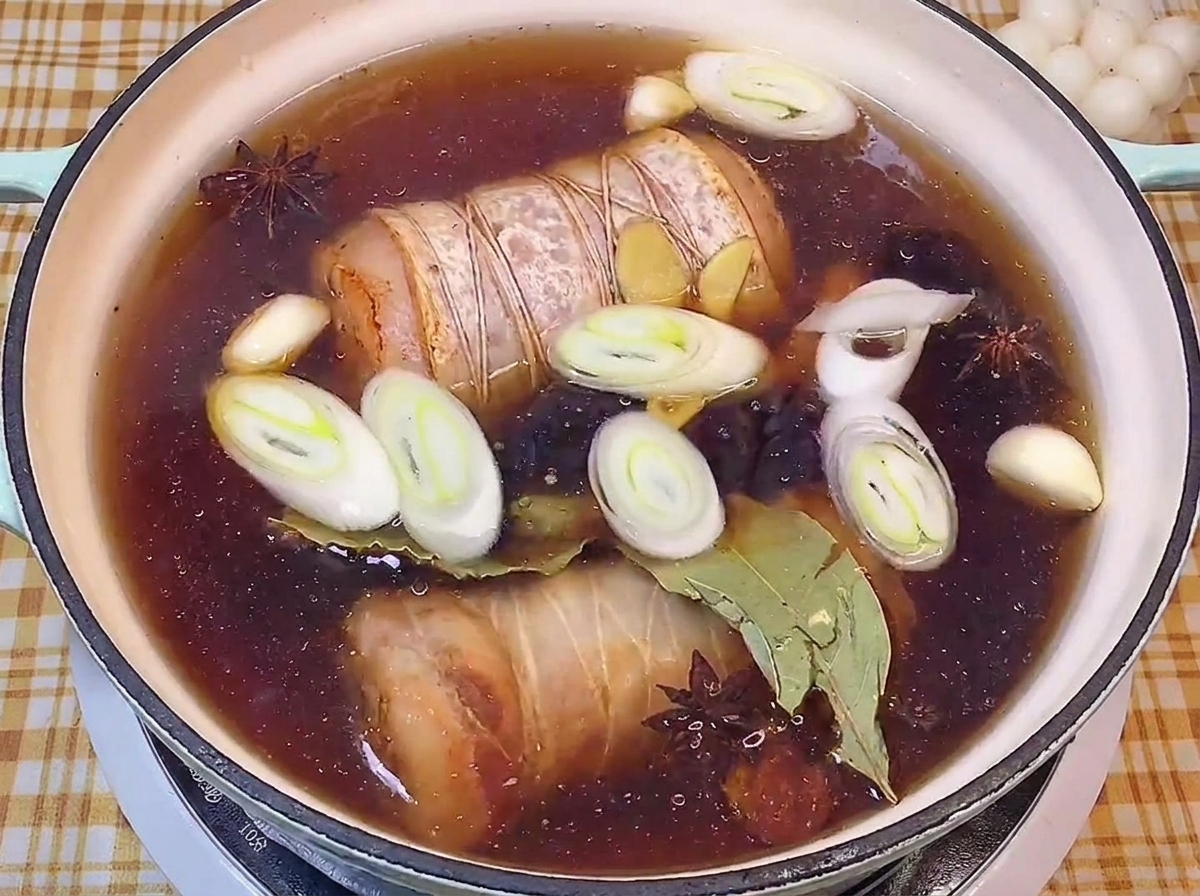
Pour dark soy sauce into the pot, blending it with the clear liquid to create a rich, dark braising base. Maintain a gentle simmer to slowly braise the rolled pork belly, allowing it to absorb the savory flavors and deep color.
Tip: Keep the heat at a gentle simmer to ensure the pork becomes tender without drying out or breaking apart. - 8Marinate the pork and egg
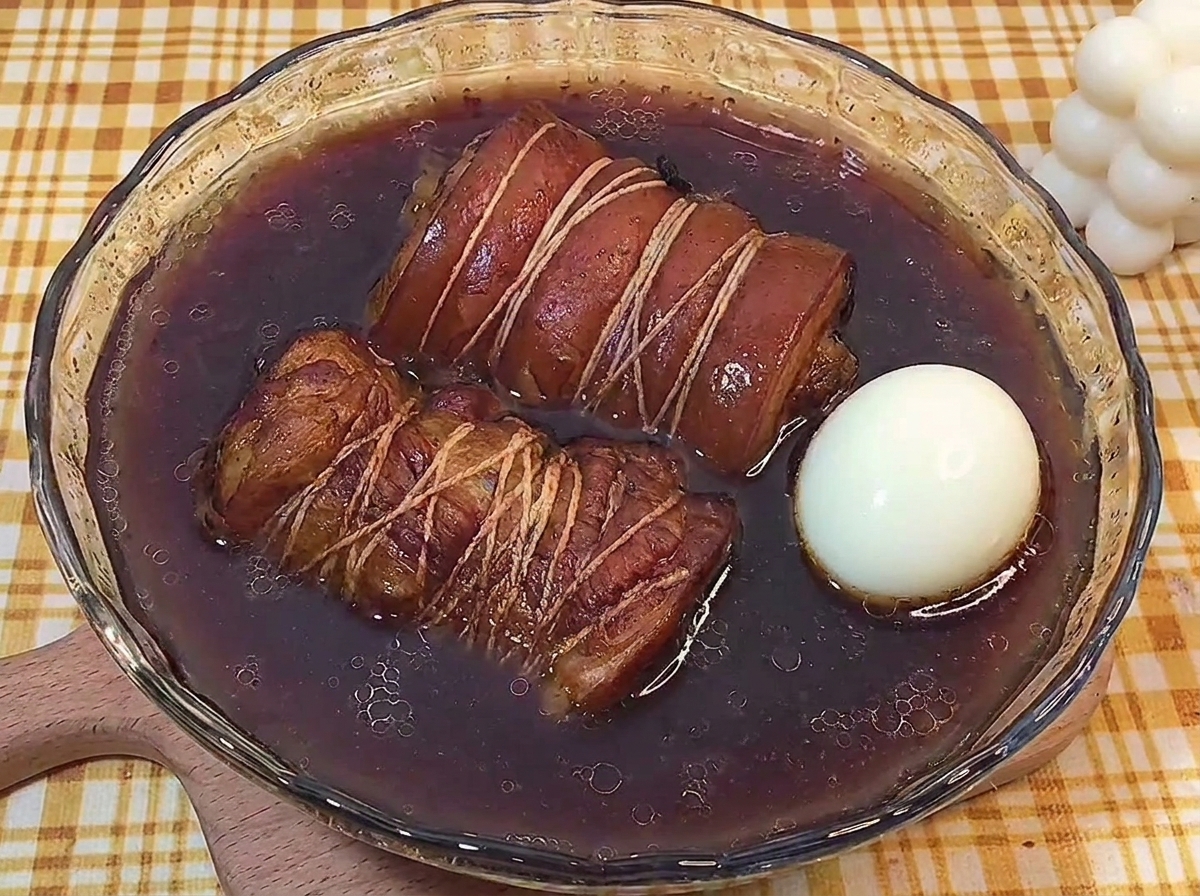
Place the braised pork rolls and the peeled boiled egg into the rich, dark braising liquid. Allow them to marinate so the proteins absorb the savory flavors and develop a deep, appetizing color.
Tip: For the best flavor, let the pork and egg steep in the braising liquid overnight in the refrigerator. - 9Slice the braised pork
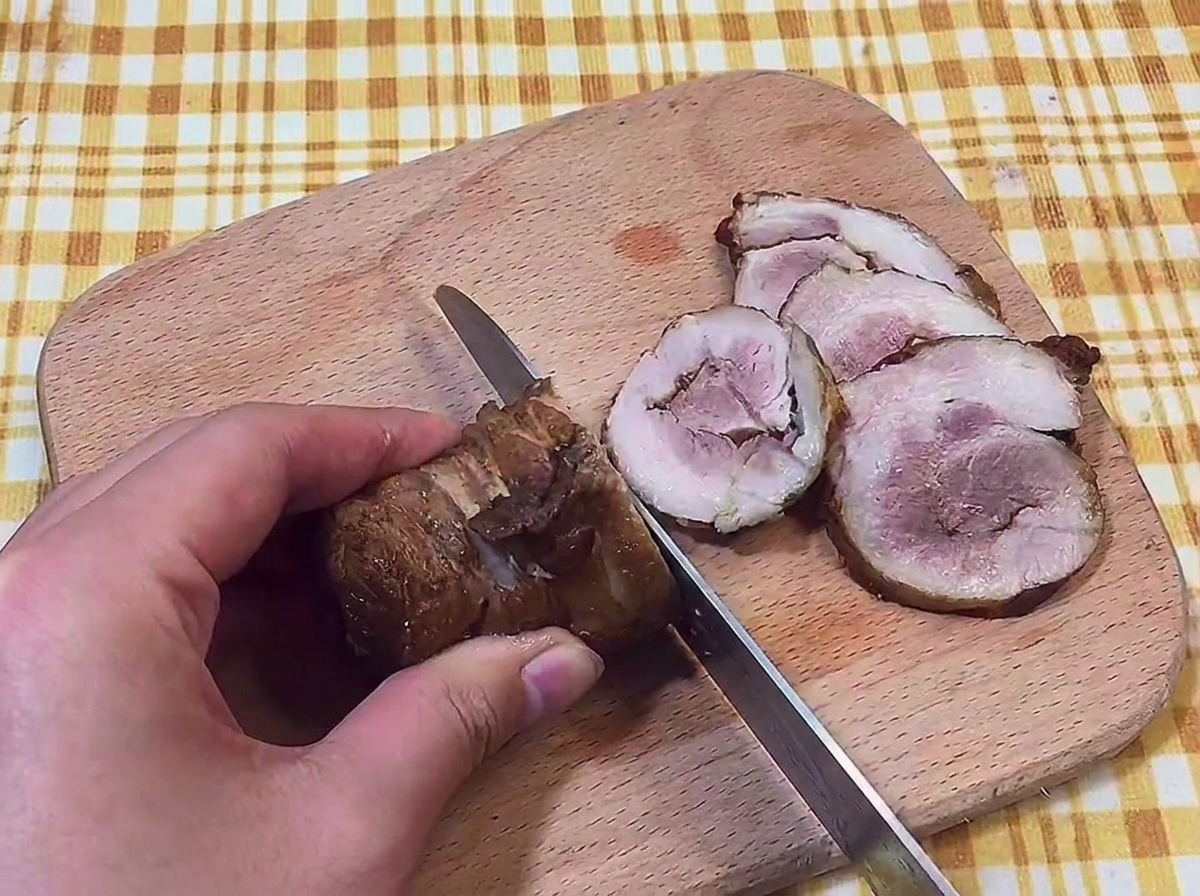
Transfer the marinated pork roll to a wooden cutting board. Using a sharp knife, carefully slice the meat into thin, even rounds to prepare it as a topping for the ramen.
Tip: Chilling the braised pork in the refrigerator before slicing helps the meat firm up, allowing you to cut perfectly thin slices without them crumbling. - 10Prepare the ramen package
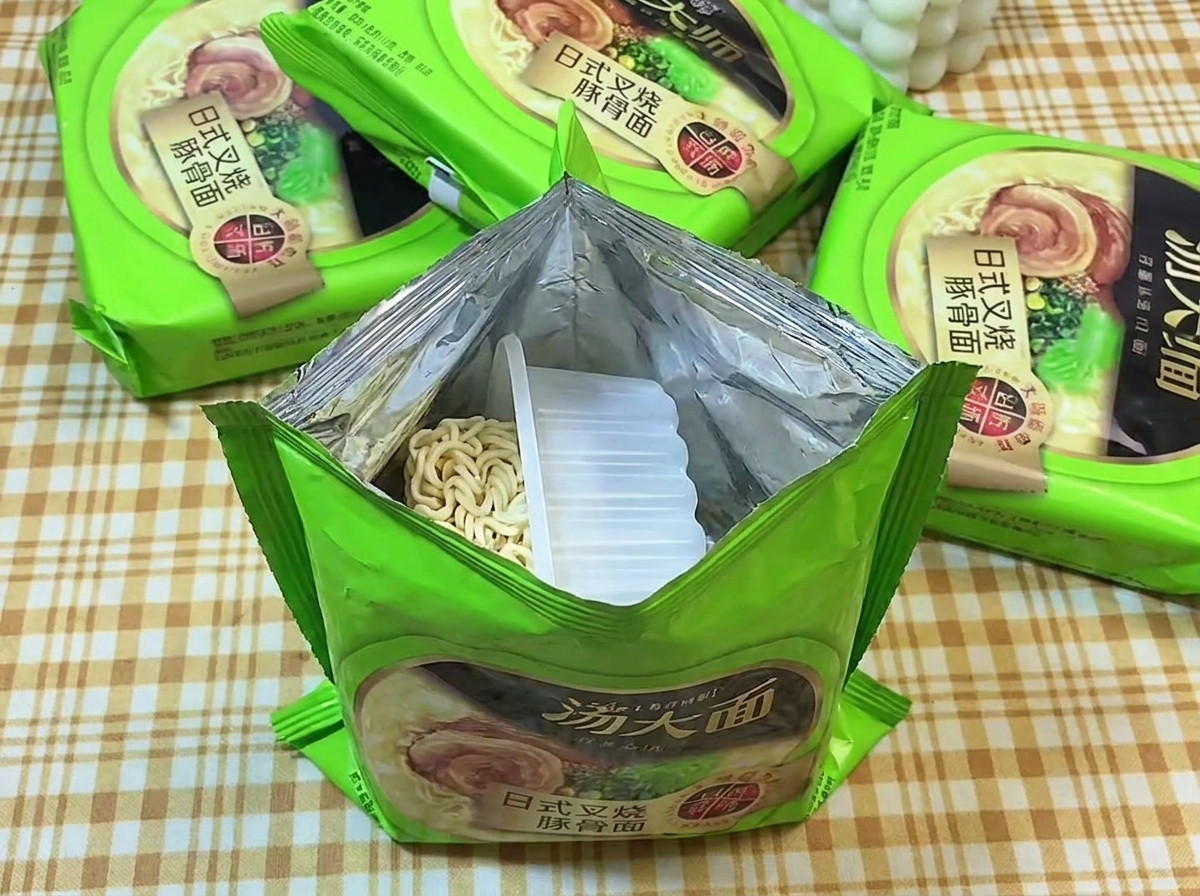
Open the package of instant ramen to reveal the dry noodle block and the accompanying flavor packets. Keep the noodles nearby and ready for the hot broth.
Tip: Handle the dry noodle block gently to prevent it from breaking into small pieces before cooking. - 11Add the soup base
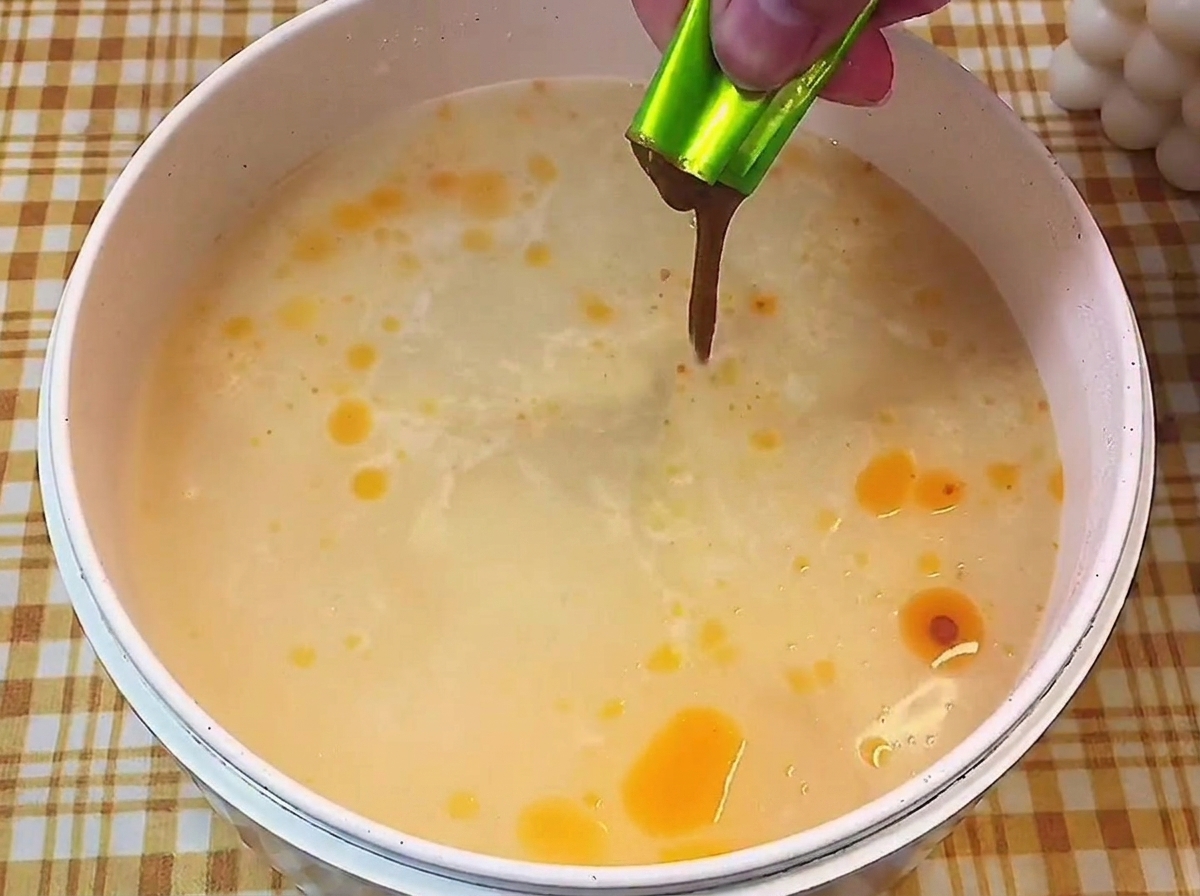
Bring a pot of water to a boil over medium-high heat. Carefully squeeze the liquid seasoning base from the ramen packet into the hot water, stirring gently to dissolve and create a rich, milky broth.
Tip: Add the liquid seasoning base to the water before dropping in the noodles so the noodles absorb maximum flavor as they cook. - 12Cook the ramen noodles

Drop the dry noodle block directly into the boiling, seasoned broth. Allow the noodles to cook undisturbed for a moment until they begin to soften and expand.
Tip: Once the noodles start to soften, use chopsticks to gently separate the strands to ensure they cook evenly and perfectly al dente. - 13Separate and simmer the noodles
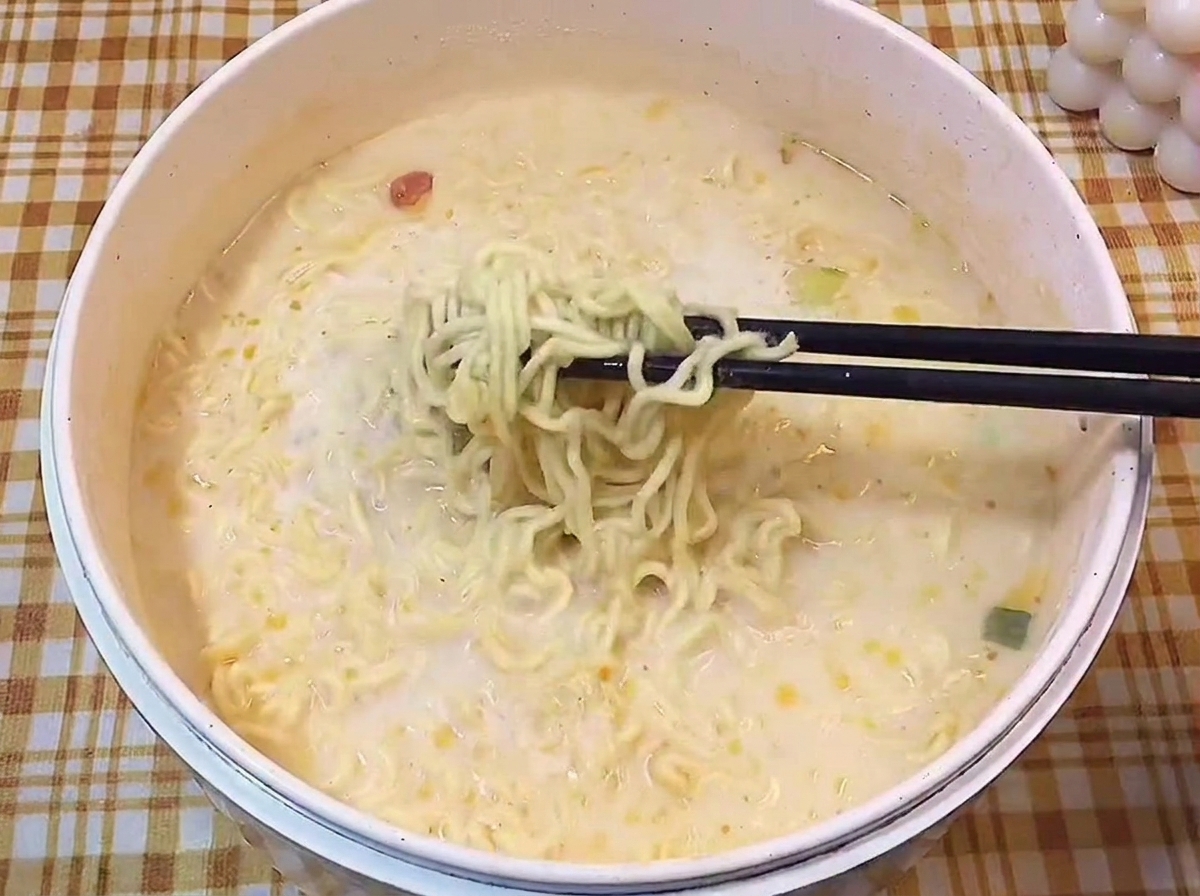
As the noodles cook in the simmering creamy broth, use chopsticks to gently loosen and separate the strands. This ensures they cook evenly and reach a perfect al dente texture.
Tip: For the best texture, cook the noodles slightly al dente, as they will continue to soften once resting in the hot soup bowl. - 14Arrange the Noodles
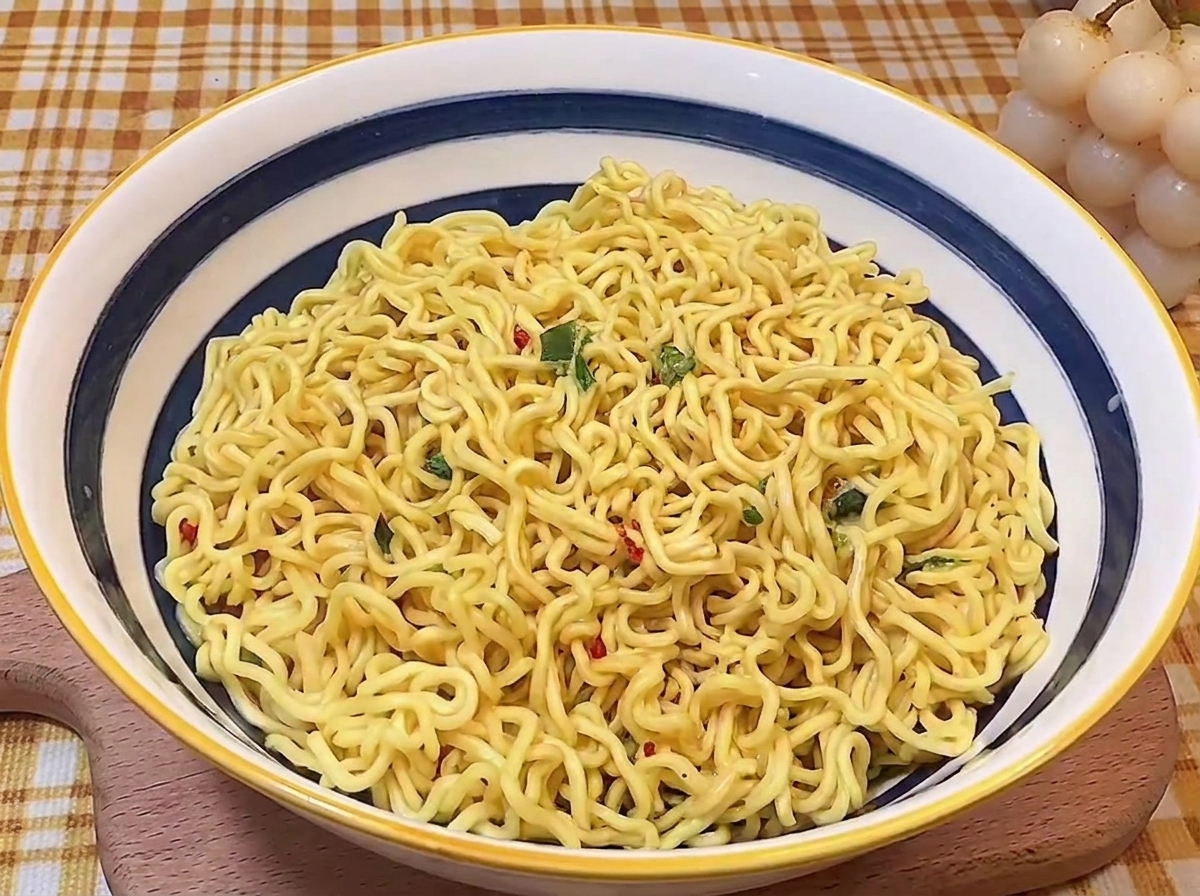
Transfer the cooked ramen noodles into your serving bowl, folding them neatly to create a clean, elevated mound in the center. This presentation helps support the toppings and ensures an appetizing look.
Tip: Use your chopsticks to gently fold the noodles over themselves in a single, continuous pile rather than dropping them loosely. - 15Add the Chashu Slices
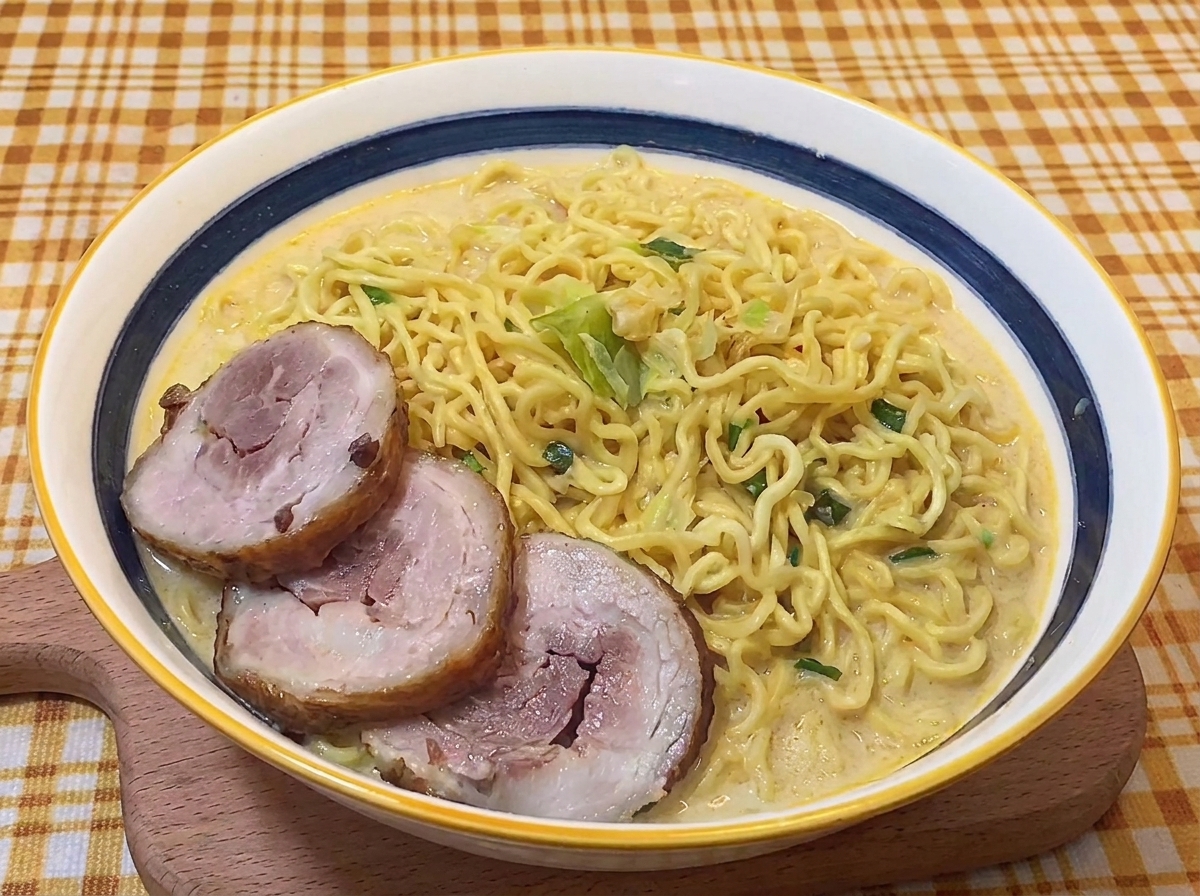
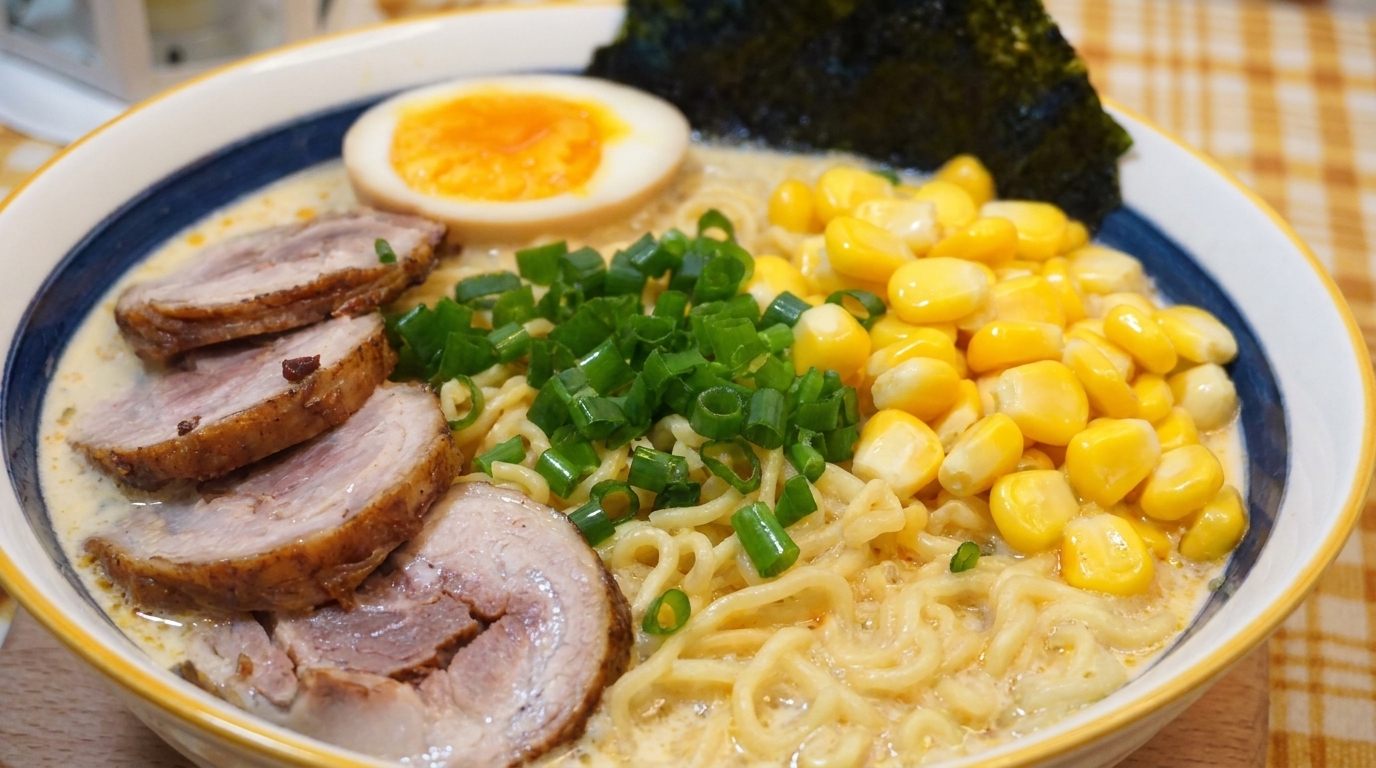
Lay thick, generous slices of the prepared braised pork chashu over the noodles on one side of the bowl. The warmth of the noodles and broth will gently heat the pork, melting the fat slightly.
Tip: Slicing the chashu while it is completely chilled makes it easier to get clean, even cuts before adding them to the hot soup. - 16Add Sweet Corn and Egg
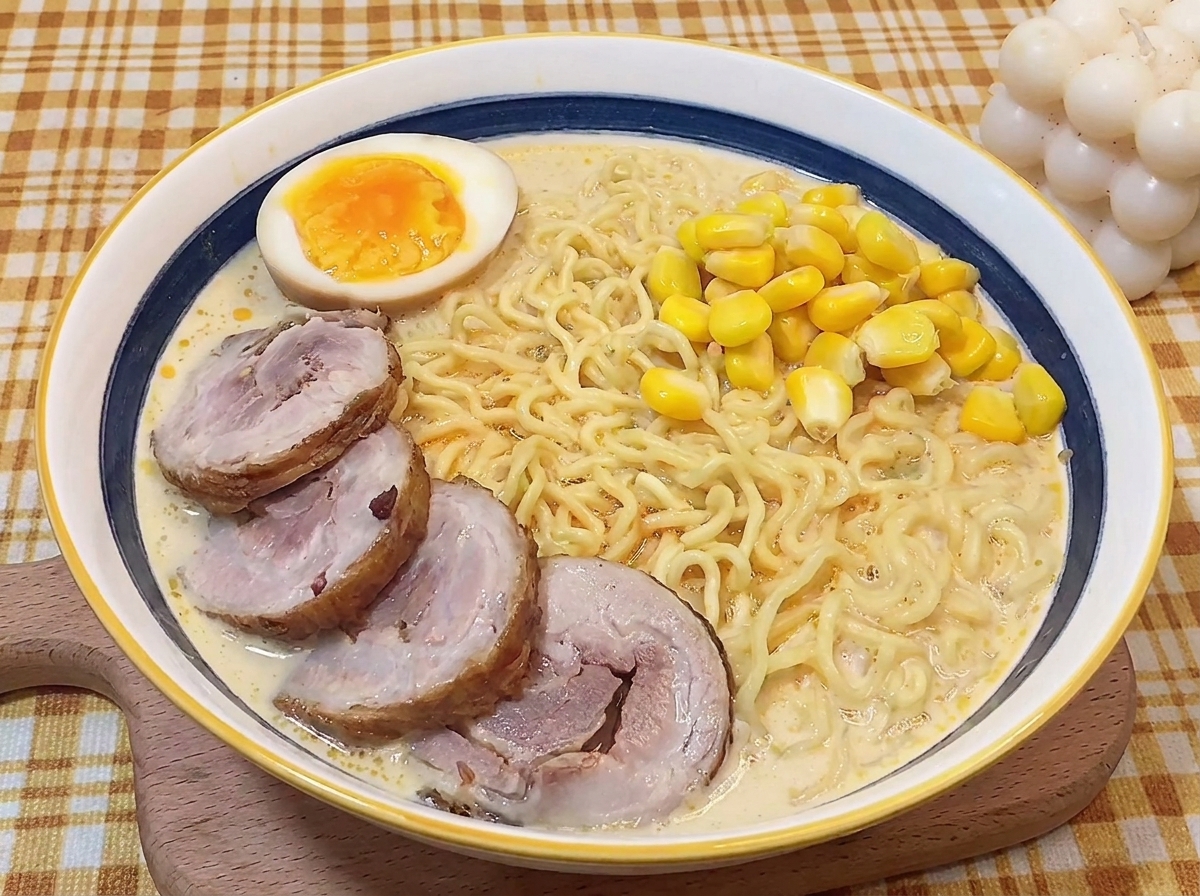
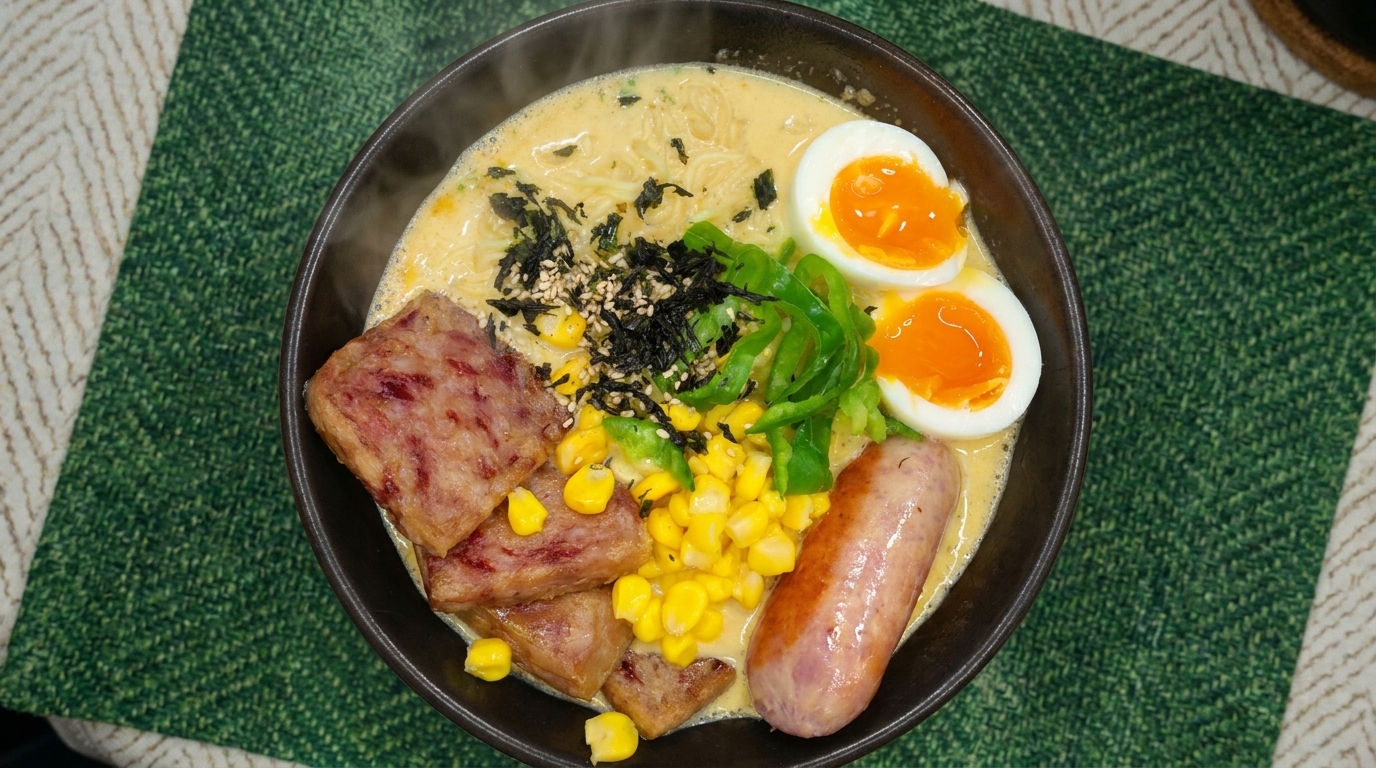
Spoon a pile of sweet corn kernels next to the chashu slices for a pop of color and a touch of sweetness. Nestle a halved soft-boiled egg into the opposite side of the bowl to complete this layer of toppings.
Tip: Drain the sweet corn well before adding it to the bowl to prevent any excess water from diluting the rich, creamy broth.