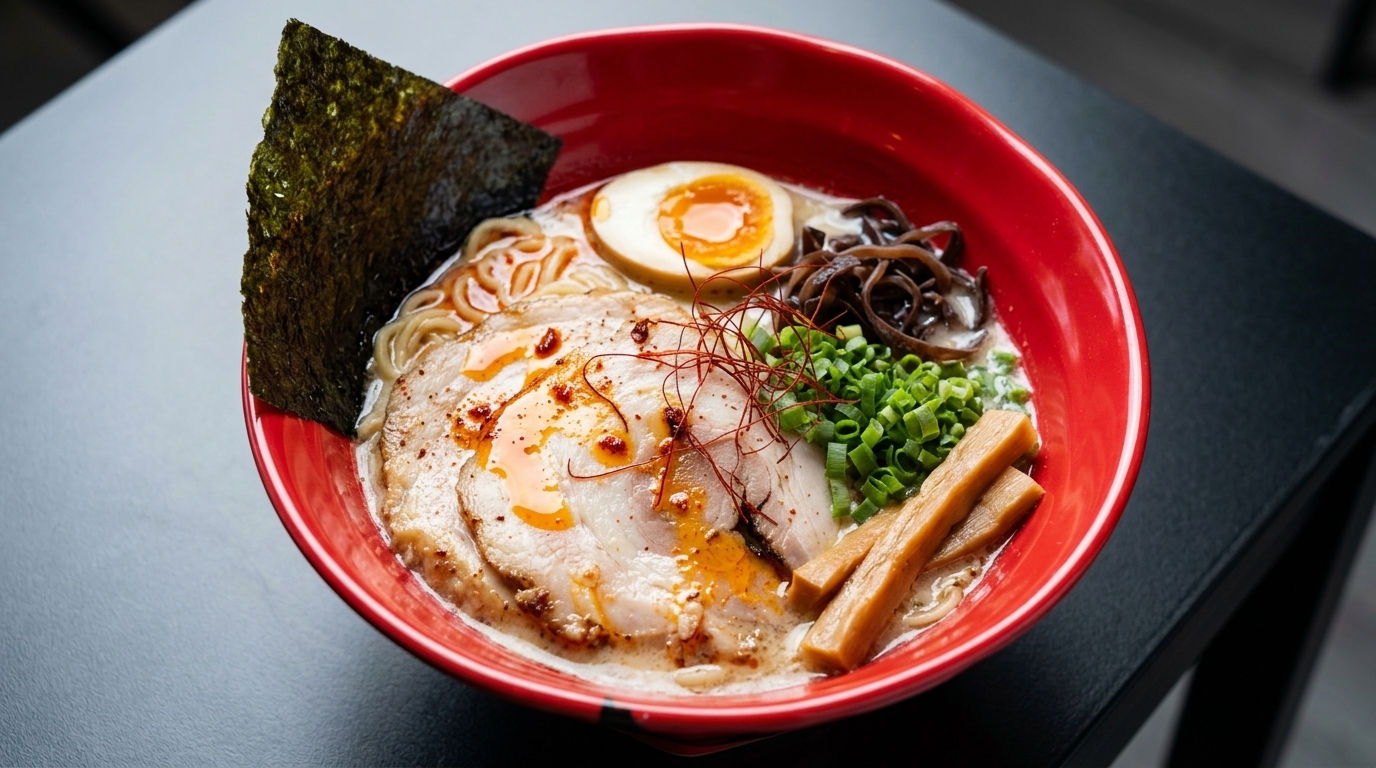
Classic Japanese Miso Ramen
Experience the deep, comforting flavors of Japanese miso ramen. A rich pork bone broth infused with savory miso paste, paired with springy noodles, chashu, and sweet corn.
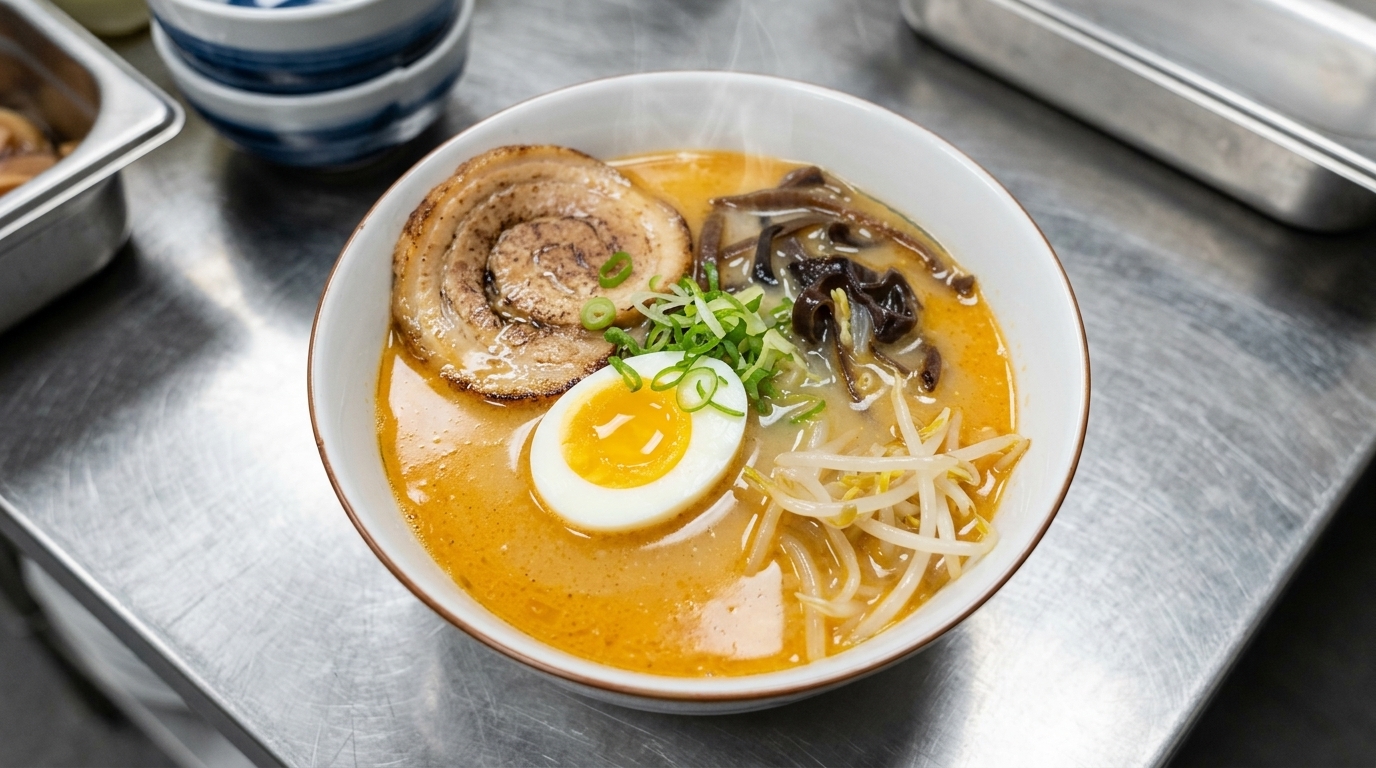
Miso ramen holds a special place in the hearts of many, famously celebrated in pop culture and beloved for its soul-warming qualities. Originating in Hokkaido, this style of ramen relies on a robust pork bone broth balanced by the earthy, fermented complexity of miso paste. It is a dish that transforms simple ingredients into a deeply satisfying bowl of comfort.
Ingredients
- 500 ml opaque pork bone broth
- 2 tbsp thick brown miso paste
- 1 tbsp dark liquid seasoning (soy-based tare)
- 1 tbsp light liquid seasoning (mirin)
- 1 tbsp fat emulsion or pork fat
- 1 portion fresh thin ramen noodles
- 2 slices chashu pork belly
- 12 soft-boiled egg
- 2 tbsp sweet corn kernels
- to taste shredded green onions
Instructions
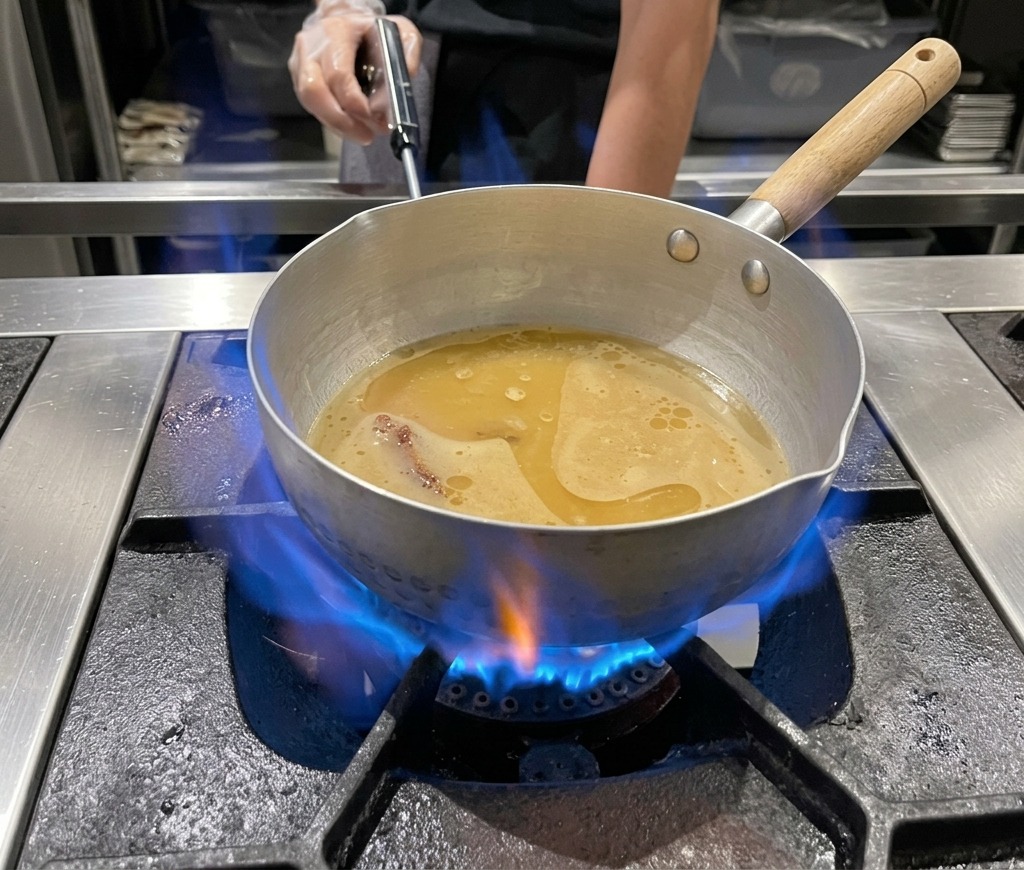
- 1Prepare the broth base
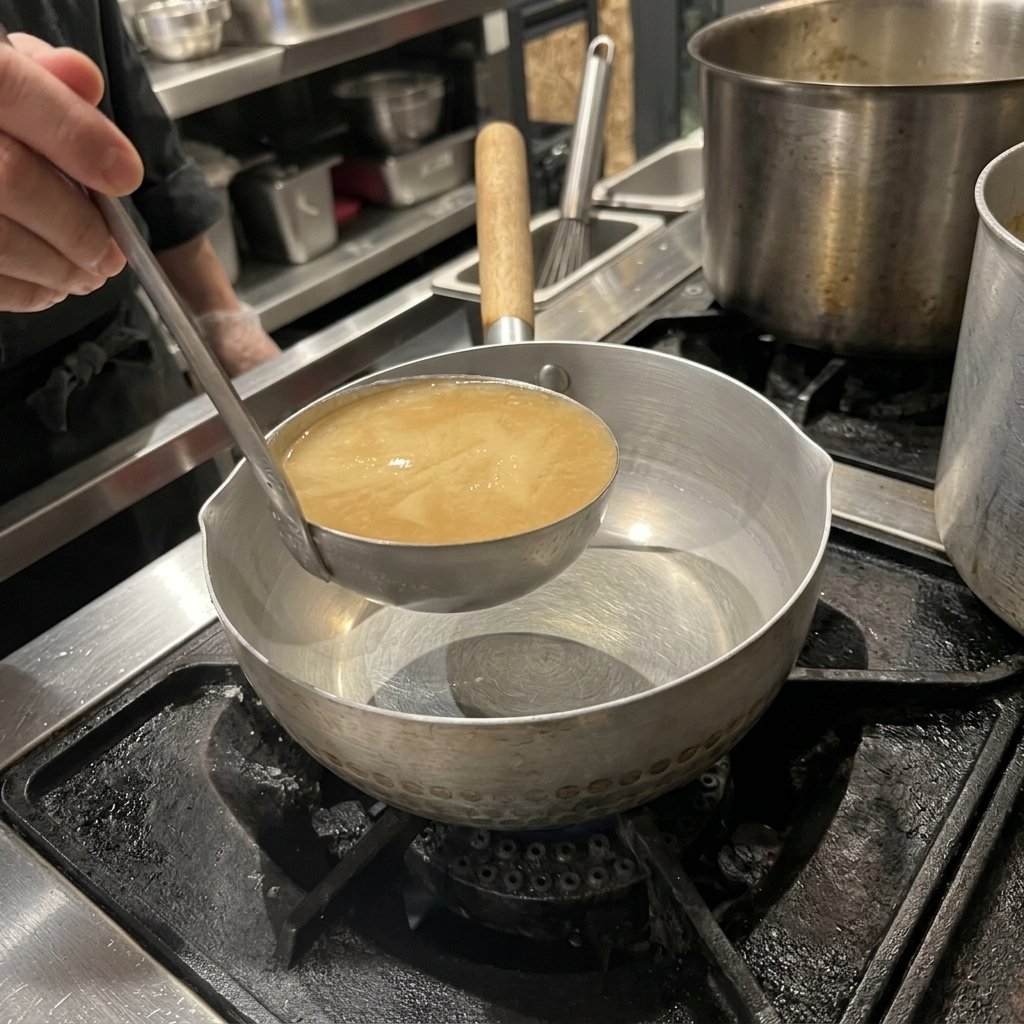
Start by transferring your prepared opaque pork bone broth into a small metal pot over the stovetop. This rich foundation will provide the deep, savory baseline needed for the ultimate ramen soup.
Tip: Heating the broth in a smaller pot makes it easier to whisk in the seasonings and miso paste evenly. - 2Add the ramen tare

Pour the dark liquid seasoning into the hot broth to start building the complex flavor profile. This provides the primary salt and umami component.
Tip: Add seasonings gradually and taste as you go to avoid over-salting the broth. - 3Add light seasoning
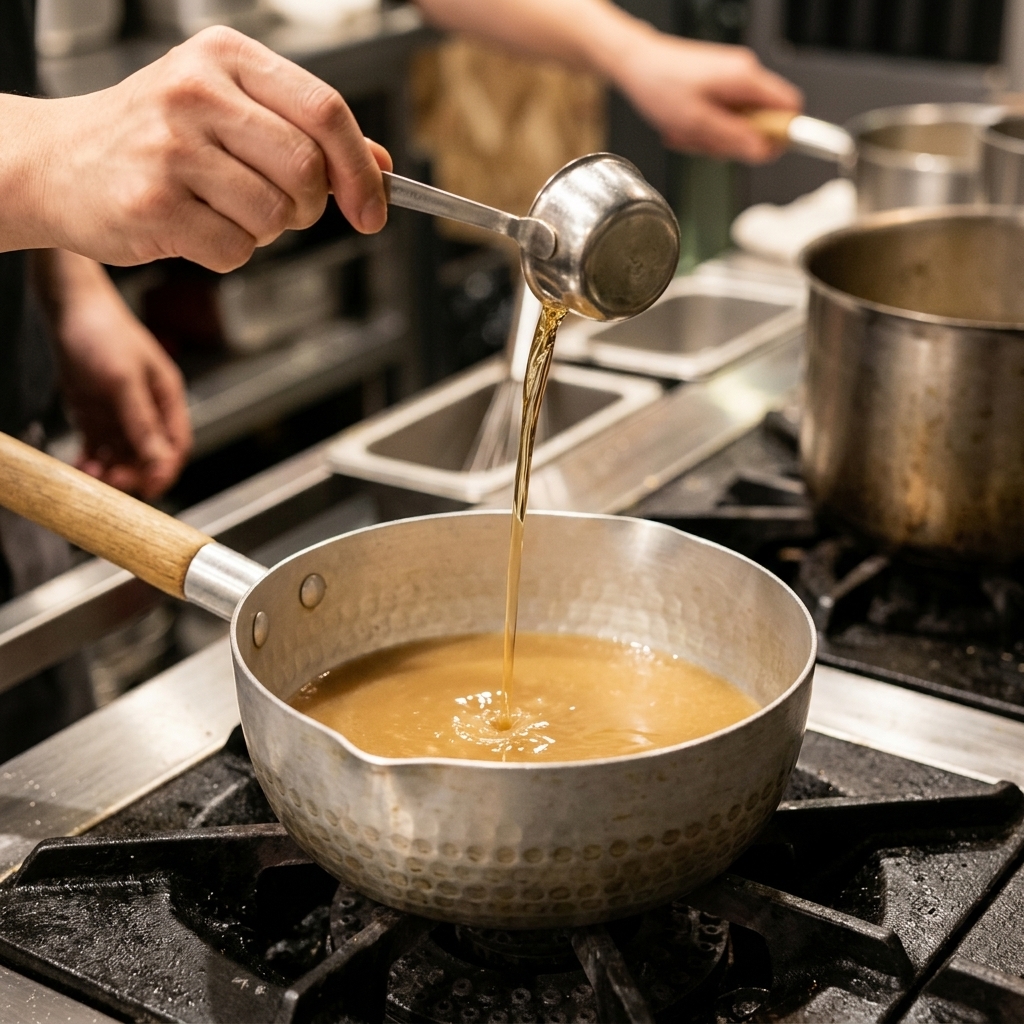
Pour the clear, light-colored liquid seasoning, such as mirin, into the broth using a small measuring spoon. This adds a hint of sweetness to balance the rich, salty flavors.
Tip: Using a small measuring cup ensures precise control over the seasoning level. - 4Add the miso paste
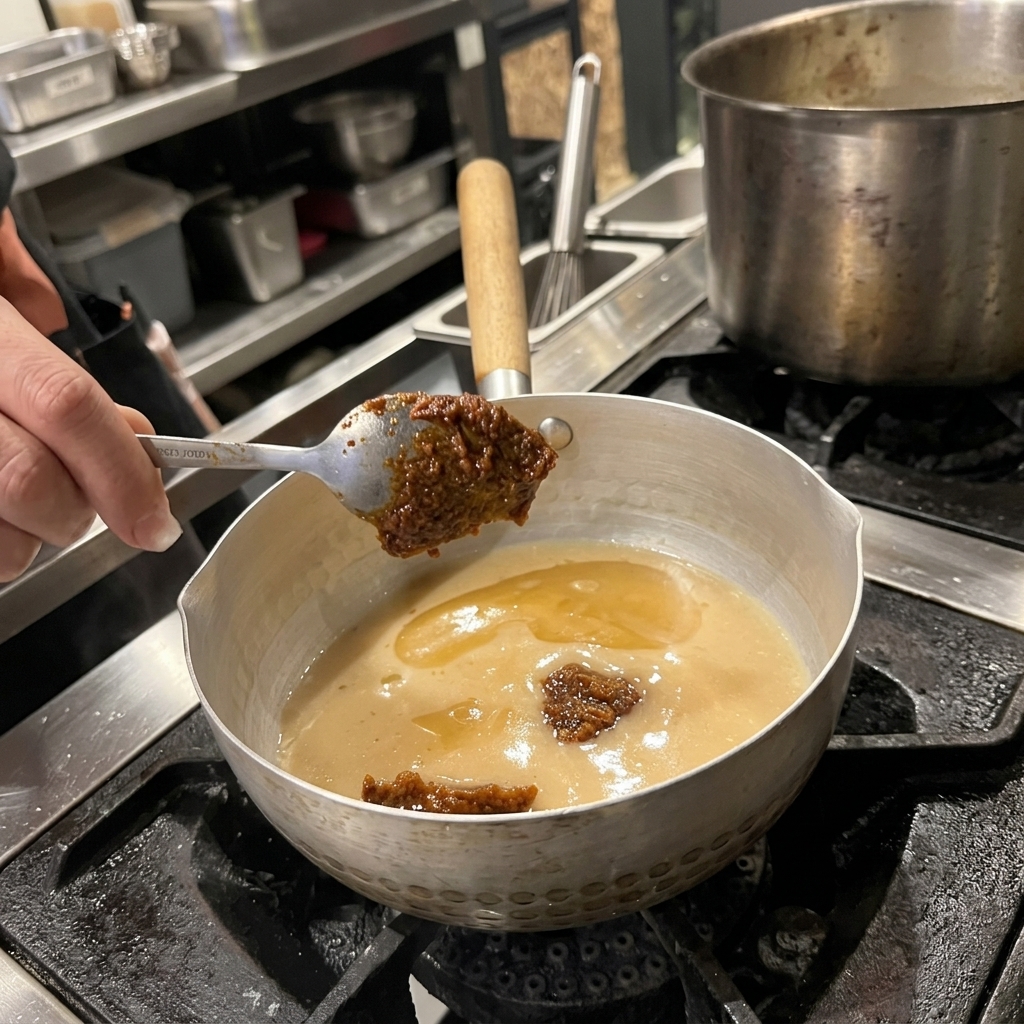
Introduce a generous dollop of thick, brown miso paste into the seasoned broth. Miso is the star ingredient of this soup, providing a rich, fermented earthiness that defines the classic Japanese flavor.
Tip: To prevent clumps, you can dissolve the miso paste in a ladle with a little hot broth before mixing it into the main pot. - 5Incorporate the fat emulsion
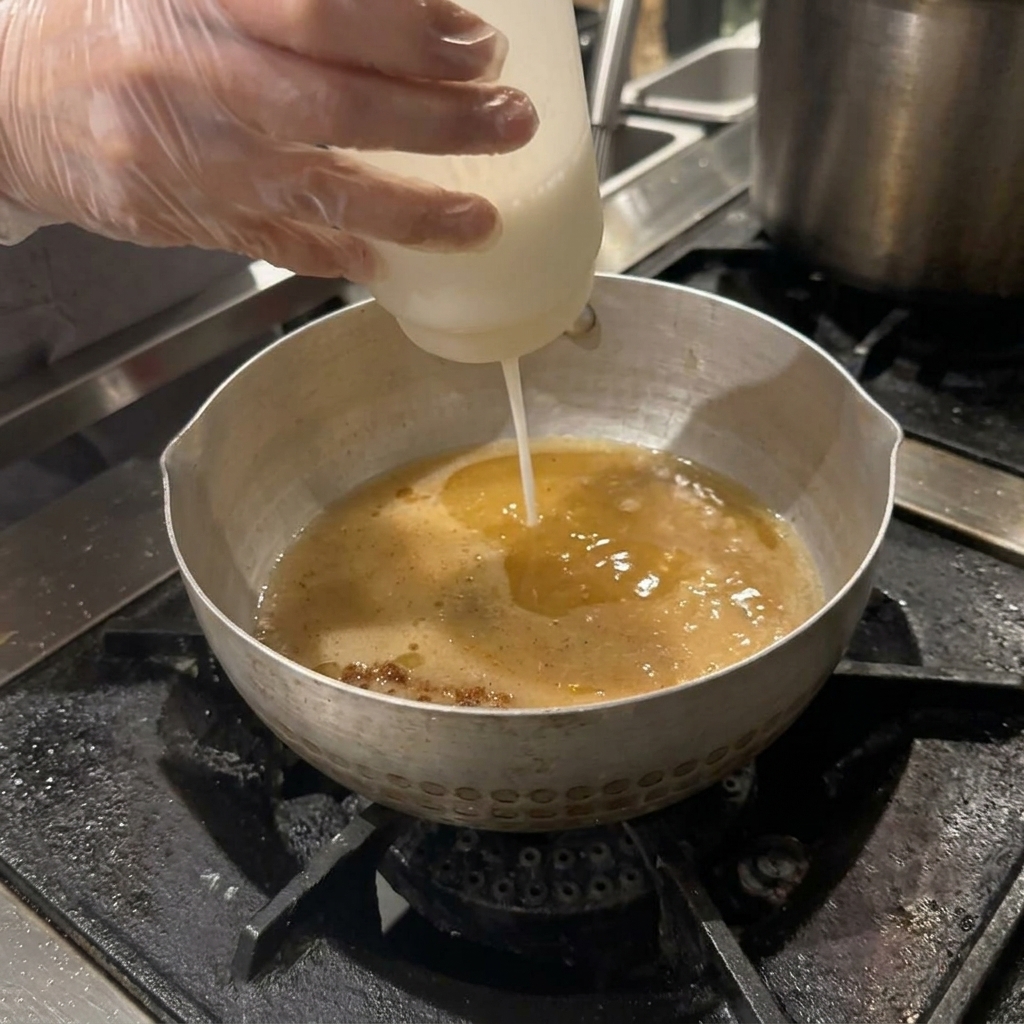
Squeeze the white liquid emulsion or flavored fat from the plastic bottle directly into the mixture. This final touch of fat enriches the soups mouthfeel, ensuring the broth clings perfectly to the ramen noodles later on.
Tip: Adding fat emulsions at this stage helps them integrate smoothly without separating. - 6Simmer and blend the soup
Place the pot over an open gas flame and bring the broth mixture to a gentle simmer. Heating the soup allows all the distinct seasonings, miso paste, and pork bone broth to meld together into a unified, flavorful base.
Tip: Stir continuously as the soup heats to ensure the miso dissolves completely and doesnt burn at the bottom of the pot. - 7Dissolve the miso paste
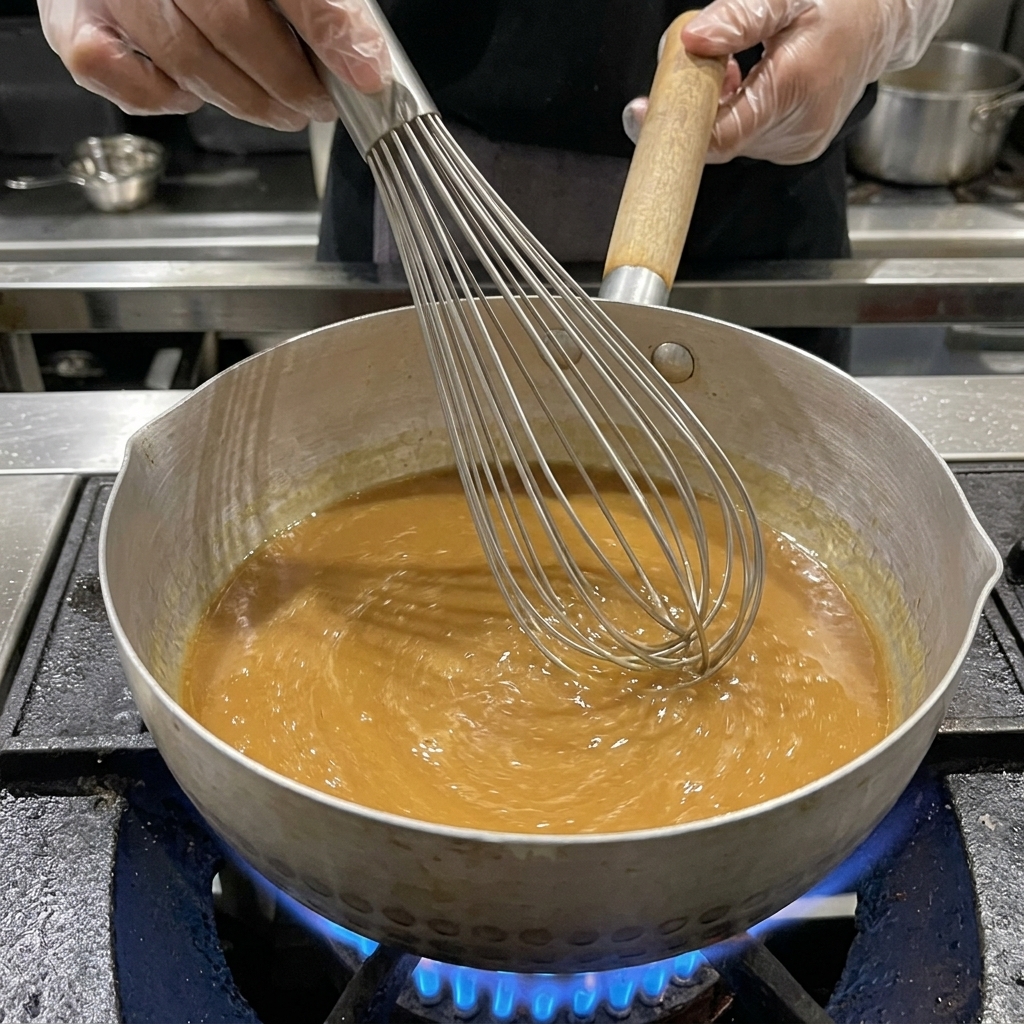
Vigorously stir the broth mixture using a metal whisk. This ensures the miso paste and other seasonings dissolve completely and evenly into the soup base. Continue to heat the broth until it comes to a gentle boil, allowing all the rich flavors to blend together.
Tip: Turn down the heat slightly when initially whisking in the miso paste to prevent it from clumping, then return it to a simmer. - 8Boil the ramen noodles
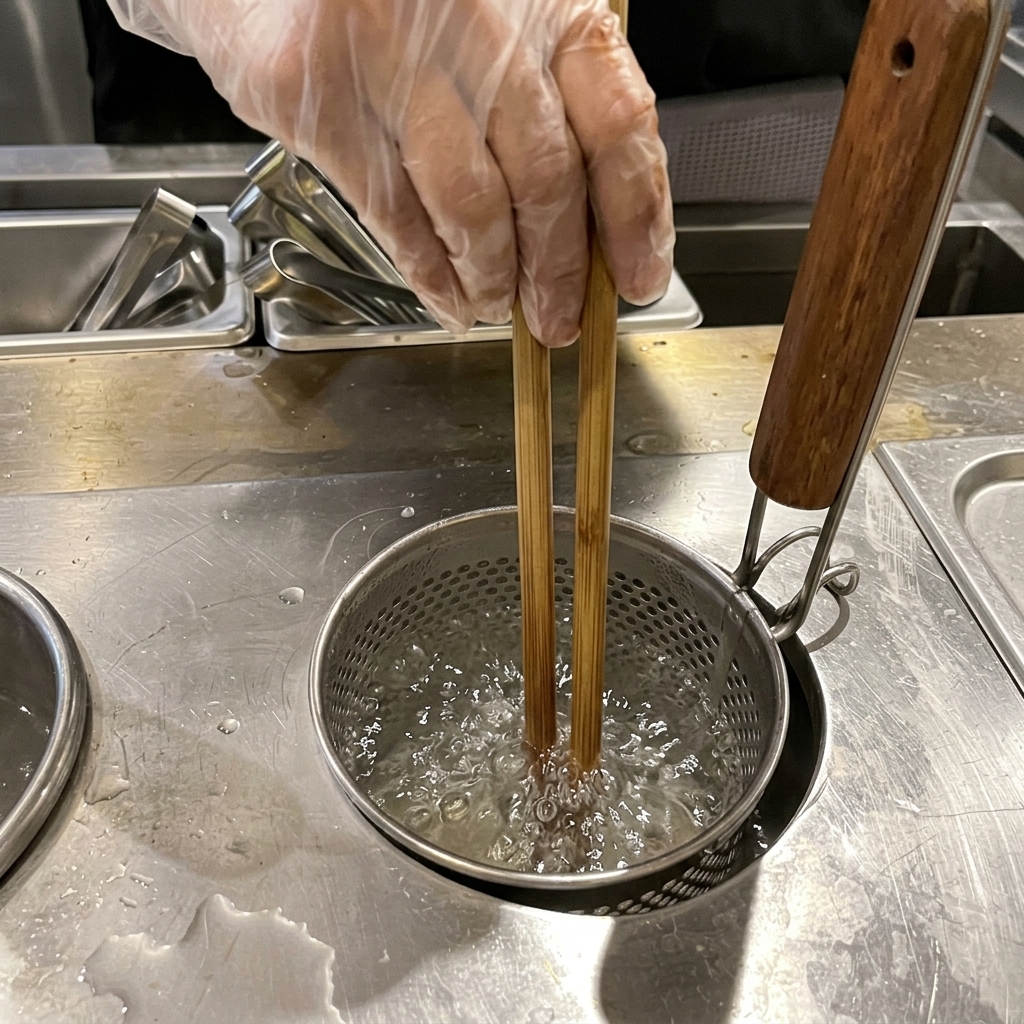
Submerge the fresh ramen noodles into a large pot of vigorously boiling water using a cylindrical metal noodle strainer. Immediately use wooden chopsticks to gently agitate and separate the noodles so they cook evenly without clumping together.
Tip: Maintain a rolling boil to prevent the noodles from becoming gummy, and cook for exactly two minutes for a perfect springy texture. - 9Transfer the cooked ramen
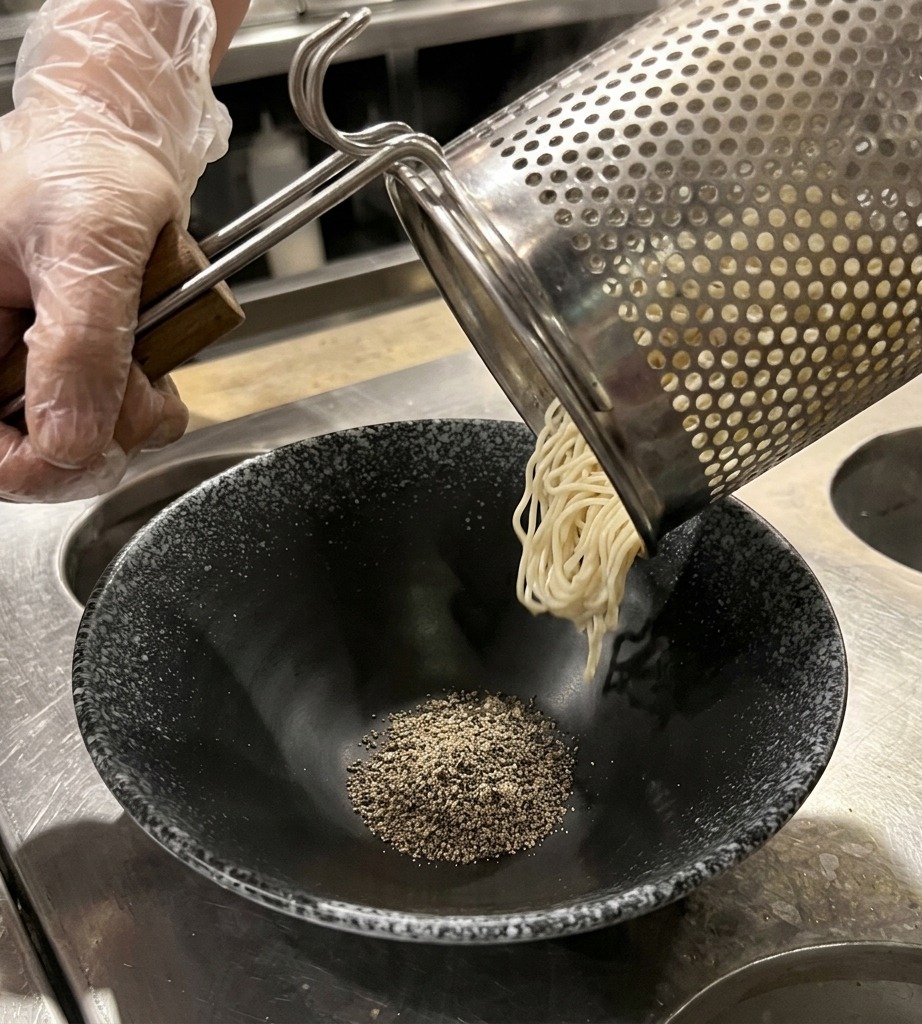
Once the ramen noodles have boiled for exactly 2 minutes, lift the metal strainer basket from the water. Give it a few firm shakes to ensure all excess water is fully drained before moving the noodles to the serving bowl. This prevents the concentrated miso broth from becoming diluted.
Tip: Work quickly during this step so the noodles dont stick together in the basket or lose their chewy al dente texture. - 10Pour the hot broth
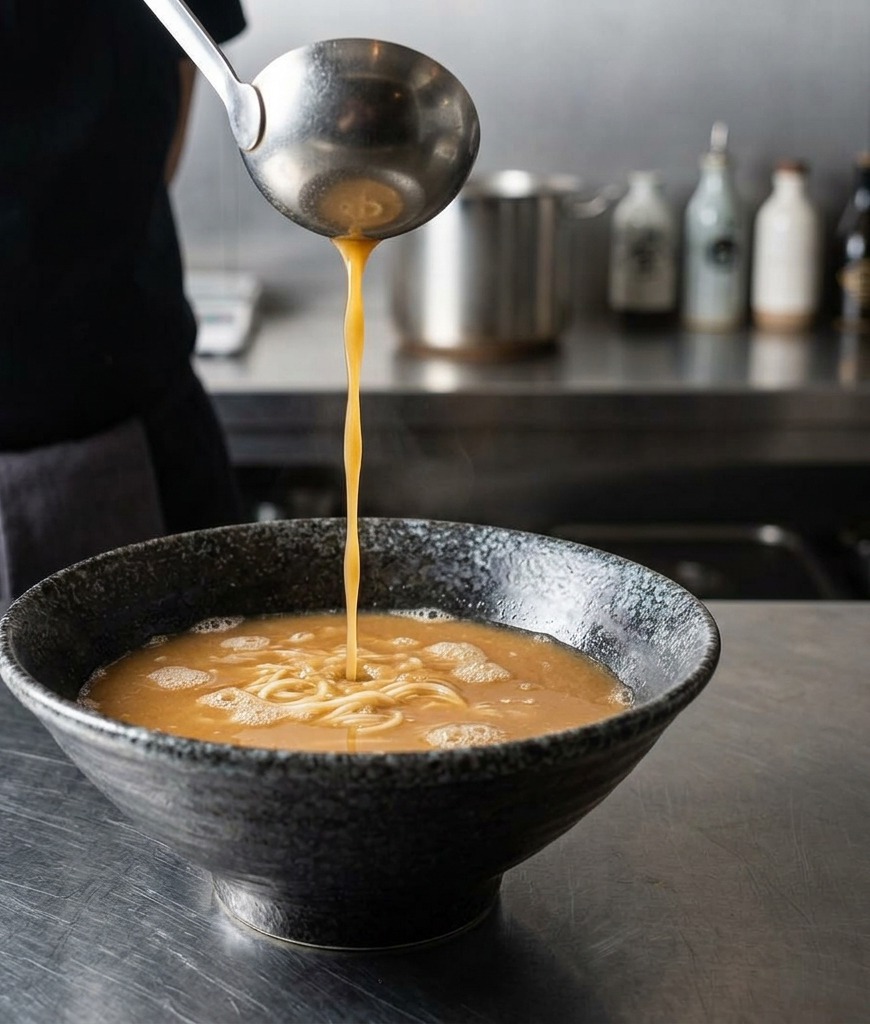
Ladle the piping hot, savory miso broth directly over the cooked noodles in the serving bowl. Pouring the steaming broth heats the bowl instantly and releases a rich, appetizing aroma.
Tip: Ensure the broth is nearly boiling when poured so the finished dish stays perfectly hot throughout the meal. - 11Arrange the noodles
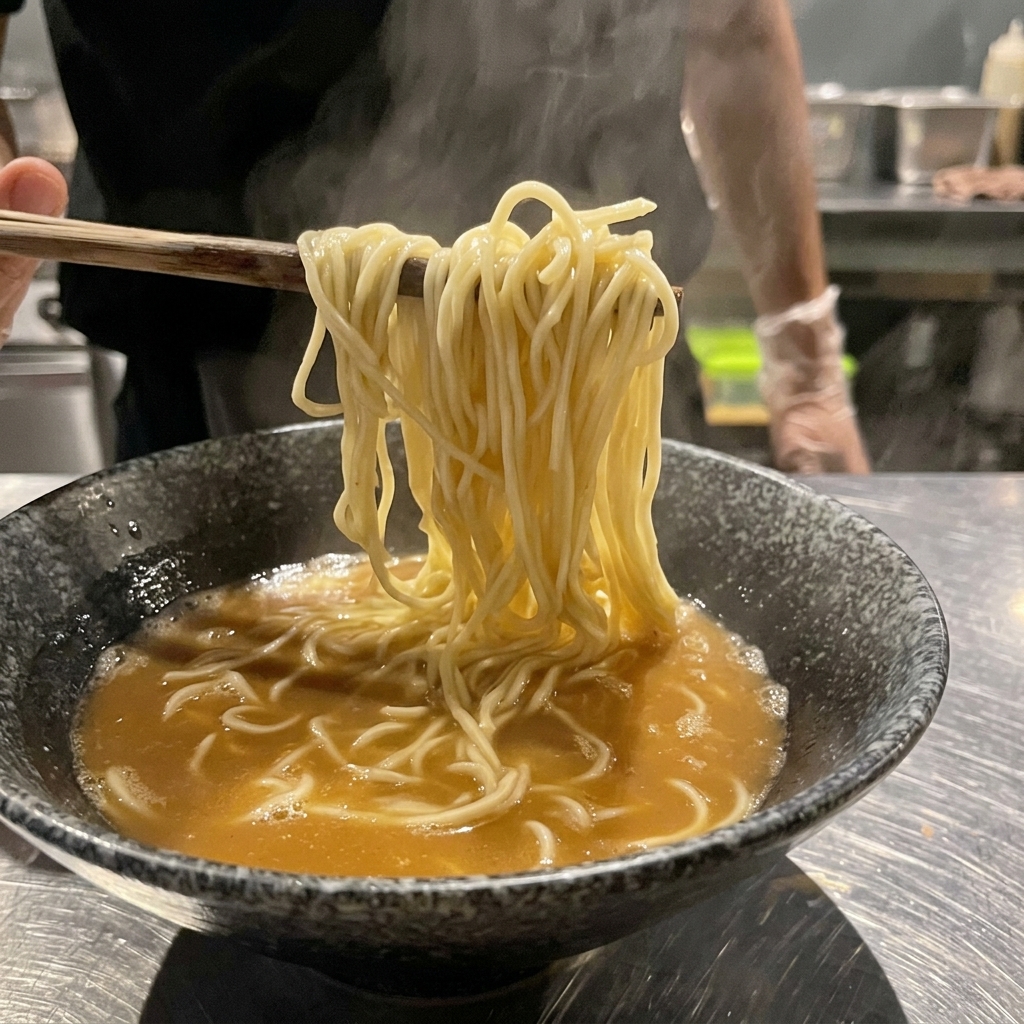
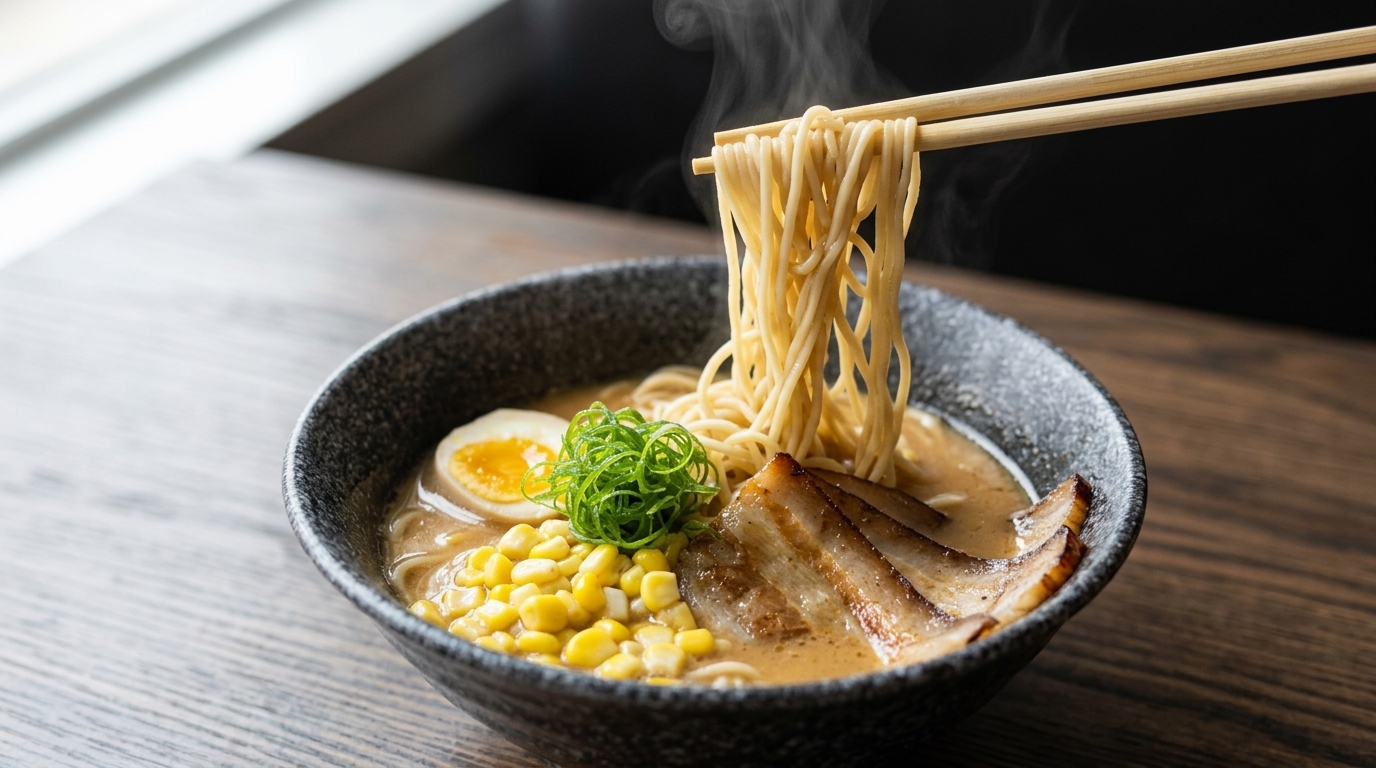
Using wooden chopsticks, gently lift and fold the ramen noodles within the hot broth. This untangles the strands and creates a neat mound in the center of the bowl.
Tip: A clean noodle fold elevates the presentation, making your homemade ramen look like a bowl from a professional shop. - 12Add the egg
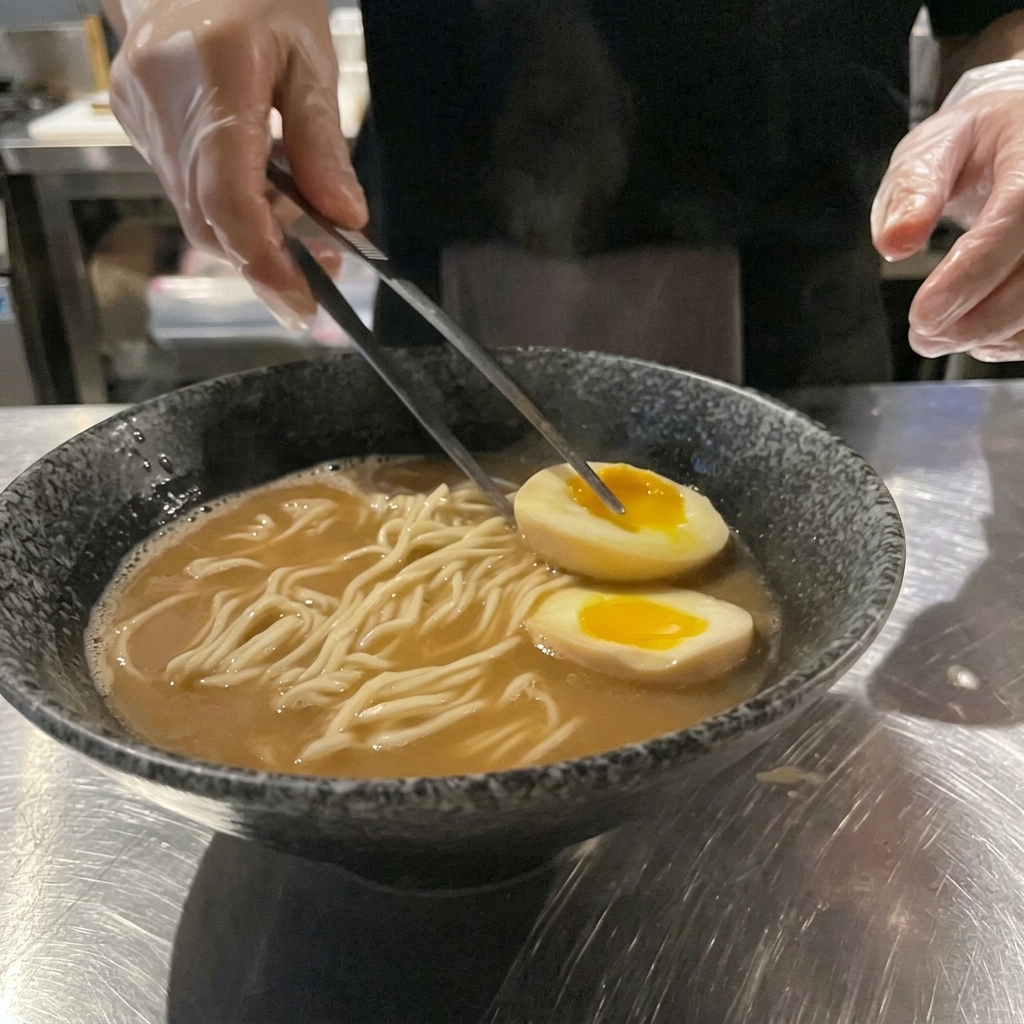
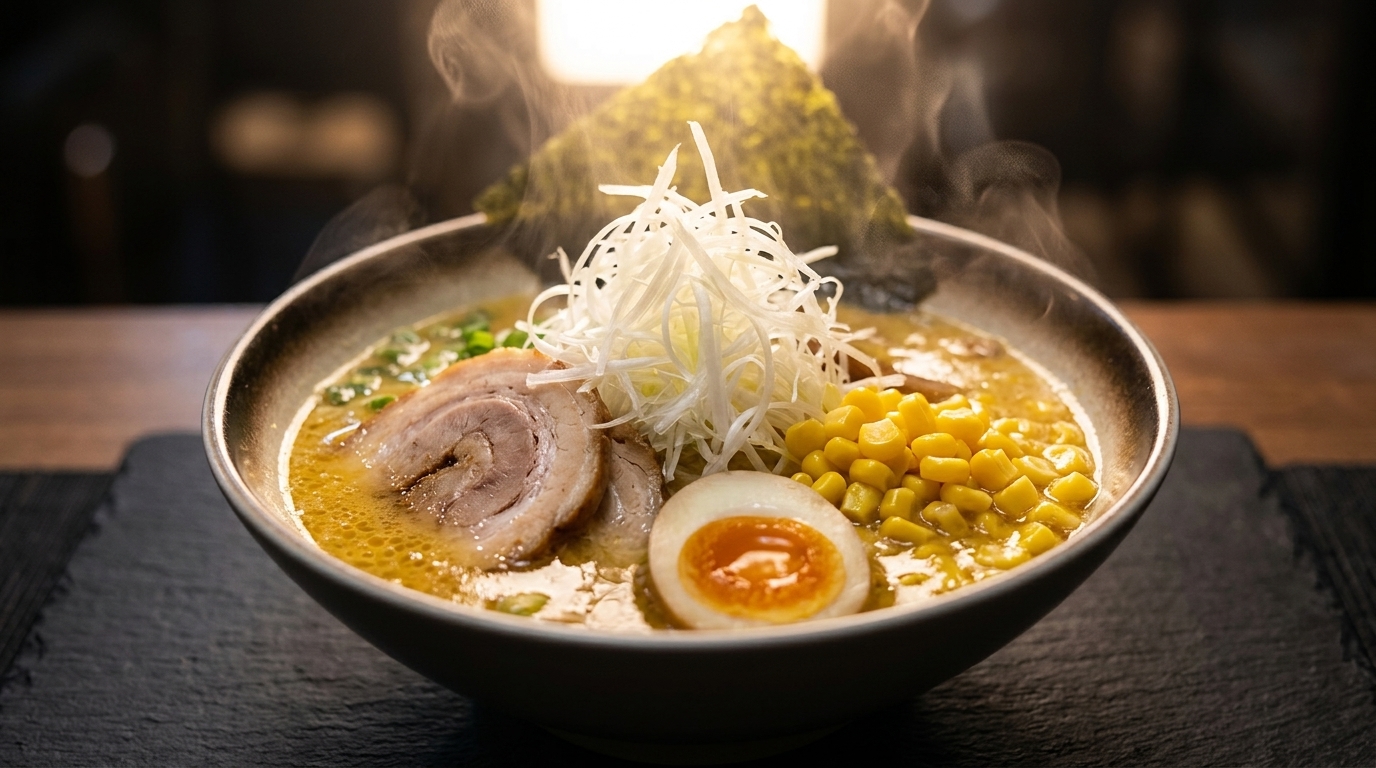
Carefully place a halved soft-boiled egg directly onto the neatly folded noodles. The rich, jammy yolk adds a creamy texture and a beautiful visual contrast to the finished ramen.
Tip: Slice the egg with a piece of clean fishing line or a very sharp, thin knife for a perfect cut without smearing the soft yolk. - 13Add the chashu pork
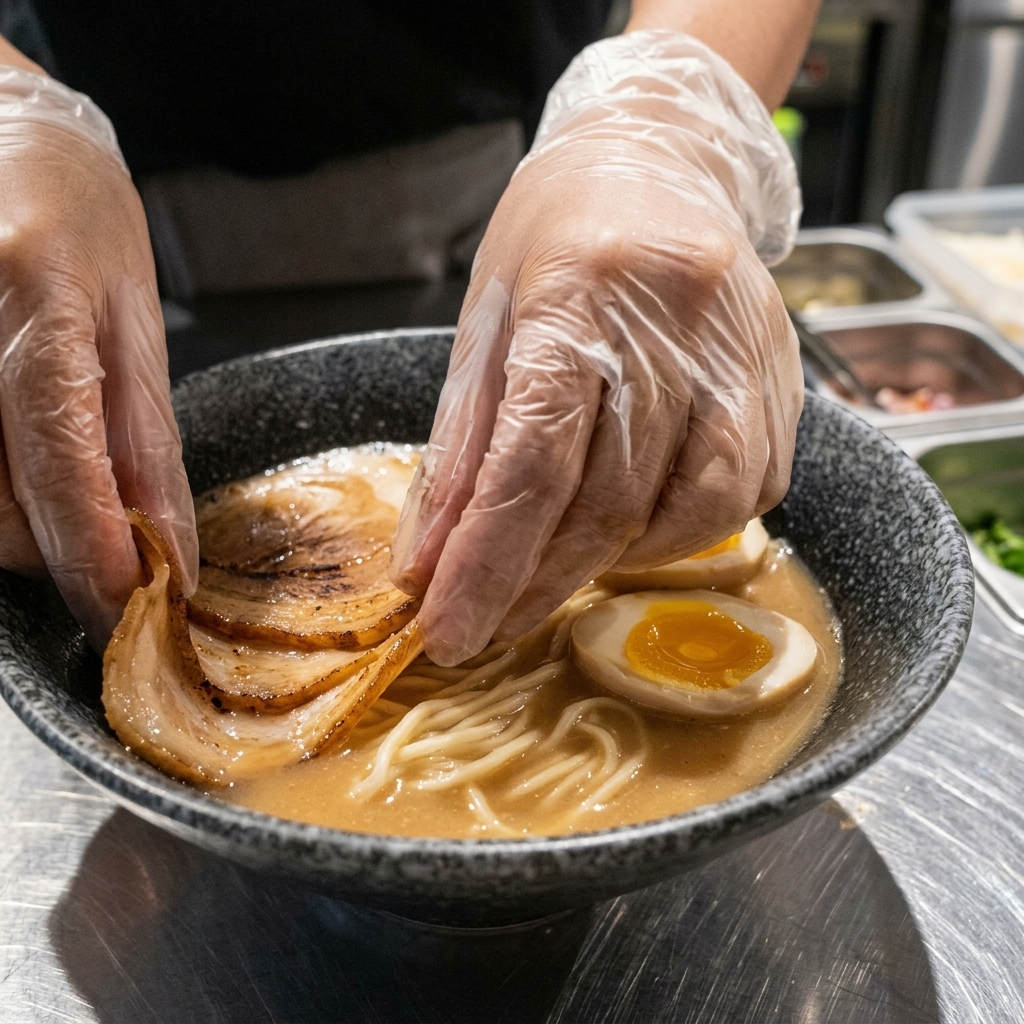
Carefully arrange several slices of prepared chashu pork belly along the inner edge of the ramen bowl. The residual heat from the steaming hot broth will gently warm the pork, softening the fat and releasing its rich, savory flavors into the soup.
Tip: For an extra depth of flavor, lightly torch the chashu slices for a few seconds right before adding them to the bowl. - 14Top with sweet corn
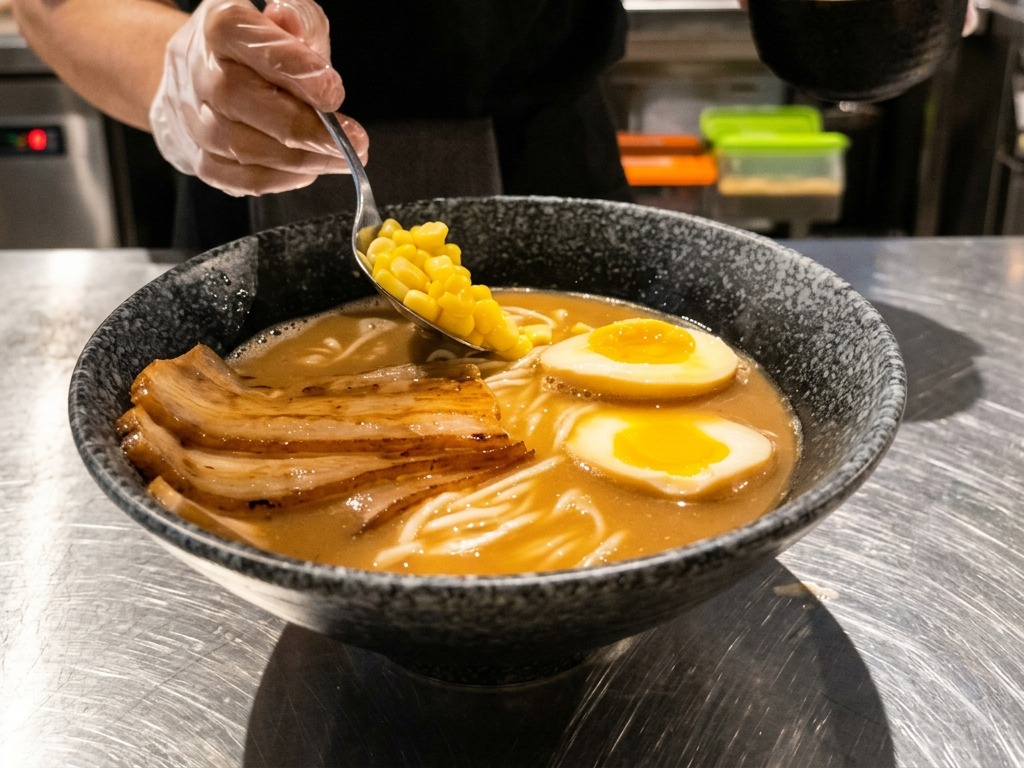
Use a spoon to neatly deposit a small mound of bright yellow sweet corn kernels next to the sliced pork. The crisp texture and natural pop of sweetness from the corn perfectly balances the deep, savory, and salty notes of the miso broth.
Tip: If using canned corn, ensure it is drained thoroughly before adding it so the excess liquid doesnt dilute your rich broth.