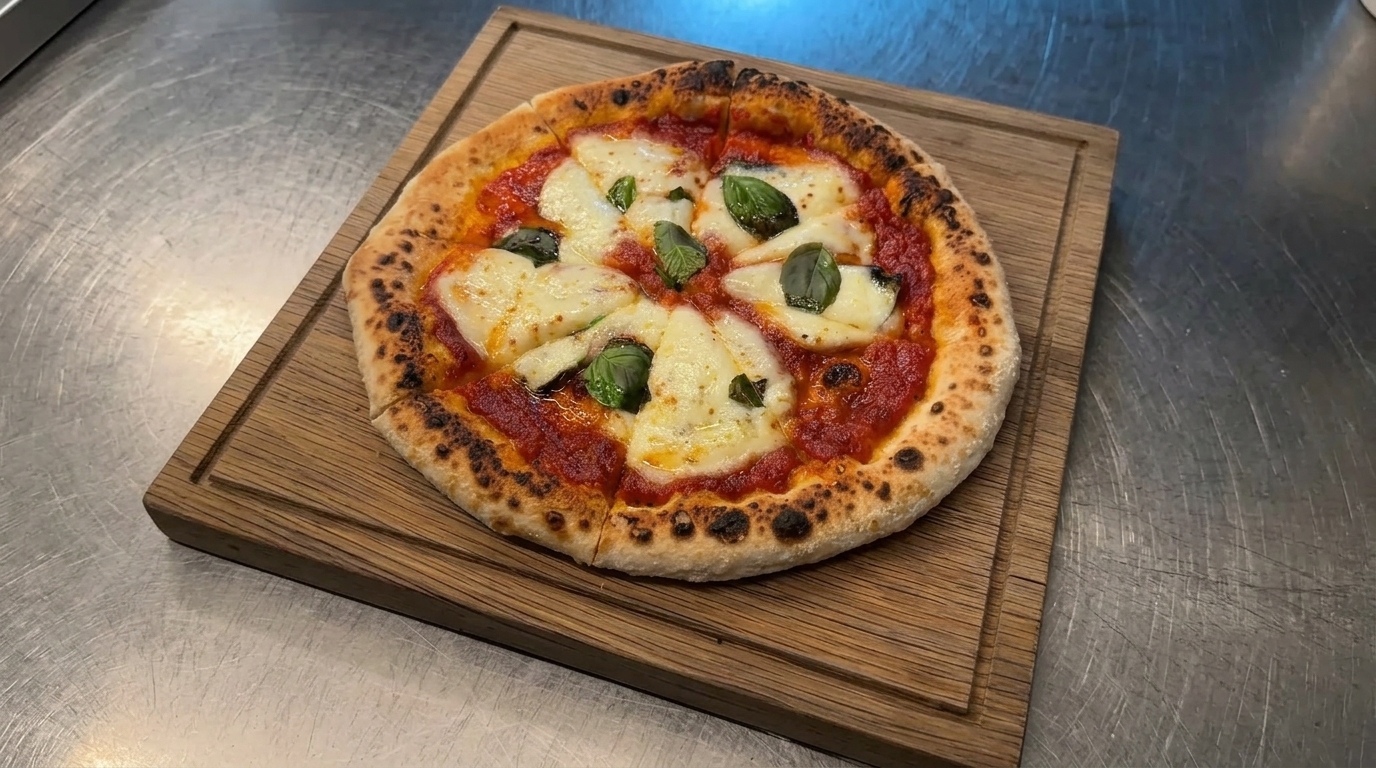
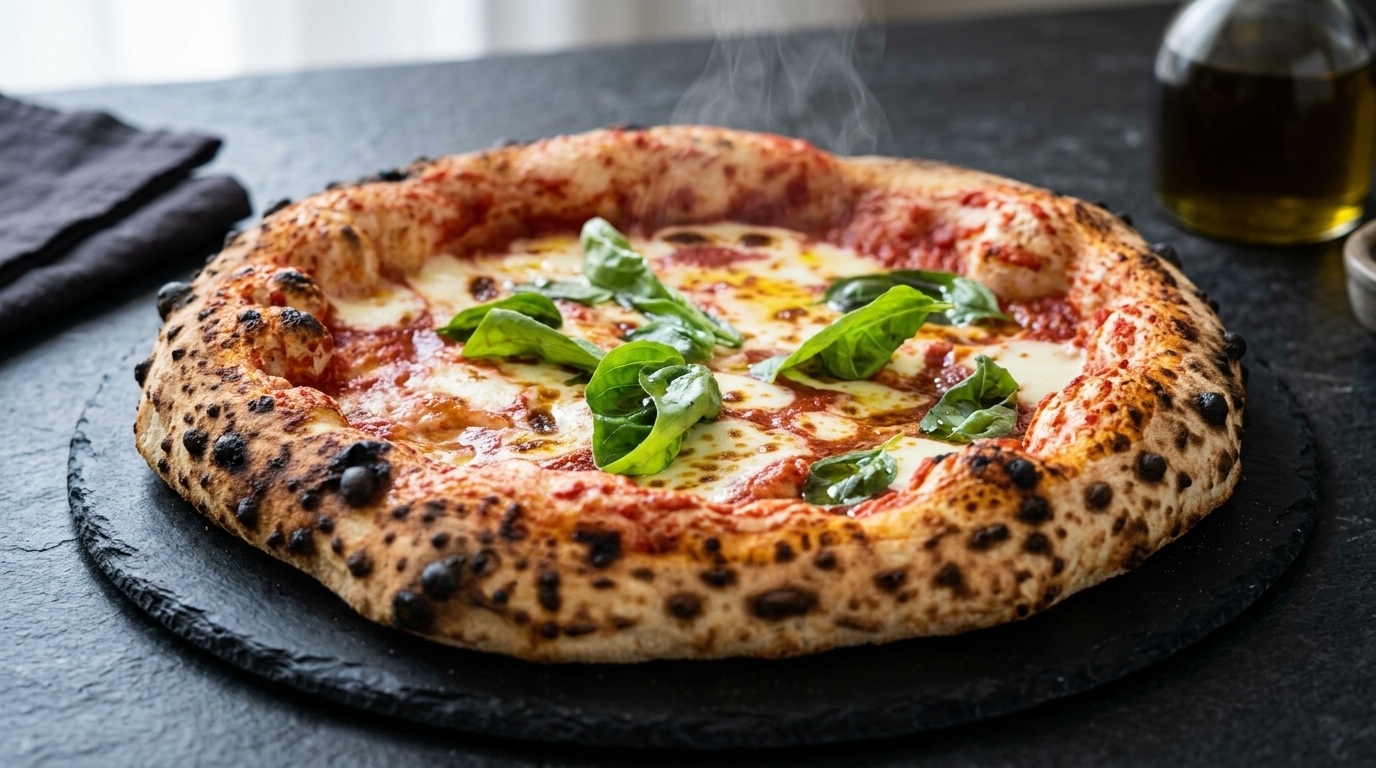
75% Hydration Margherita Pizza (Neapolitan Style)
Master the art of high-hydration pizza with this 75% water-to-flour ratio dough, resulting in an ultra-airy, leopard-spotted crust and a delicate, melt-in-your-mouth texture.
High-hydration dough is the secret to the incredibly light and bubbly crust found in the best artisanal pizzerias. By using 75% water, we achieve a superior oven spring and those coveted large air pockets, known as the alveoli. This recipe balances technical precision with the classic, simple flavors of a traditional Neapolitan Margherita.
Ingredients
- 1000 g high-protein pizza flour
- 750 g ice water
- 25 g salt
- 5 g fresh yeast
- to taste extra virgin olive oil
- to taste tomato sauce
- 250 g fresh mozzarella cheese
- optional fresh basil leaves
Instructions
- 1Combine dry ingredients in the mixer
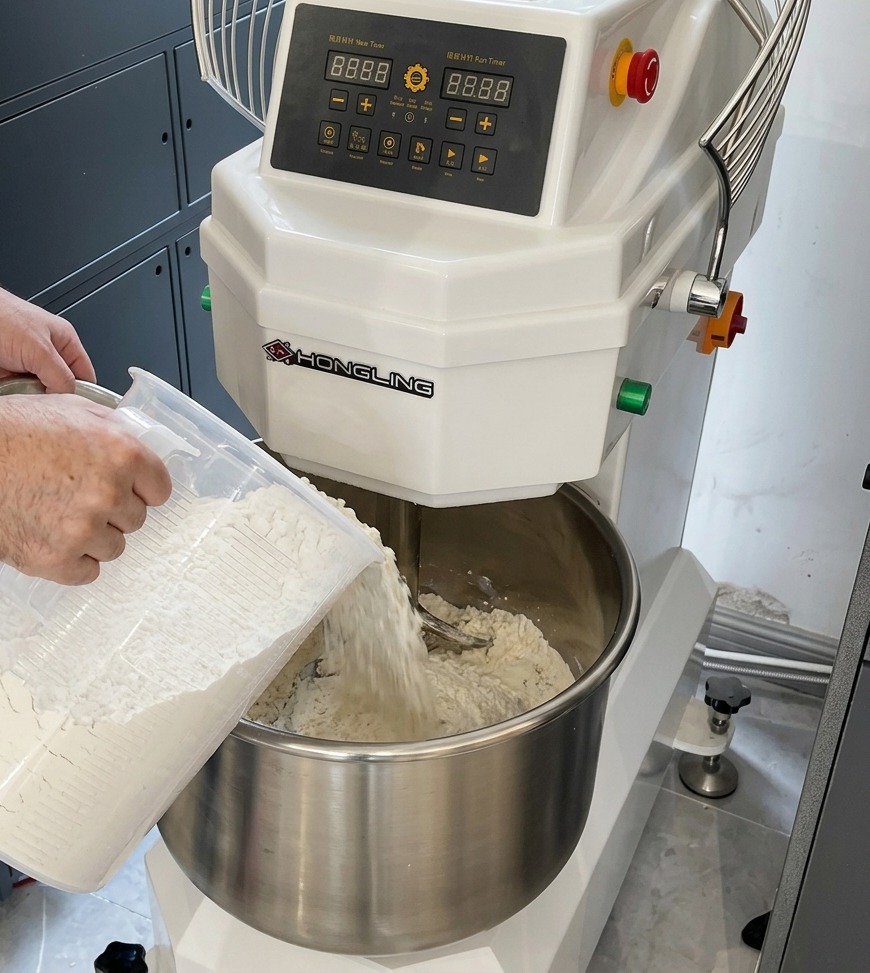
Begin by adding the high-protein pizza flour, salt, and fresh yeast into the stainless steel bowl of the spiral mixer. Placing the dry ingredients first ensures they are evenly mixed before introducing water, which helps build a consistent gluten structure during the kneading process.
Tip: If using fresh yeast, crumble it finely with your fingers as you add it to the flour to ensure it incorporates quickly and evenly into the dough. - 2Mix the dry ingredients and start hydration
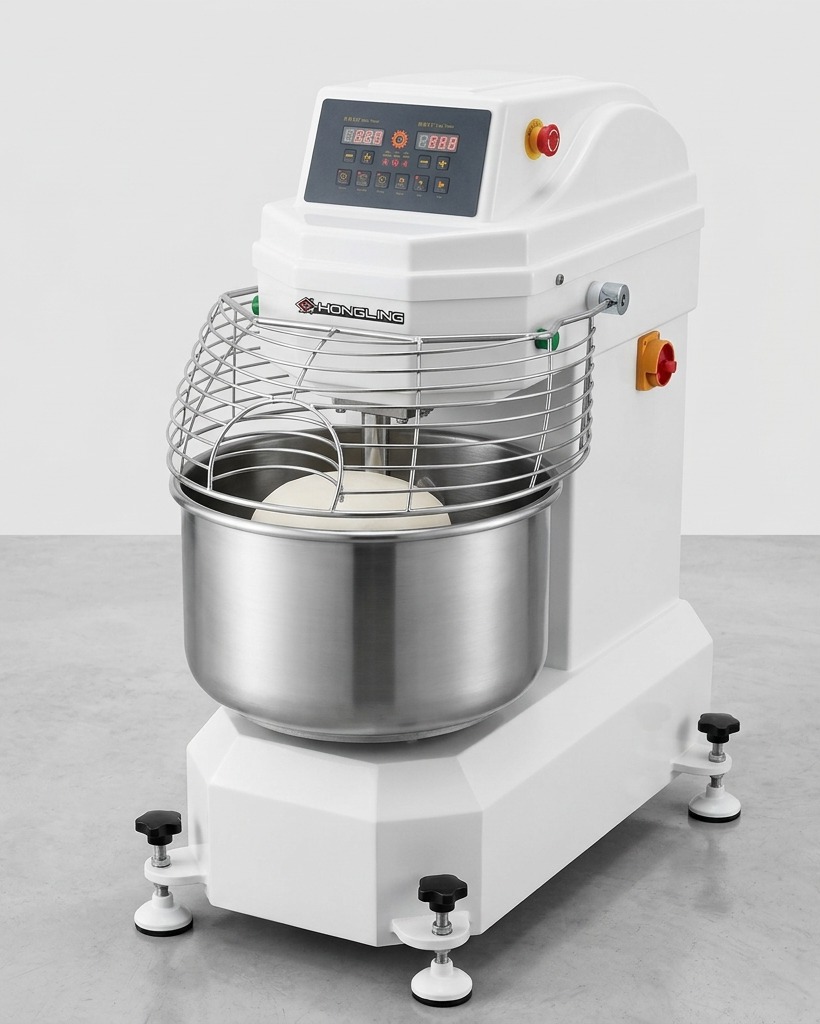
Start the spiral mixer on a low speed setting and slowly pour in the first 600 grams of ice water. This initial mixing phase combines the dry components into a shaggy mass while the cold water prevents the friction from heating the dough.
Tip: Ice water is essential for high hydration dough because it keeps the yeast stable and ensures the gluten develops properly without overheating. - 3Incorporate remaining water
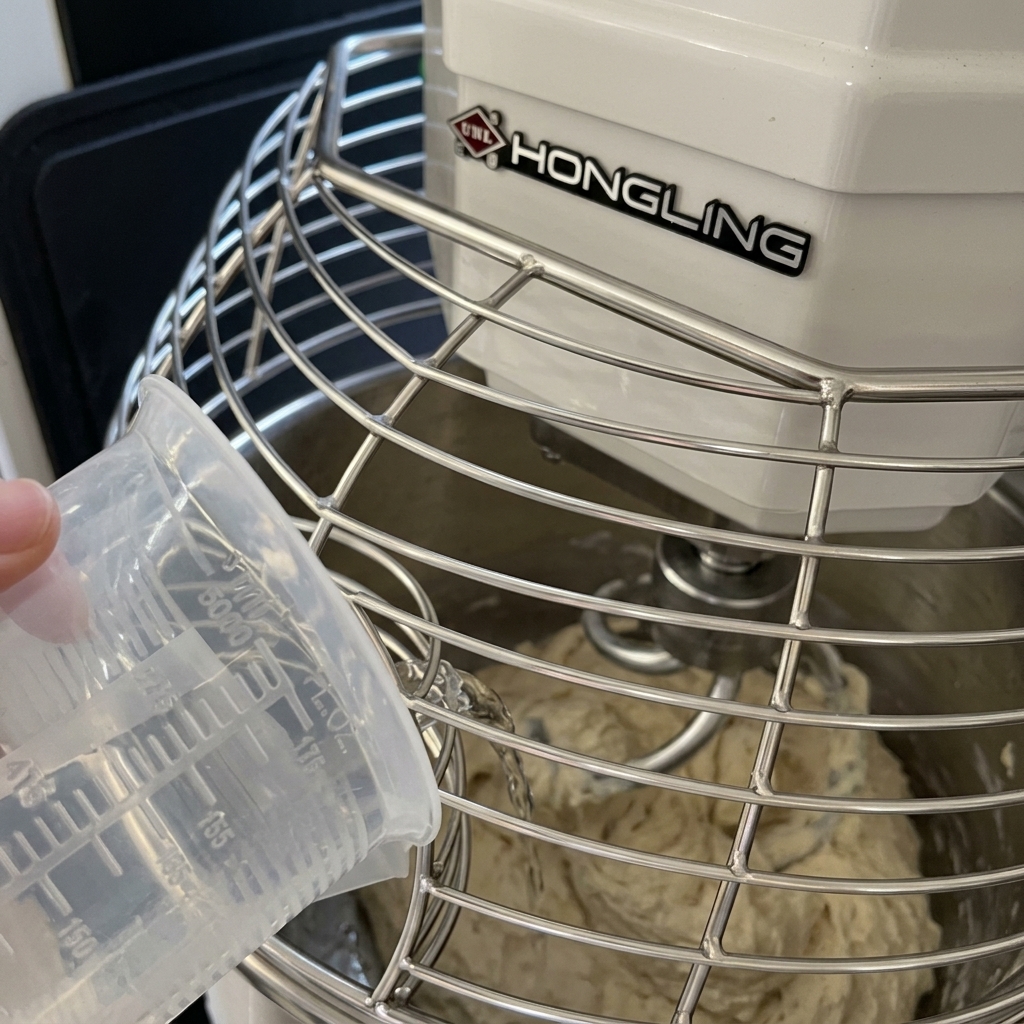
As the mixer continues to knead, gradually pour in the remaining 150 grams of ice water. This slow addition allows the flour to fully absorb the moisture, resulting in a 75% hydration dough that is strong yet extensible.
Tip: Dont rush this step; adding water too quickly can cause the dough to slip and lose its ability to develop a proper gluten network. - 4Oil the dough surface
Transfer the mixed dough to a clean work surface. Drizzle a small amount of olive oil over the smooth surface of the dough and spread it evenly to prevent a skin from forming during the initial rest.
Tip: The olive oil not only prevents drying but also adds a subtle flavor and helps in achieving a crispier crust during baking. - 5Divide the dough
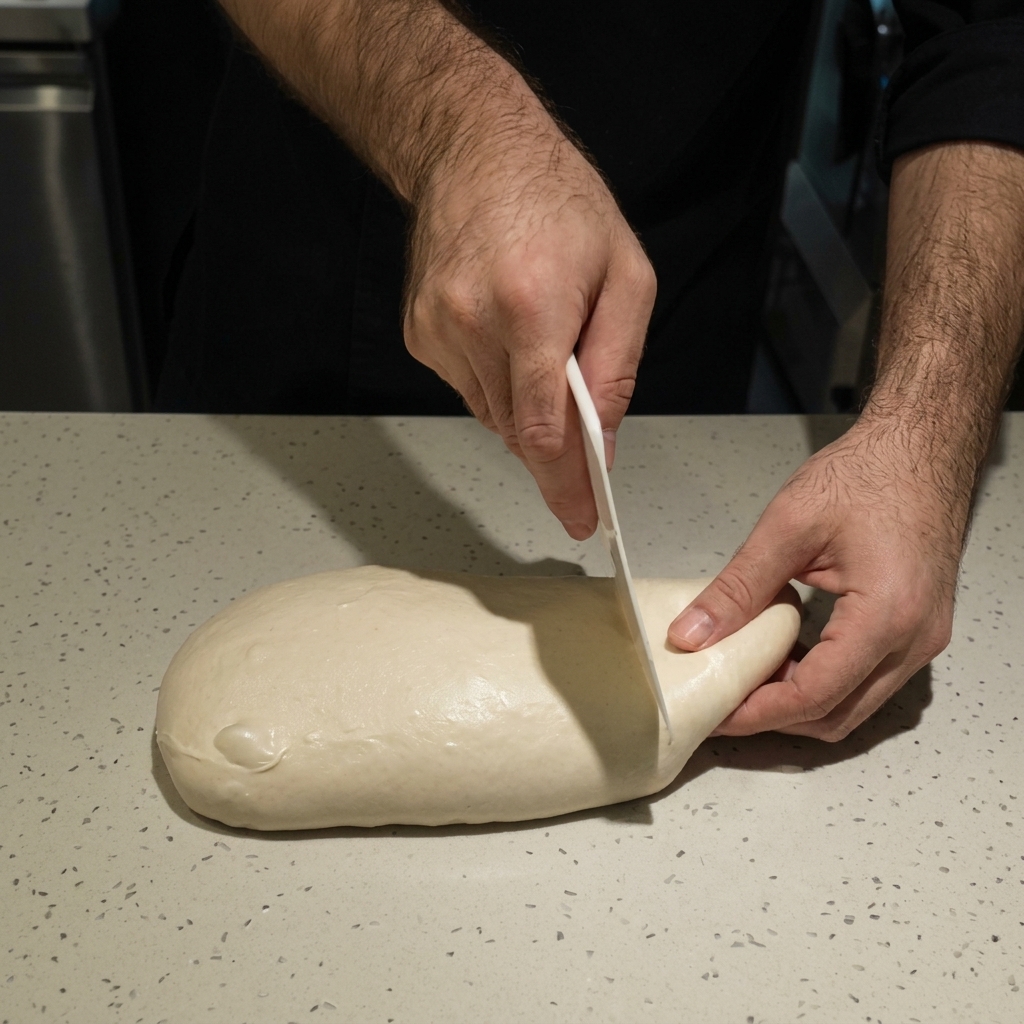
Use a plastic or stainless steel bench scraper to cut the large mass of dough into individual portions. Aim for consistent weights to ensure that every pizza bakes evenly in the wood-fired oven.
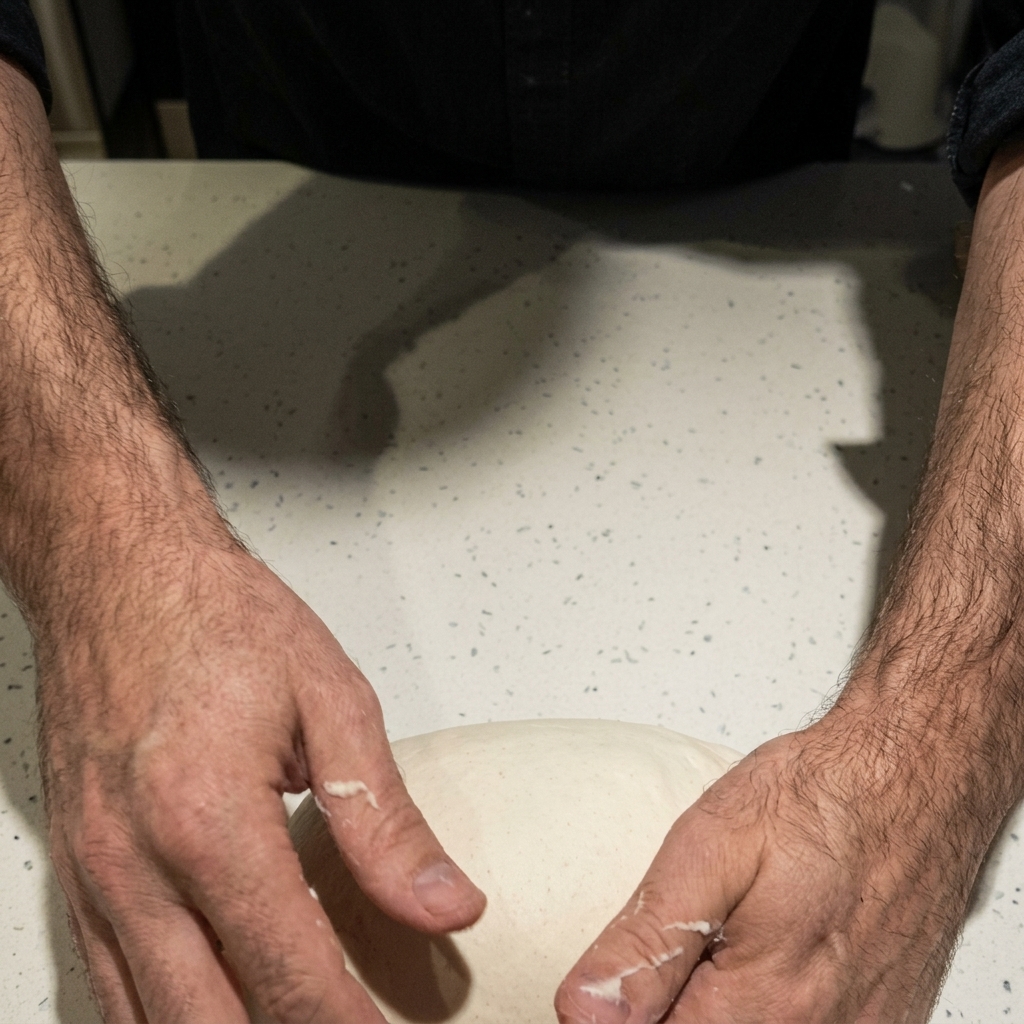
Tip: Try to cut the dough with clean, swift motions rather than pulling it, which helps preserve the internal air structure developed during mixing. - 6Shape into dough balls
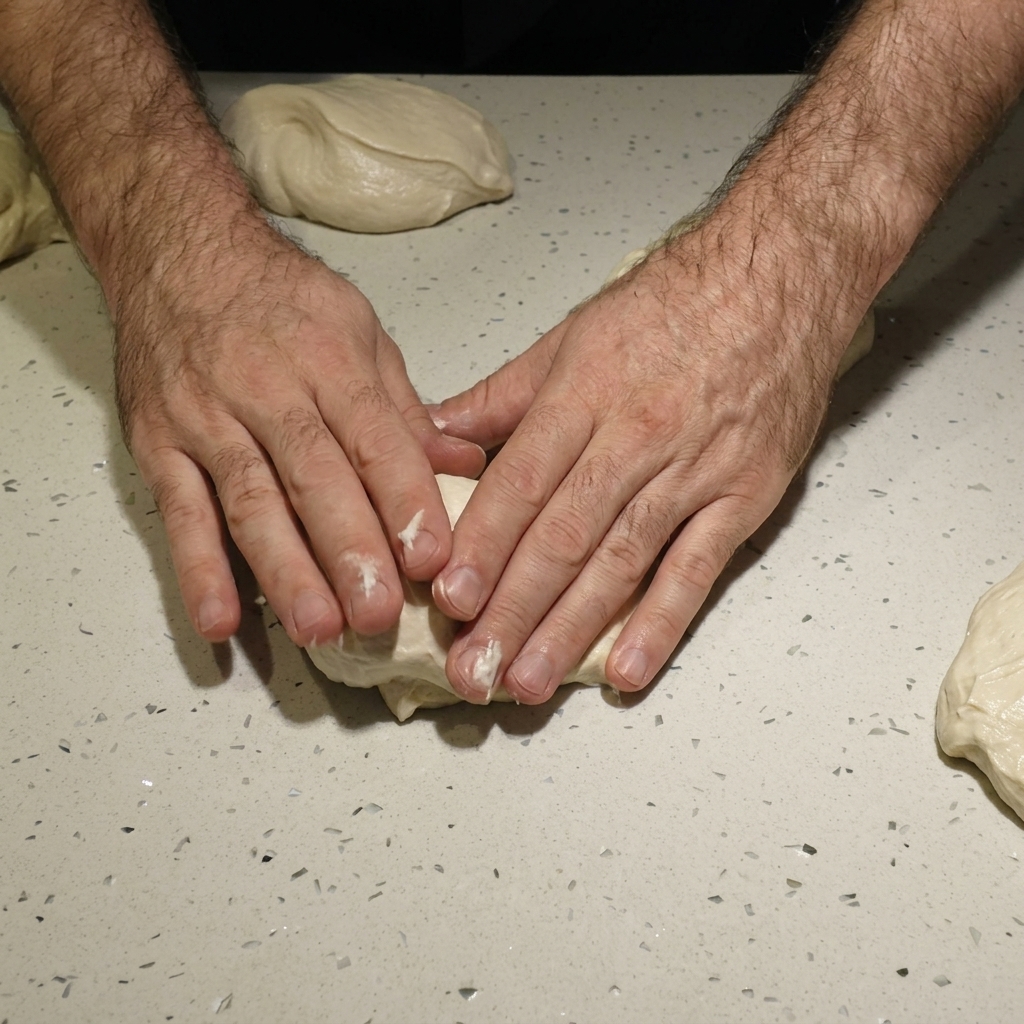
Take each divided portion and fold the edges toward the center, then roll it against the counter to create tension. This creates a smooth, tight surface on the dough balls, which is essential for a uniform rise.
Tip: Cupping your hand and moving in a circular motion on a non-floured surface helps create the necessary friction to tighten the skin of the dough ball. - 7Initiate cold fermentation
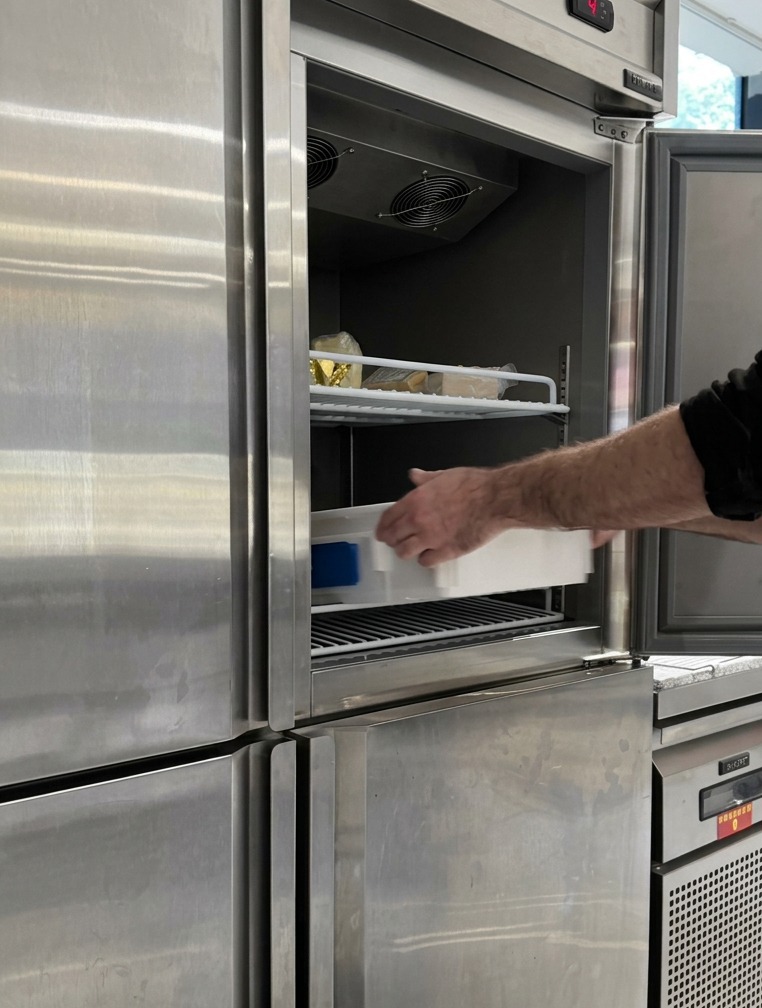
Carefully place the tray containing the portioned dough balls into a commercial refrigerator for cold storage. This cold fermentation process significantly slows down the yeast, allowing complex flavors to develop and creating a dough that is easier to handle and results in a superior crust texture.
Tip: For the best results, let the dough ferment for at least 24 to 48 hours; the longer cold rest allows for better enzyme activity and deeper flavor development. - 8Stretch the dough
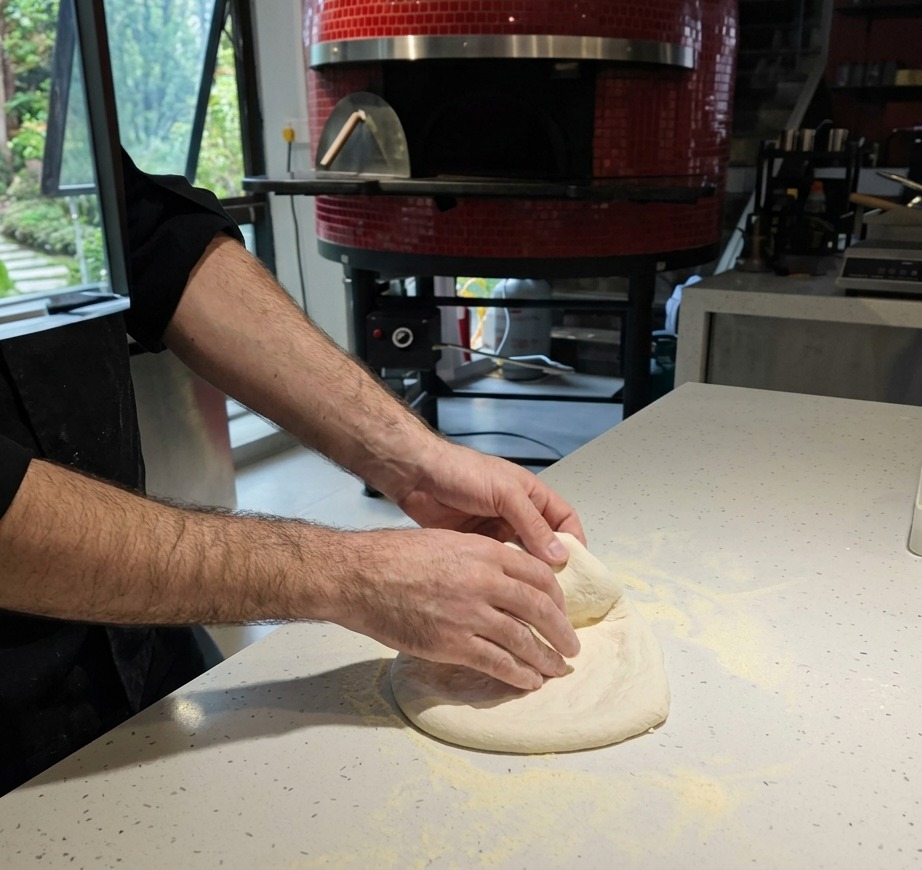
Place the fermented dough ball on a floured surface. Using your fingertips, press gently from the center outwards to push air into the rim, creating a puffy edge. Carefully stretch the dough by hand, rotating it until it forms a thin, even circle with a slightly raised border.
Tip: Handle the dough with care to preserve the air bubbles in the crust; this ensures the pizza becomes light and airy when baked. - 9Spread the tomato sauce
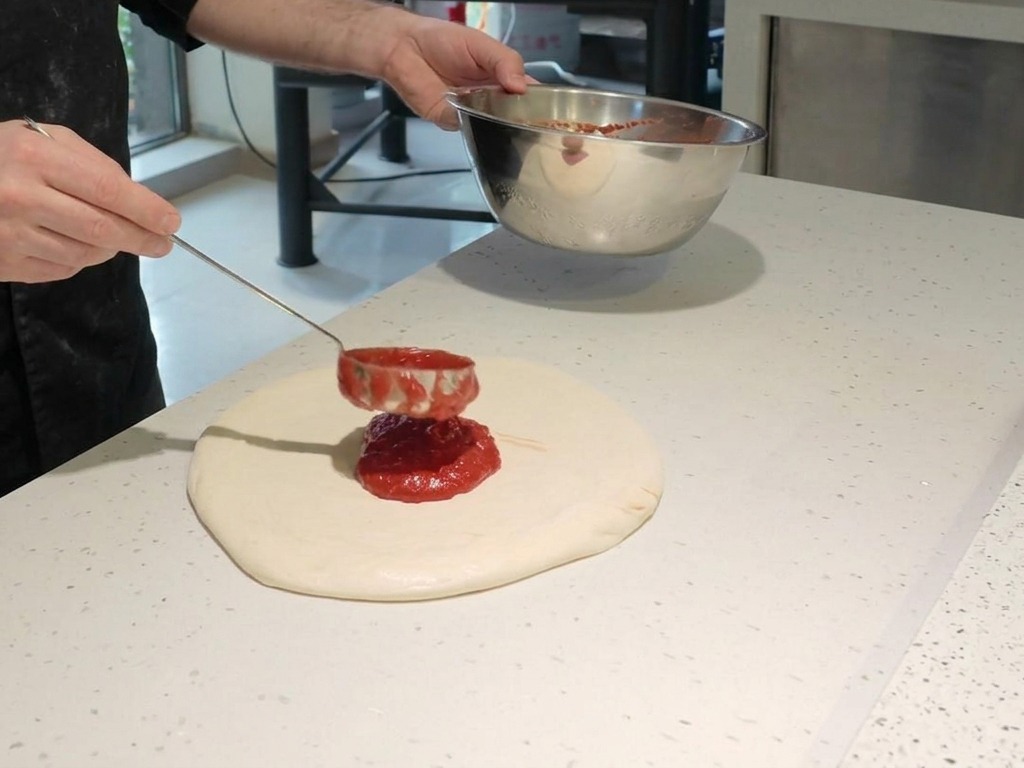
Ladle a portion of red tomato sauce onto the center of your hand-stretched dough. Using the bottom of the ladle, spread the sauce in a smooth, circular motion outward, leaving about an inch of space around the edge to allow the crust to rise and char.
Tip: Dont over-sauce the center; a thin, even layer prevents the crust from becoming soggy during the high-heat bake. - 10Add the fresh mozzarella
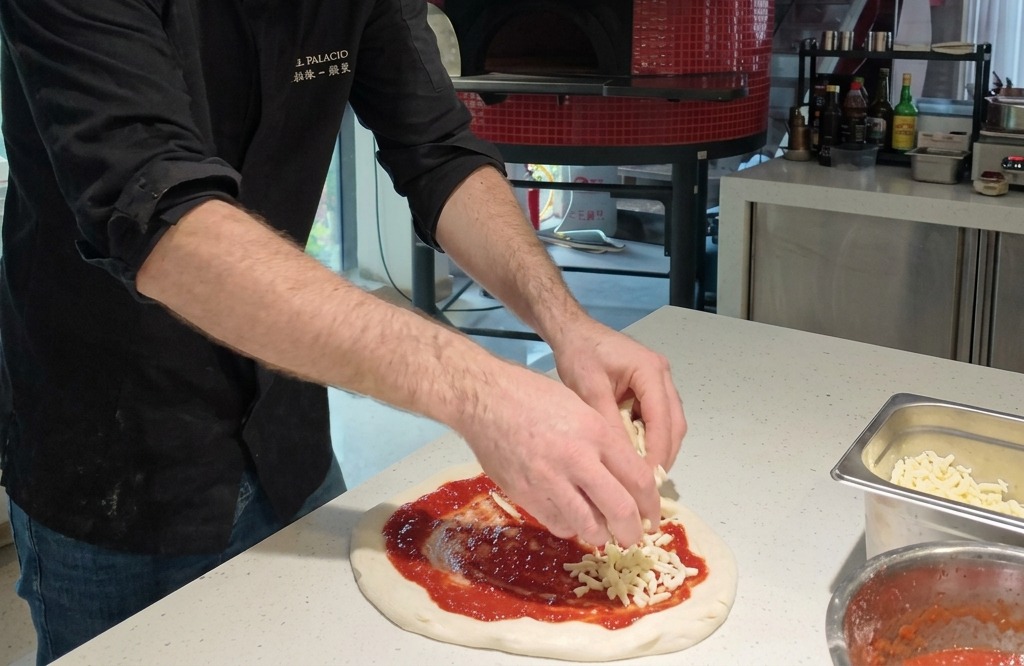
Distribute pieces of fresh mozzarella cheese evenly over the layer of red tomato sauce. Spreading the cheese balanced across the surface ensures that it melts uniformly in the oven, providing a perfect cheese-to-sauce ratio in every bite.
Tip: If the fresh mozzarella is very wet, pat the pieces dry with a paper towel before adding them to the pizza to prevent excess moisture from making the crust soggy. - 11Bake in the wood-fired oven
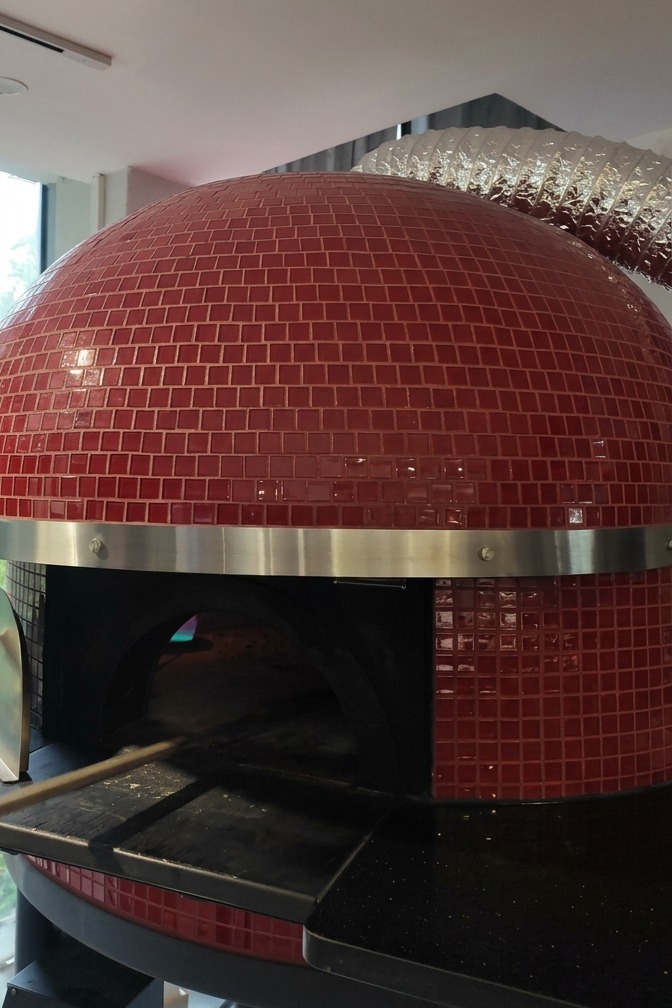
Use a long-handled pizza peel to slide the assembled pizza into the heart of the high-temperature wood-fired oven. The intense, dry heat will quickly oven-spring the dough, charring the edges of the crust and melting the toppings to perfection in just 60 to 90 seconds.
Tip: Dust your peel with a small amount of semolina or flour just before loading the pizza to ensure it slides off smoothly without sticking to the metal. - 12Garnish and finish with oil
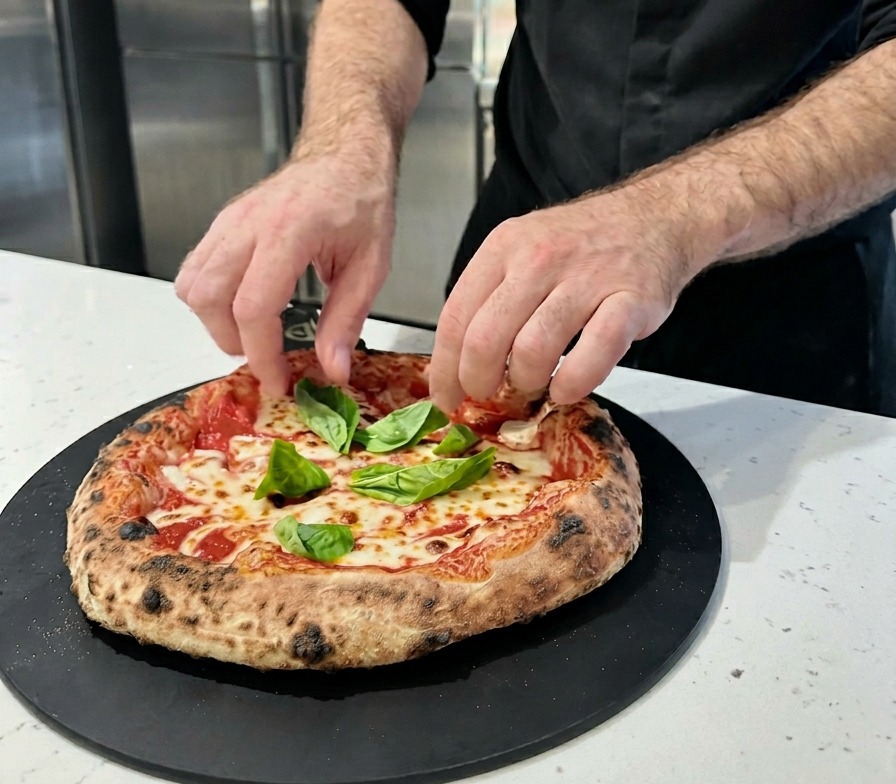
Once the pizza is removed from the oven, immediately top it with fresh green basil leaves. The residual heat will gently wilt the herbs and release their aroma. Finish the dish with a light drizzle of high-quality extra virgin olive oil for a glossy, flavorful finish.
Tip: Adding basil after baking keeps the leaves vibrant and prevents them from burning or becoming bitter in the high-temperature oven.