American-Style BBQ Ribs
Cornbread
Tender, fall-off-the-bone American-style BBQ ribs slow-baked in their own savory broth and finished with a sticky caramelized glaze. Served with warm, buttery cornbread for the ultimate comfort meal.
American-style baked ribs are a celebration of patience and flavor, utilizing a slow-cooking method to break down tough connective tissues into meltingly tender meat. By simmering the ribs first with vinegar and beer, then steaming them in foil, you ensure maximum juiciness before the final sticky, caramelized glaze is baked on.
Ingredients
- 1 rack pork ribs
- to taste salt
- to taste black pepper
- 14 cup white vinegar
- 2 tbsp aged dark vinegar
- 1 can beer
- 12 cup broth
- 1 cup BBQ sauce
- 1 batch cornbread batter
- to taste butter
Instructions
- 1Season the ribs
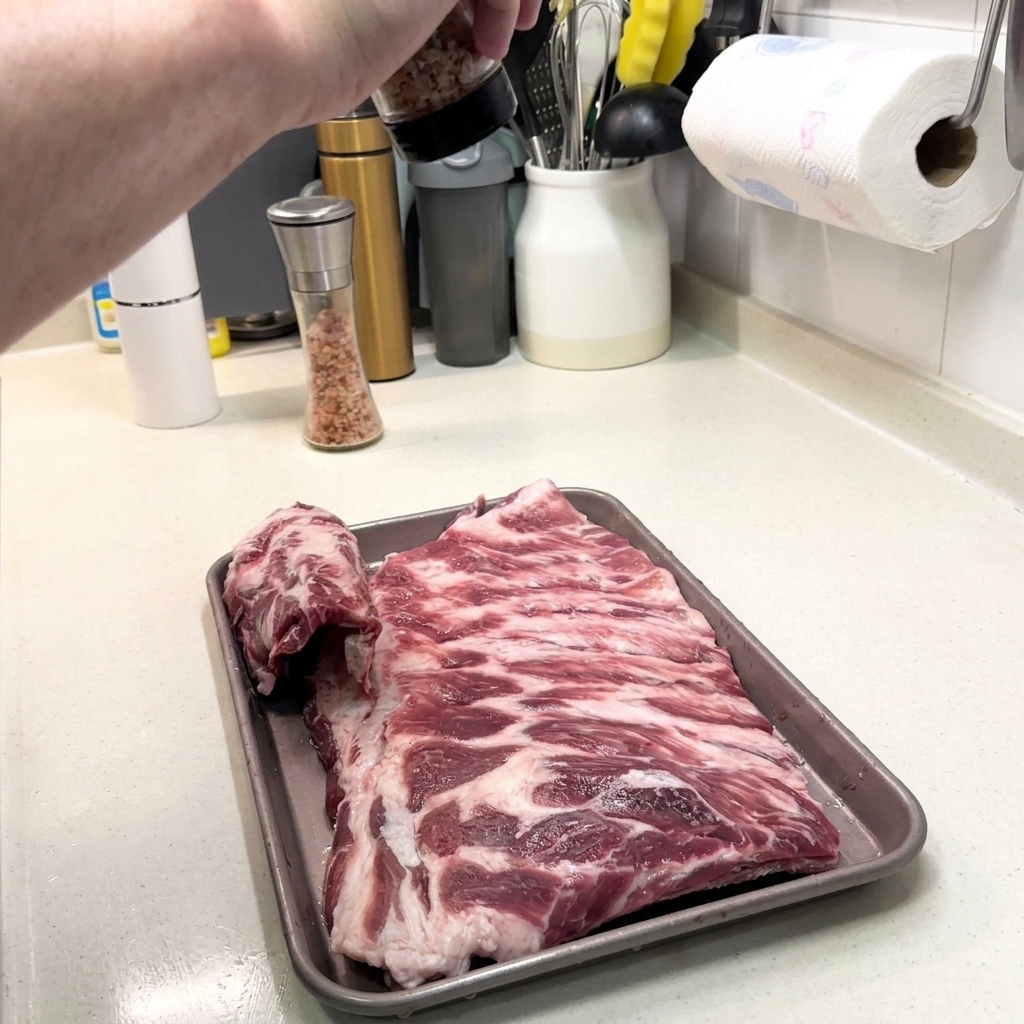
Place the raw rack of ribs on a baking sheet and begin by generously sprinkling both salt and black pepper over the surface. This initial seasoning is crucial as it helps to tenderize the meat and build the foundation of flavor for the American-style bake.
Tip: Apply the seasoning from a height to ensure an even distribution across the entire surface of the meat. - 2Apply vinegar for tenderizing
Pour a small amount of white vinegar over the seasoned ribs and smear it evenly across the meat. The acidity in the vinegar acts as a natural tenderizer, breaking down tough fibers to ensure the ribs eventually become fall-off-the-bone tender.
Tip: You can use a brush or your hands to make sure the vinegar reaches every part of the meat, especially the thicker sections. - 3Remove the rib membrane
Flip the ribs over and use your fingers to try and peel off the tough fascia membrane from the bone side. Removing this allows seasonings and heat to penetrate better, though if the membrane is particularly stubborn, you may need to leave it as it is.
Tip: Use a piece of paper towel to get a better grip on the slippery membrane when you start to pull it away. - 4Add vinegar to the boiling water
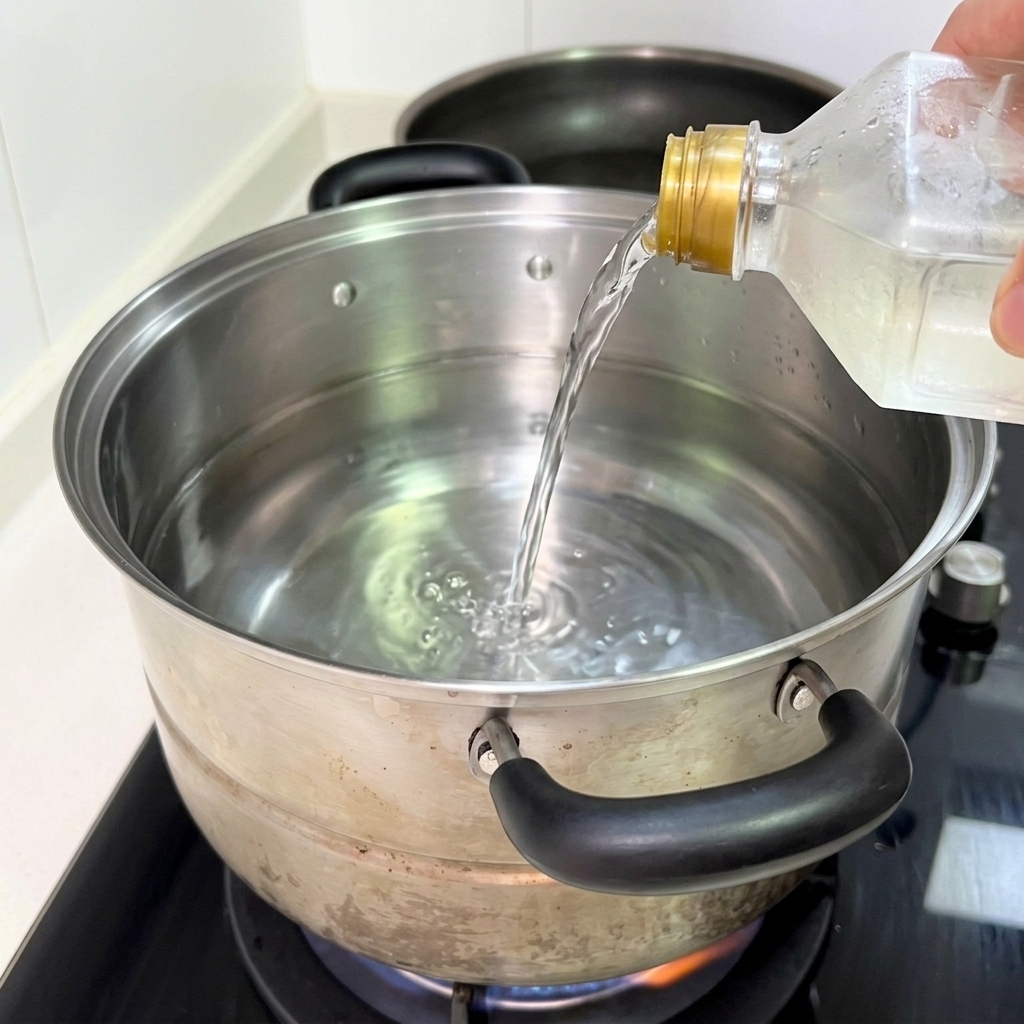
Pour both white and aged dark vinegar into a pot of water on the stovetop. The acidity of the vinegar acts as an excellent tenderizer, breaking down the tough fibers of the meat during the boiling process.
Tip: Using vinegar in the boiling stage ensures the ribs become incredibly tender before they even go into the oven. - 5Boil the ribs
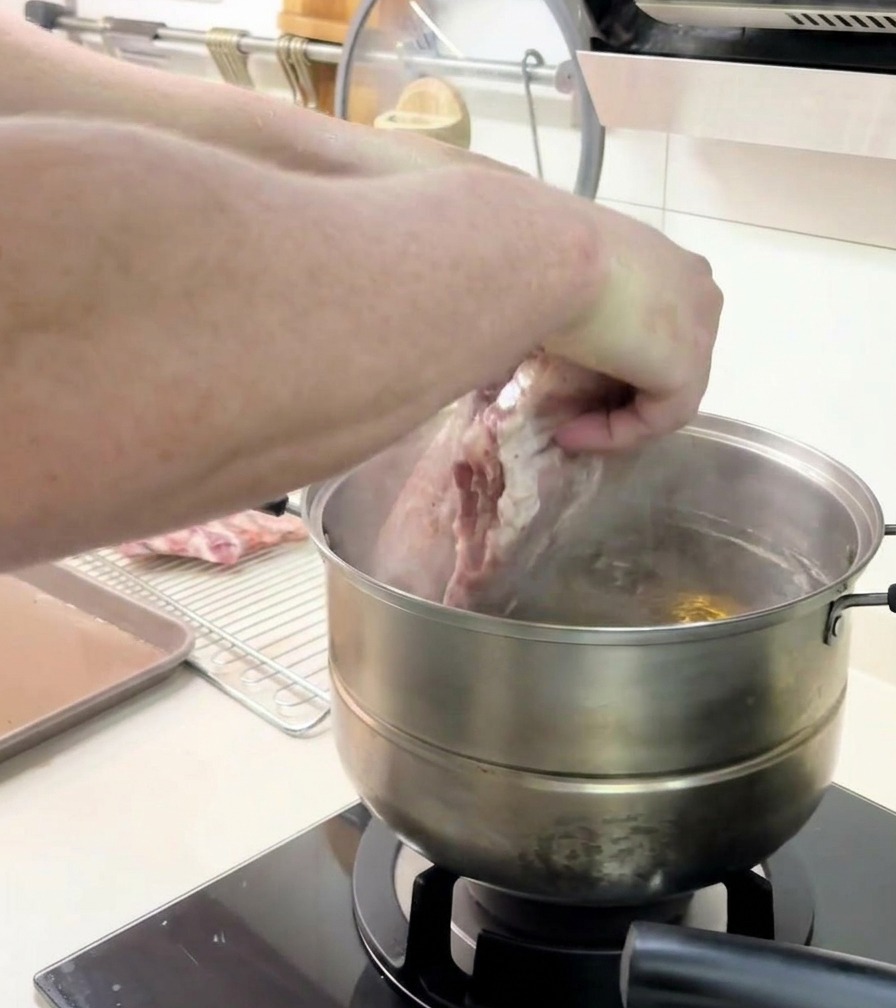
Carefully lower the whole rack of seasoned ribs into the pot of prepared vinegar water. Boiling the meat before baking helps jumpstart the tenderizing process and ensures the interior is cooked through while remaining moist.
Tip: Be careful when lowering the meat to avoid splashing the hot liquid. - 6Add beer to the pot
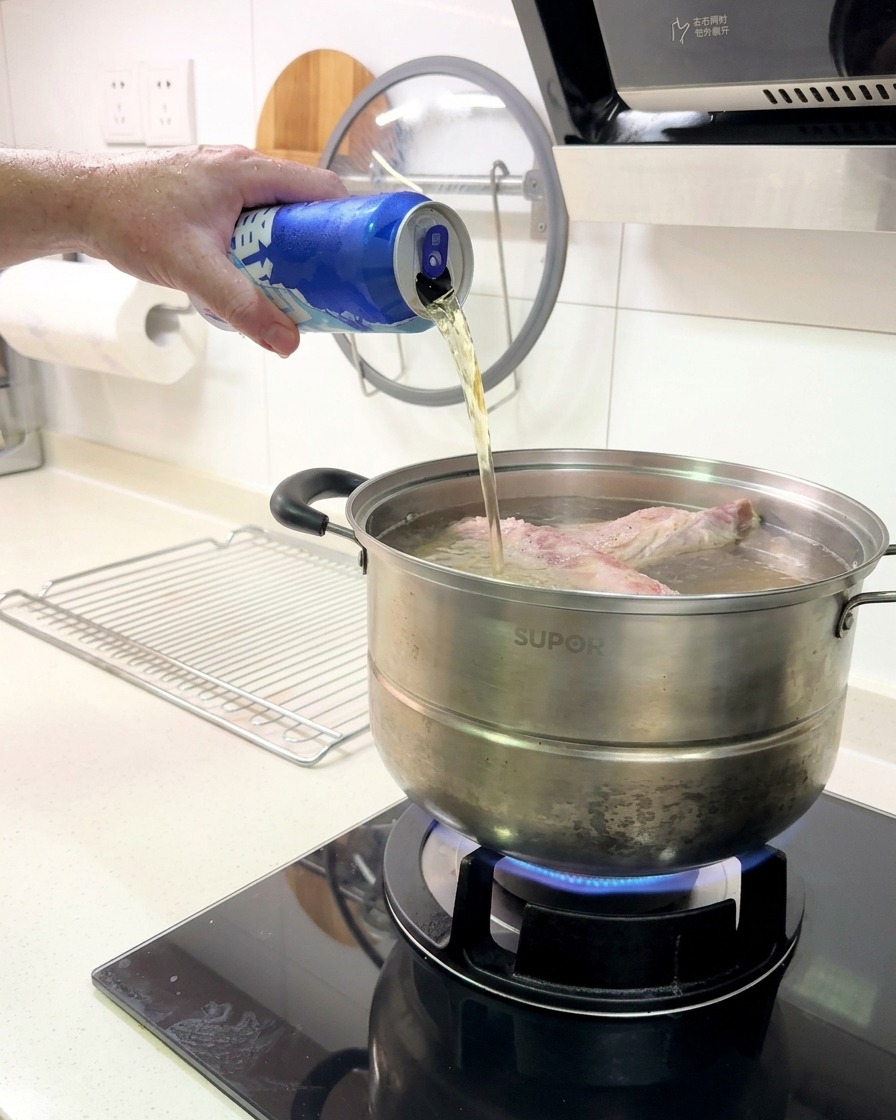
To add an extra layer of flavor and depth, pour a full can of beer into the pot with the ribs. The enzymes in the beer help further soften the meat, while the hops and malt provide a savory undertone to the finished dish.
Tip: Any standard lager or ale works well for this; the alcohol will cook off, leaving only the flavor behind. - 7Remove the ribs from the pot
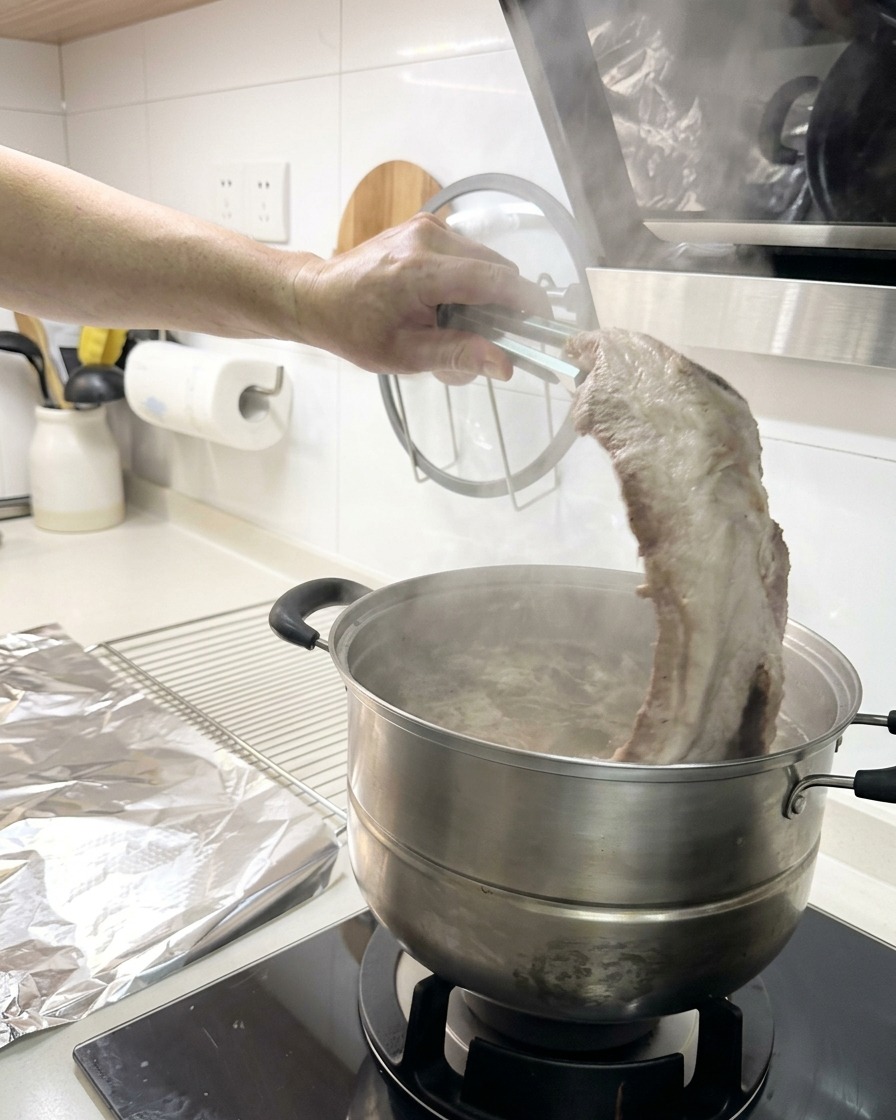
After simmering the meat with the vinegar and a splash of beer for about 15 minutes, carefully lift the ribs out of the hot broth using a sturdy pair of tongs. The surface of the meat should appear opaque and partially cooked.
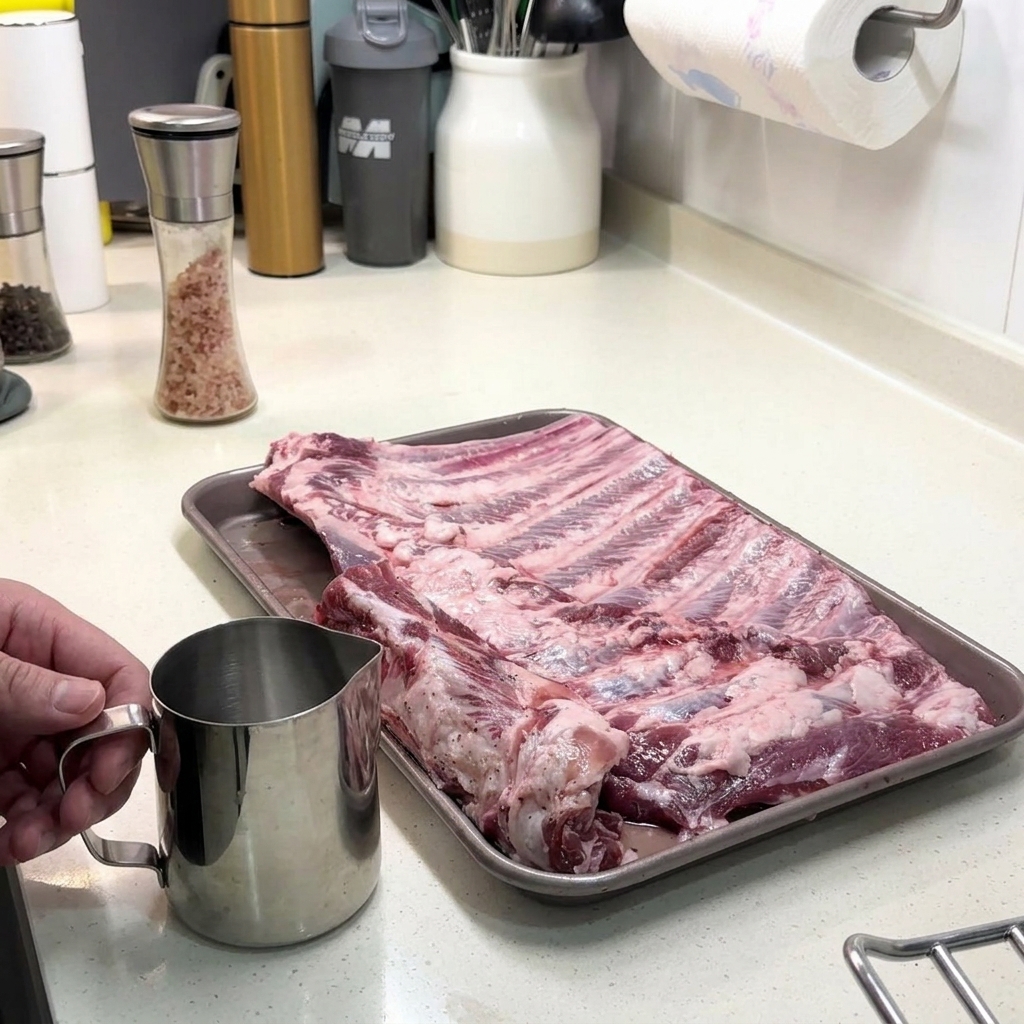
Tip: Allow the excess liquid to drip off the ribs for a moment before moving them to the next preparation station. - 8Transfer to foil and add broth
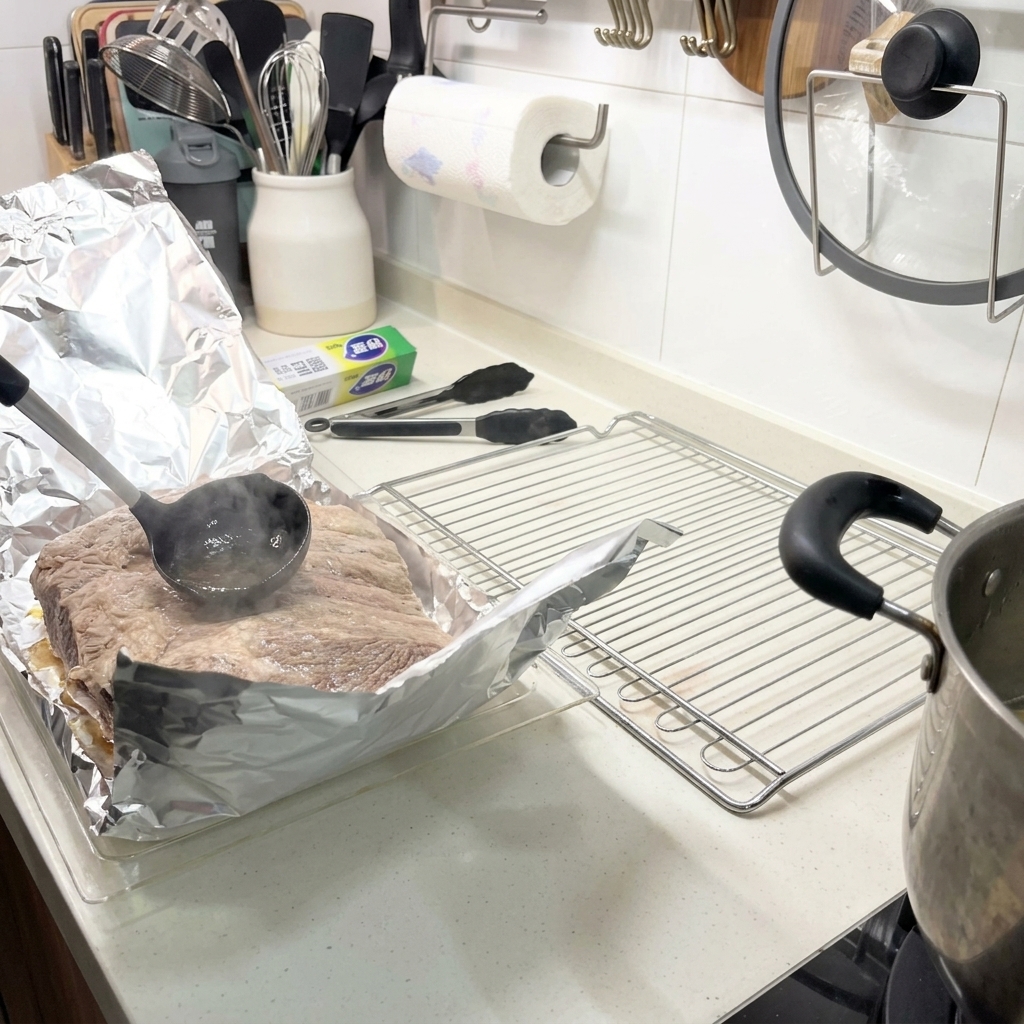
Place the boiled ribs onto a large sheet of heavy-duty aluminum foil resting on a baking tray. Ladle some of the seasoned cooking broth directly over the meat to provide essential moisture.
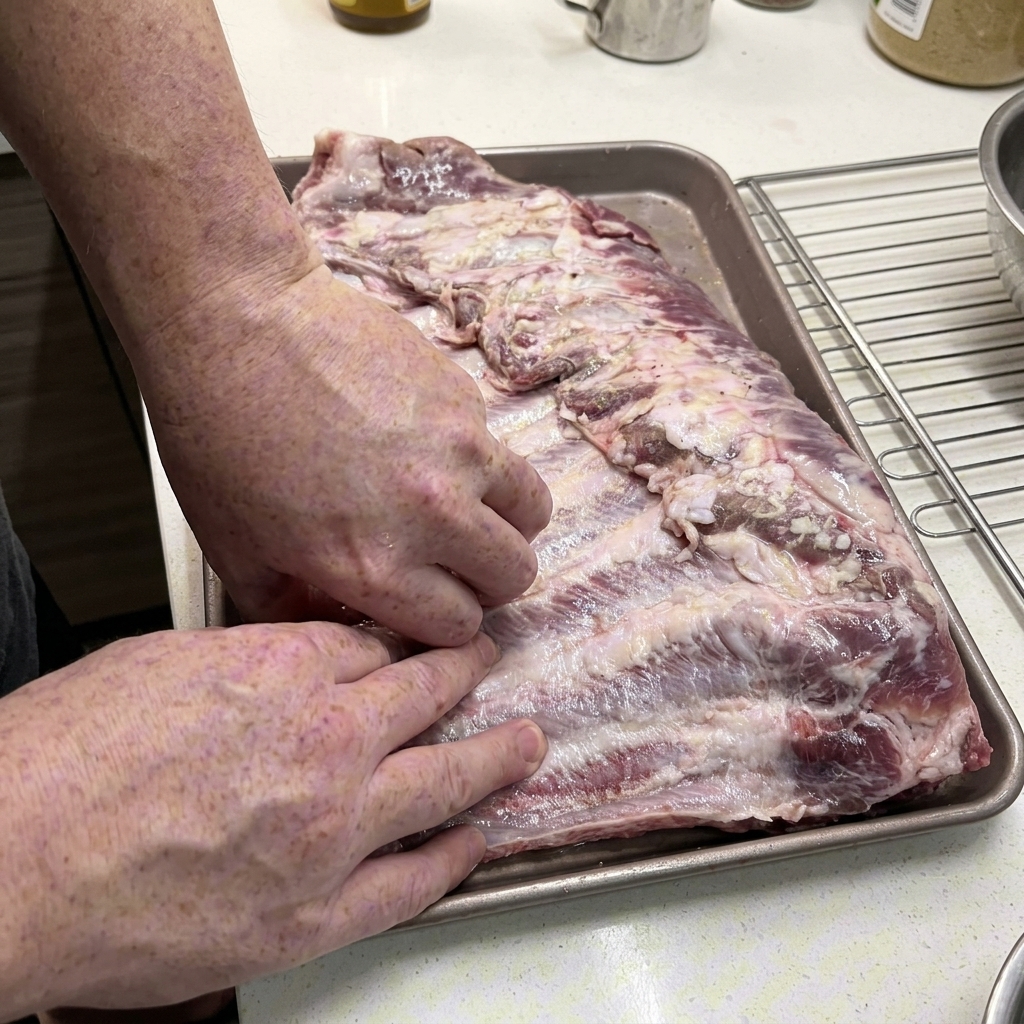
Tip: Adding broth prevents the ribs from drying out during the long baking time, essentially braising the meat in its own flavorful steam. - 9Seal the ribs tightly
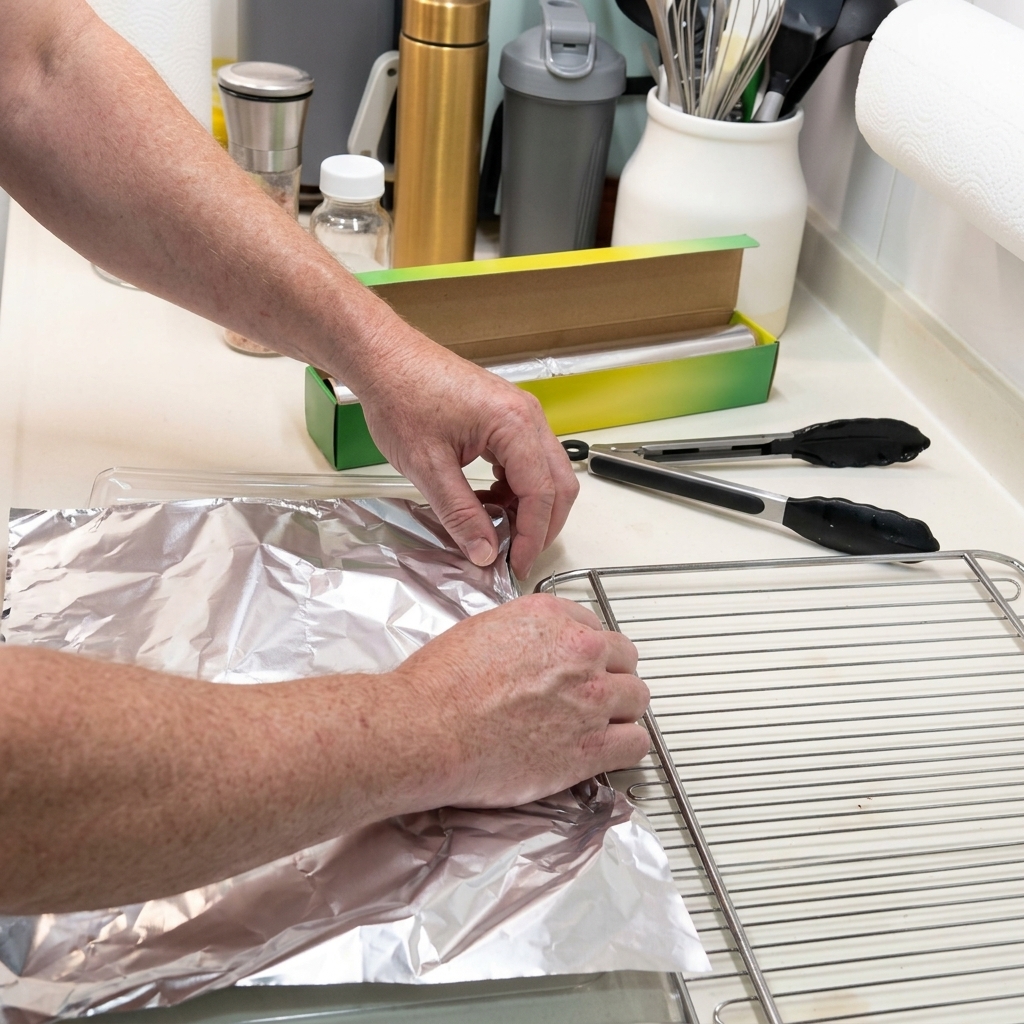
Carefully fold the edges of the aluminum foil up and over the ribs, crimping the seams together securely to form a tightly sealed packet. This traps the steam and juices inside.
Tip: Ensure there are no gaps or tears in the foil. A tight seal is critical for achieving that fall-off-the-bone tenderness. - 10Bake on low heat
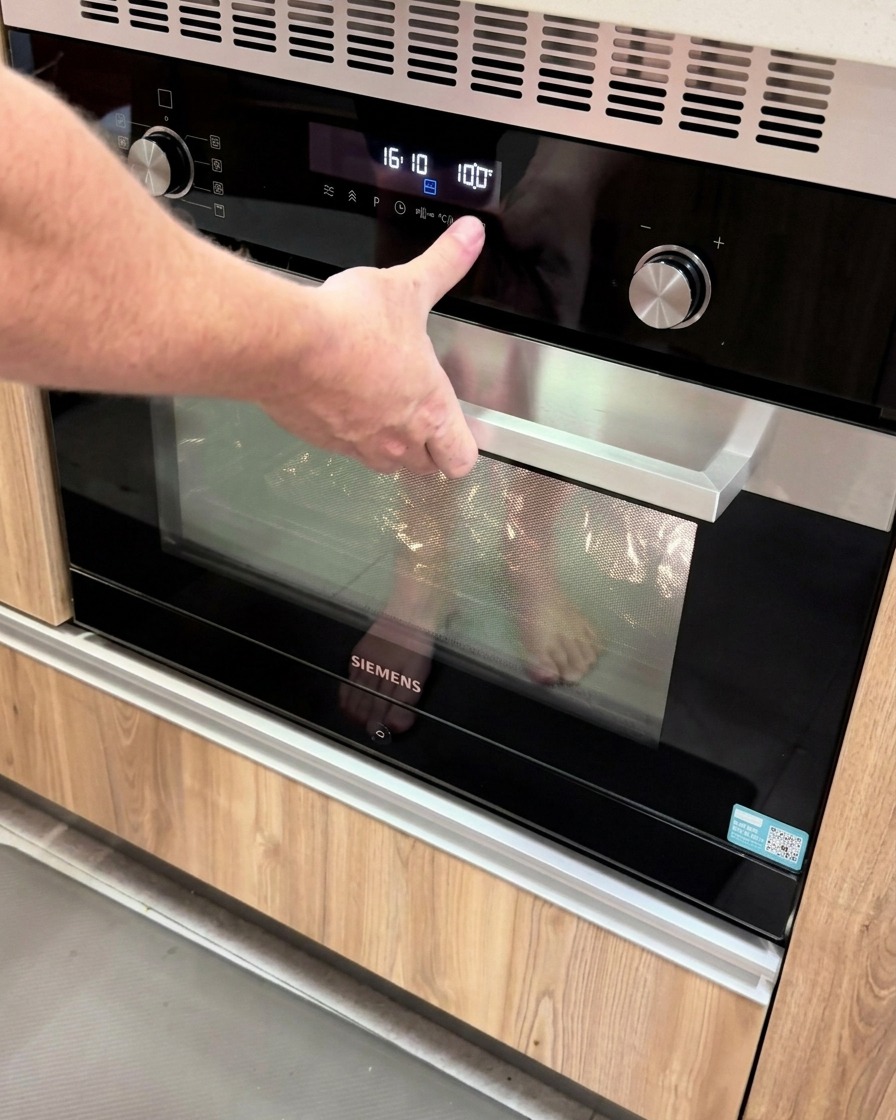
Transfer the foil-wrapped ribs into the oven. Set the temperature to a gentle 100 degrees Celsius. Bake low and slow for anywhere from two to four hours, depending on how much time you have.
Tip: Patience is key here. The longer you bake the ribs at a low temperature, the more tender the meat will become. - 11Apply the BBQ glaze
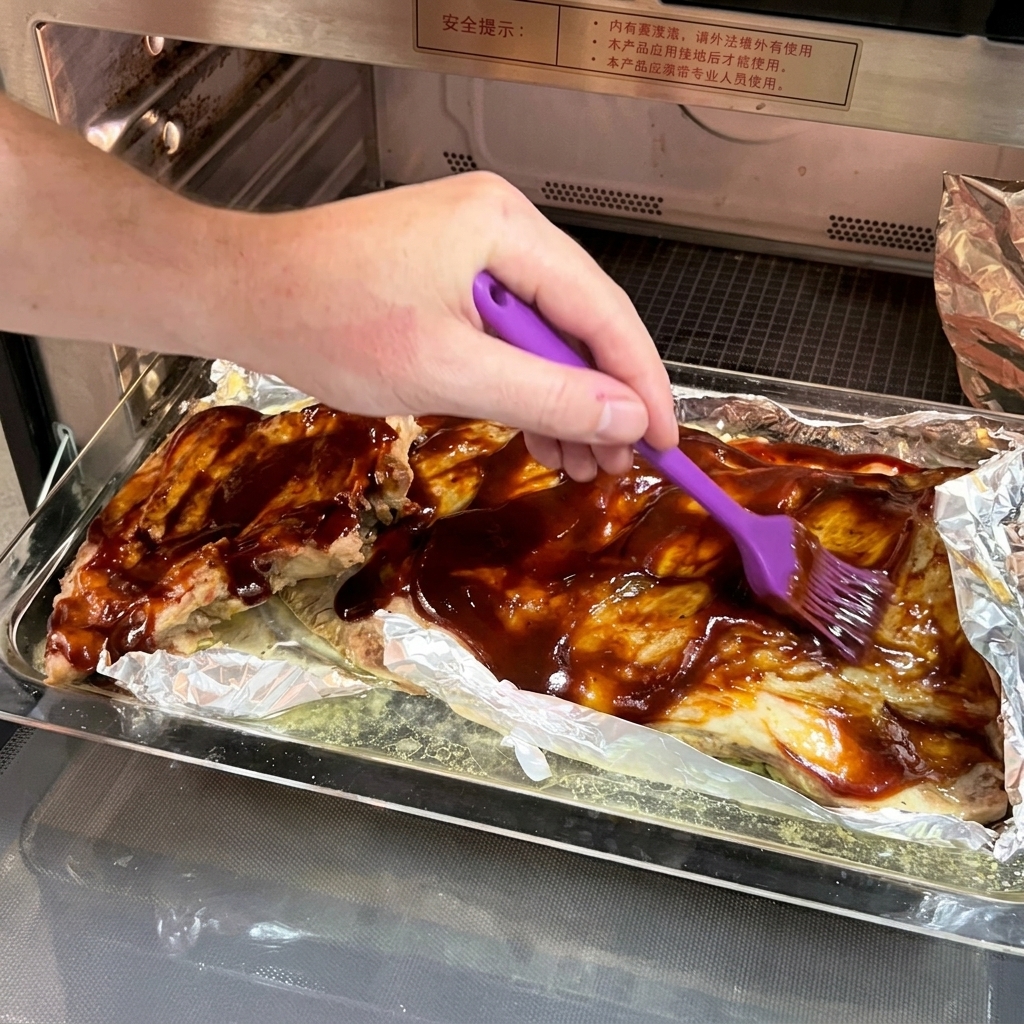
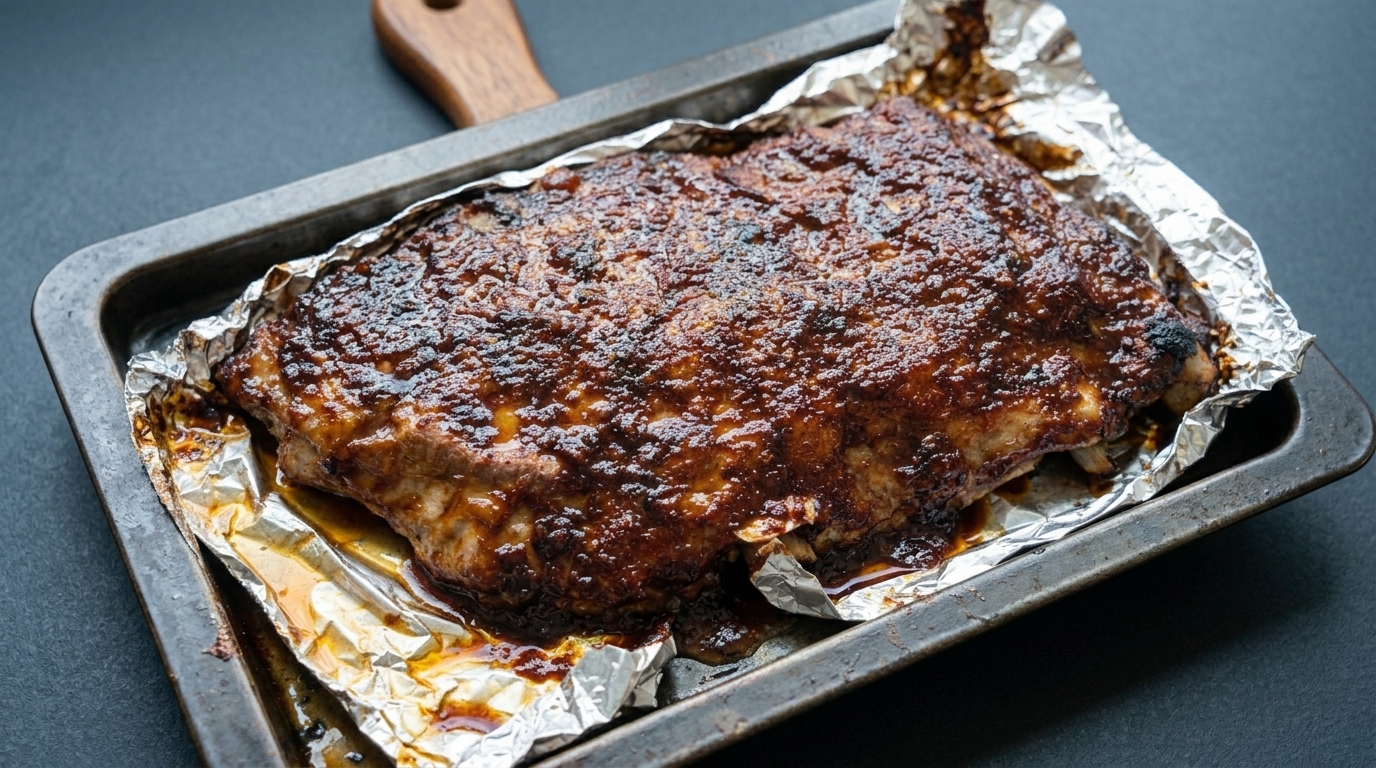
During the final hour of cooking, carefully open the foil packet to expose the ribs. Use a silicone brush to slather a generous layer of thick BBQ sauce over the surface of the meat. Continue baking to allow the sauce to caramelize, applying additional layers in batches for maximum flavor.
Tip: Brushing the sauce on in multiple stages creates a sticky, intensely flavorful crust that characterizes classic American-style ribs. - 12Bake with the BBQ glaze
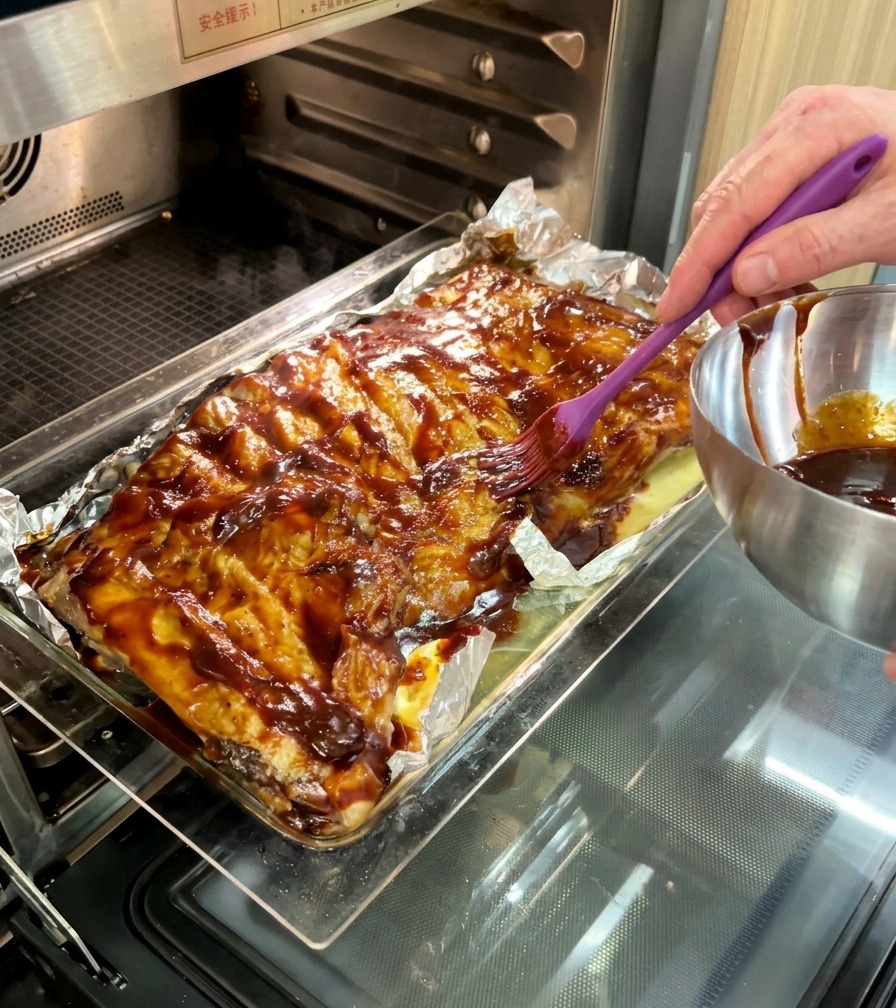
Slide the ribs back into the oven after the first application of sauce. Baking the sauce in batches allows the sugars to caramelize and the flavors to penetrate deep into the meat. Continue this process for the final hour of cooking for the best results.
Tip: If you want a deeper color, increase the oven temperature slightly during the last 15 minutes of glazing, but watch closely to prevent burning. - 13Check the cornbread
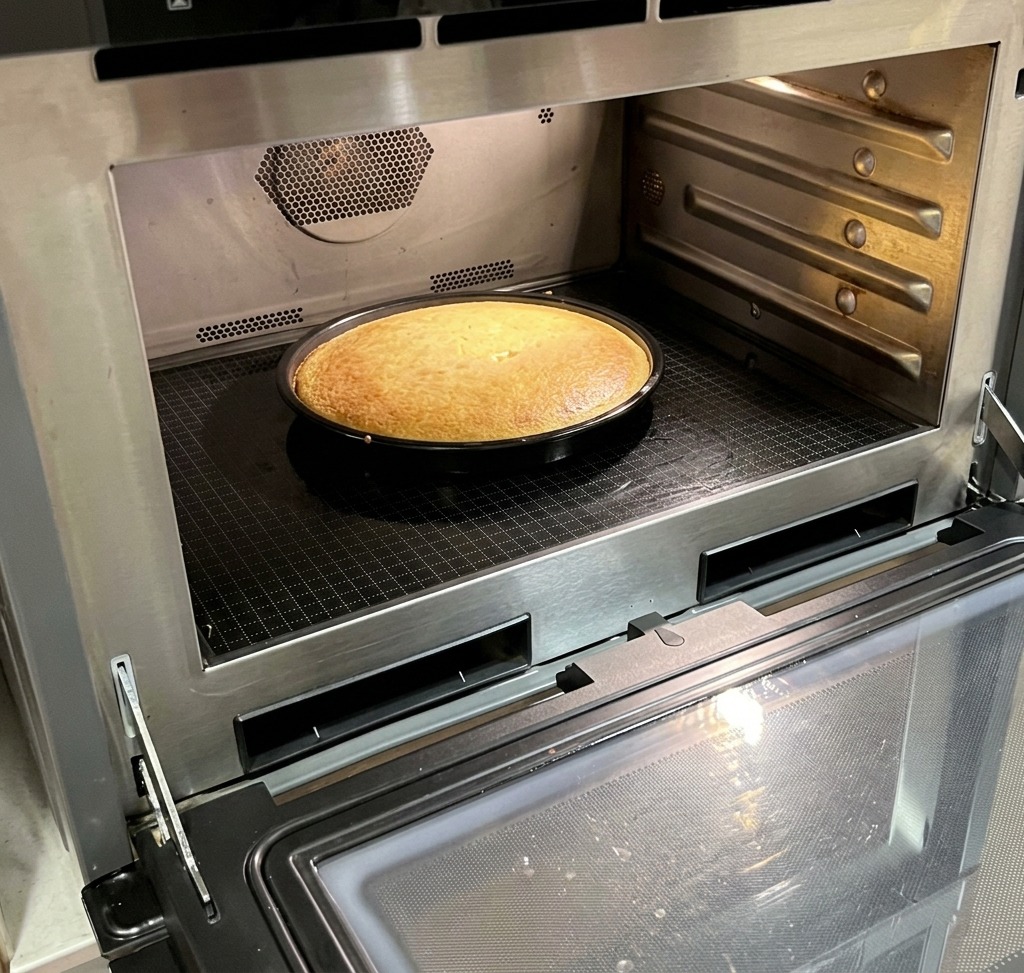
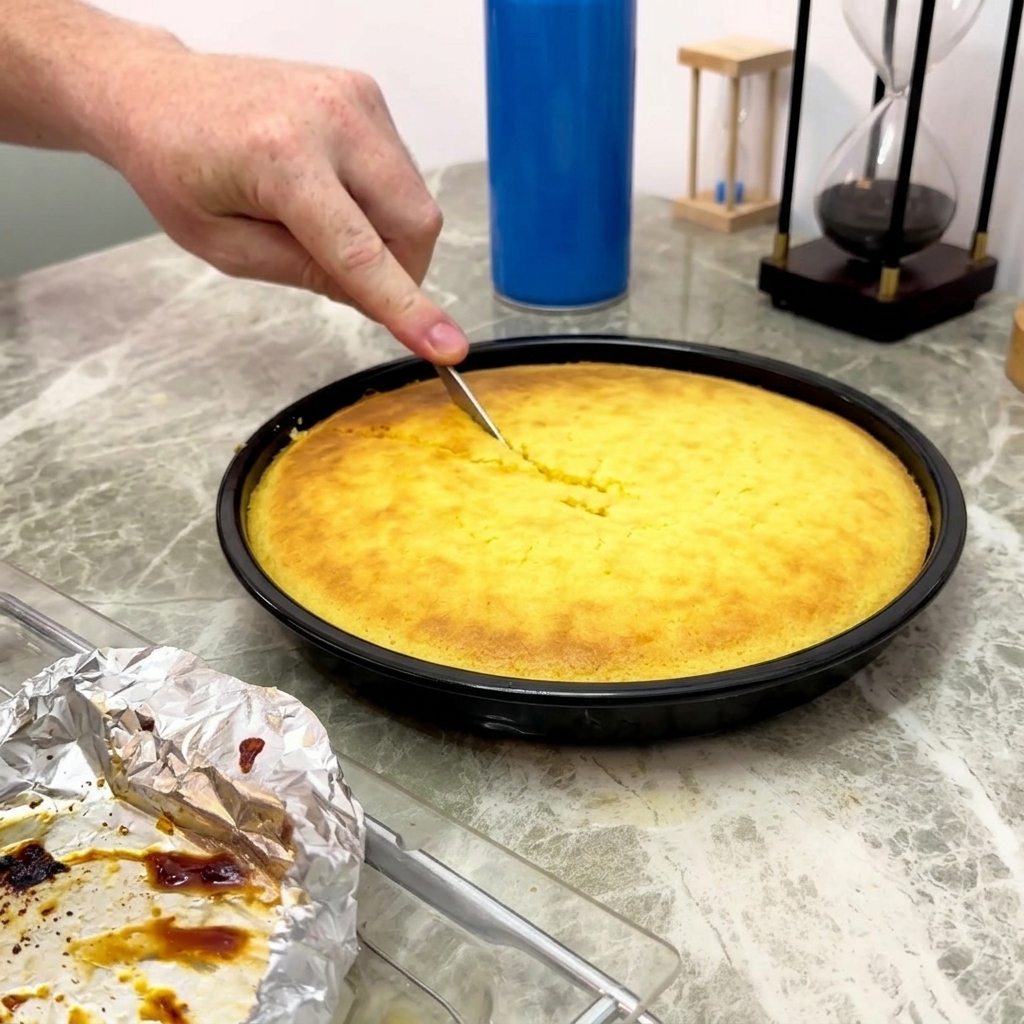
Check the doneness of your baking cornbread by inserting a knife into the center of the golden-brown crust. If the blade comes out clean, this sweet and savory classic American side dish is ready to be taken out of the oven.
Tip: Do not overbake the cornbread; as soon as it pulls away slightly from the edges of the pan and the center is set, its ready. - 14Apply the final glaze
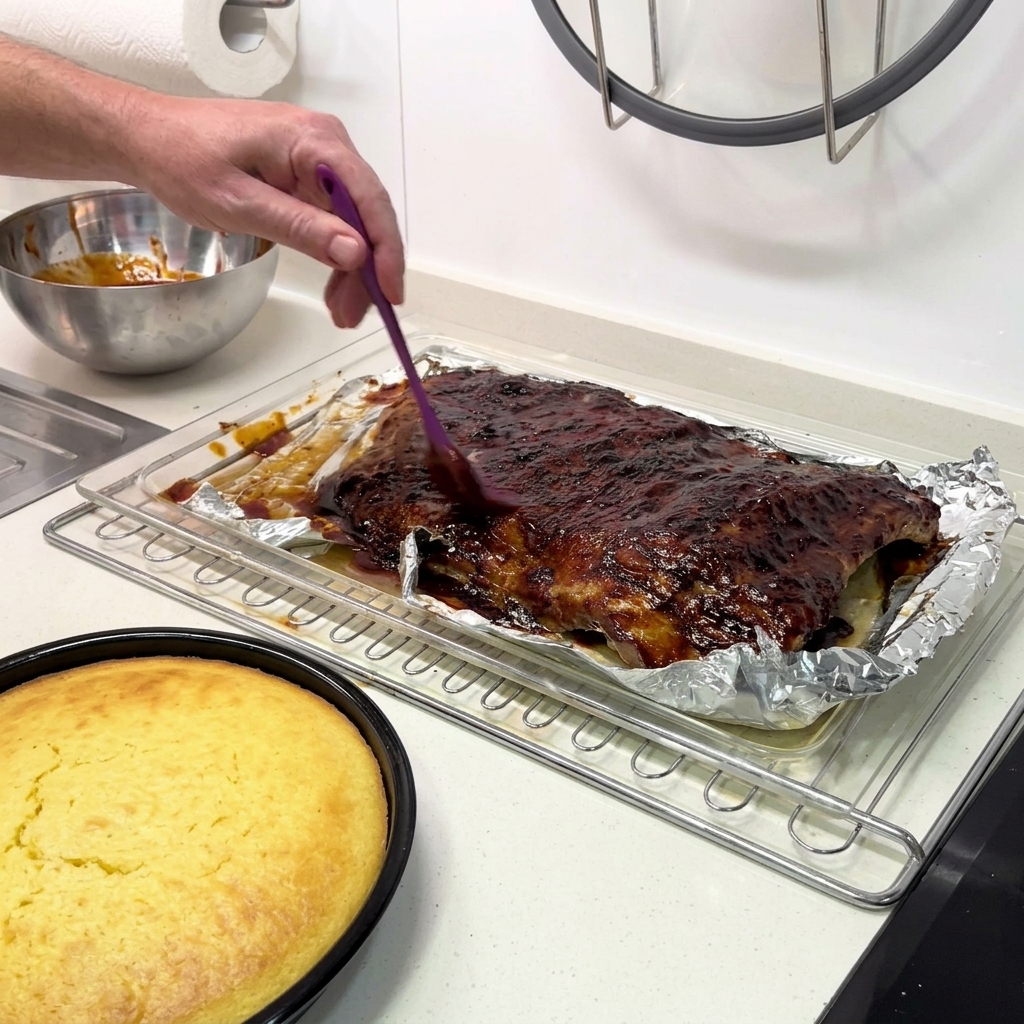
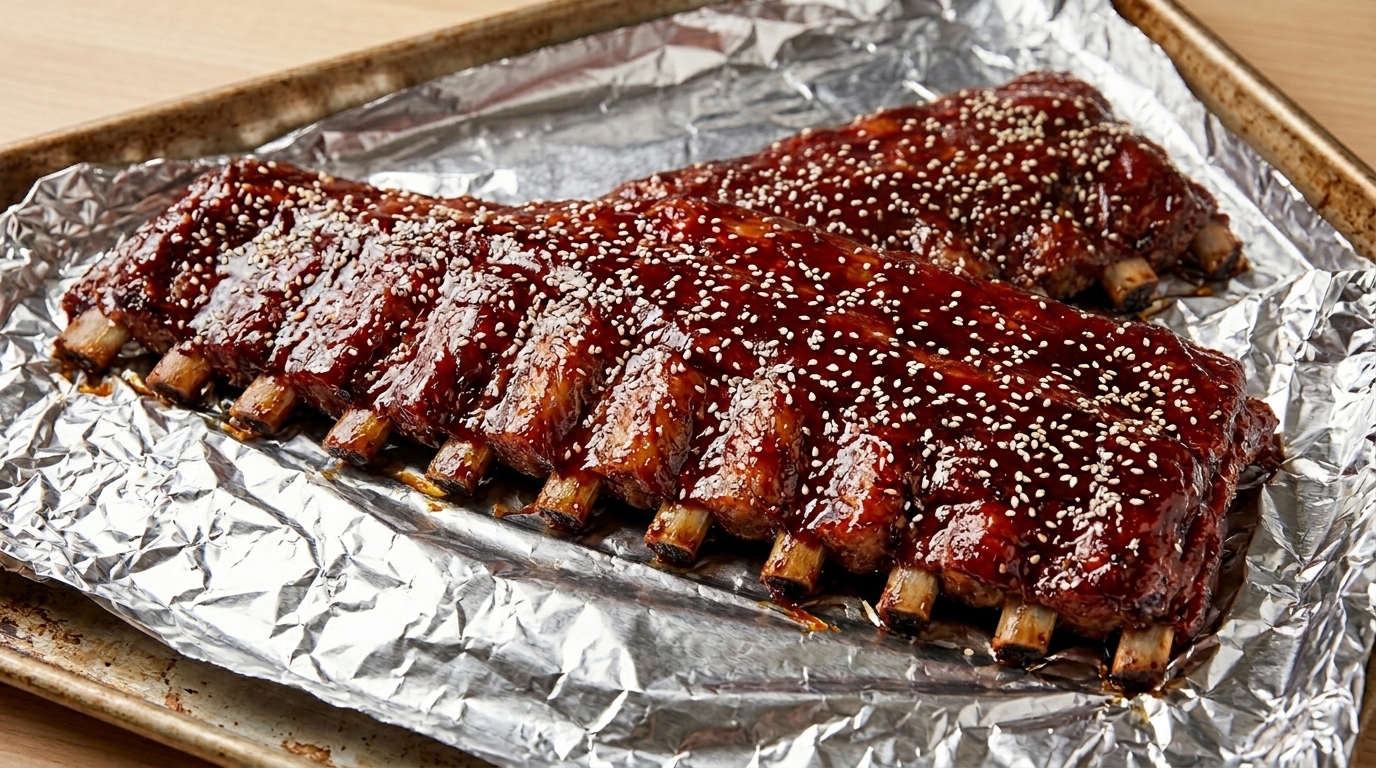
Remove the ribs from the oven one last time and brush on a generous final layer of BBQ sauce. This creates a beautiful, shiny finish and a burst of fresh flavor just before serving.
Tip: For an extra kick, you can mix a little honey or maple syrup into the final layer of sauce for added shine and sweetness. - 15Portion the ribs
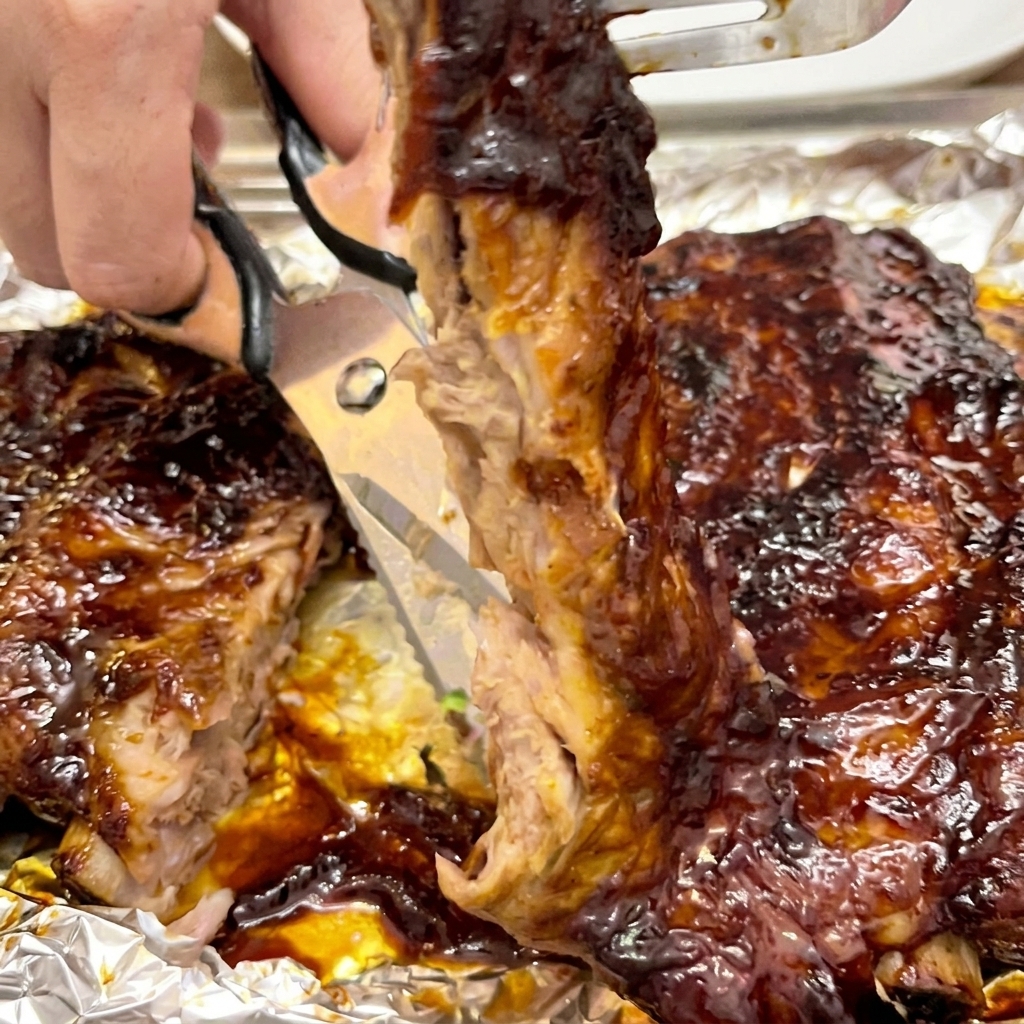
Once the ribs have rested for a few minutes, use a fork to hold the meat steady and a pair of clean kitchen scissors to snip between the bones into individual portions. The meat should be so tender that it easily separates.
Tip: Using kitchen scissors is often easier than a knife for ribs that are fall-off-the-bone tender, as it prevents the meat from shredding. - 16Slice and serve
Move the cornbread to a cutting surface and slice it into even wedges. Serve the warm cornbread alongside the hot ribs. For an extra touch of indulgence, spread a little butter on each slice while its still warm.
Tip: If the cornbread is too crumbly to slice cleanly, let it cool for 5-10 minutes before cutting.