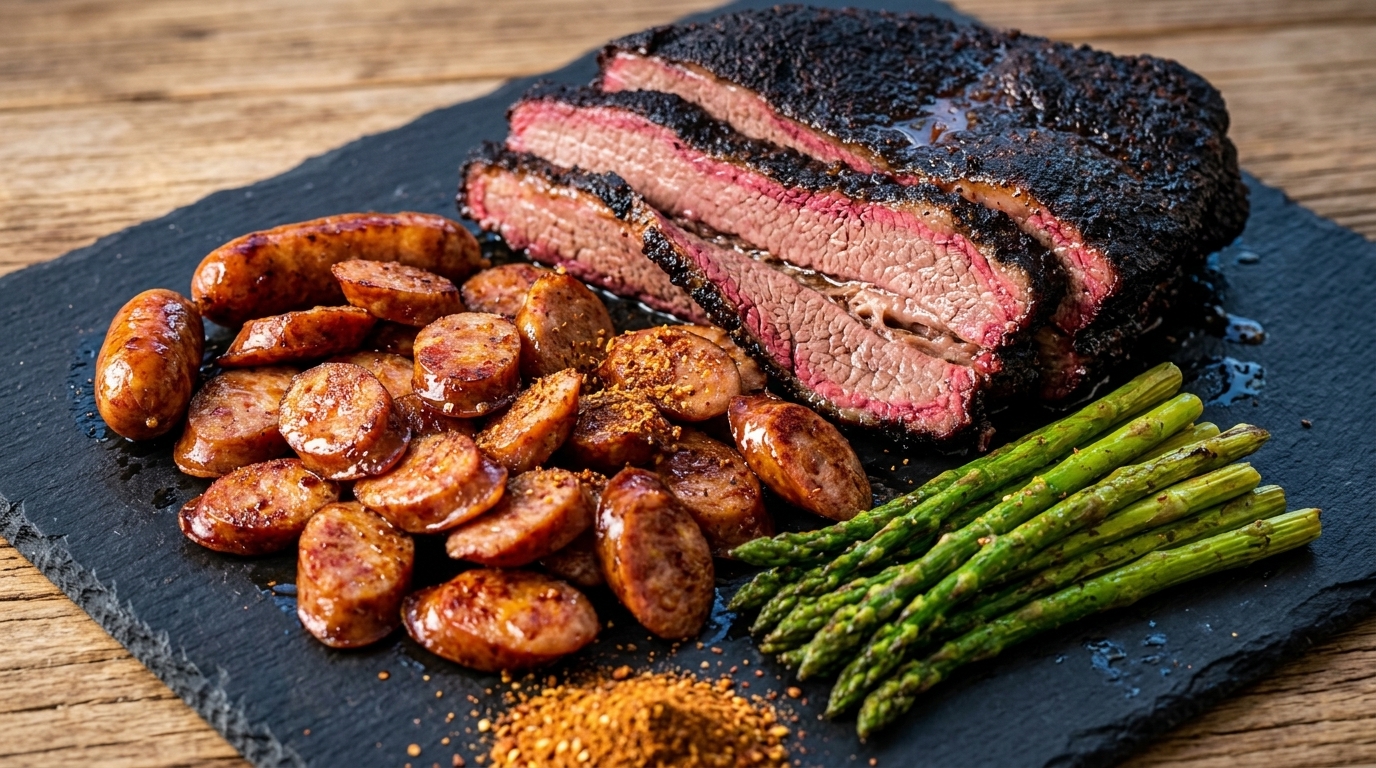
Slow-Smoked American Barbecue Beef Chuck
Experience melt-in-your-mouth American barbecue with this slow-smoked beef chuck. It features a dark, caramelized bark and incredibly juicy, tender meat.
True American barbecue is a labor of love, relying on low and slow cooking to transform tough cuts into rich, tender masterpieces. While brisket is the traditional king of Texas barbecue, beef chuck offers a wonderfully marbled alternative that practically melts after hours of roasting. The long cook time breaks down the dense collagen, rendering the fat to baste the meat internally while building a deeply savory, dark crust known as the bark.
Ingredients
- 2 kg beef chuck roast
- 1 whole red onion
- 2 tbsp oyster sauce
- 2 tbsp yellow mustard
- 2 tbsp black pepper sauce
- 1 tbsp coarse salt
- 1 tbsp coarse black pepper
- 1 tbsp fennel seeds
- 1 tsp sugar
- 12 tsp MSG (optional)
- to serve flour tortillas
- to serve avocado, sliced
- to serve lettuce
Instructions
- 1Prepare the Onion Base
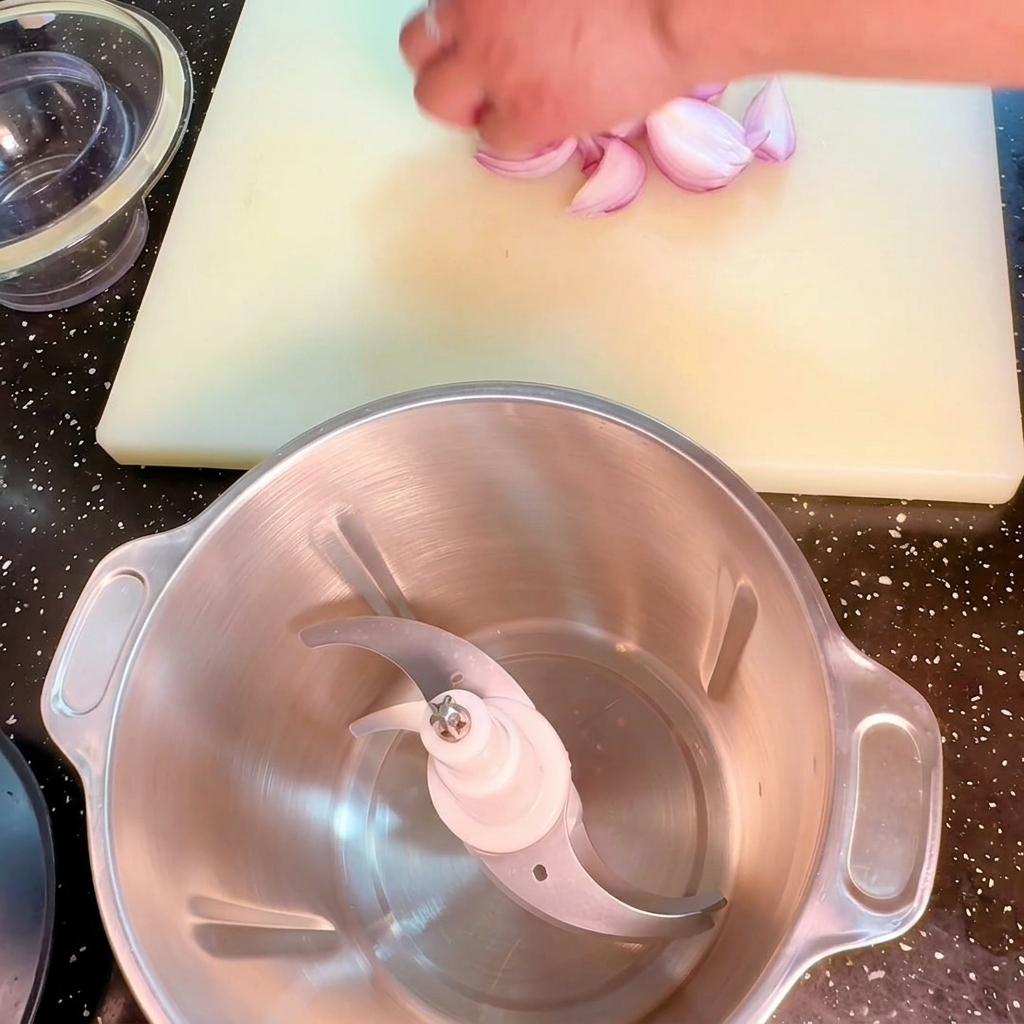
Begin by roughly chopping the red onion and bringing out a food processor. We will blend the onion into a fine paste or juice, which will serve as the aromatic foundation for our barbecue marinade, helping to tenderize the meat.
Tip: Using fresh blended onion instead of dry powder provides a much deeper, more pungent flavor that penetrates the thick cuts of beef more effectively. - 2Apply the Dry Seasoning
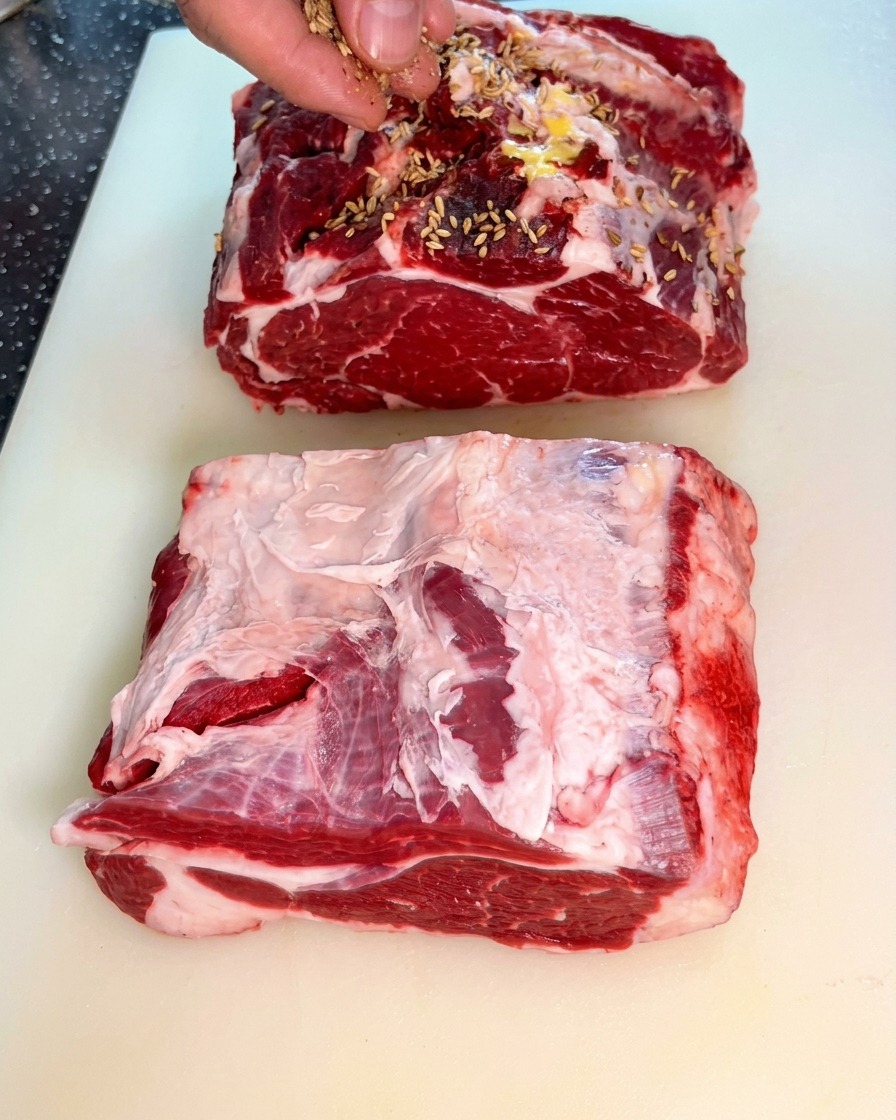
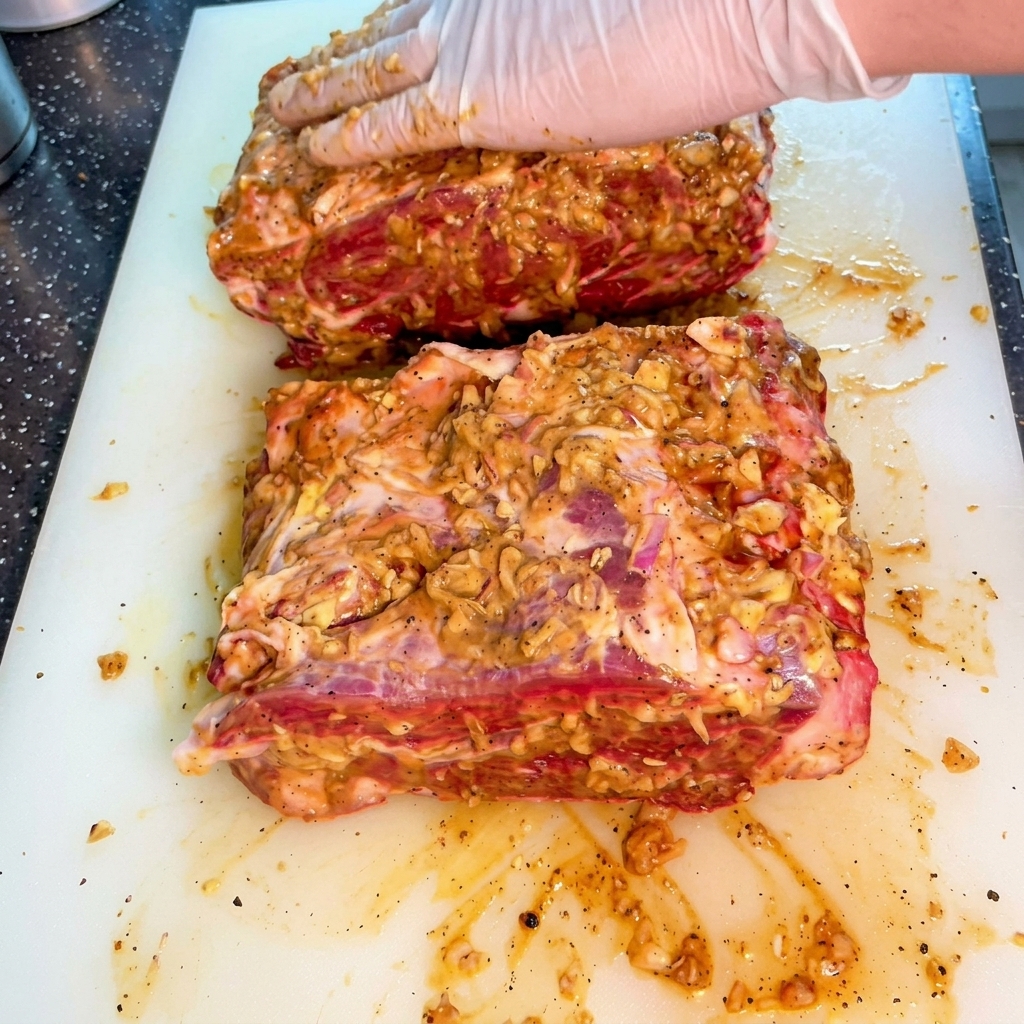
Place the two large cuts of raw beef chuck on a clean cutting board. Start building the flavor profile by evenly sprinkling your dry spices, such as fennel seeds, directly onto the surface of the meat.
Tip: Pat the raw beef completely dry with paper towels before applying any seasonings to ensure the spices adhere properly and dont slide off. - 3Add the Oyster Sauce
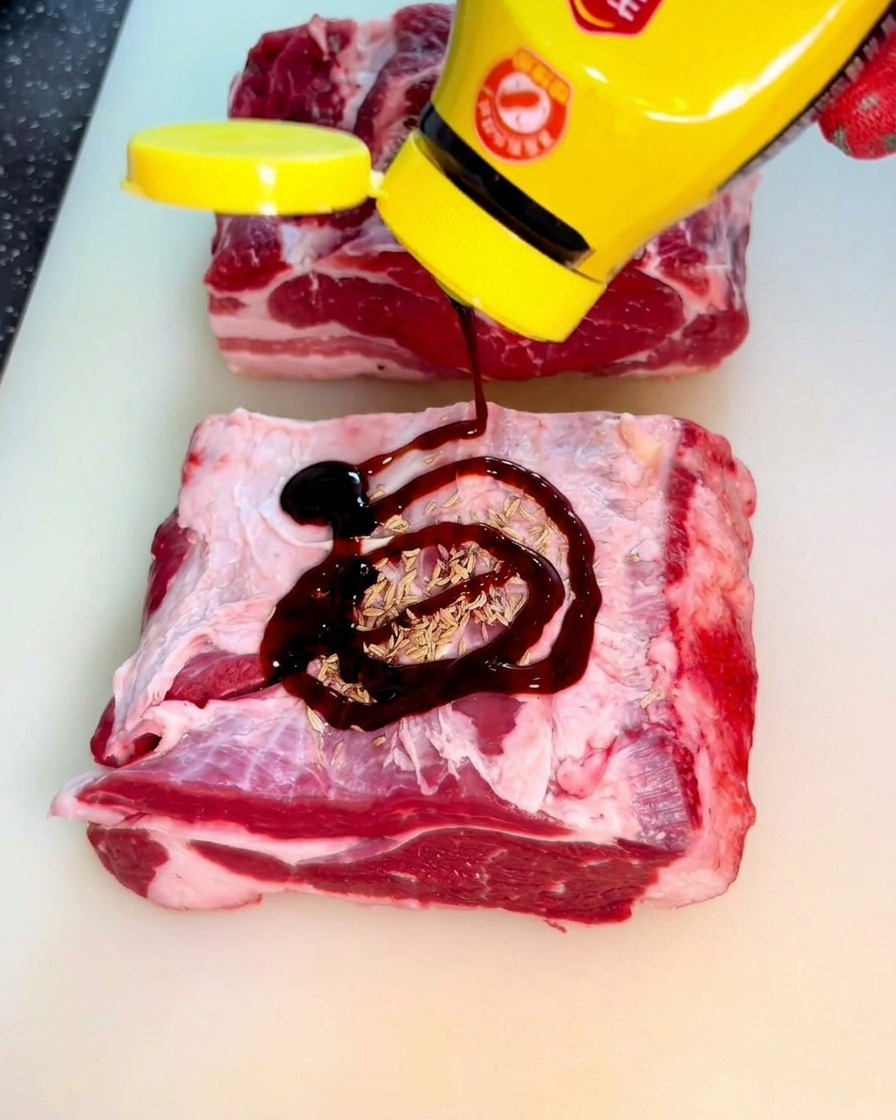
Pour a generous amount of thick, dark oyster sauce directly over the seasoned beef. The oyster sauce adds a rich umami depth and a touch of sweetness that will eventually caramelize beautifully during the slow roasting process.
Tip: Oyster sauce is highly viscous; it acts as an excellent initial binder to hold the rest of the marinades and spices to the meat. - 4Layer with Mustard
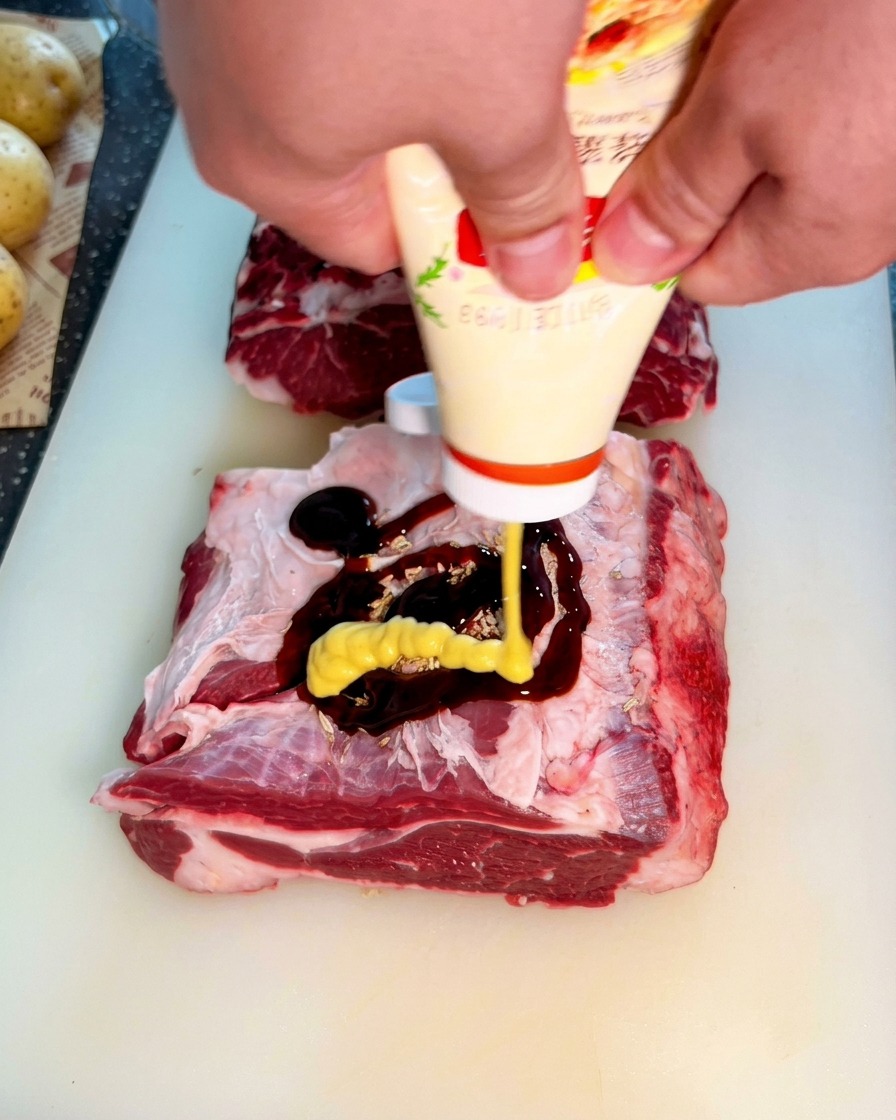
Squeeze yellow mustard directly over the oyster sauce layer on the beef. The acidity and tanginess of the mustard balance the rich savory notes of the oyster sauce and help develop the classic dark, crusty bark associated with American barbecue.
Tip: You can substitute standard yellow mustard with a honey mustard blend if you prefer a slightly sweeter finish to your barbecue crust. - 5Apply Black Pepper Sauce
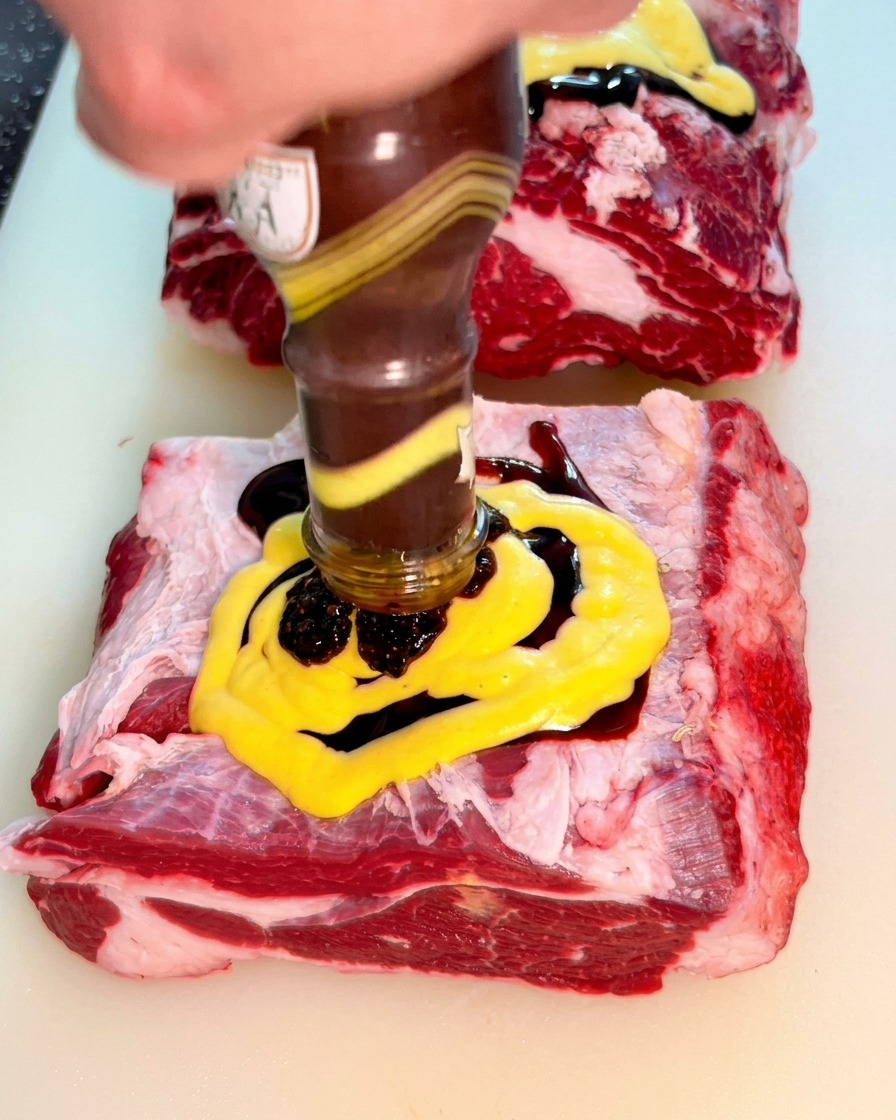
Add a thick layer of black pepper sauce over the mustard and oyster sauce. This concentrated sauce provides a robust, pungent heat that cuts through the fattiness of the beef chuck, elevating the overall flavor.
Tip: If you dont have prepared black pepper sauce, a quick slurry of soy sauce, beef broth, and heavily cracked black peppercorns makes a great substitute. - 6Add Salt and Pepper
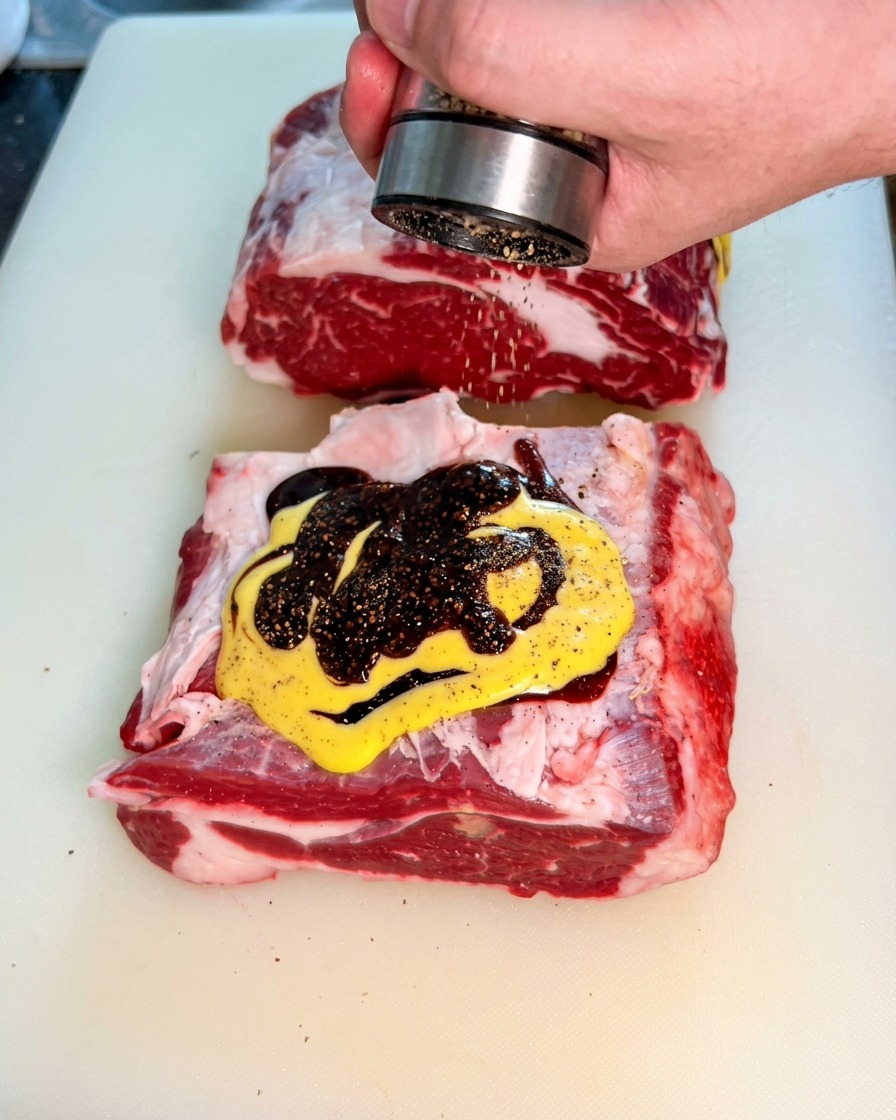
Complete the seasoning layers by generously grinding coarse salt and additional black pepper over the meat and wet sauces.
Tip: Always use coarsely ground pepper and salt for barbecue rather than fine table grinds; the coarse texture is essential for building a proper, crispy bark. - 7Add the Minced Onion

Top the layers of wet and dry seasonings with the minced red onion prepared earlier. This adds an extra layer of sharp, aromatic flavor that will mellow out during the long cook.
Tip: You can also use blended onion juice instead of minced onion for a smoother marinade. - 8Rub the marinade
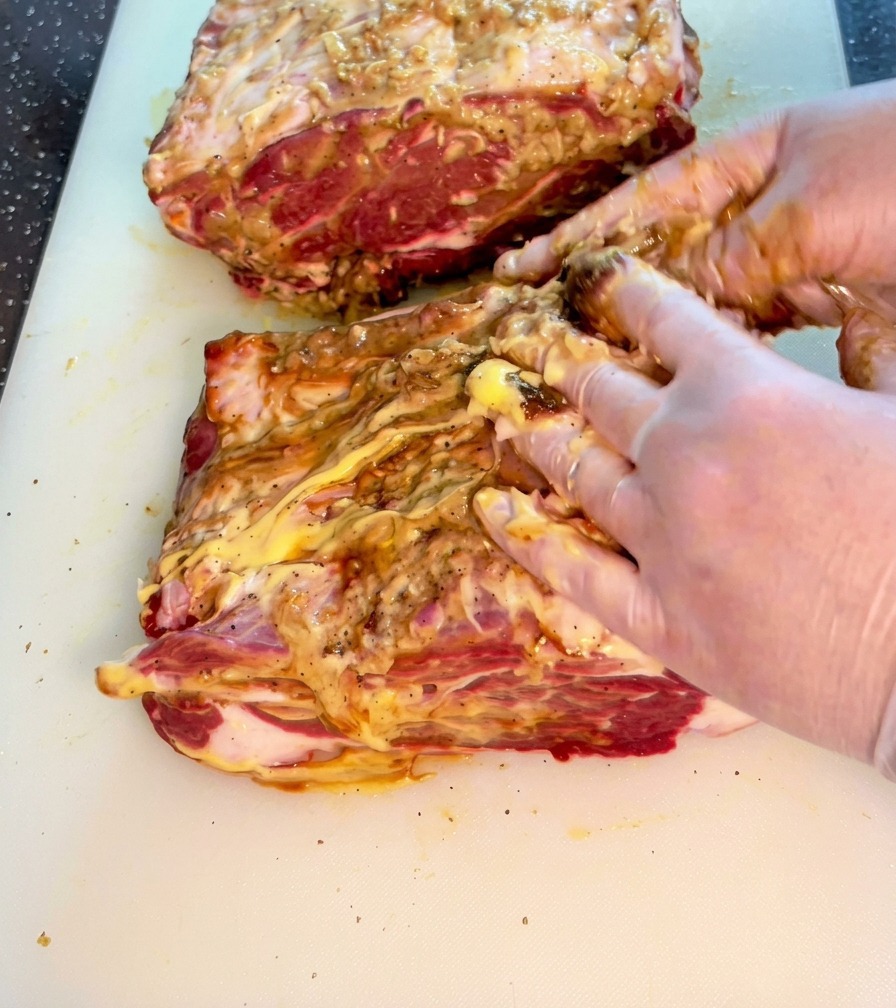
Thoroughly rub the sauces, spices, and minced onion evenly across the surface of the beef. Ensure every part of the meat is well-coated to guarantee deep flavor penetration during the marinating process.
Tip: Take your time massaging the marinade into the meat; this helps tenderize the beef and enhances the final taste. - 9Rest and Marinate
Once the beef is entirely coated with the thick marinade, transfer it to a bowl lined with plastic wrap or a sealed container. Place it in the refrigerator to marinate for at least 12 hours, allowing the flavors to penetrate deeply.
Tip: For optimal flavor absorption leave the beef in the refrigerator overnight. A longer resting time allows the spices to fully permeate the thick cut of meat. - 10Initial bake and poke
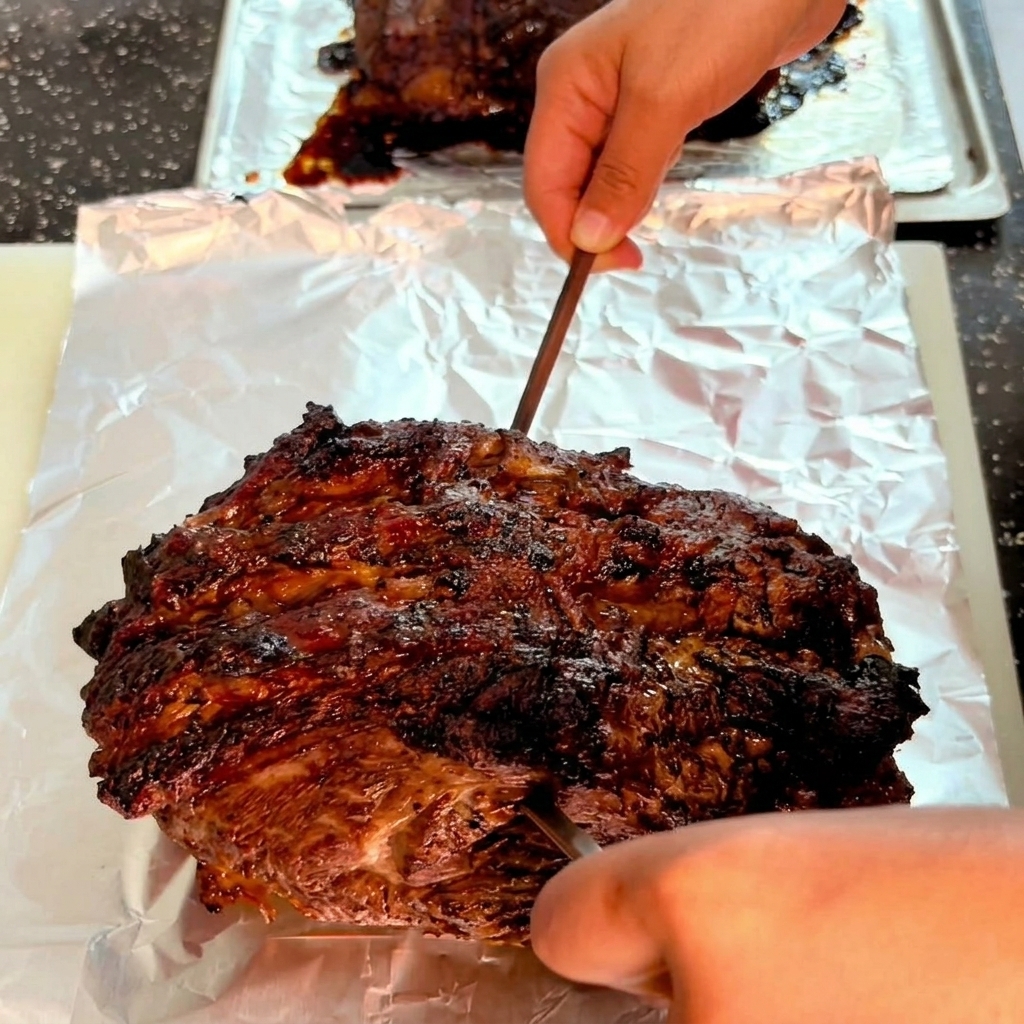
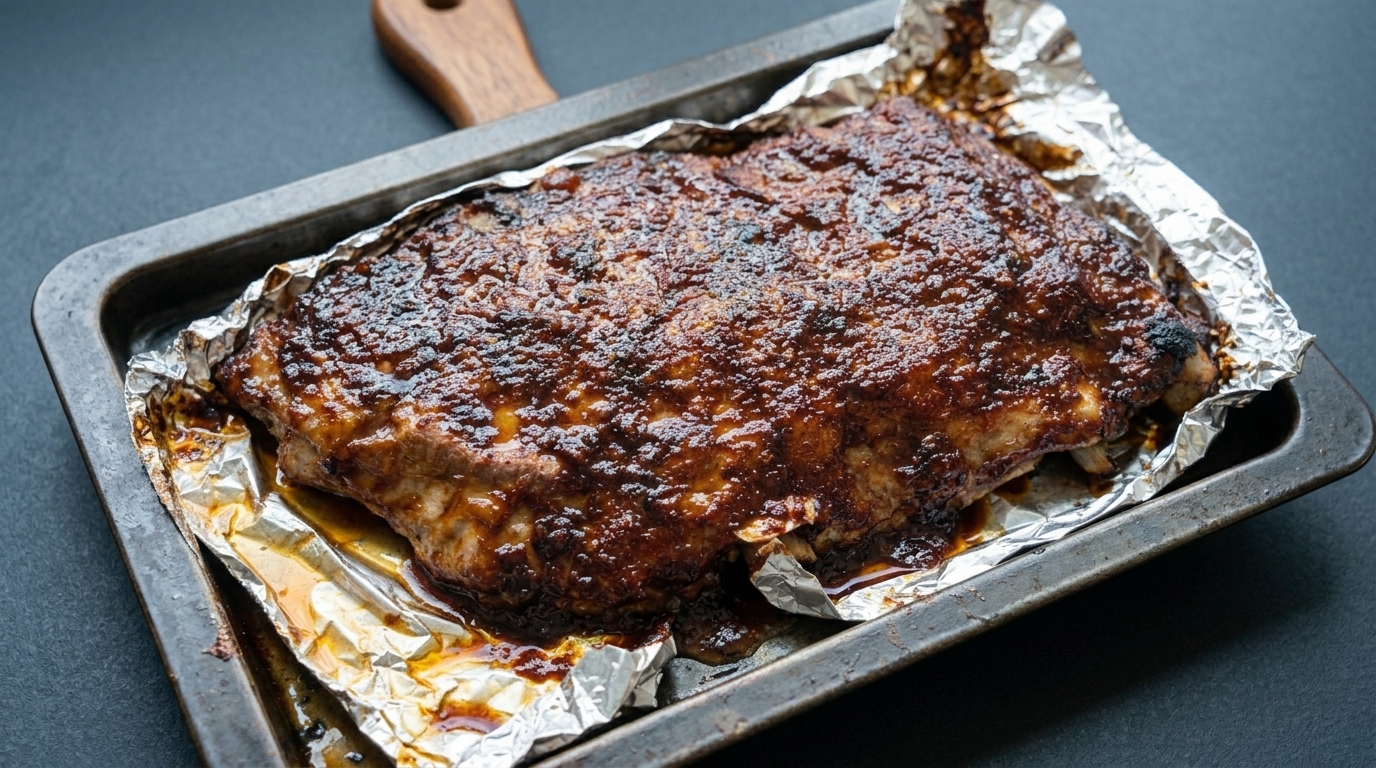
After marinating the beef for over 12 hours in the fridge, bake it uncovered at 120°C (250°F) for about an hour. Once a dark, caramelized crust forms, use a metal skewer to poke holes in the meat, allowing heat and moisture to penetrate better in the next phase.
Tip: Poking holes helps the remaining fat render and baste the lean meat internally during the long slow roast. - 11Wrap in foil for slow roasting
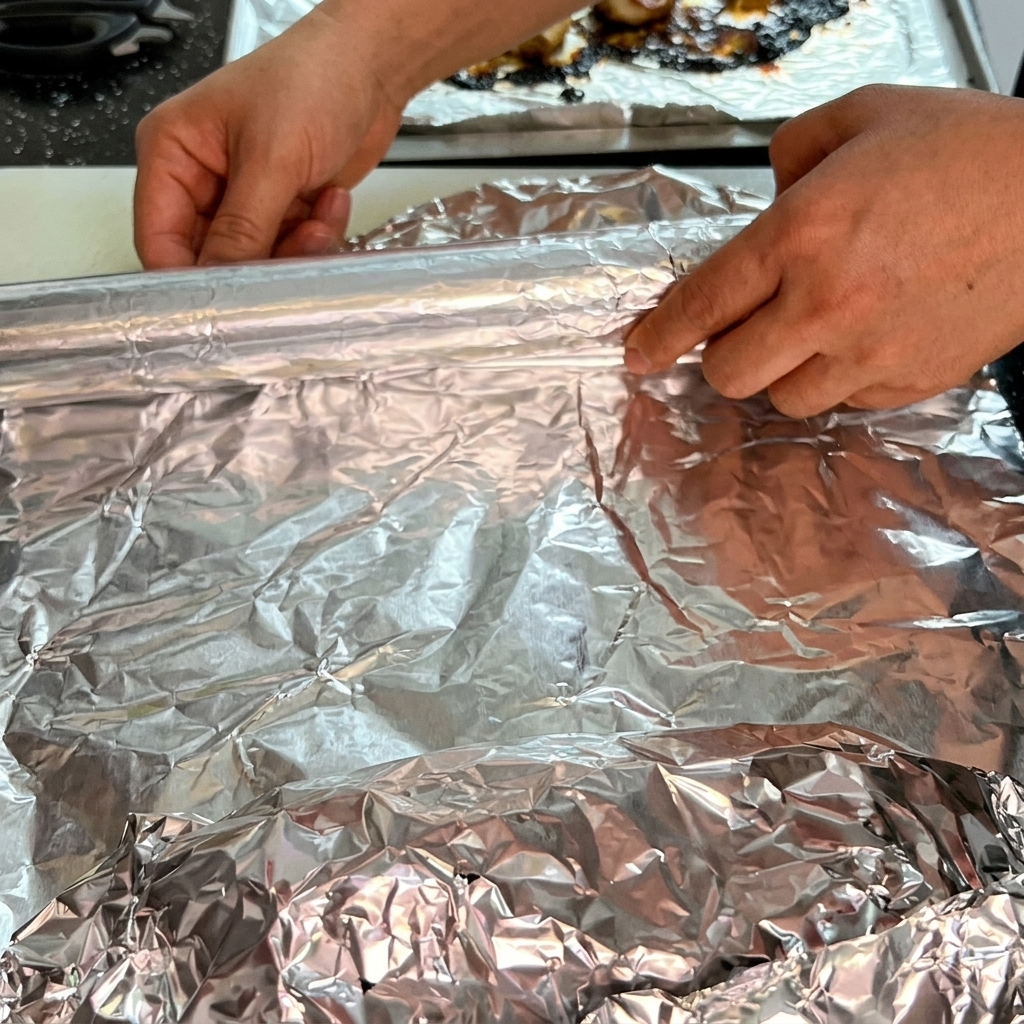
Prepare a large sheet of aluminum foil and wrap the partially roasted beef tightly. Place it back into the oven, maintaining the temperature at 120°C (250°F), and let it slow-roast for approximately 6 hours to break down the collagen and tenderize the meat.
Tip: Ensure the foil is sealed tightly without any gaps to trap steam and keep the meat incredibly juicy. - 12Rest and slice the beef
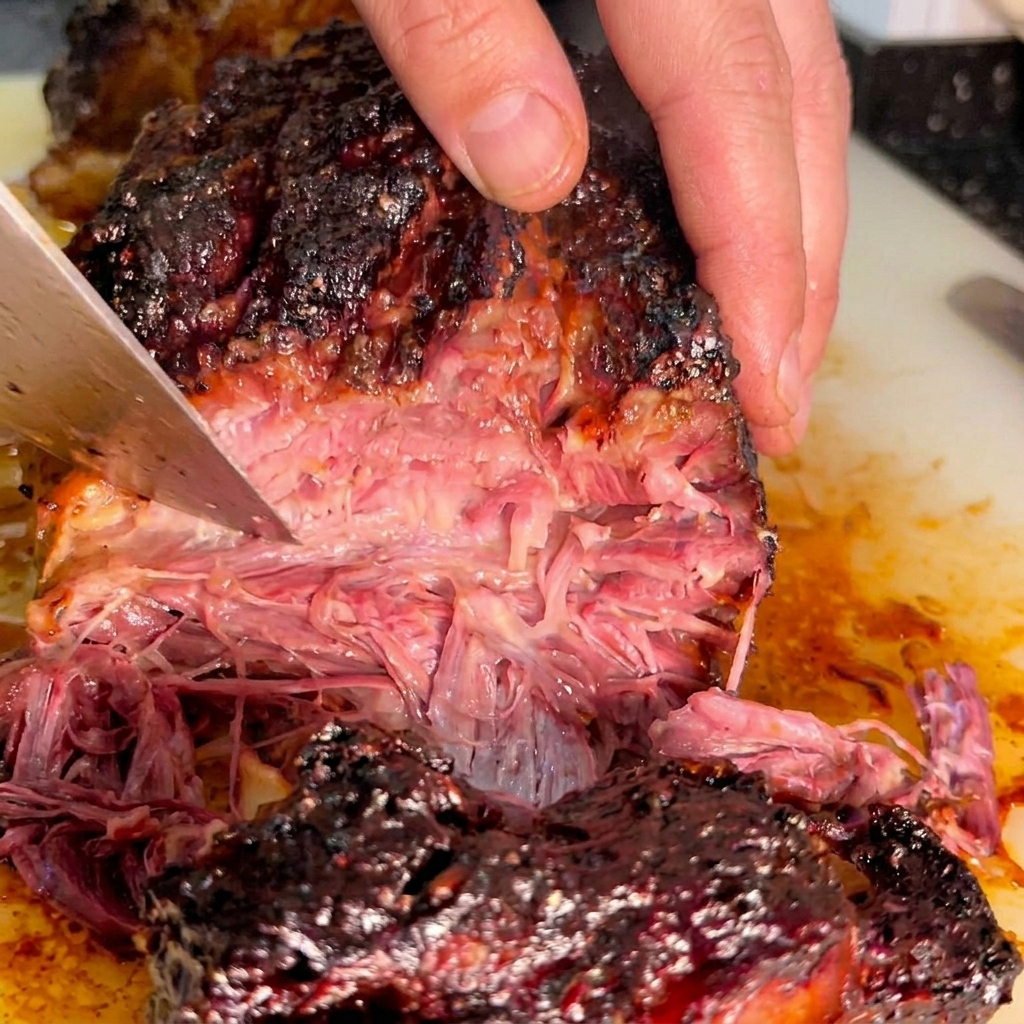
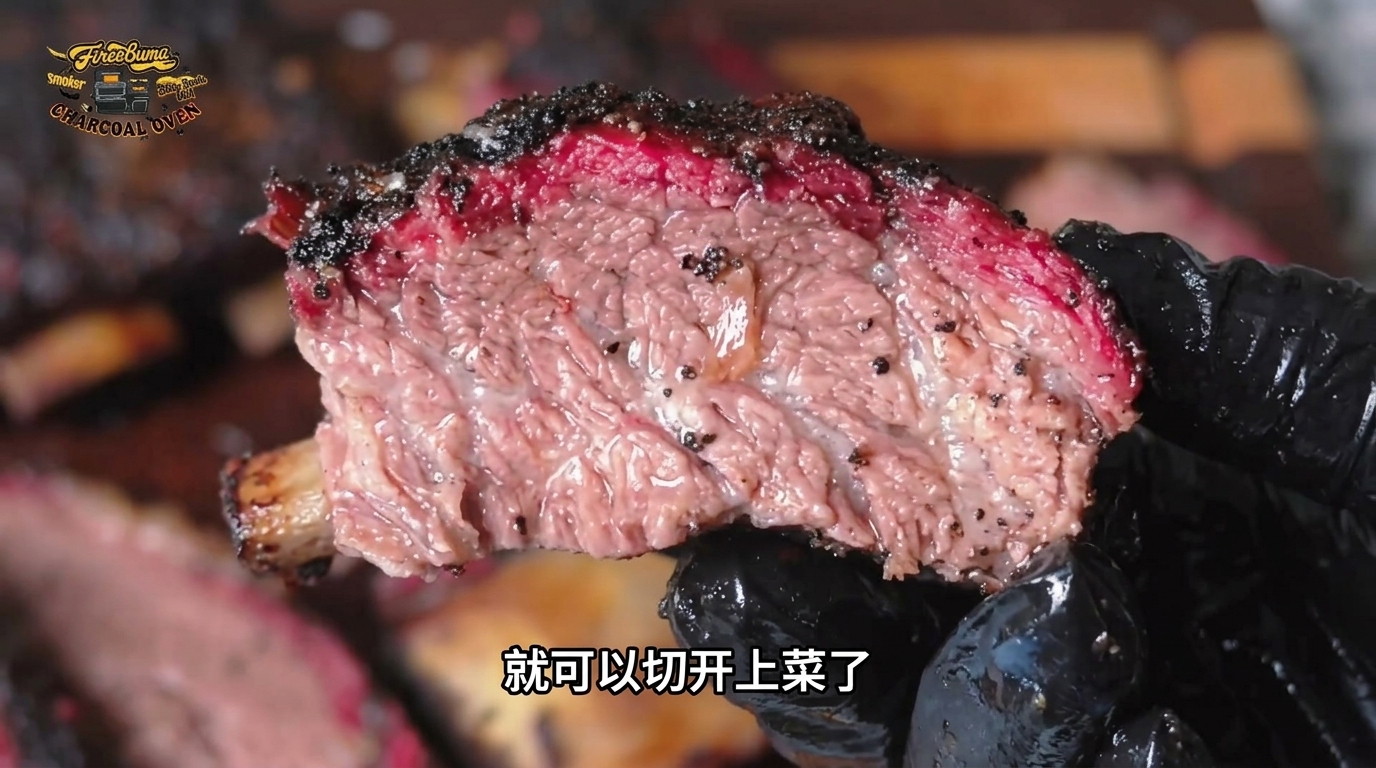
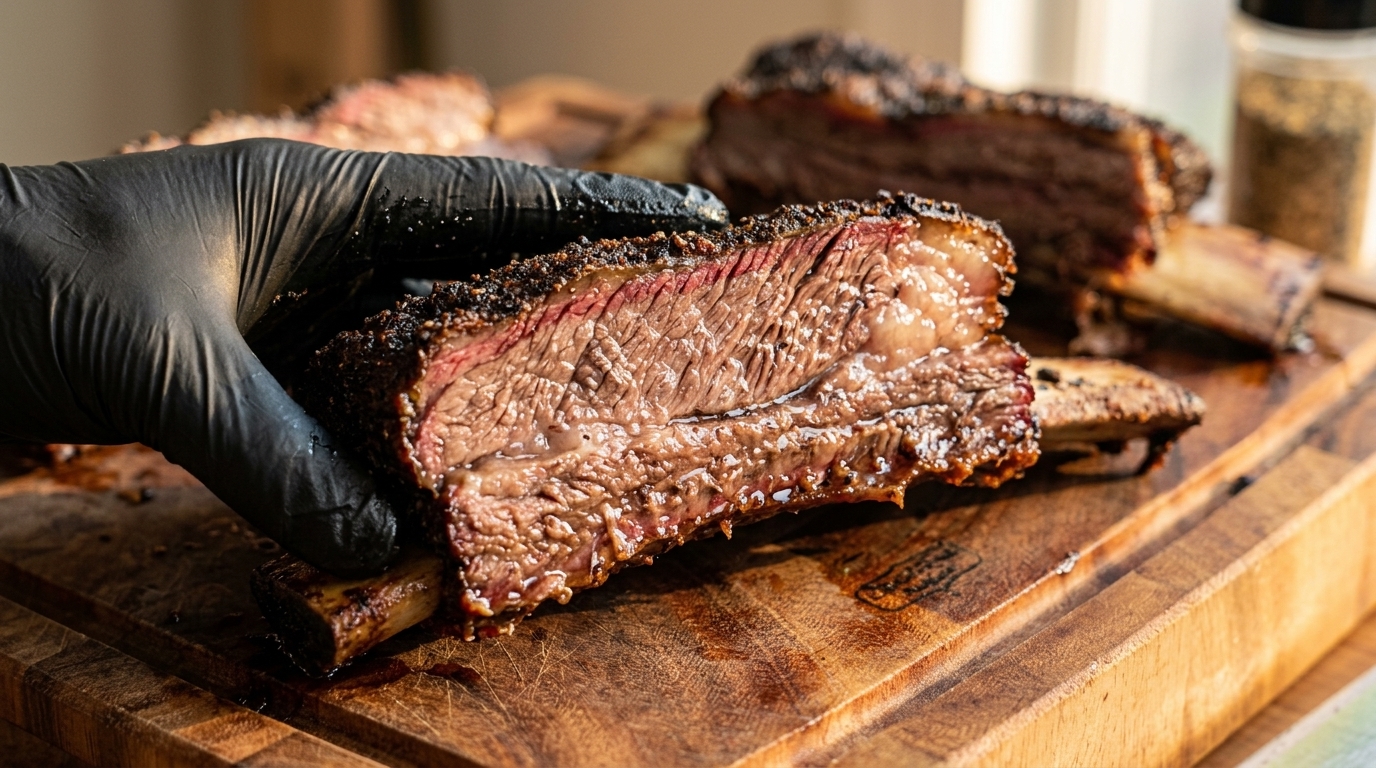
Turn off the oven and let the beef rest for half an hour before taking it out. Using a sharp knife or cleaver, slice through the dark, crispy bark to reveal the incredibly tender, juicy, and pink interior. Serve with lettuce, cucumber, or corn to balance the richness.
Tip: Resting the meat is crucial—it allows the juices to redistribute and settle, so they dont run out when slicing. - 13Assemble the wrap
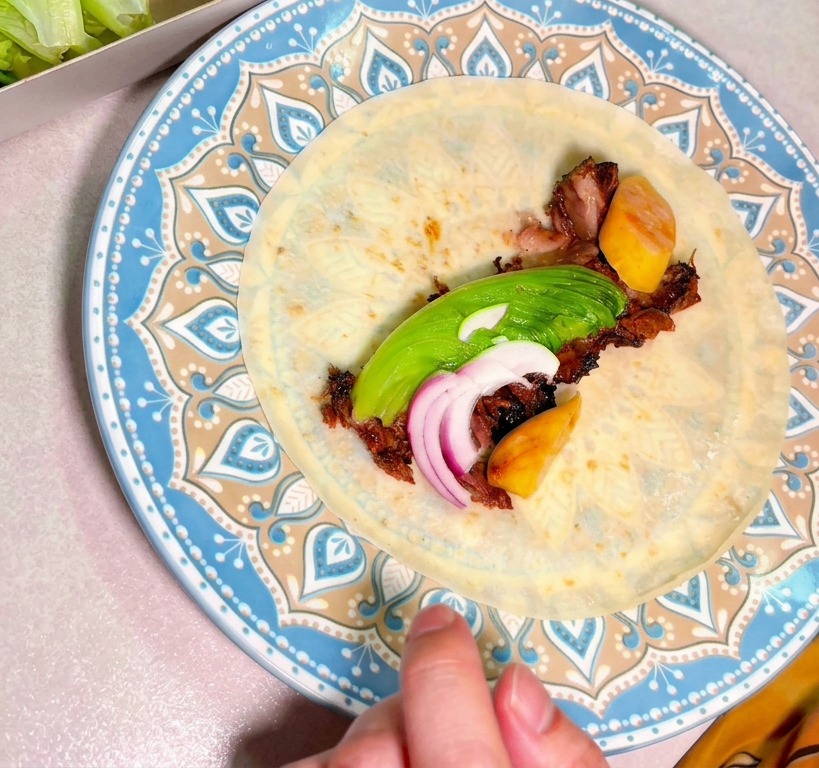
Lay a fresh tortilla flat on a plate and arrange generous pieces of the slow-roasted, tender beef in the center. Top the meat with sliced red onions, creamy avocado, and fresh greens to balance the rich, smoky profile of the barbecue.
Tip: Lightly warm the tortilla in a dry pan before assembling; this makes it more pliable and prevents it from tearing when rolled. - 14Roll and serve
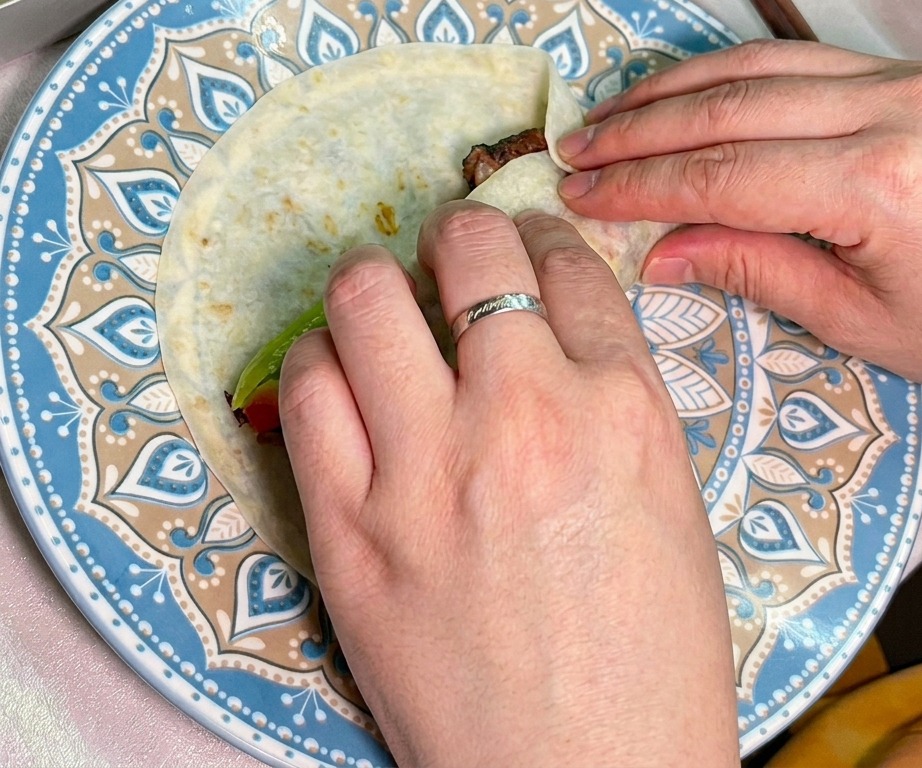
Carefully fold the sides of the tortilla over the filling, then roll it tightly from the bottom up to secure the ingredients. The melt-in-your-mouth beef paired with crisp, fresh vegetables creates a beautifully balanced and satisfying bite.
Tip: Tuck the ingredients tightly under your fingers as you begin the roll to ensure the wrap holds its shape perfectly.