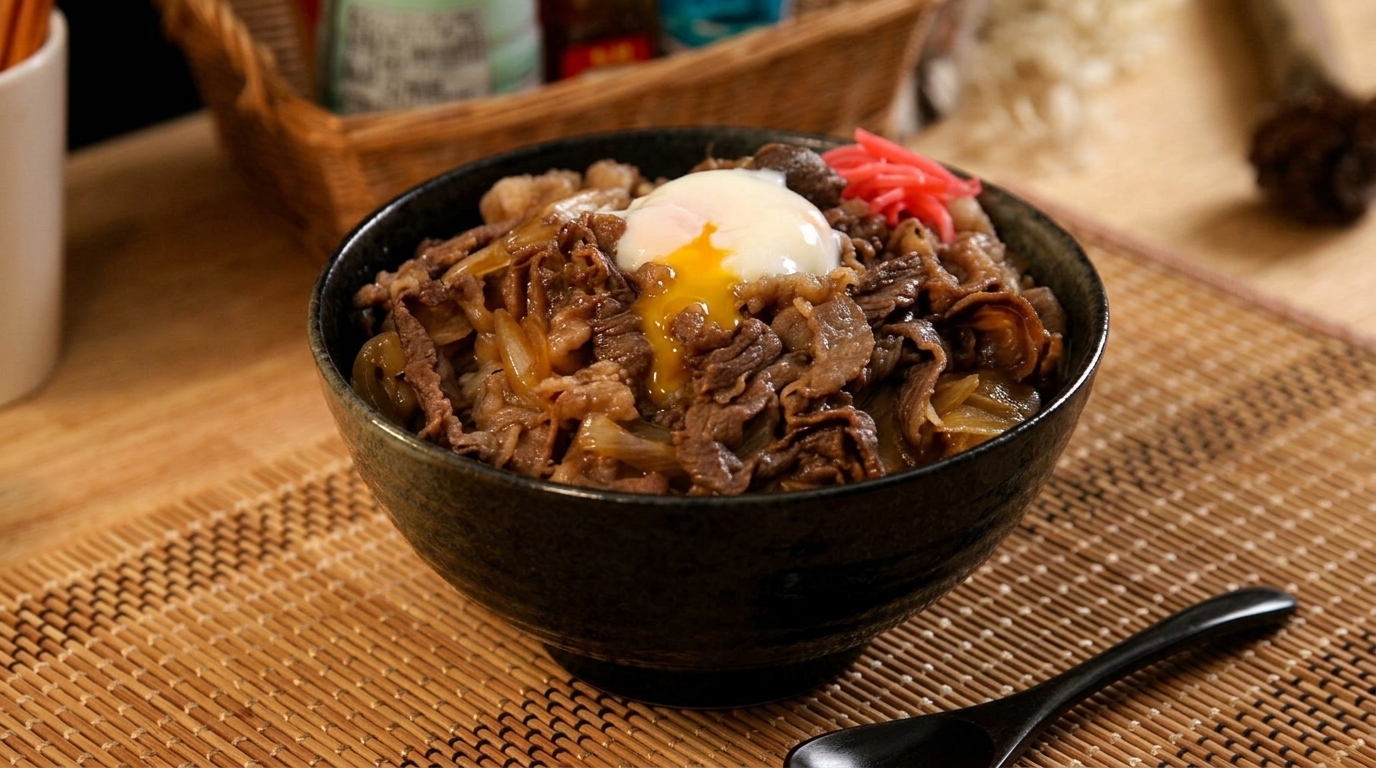
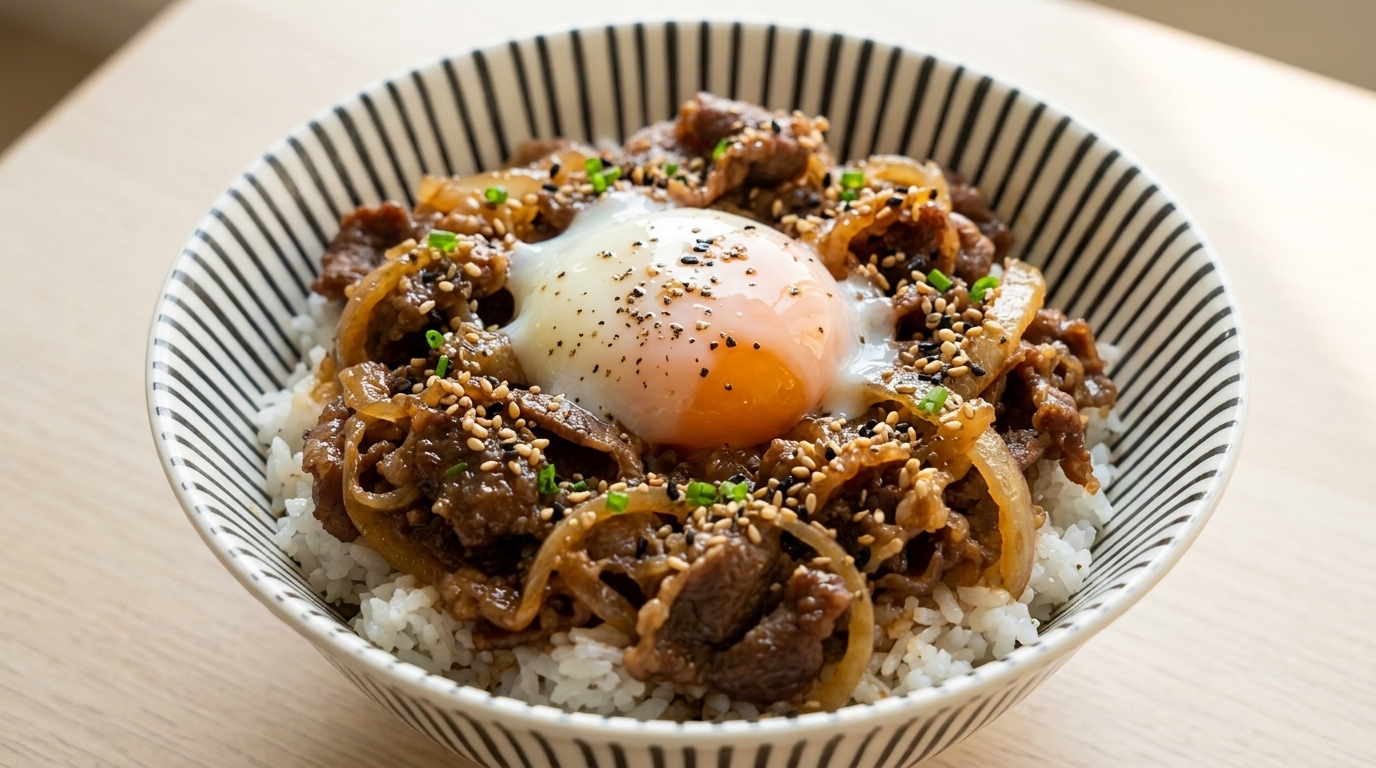
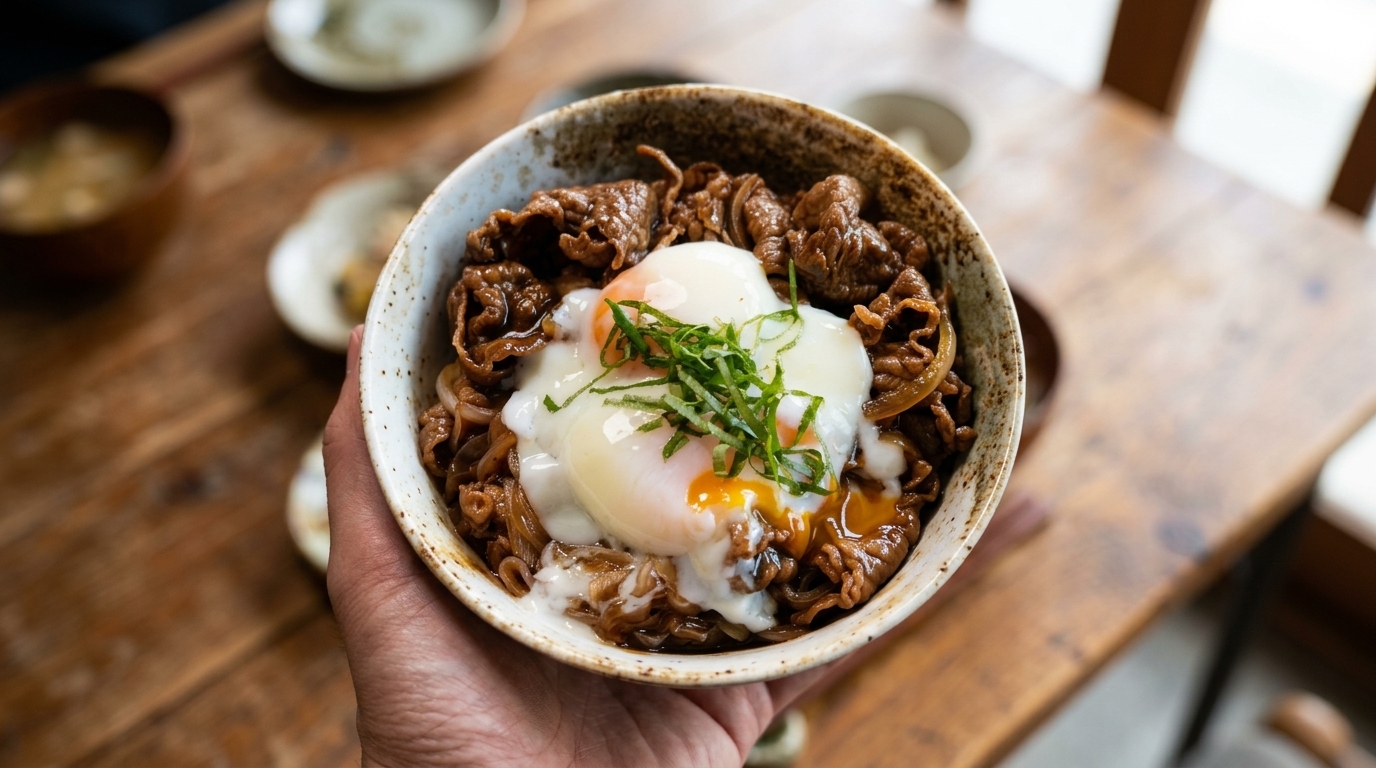
Authentic Japanese Gyudon (Beef Rice Bowl
Onsen Egg)
A comforting bowl of thinly sliced beef and sweet onions simmered in a rich soy glaze, served over hot rice and crowned with a perfectly silky, soft-set onsen egg.
Gyudon is the ultimate Japanese comfort food, beloved for its savory-sweet flavor profile and quick preparation. Adding an onsen egg—a traditional hot spring egg cooked slowly in residual heat—creates a luxurious, creamy sauce that binds the tender beef and steamed rice together perfectly.
Ingredients
- 3 cups cold water (for boiling)
- 1 cup cold water (for cooling)
- 1 whole egg (sterile, room temperature)
- 2 tbsp mirin
- 1 tbsp light soy sauce
- 1 tbsp oyster sauce
- 2 tbsp beef bowl sauce
- 1 tbsp sugar
- 0.5 tbsp cornstarch
- 0.5 whole white onion
- 1 splash cooking wine
- 200 g thinly sliced beef
- 1 tbsp cooking oil
- 1 bowl steamed rice (optionally mixed with quinoa)
- to taste fresh green garnishes (shiso or scallions)
Instructions
- 1Pour water into the pot
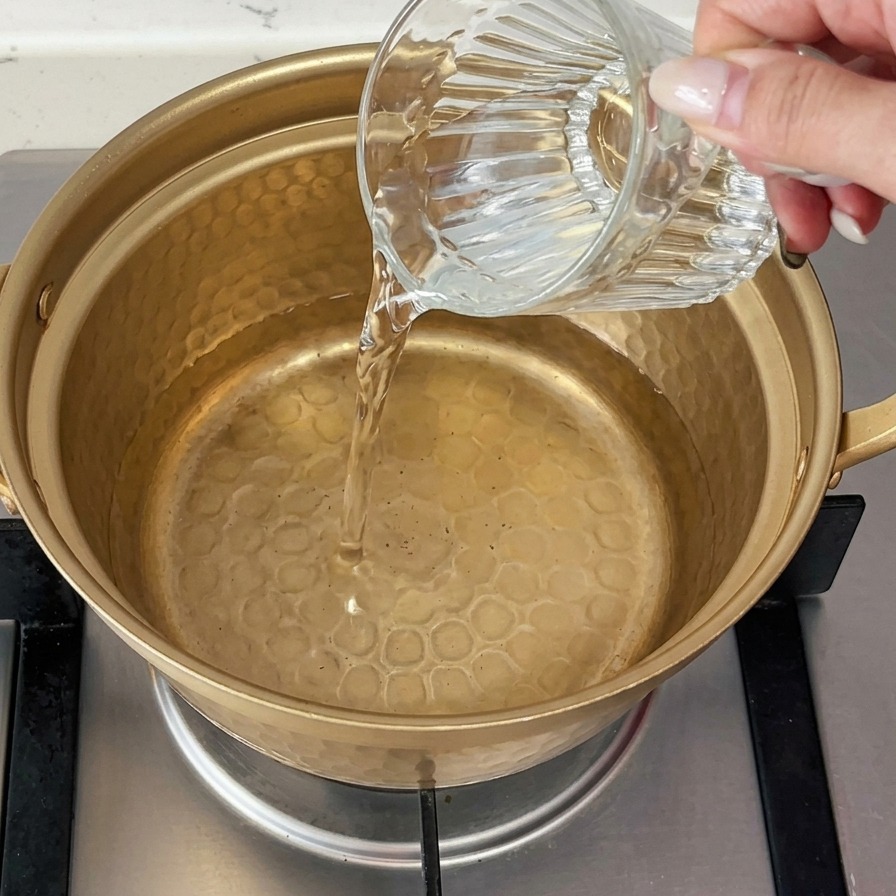
Begin by pouring three cups of fresh cold water into a small gold-colored pot. This will serve as the base for preparing your onsen egg. Ensure the pot is placed securely on the stove burner before starting.
Tip: Using a gold-colored aluminum pot helps with rapid heat conduction, which is ideal for small volumes of water. - 2Adjust the water temperature
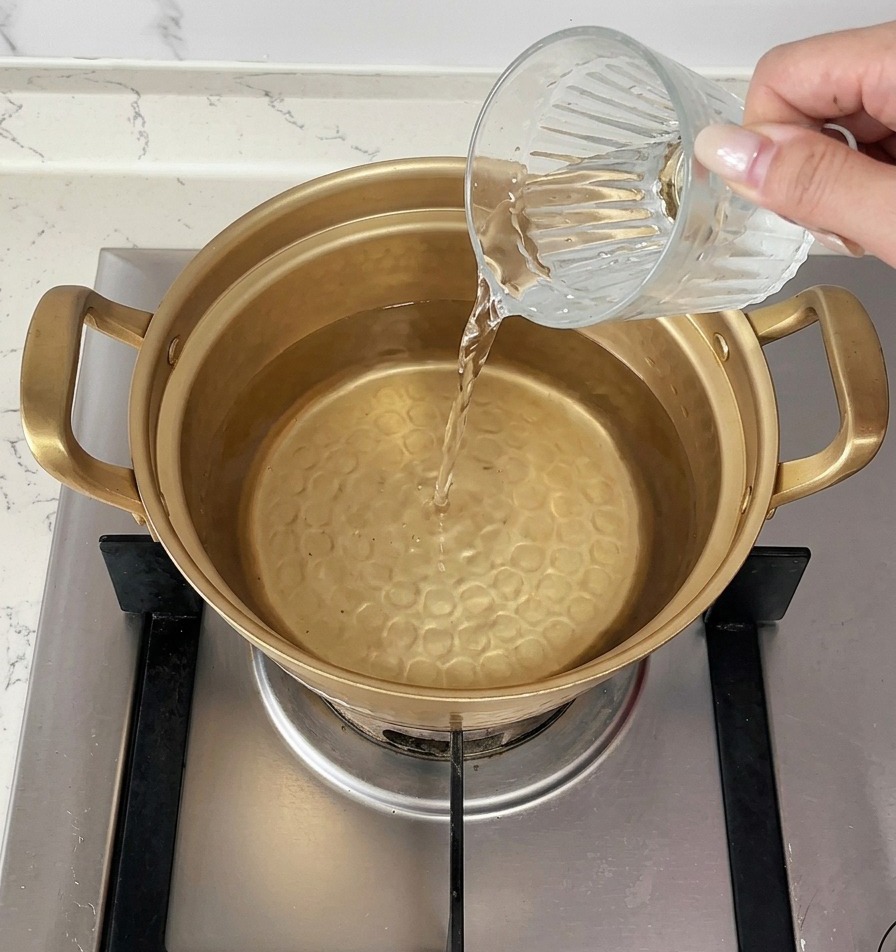
Once the initial three cups of water have reached a rolling boil, turn off the heat immediately. Pour in one additional cup of cold water. This step is crucial to lower the temperature slightly so the egg cooks gently without becoming hard-boiled.
Tip: This precise temperature adjustment is the secret to achieving that signature silky onsen egg texture. - 3Submerge the egg
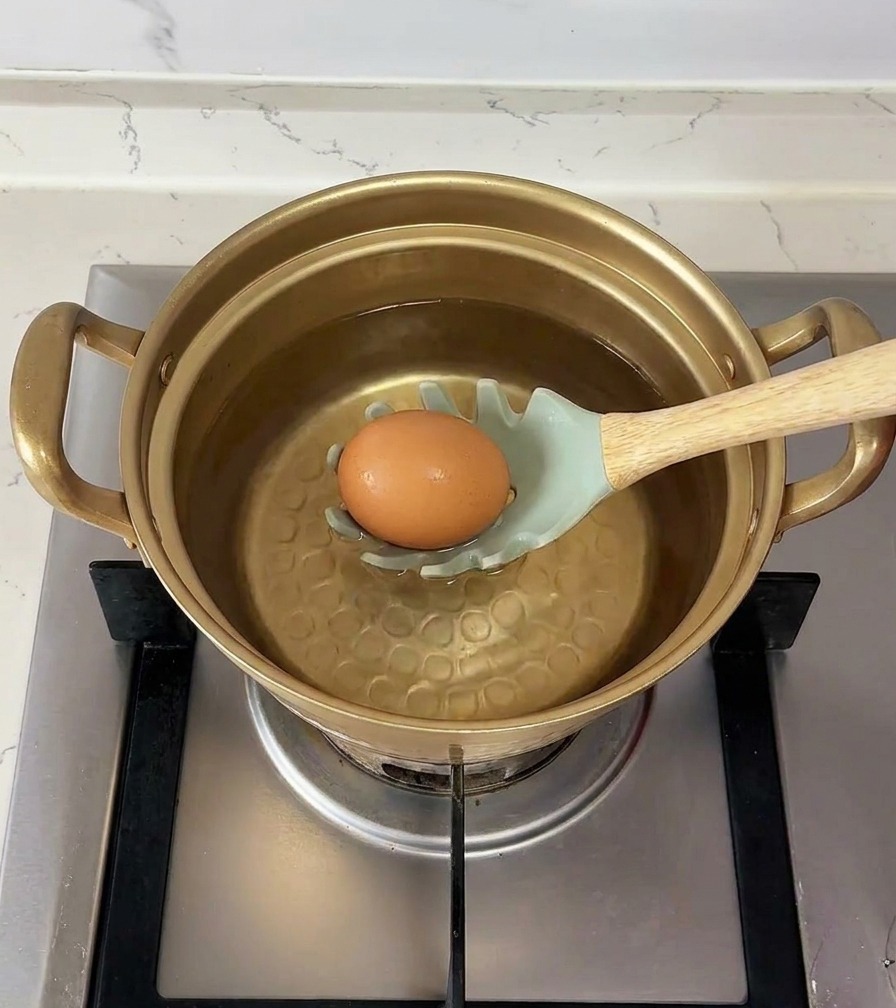
Use a slotted spoon to gently lower a sterile, room-temperature egg into the hot water. Placing it carefully prevents the shell from cracking against the bottom of the pot, ensuring the egg remains intact.
Tip: Room temperature eggs are less likely to crack when submerged in hot water compared to those taken straight from the refrigerator. - 4Cover and simmer
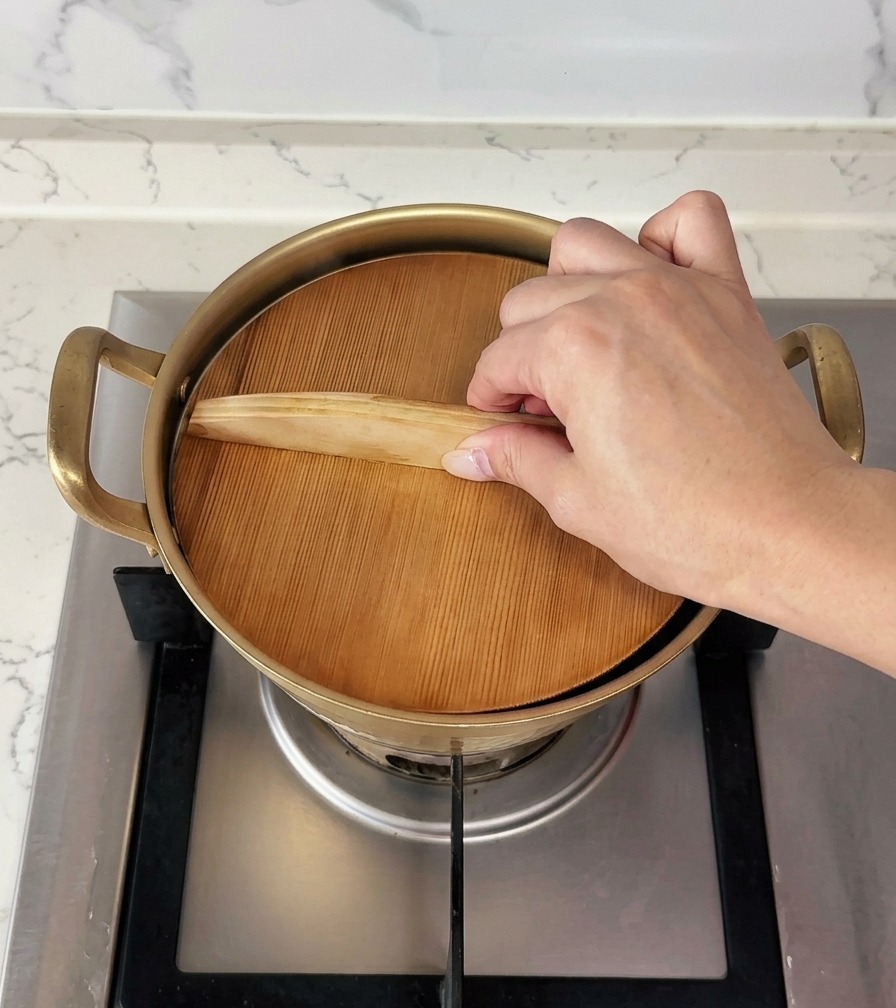
Place a lid—ideally a wooden one to retain heat effectively—over the pot. Let the egg sit undisturbed in the hot water for exactly 10 minutes. The residual heat will cook the egg to a perfect, soft-set consistency.
Tip: A heavy wooden lid helps maintain a constant temperature better than a thin metal lid, which is perfect for residual heat cooking. - 5Start the seasoning sauce

While the egg is simmering, begin preparing the savory sauce for the beef bowl. Pour two spoonfuls of mirin into a small glass mixing bowl as the first step in creating your seasoning base.
Tip: Mirin adds a subtle sweetness and a beautiful glossy finish to the beef slices later on. - 6Finish the sauce mixture

Add the remaining ingredients to the bowl: light soy sauce, oyster sauce, beef bowl sauce, and sugar. Finally, add half a spoonful of cornstarch. The cornstarch is essential as it will help thicken the sauce into a rich glaze when it hits the heat.
Tip: Stir the mixture thoroughly to ensure there are no cornstarch clumps before you set it aside. - 7Mix the seasoning sauce
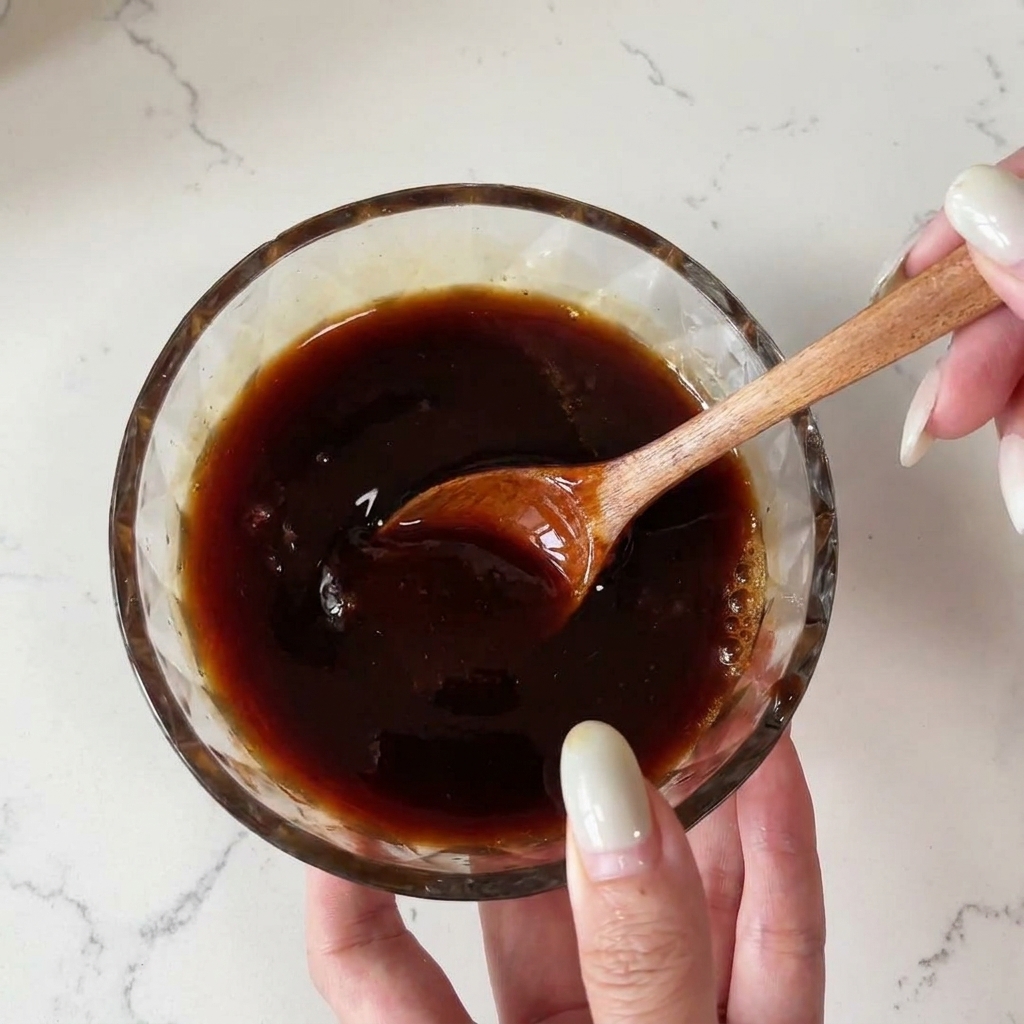
Using a wooden spoon, gently stir the combined sauce ingredients in your bowl. Make sure to mix thoroughly until the sugar completely dissolves and the cornstarch is fully incorporated, leaving a smooth, lump-free liquid.
Tip: Be sure to stir the sauce well right before pouring it into the pan later, as the cornstarch can settle at the bottom of the bowl over time. - 8Slice the white onion

Peel a white onion, cut it in half, and slice it thinly into even half-moons on a cutting board. Slicing the onion thinly allows it to cook down quickly and release its natural sweetness into the savory broth, softening perfectly alongside the beef.
Tip: Keep the slices uniform in thickness so they cook evenly in the pan. - 9Prepare the blanching water
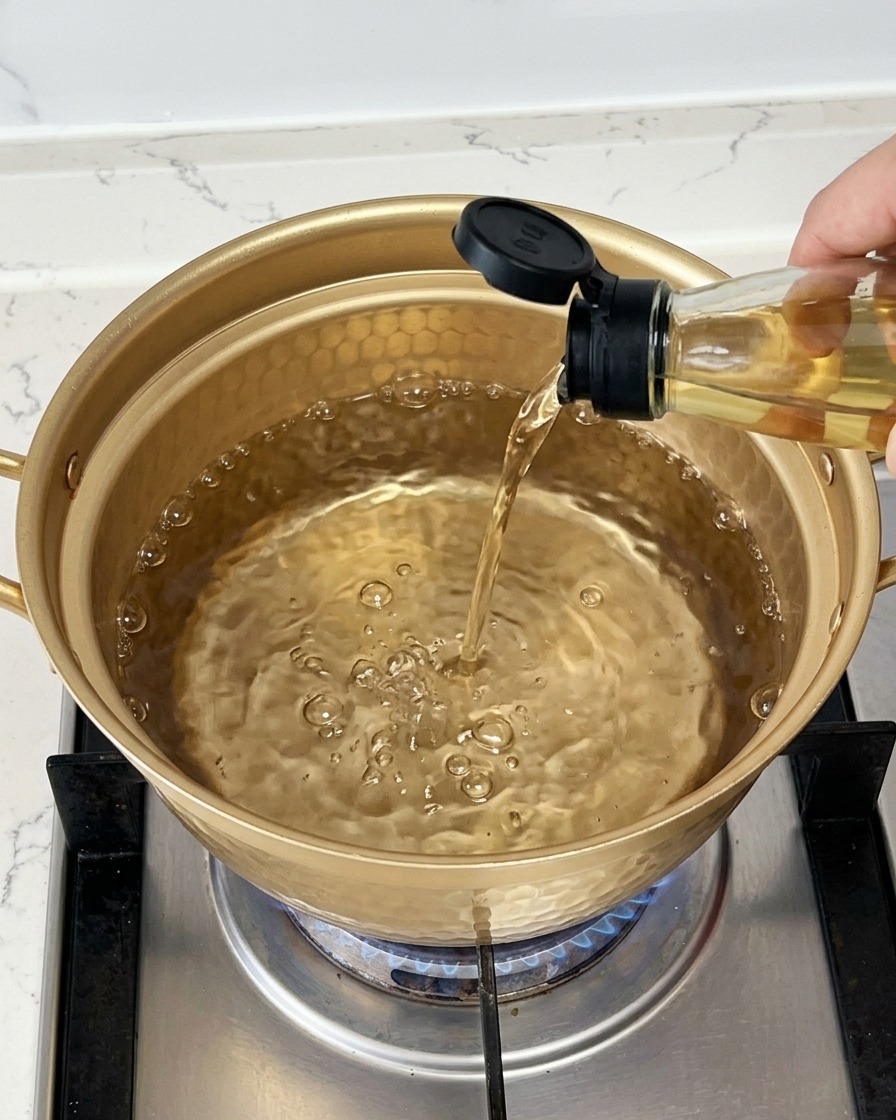
Bring a pot of water to a rolling boil over medium-high heat. Once the water is bubbling vigorously, pour in a splash of cooking wine. The cooking wine will help to deodorize the raw beef and remove any unwanted meat odors during the blanching process.
Tip: You only need a small amount of cooking wine; too much can overpower the delicate flavor of the beef. - 10Blanch the sliced beef
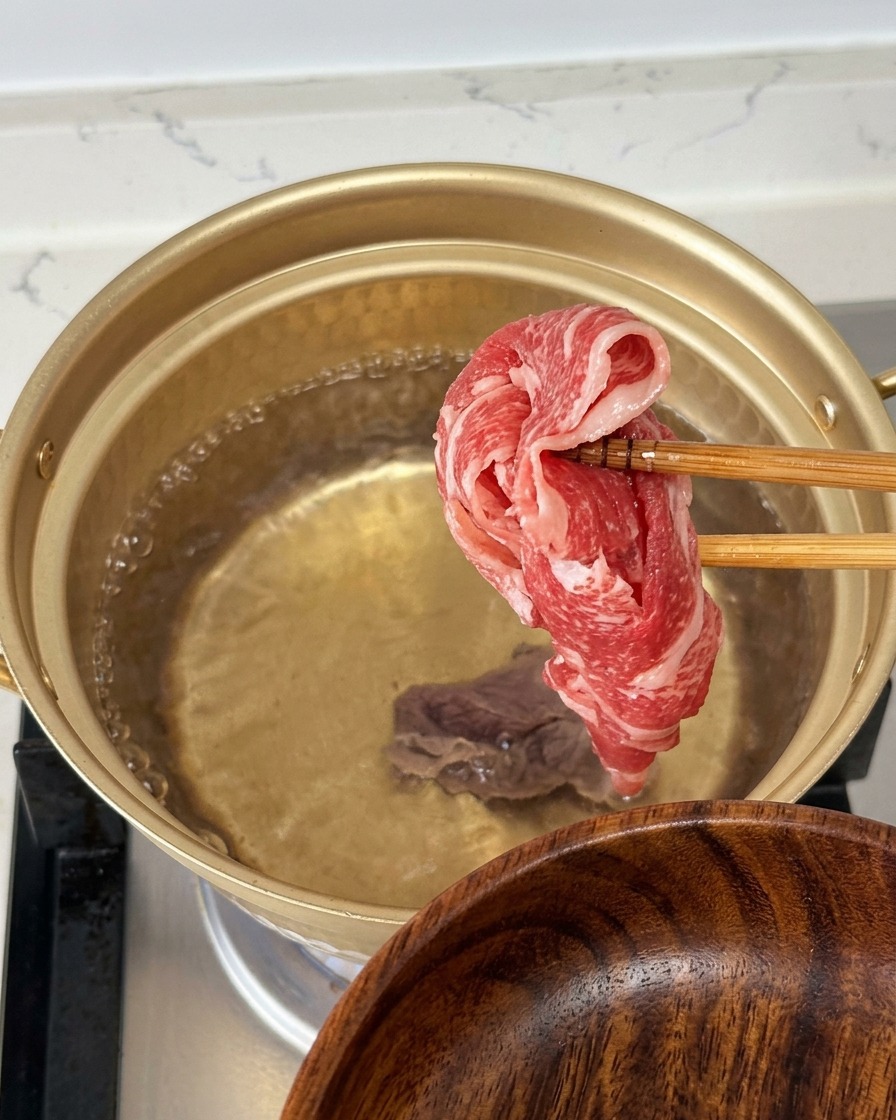
Using chopsticks, gently lower the thinly sliced raw beef into the boiling water. The goal here is a very quick blanch to draw out impurities and set the meats texture, ensuring the final dish tastes clean and fresh.
Tip: Work in small batches if necessary so the water temperature doesnt drop too much when the cold meat is added. - 11Remove the beef promptly
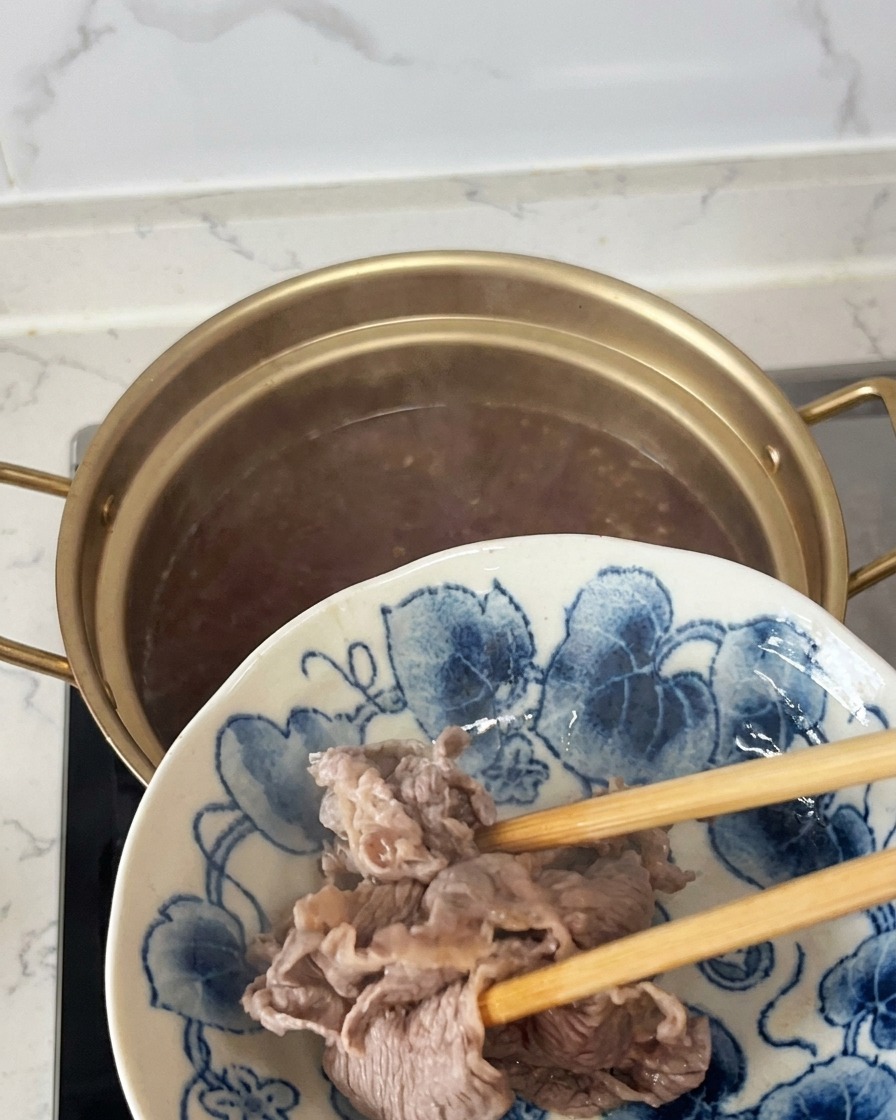
Keep a close eye on the meat. As soon as the beef slices turn opaque and lose their raw pink color, quickly remove them from the boiling water and transfer them to a clean plate. Do not fully cook the beef at this stage, as it will continue cooking later in the sauce.
Tip: Removing the beef quickly prevents it from becoming tough and rubbery, keeping the slices tender for the rice bowl. - 12Sauté the sliced onions
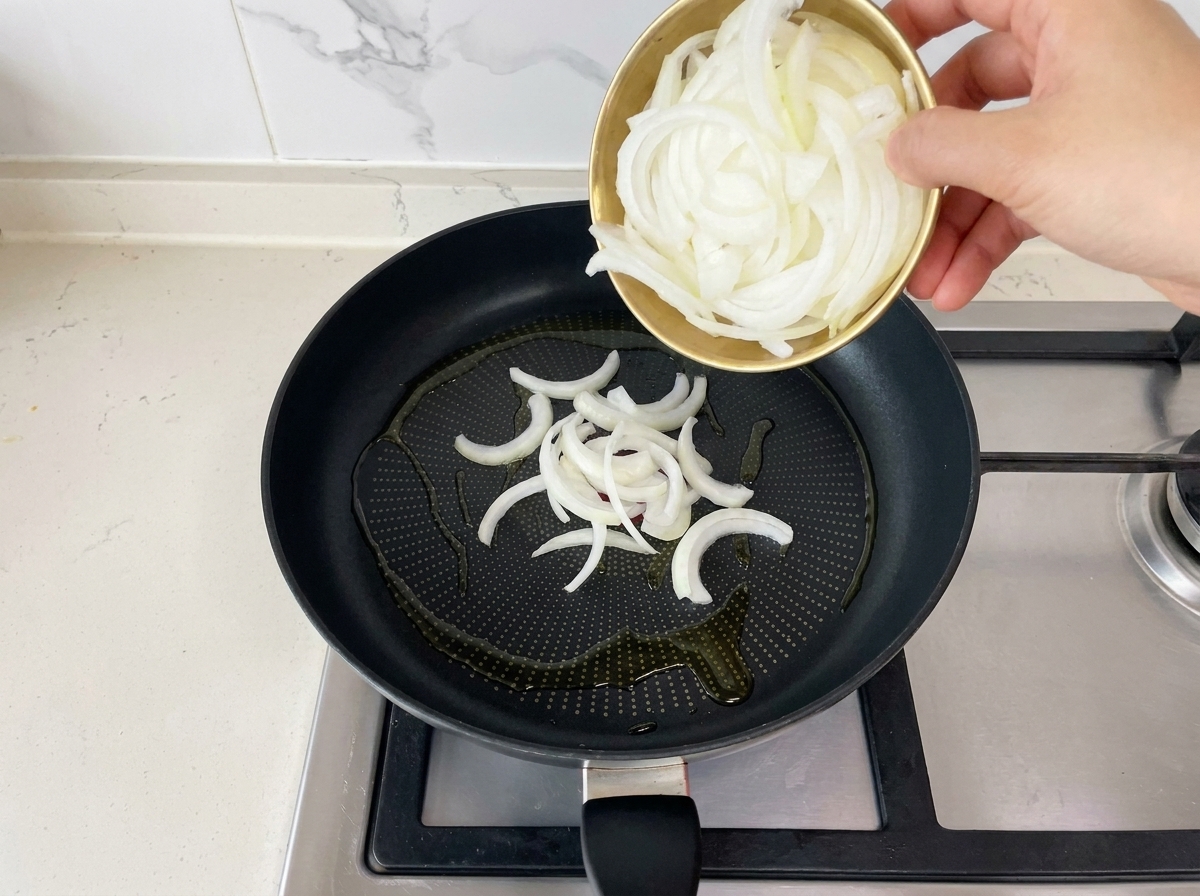
Heat a small amount of cooking oil in a frying pan over medium heat. Once the oil is hot, pour the sliced white onions into the pan. Stir-fry them gently until they begin to soften, turn slightly translucent, and develop a subtle golden color on the edges.
Tip: Take your time softening the onions. Slowly cooking them draws out their sugars and builds a flavorful foundation for the sauce. - 13Add beef to the pan
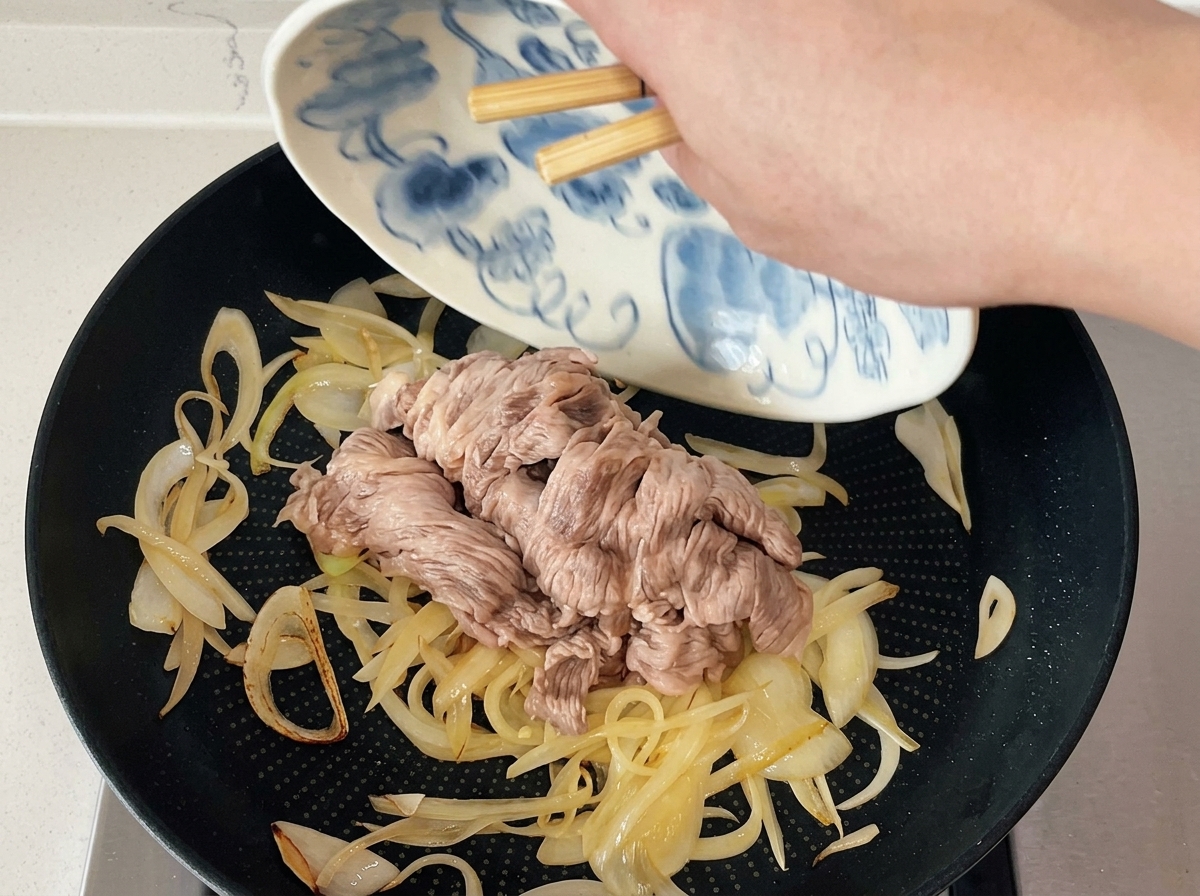
Slide the blanched beef slices into the pan along with the golden, softened onions. The meat will continue to cook and absorb the flavors as it incorporates with the aromatics.
Tip: Be careful not to overcook the beef during the initial blanching stage, as it will cook further in the pan. - 14Pour in the sauce
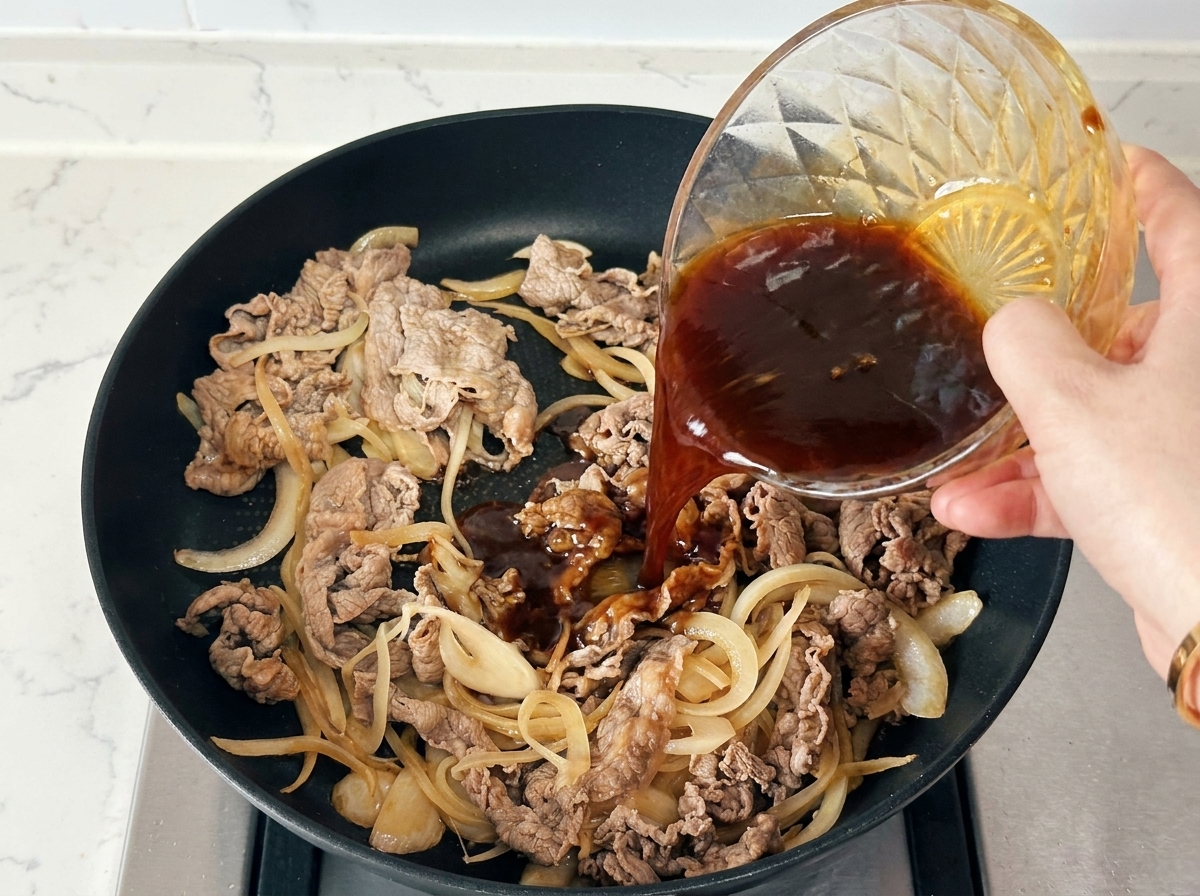
Give your prepared sauce a quick stir to ensure the cornstarch hasnt settled at the bottom, then pour it evenly over the beef and onions in the pan.
Tip: Stirring the sauce right before pouring is crucial to activate the cornstarch for a beautifully glossy glaze. - 15Stir-fry and thicken
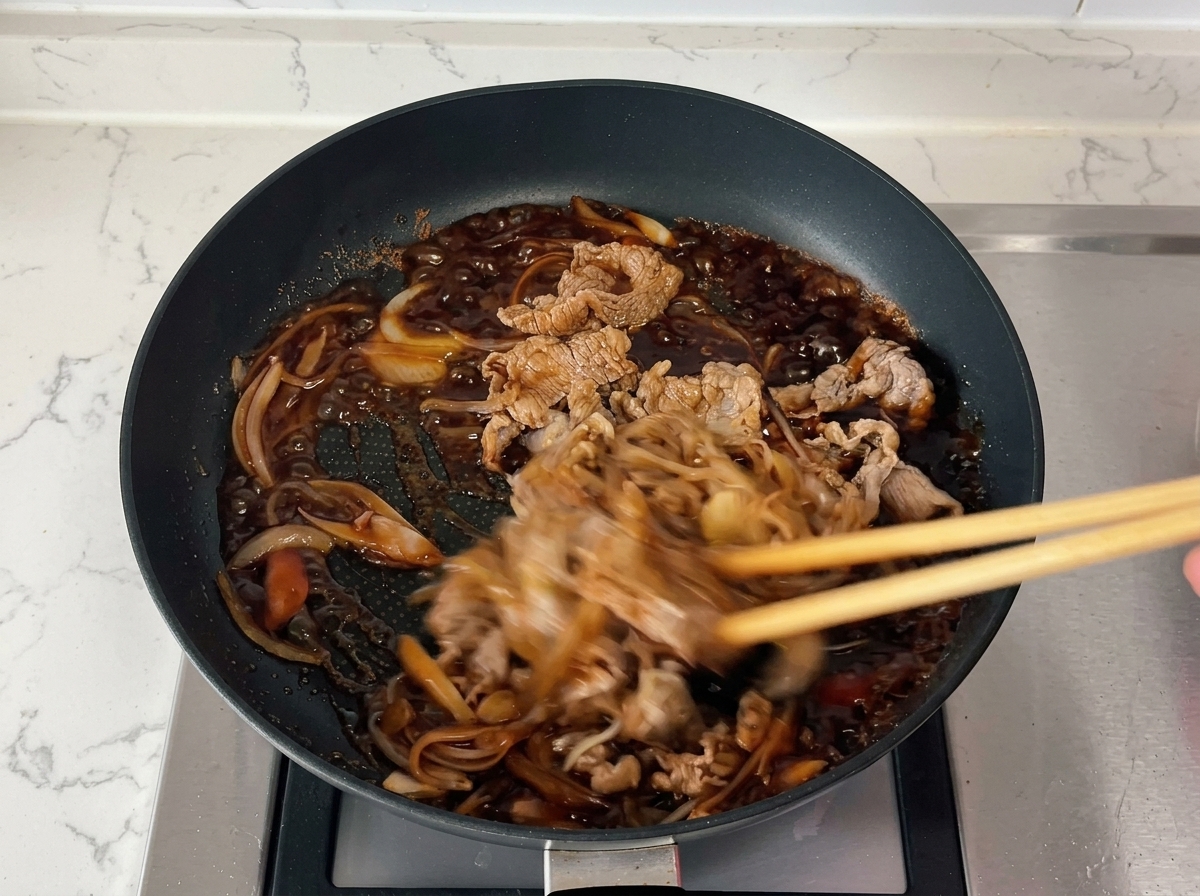
Quickly stir-fry the mixture together over the heat. Watch as the sauce begins to bubble and thicken, coating the beef and onions with a rich, savory glaze.
Tip: Keep the ingredients moving constantly at this stage so the sweet sauce doesnt stick to the pan and burn. - 16Serve over rice
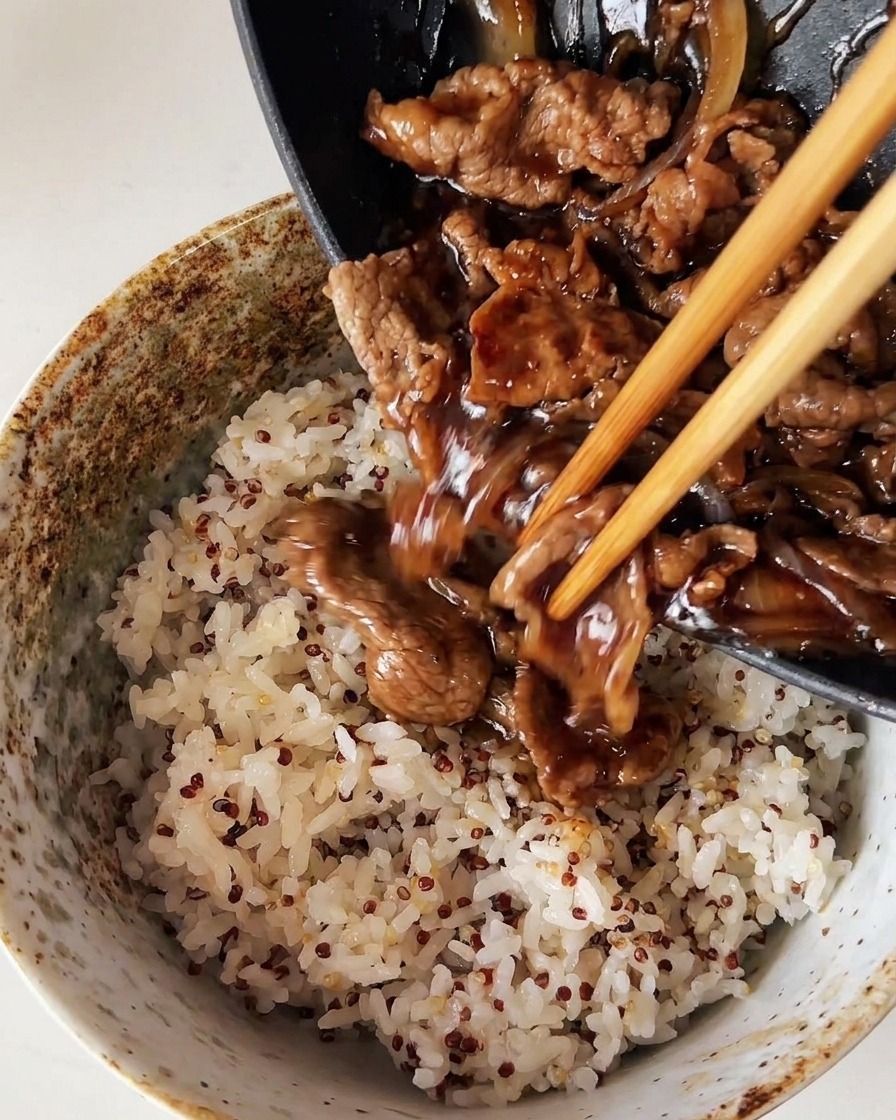
Carefully slide the rich, saucy beef and onions out of the pan and layer it generously over a warm bowl of steamed rice and quinoa.
Tip: Make sure to scrape out every last drop of that savory, thickened sauce from the pan to flavor your rice.