Classic Japanese Oyakodon (Chicken
Egg Bowl)
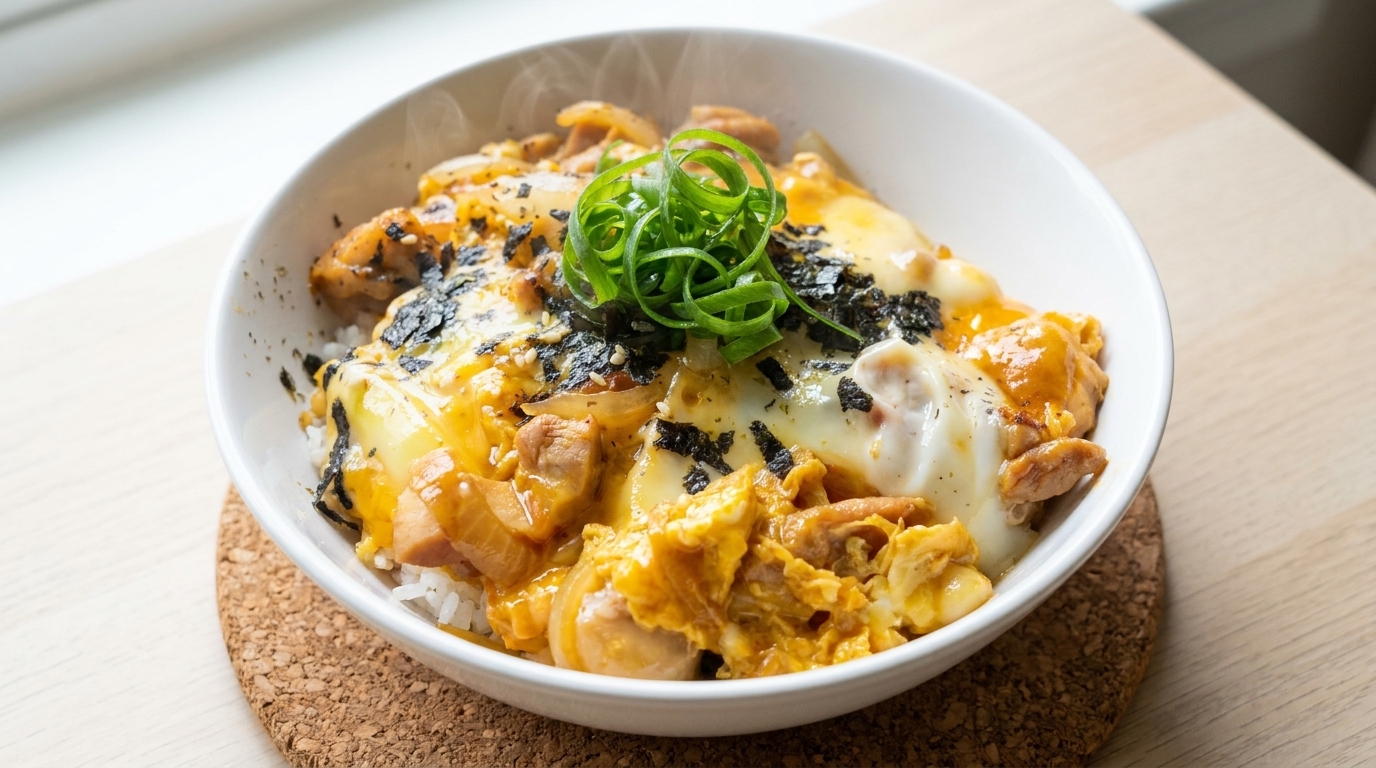
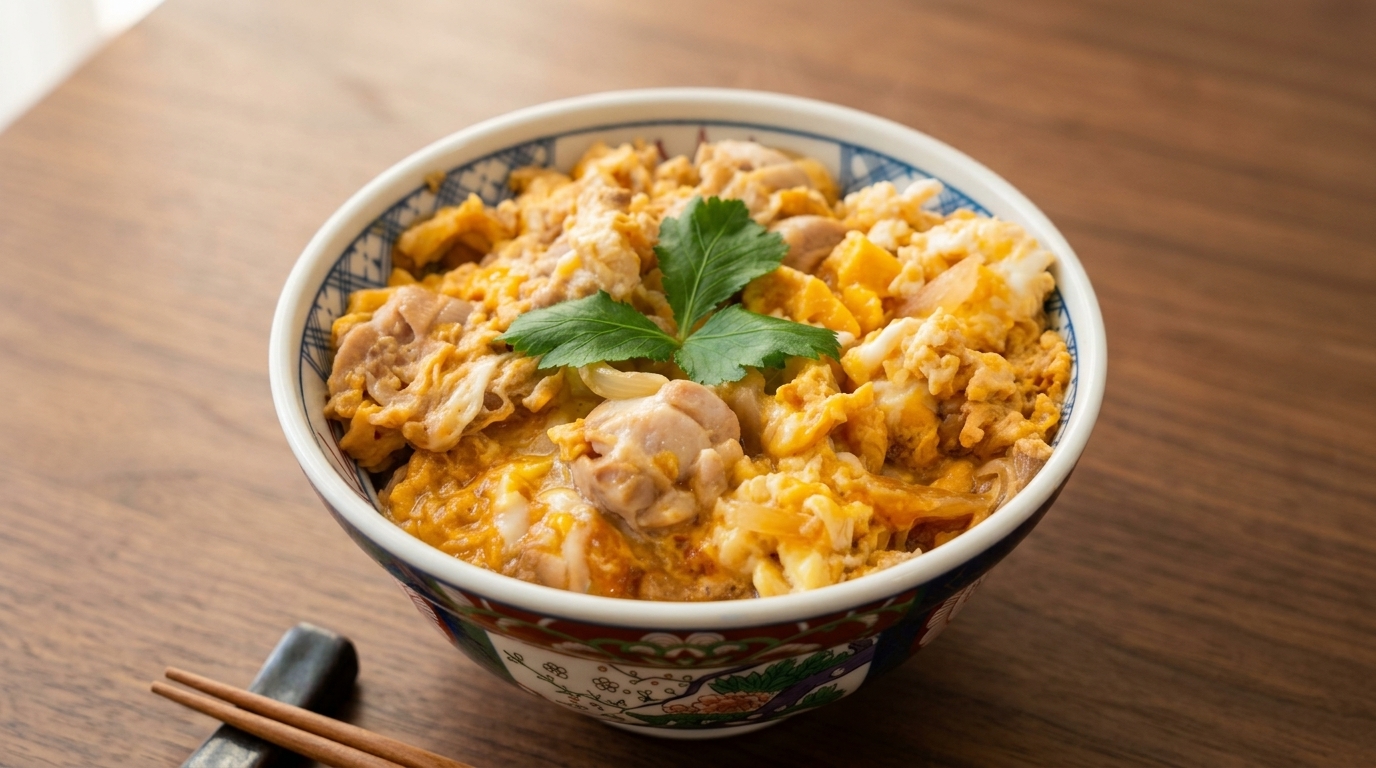
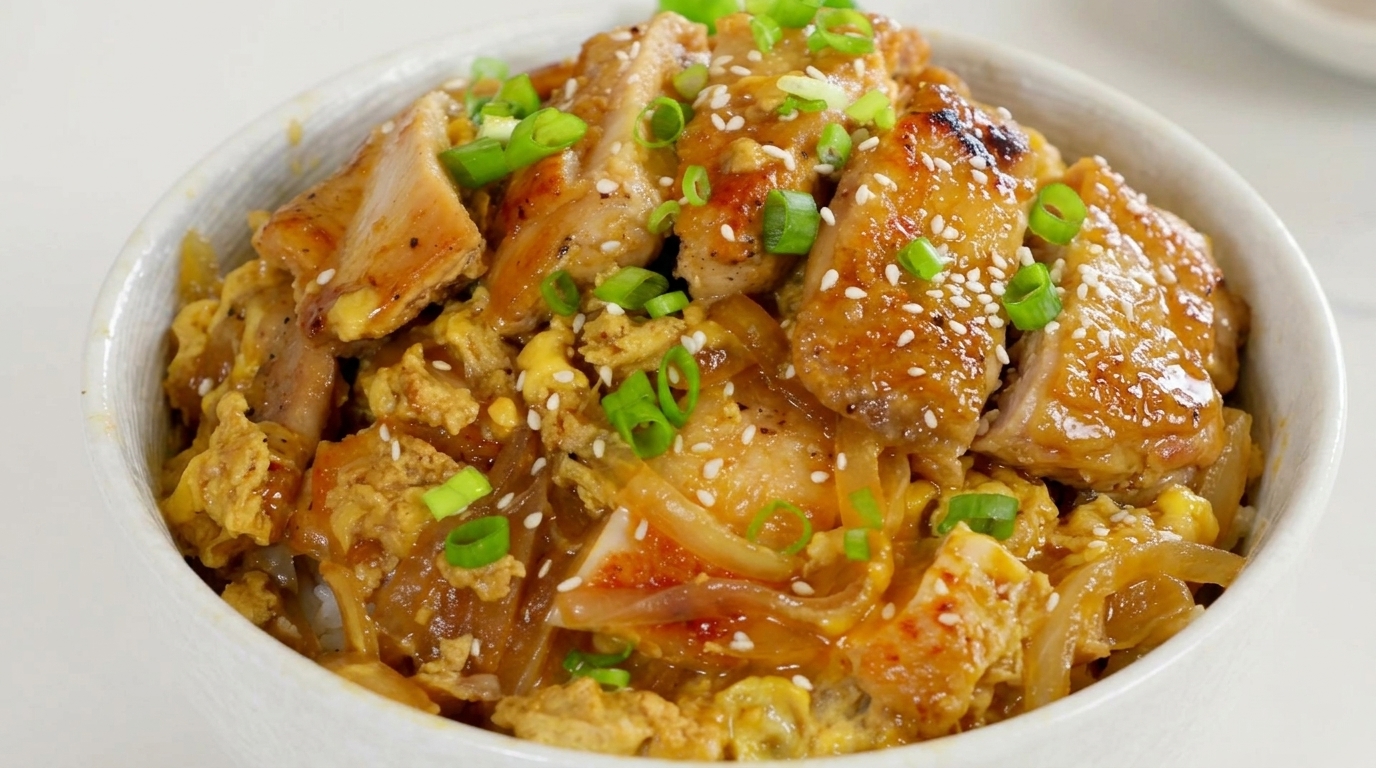
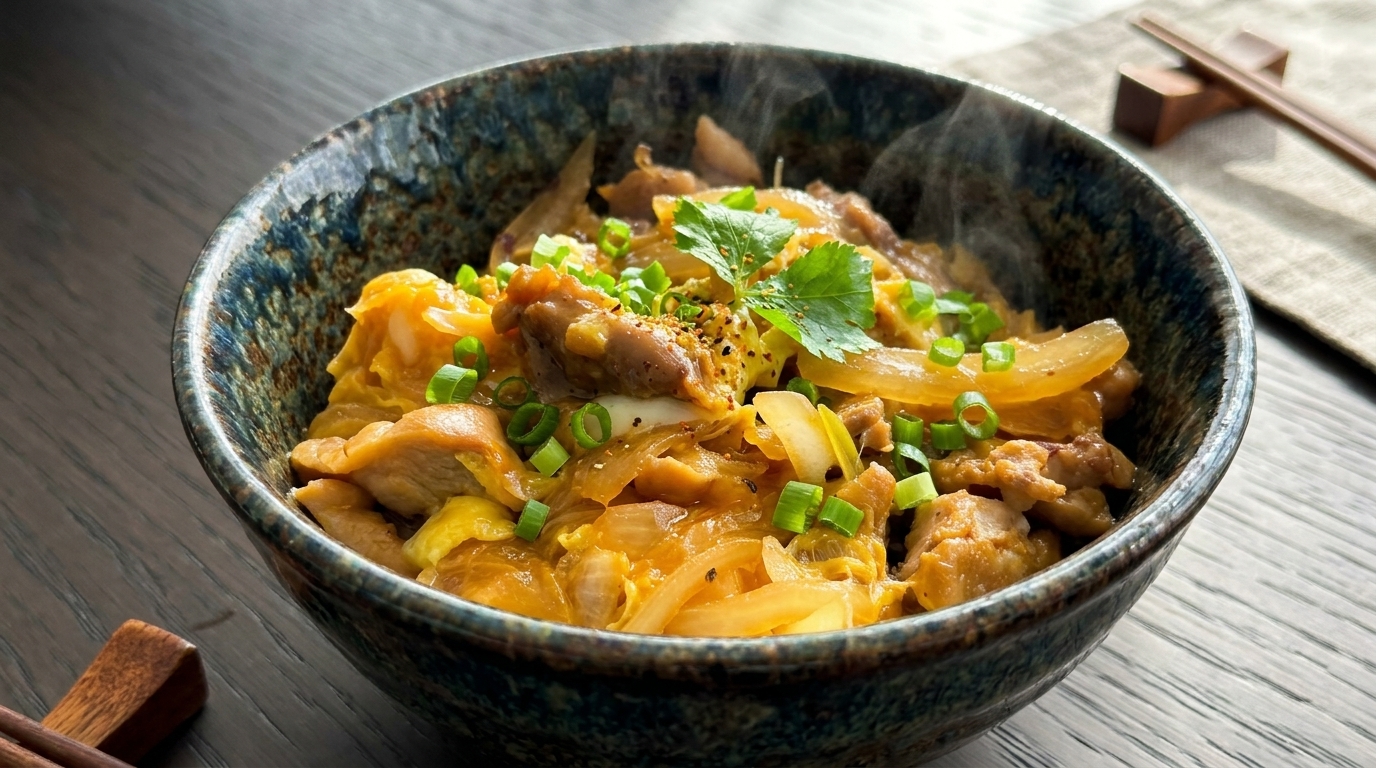
A comforting Japanese classic, Oyakodon features tender chicken, sweet onions, and silky, barely-set eggs simmered in a savory dashi broth and served over warm rice.
Translated literally as parent and child bowl, Oyakodon is a beloved staple of Japanese comfort food. Its magic lies in the signature two-step egg pouring technique, ensuring the bottom sets to bind the ingredients while the top remains luscious, glossy, and perfectly soft.

Ingredients
- 200 g boneless chicken thigh
- 1 small onion
- 2 large eggs
- 18 g soy sauce
- 18 g mirin
- 15 g cooking sake
- 9 g sugar
- 3 g hon dashi (dashi powder)
- 100 ml water
- 1 serving steamed white rice
Instructions
- 1Halve the onion
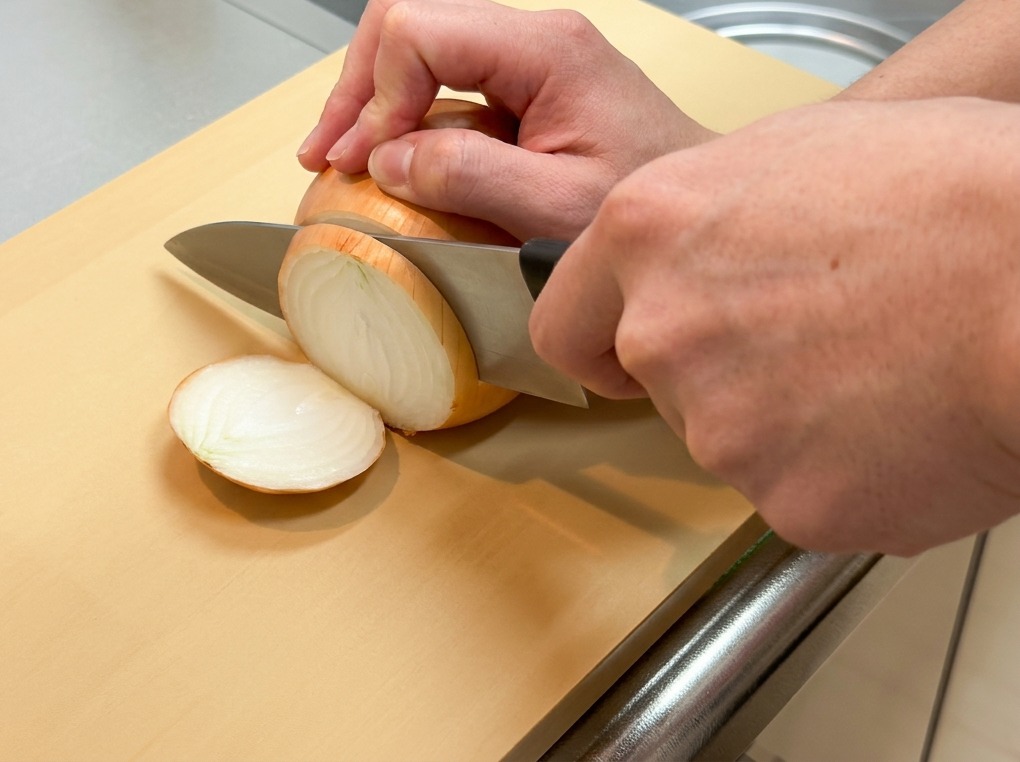
Start by peeling the onion and placing it on a stable cutting board. Use a sharp chefs knife to carefully cut the onion in half through the root. This provides a flat, stable surface for safer slicing in the subsequent steps.
Tip: Leave the root end slightly intact while cutting to help hold the layers together as you move to slicing. - 2Slice into thick wedges
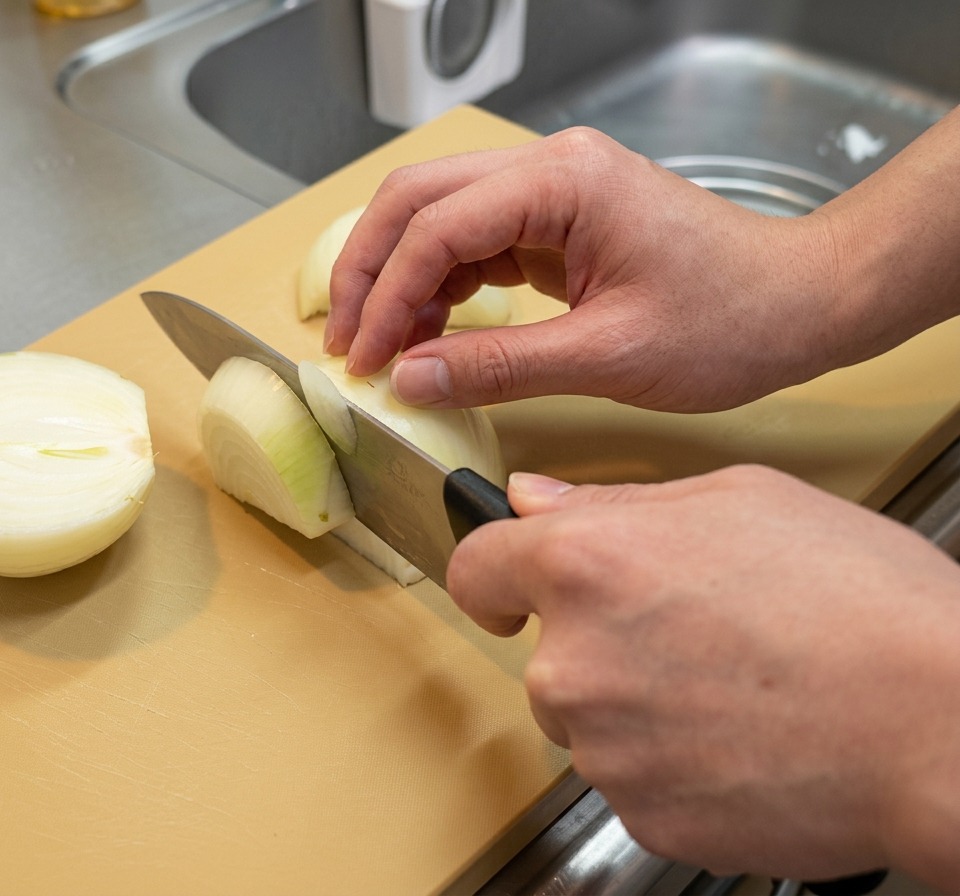
Take the onion halves and slice them lengthwise into thick wedges, about 1 cm wide. For Oyakodon, wedges are preferred over thin slices as they maintain a pleasant bite and absorb the savory sauce perfectly without dissolving.
Tip: Try to keep the wedges uniform in size so they soften at the same rate when simmering. - 3Prepare the chicken
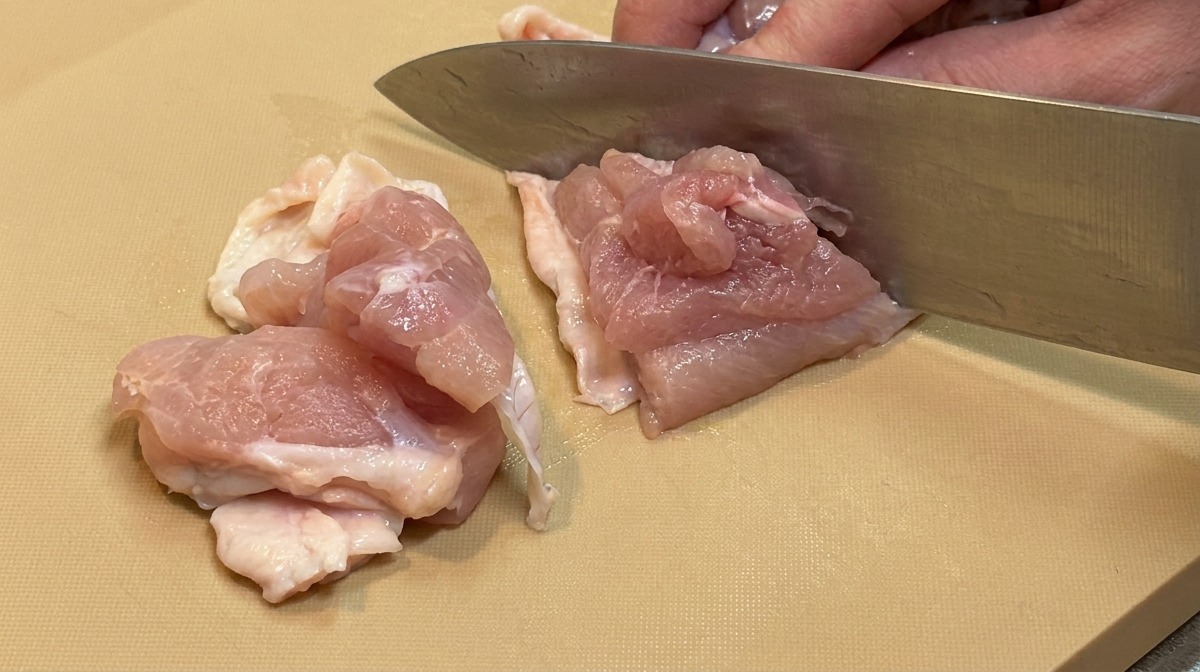
Take 200 grams of boneless chicken thigh and trim away any excess fat. Cut the meat into uniform, bite-sized pieces. Chicken thigh is ideal for this dish because it remains juicy and tender even after simmering in the sauce.
Tip: Smaller pieces ensure the chicken cooks through quickly and is easier to enjoy with a spoon alongside the rice. - 4Crack the eggs
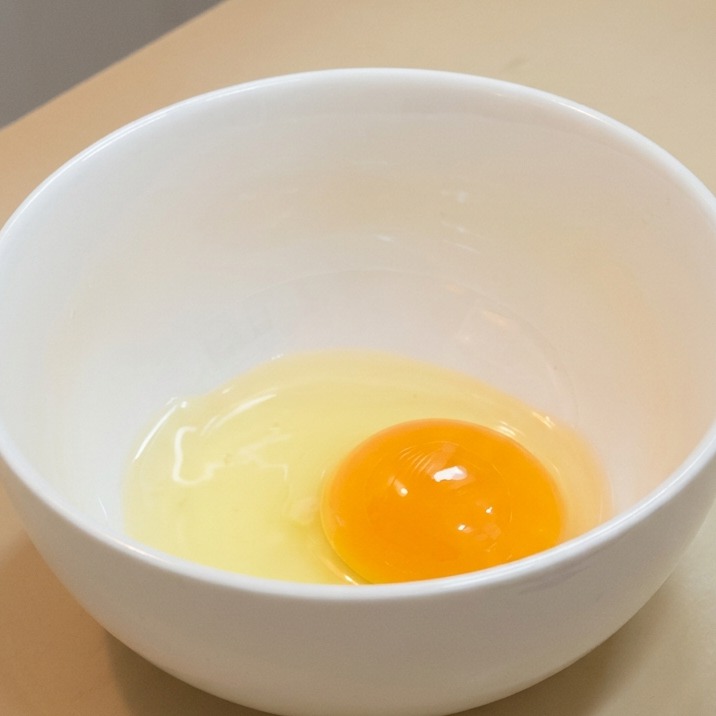
Crack two large eggs into a clean white bowl. Using fresh eggs will provide a better flavor and ensure a vibrant, appetizing yellow color for the final topping.
Tip: Crack eggs on a flat countertop instead of the bowls edge to prevent shell fragments from falling into the whites. - 5Beat the eggs
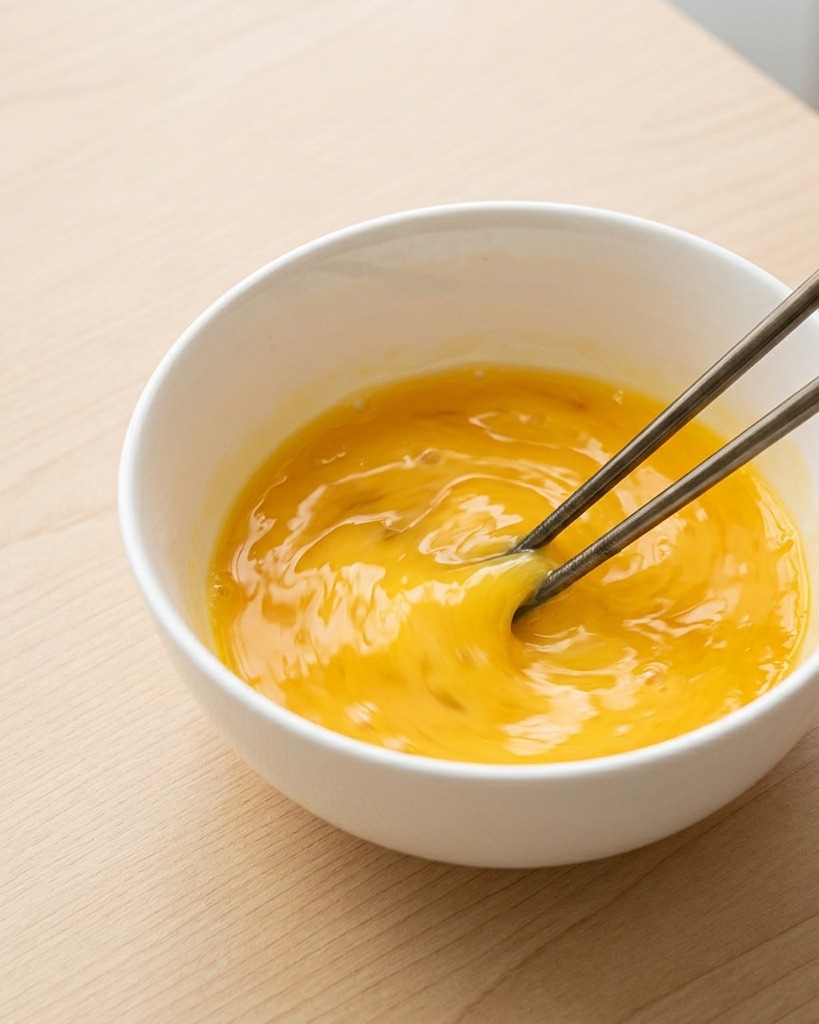
Use a pair of chopsticks to beat the eggs vigorously. Aim to combine the yolks and whites thoroughly, but avoid over-beating until foamy; you want a silky, smooth consistency for the final pour.
Tip: For the best texture, use a cutting motion with the chopsticks to break up the thick proteins in the egg whites. - 6Mix the sauce base
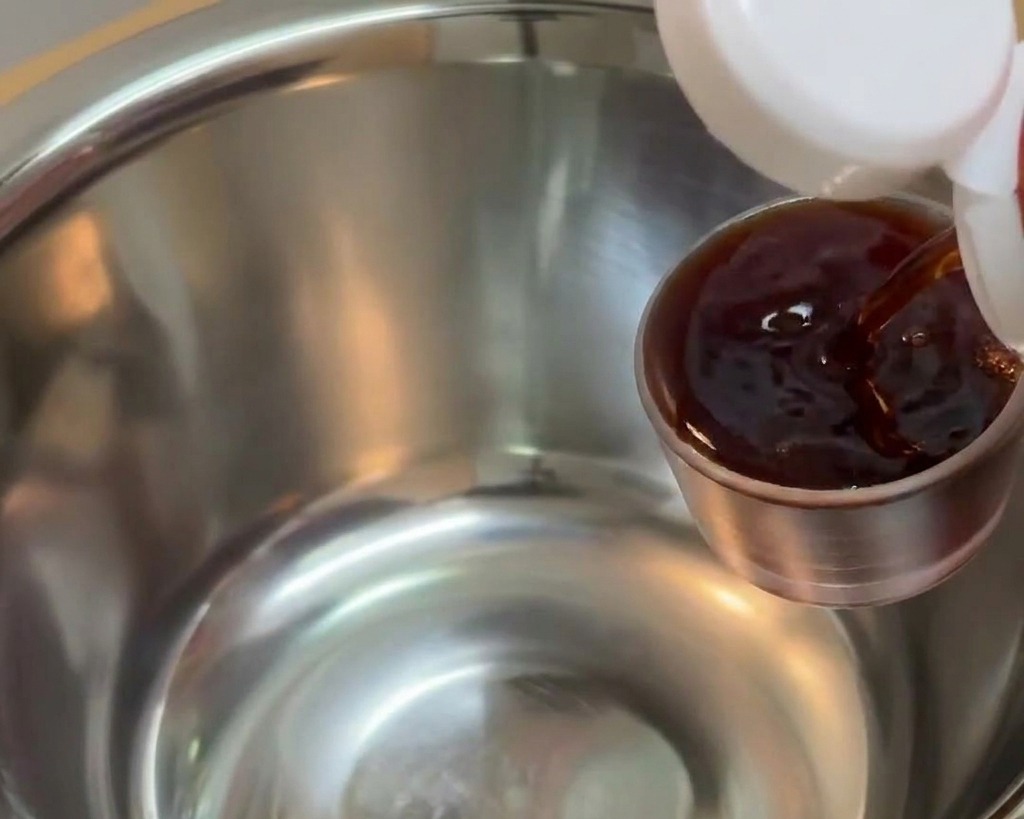
In a metal mixing bowl, begin assembling the seasoning. Start by pouring in 18 grams of dark soy sauce. This ingredient provides the deep umami base and the rich, characteristic color of the Oyakodon sauce.
Tip: Measuring liquid ingredients by weight rather than volume is the most accurate way to ensure a consistent flavor every time. - 7Mix the seasoning
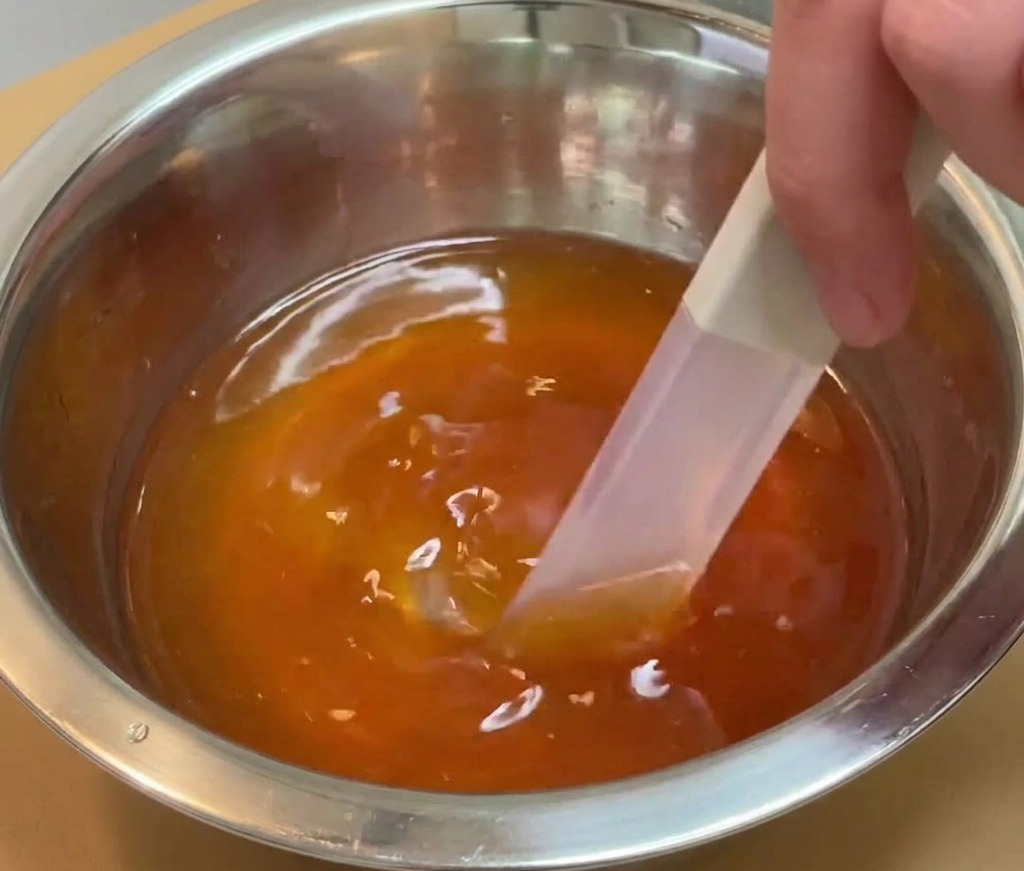
In the same metal bowl, combine the soy sauce, mirin, cooking sake, sugar, hon dashi, and water. Stir the mixture thoroughly until the sugar and dashi powder are completely dissolved. This balanced liquid will form the flavorful base of your Oyakodon.
Tip: Using hon dashi (instant dashi) provides a quick way to add savory umami depth without brewing stock from scratch. - 8Prepare the pan with onions
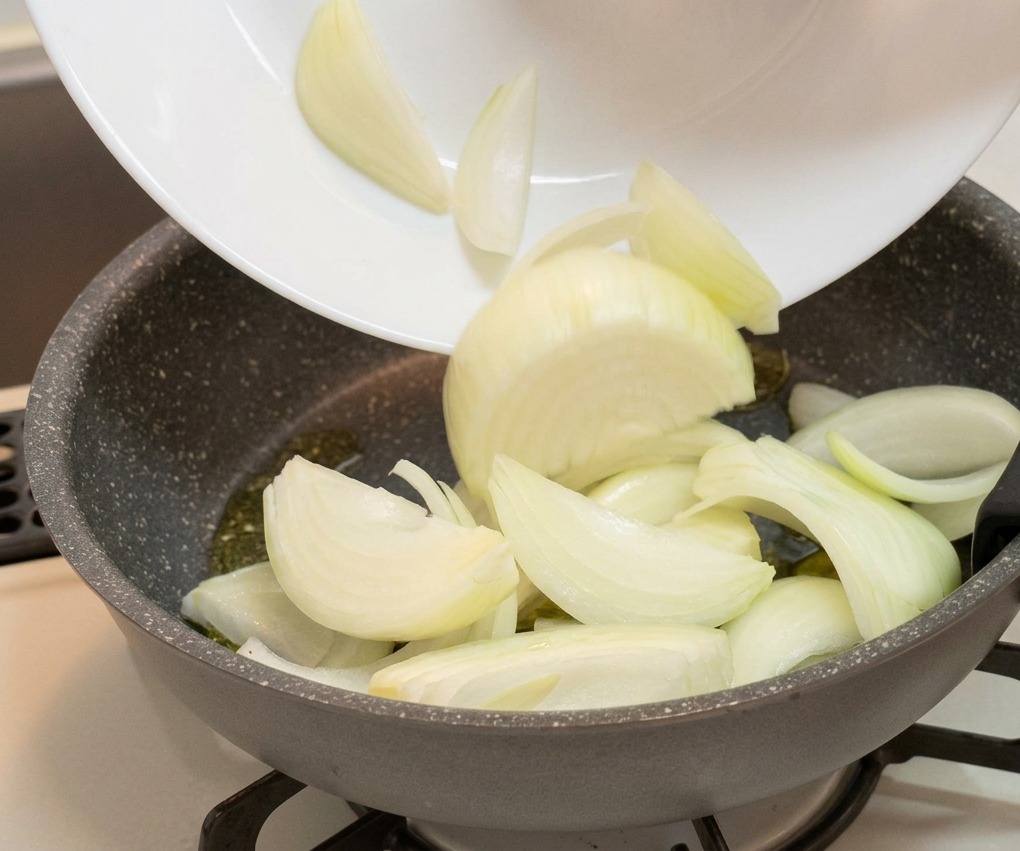
Place the sliced onion wedges into a dry cooking pan. Spread them out evenly across the bottom of the pan to ensure they cook at a consistent rate. We use a dry pan here because the moisture and flavor will come from the seasoning liquid added in the next step.
Tip: Slicing the onions into wedges rather than thin rings helps them maintain a bit of texture even after simmering. - 9Add the seasoning liquid
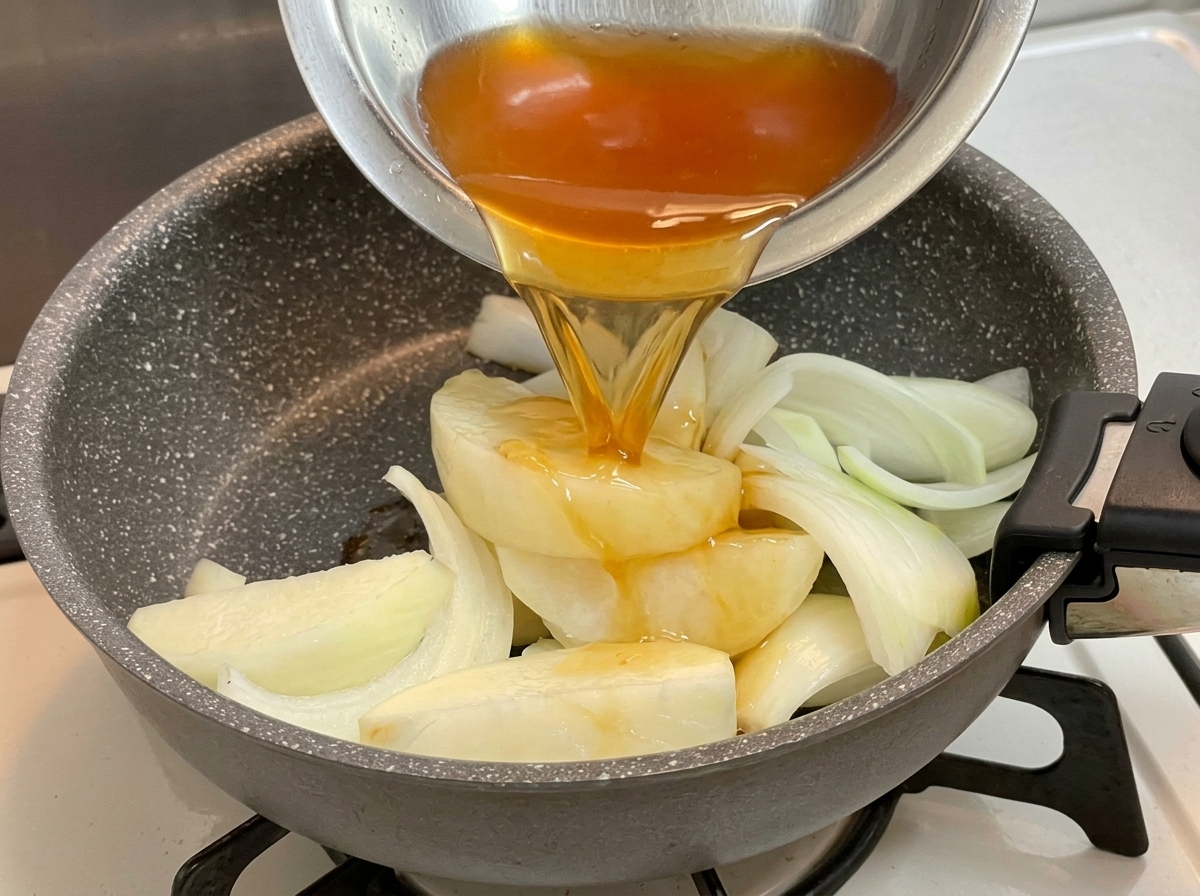
Pour the prepared seasoning mixture over the onion wedges in the pan. Make sure the liquid covers the onions sufficiently. The sugar and soy sauce in the liquid will begin to caramelize and soften the onions as they heat up.
Tip: Distribute the liquid evenly so that every piece of onion is submerged or coated. - 10Simmer the onions
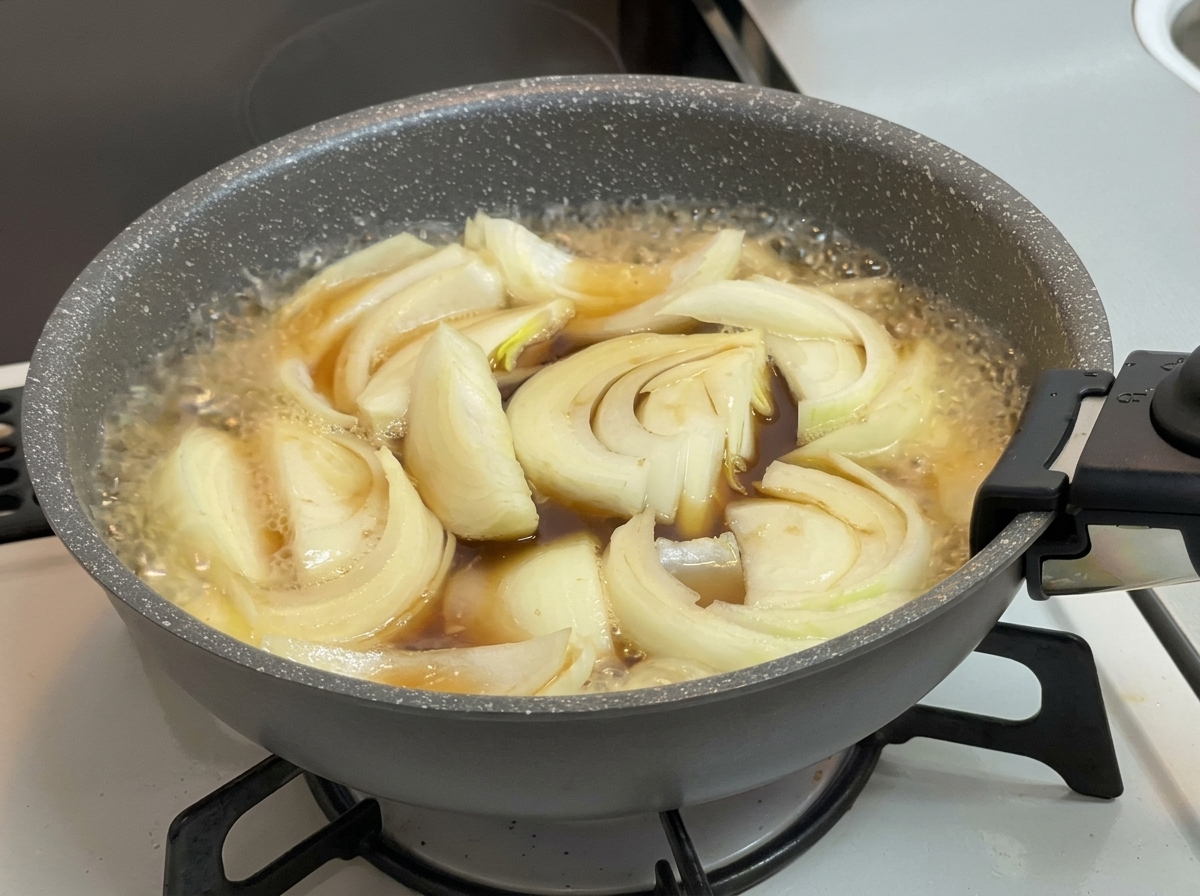
Turn the heat to medium-high and bring the liquid to a boil. Once it starts bubbling, let the onions simmer for about 2 minutes. This brief simmer softens the onions and removes their raw bite, infusing them with the sweet and savory flavors of the broth.
Tip: Dont overcook the onions at this stage; they will continue to soften as the chicken and eggs are added. - 11Add the chicken pieces
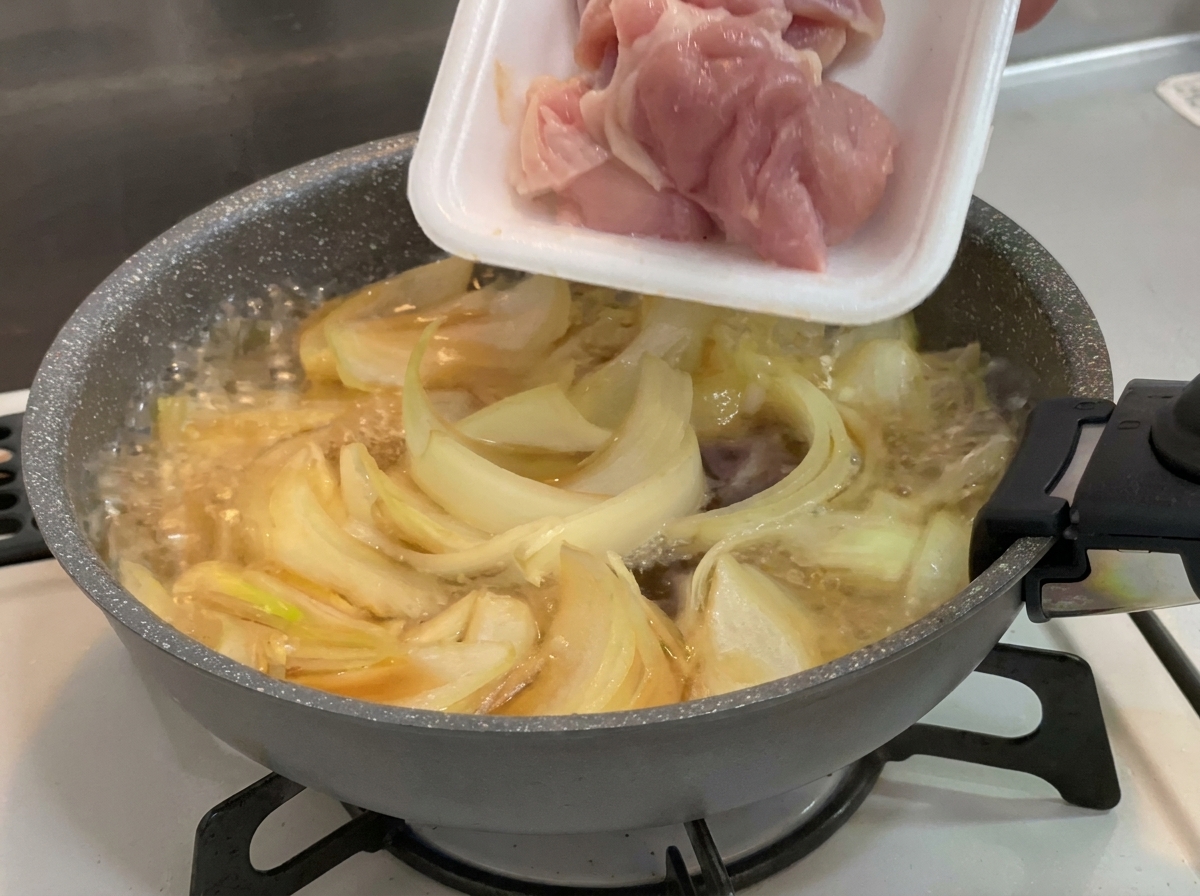
Carefully add the bite-sized pieces of raw chicken thigh into the simmering pan with the onions. Distribute the meat evenly throughout the pan so that each piece is in contact with the hot broth for even cooking.
Tip: Chicken thigh is preferred over breast for Oyakodon because it remains juicy and tender even after simmering. - 12Cook the chicken

Use a wooden spatula to gently stir the chicken pieces into the broth and onions. Continue simmering until the meat is cooked through and the color has changed from pink to opaque. The chicken will absorb the flavors of the dashi-based sauce as it cooks.
Tip: Avoid over-stirring; you want the chicken to poach gently in the liquid to keep it tender. - 13Add the first layer of eggs
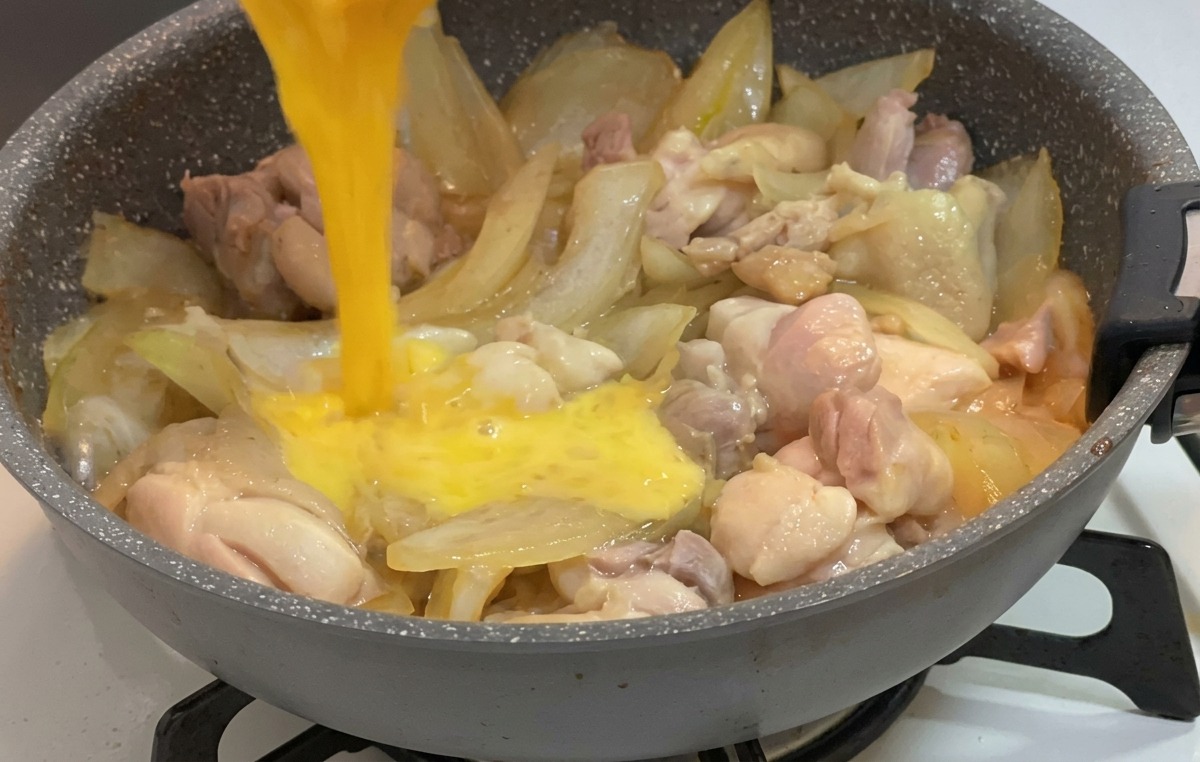
Once the chicken is fully cooked, pour approximately two-thirds of the beaten eggs into the pan. Drizzle the egg mixture in a circular motion over the chicken and onions to ensure even coverage. This first layer will act as the base, binding the ingredients together.
Tip: Pouring the eggs in two stages is the secret to achieving that classic Oyakodon texture—the first layer sets while the second stays creamy. - 14Cover and steam
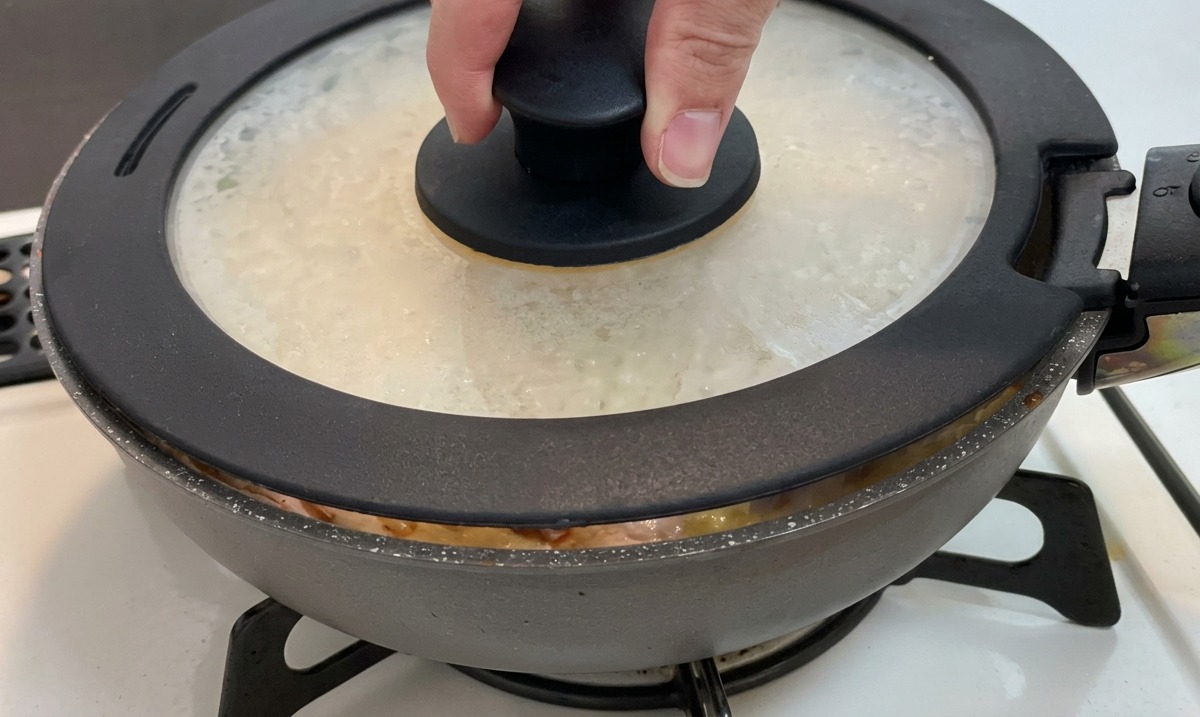
Place a lid on the pan and let it simmer for about 30 seconds over medium-low heat. The steam trapped under the lid will cook the first layer of eggs until they are mostly set, which helps bind the chicken and onions together into a cohesive topping.
Tip: Using a glass lid allows you to monitor the eggs progress without lifting the lid and losing essential heat and steam. - 15Add the remaining egg
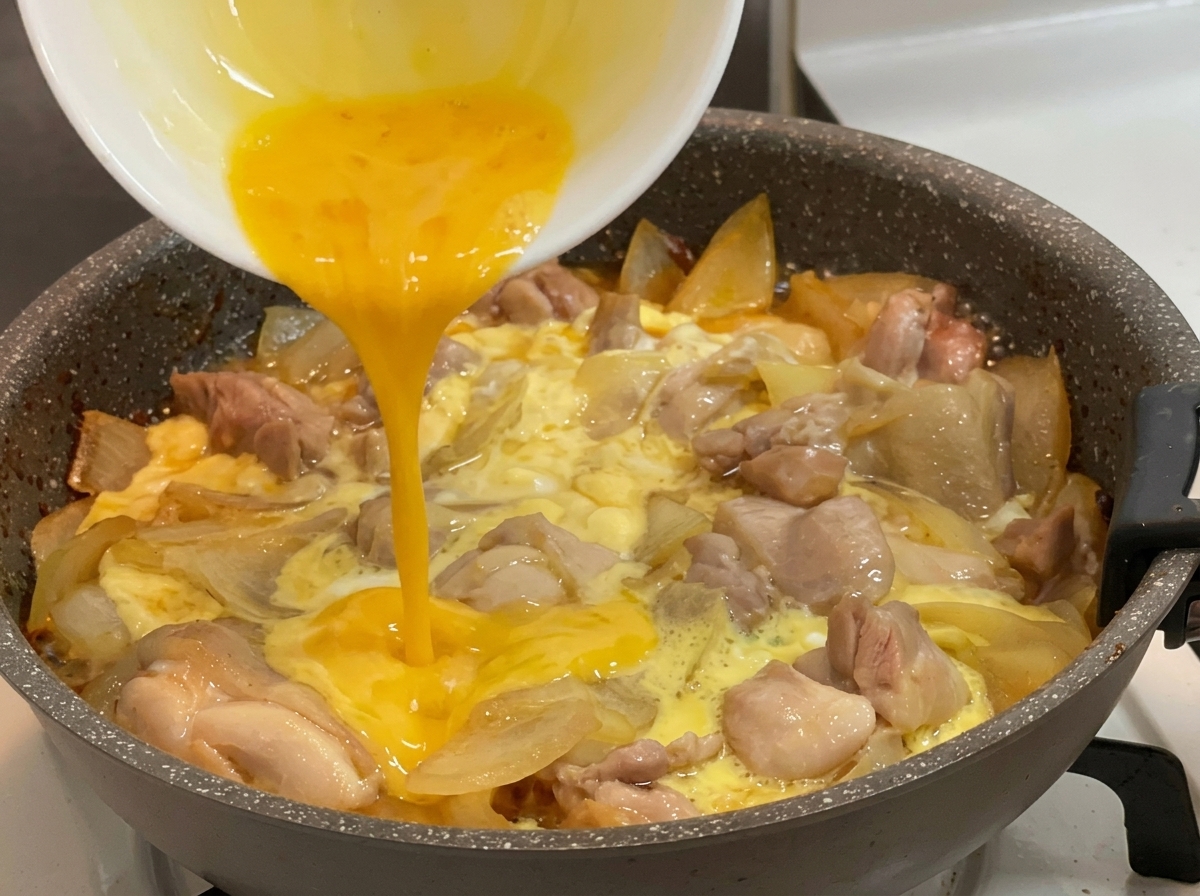
Remove the lid from the pan and gently pour the remaining beaten egg over the simmering chicken, onions, and partially set eggs. Allow the mixture to cook briefly until the new addition of eggs is just half-cooked, maintaining a soft and fluffy consistency.
Tip: Turn off the heat while the top layer of egg is still slightly runny. The residual heat from the pan and rice will finish cooking the egg to the perfect silky texture. - 16Serve over rice
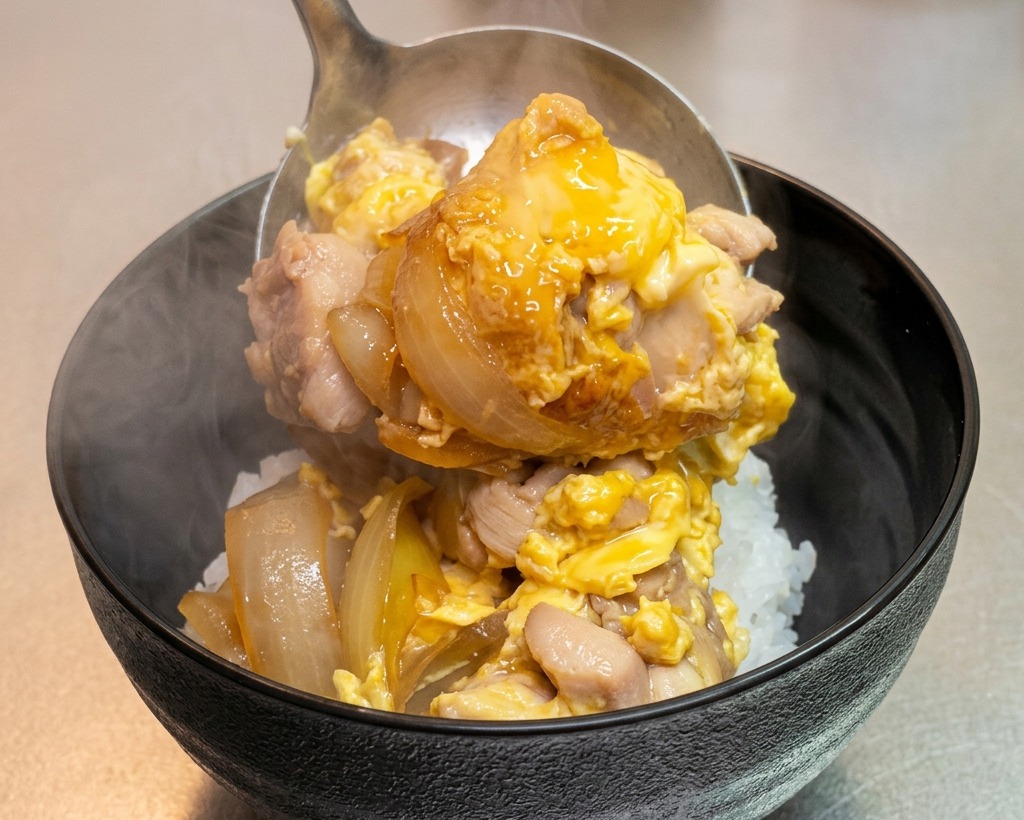
Ladle the hot chicken and egg mixture carefully onto a bowl of steamed white rice. The rich, savory sauce will soak into the rice, and the tender, fluffy eggs will provide a silky finish. This harmony of textures is what makes Oyakodon a beloved Japanese classic.
Tip: Transfer the mixture gently with a large ladle to maintain the soft, custardy structure of the eggs and keep the presentation neat.